Do you often catch yourself saying negative statements to and about yourself? What if there was a pretty tool that was not only beautiful to look at but also helped improve your self esteem? That is exactly what these DIY watercolor positive affirmation cards are!
Affiliate links may be used in this post. Ordering a product through these links may result in a commission. Read the full disclosure here.

[bctt tweet=”What if there was a tool that was beautiful and helped improve your self esteem? That is exactly what these DIY watercolor positive affirmation cards are!” username=”diyadulation”]
I am super guilty of talking badly to and about myself. Instead of focusing on any one of the amazing traits about me, I have always fixated on the flaws. Even offhand comments were destructive.
Have you ever asked a question that you knew the answer to and simply forgotten? When the person’s answer reminds you, what do you say. “Oh, I’m dumb, I knew that.”
Seriously? Would we talk about anyone else that way? I don’t think so. Something has to give.
I will talk more about how to shut down negative self talk later in the the series but we’re going to start on it today with these DIY watercolor positive affirmation cards.

What Are Positive Affirmations
There are many definitions of what positive affirmations are (especially since they can be so different person to person). Essentially they are phrases that you repeat to yourself on a daily basis that are meant to improve your self-talk, beliefs, and outlook. They can be used in a multitude of ways such as building confidence with people and improving work performance to name a few.
These DIY watercolor positive affirmation cards are meant to bolster your self-confidence and begin improving the way you speak to and about yourself. Read them every day to start truly cementing the beliefs you write down.
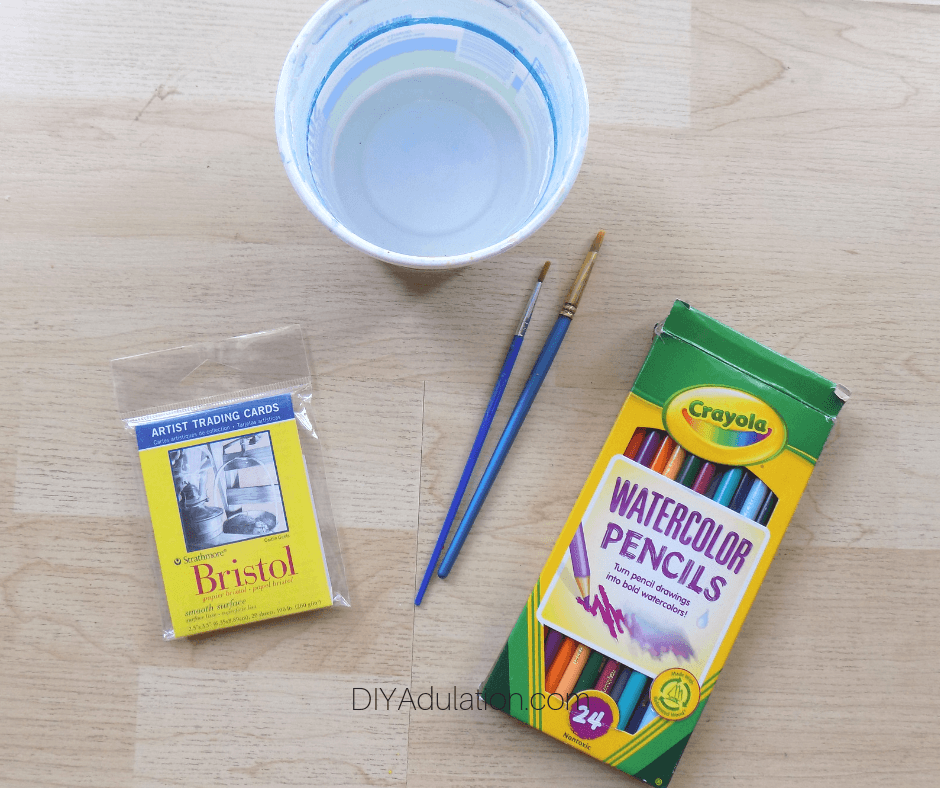
DIY Watercolor Positive AFfirmation Cards Materials
- Artists Trading Cards
- Watercolor Pencils
- Water
- Paintbrush
- Permanent Marker
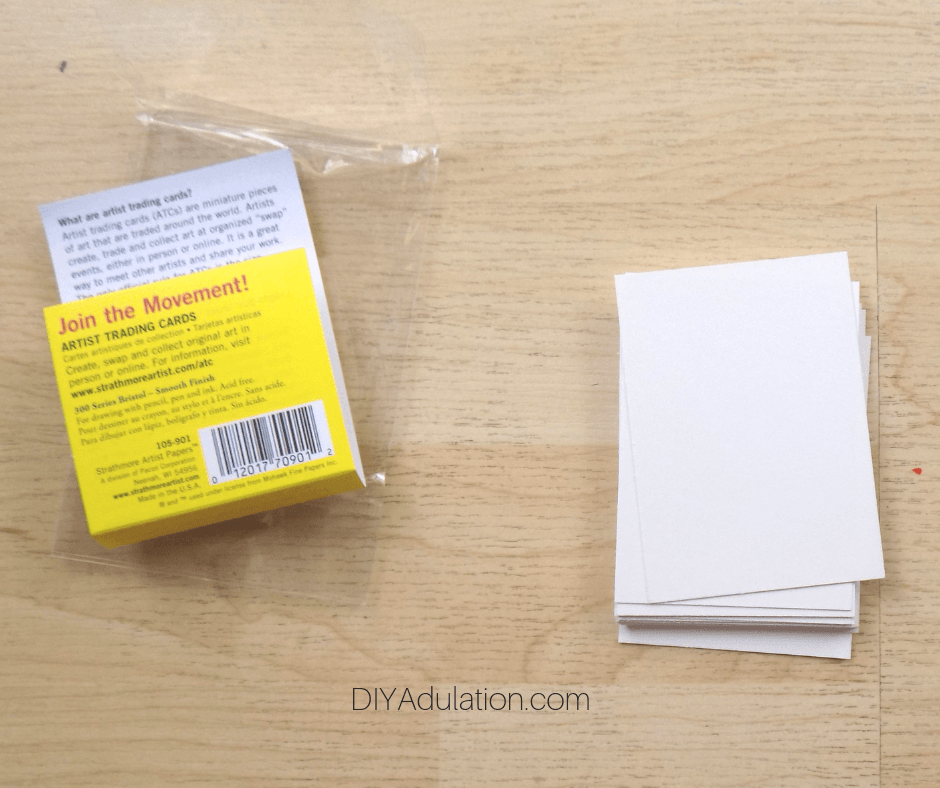
Step 1
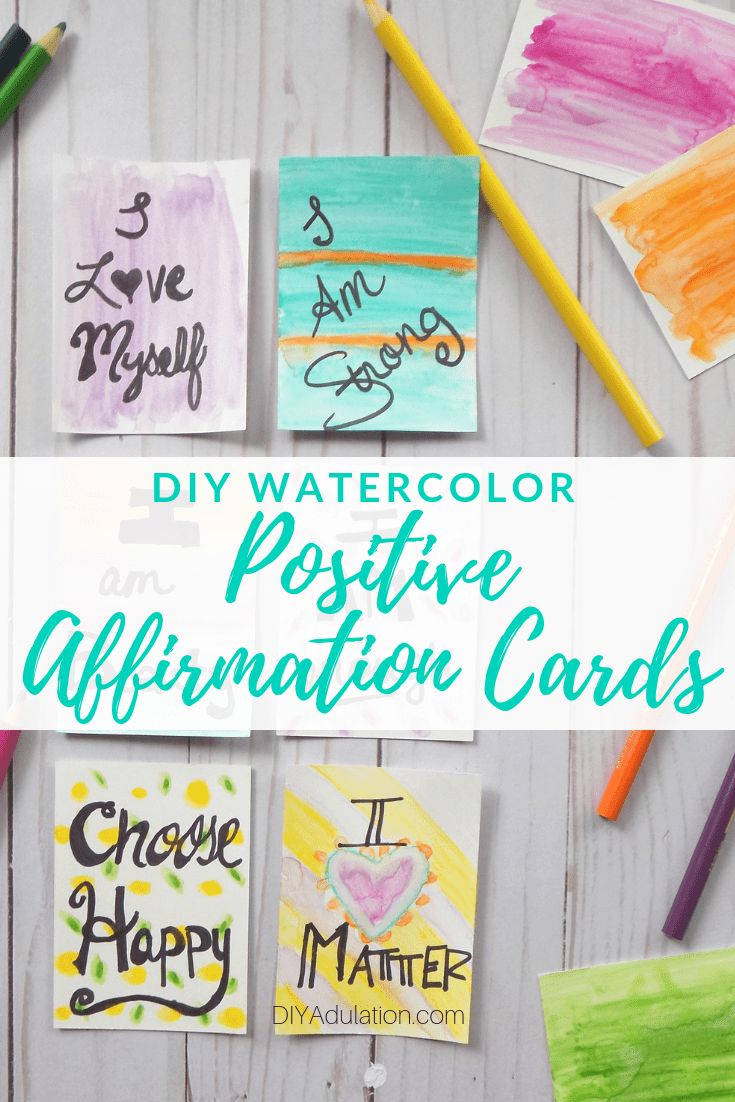
First, remove your artists trading cards from their packaging. You can make as many positive affirmation cards as you want but I recommend no fewer than ten.

Step 2
Next, use your watercolor pencils to draw designs on your cards. These can be as simple or elaborate as you want. I’ve included multiple examples for you above to help with inspiration.

Step 3
After you’ve colored your cards, dip your brush in water and brush over your designs.
Note:
- Only add water to one color at a time and rinse your brush between colors. Otherwise you will mix and muddy your colors.

Step 4
Once a design has been brushed with water, set it aside to dry. Continue until all of your cards are completed.

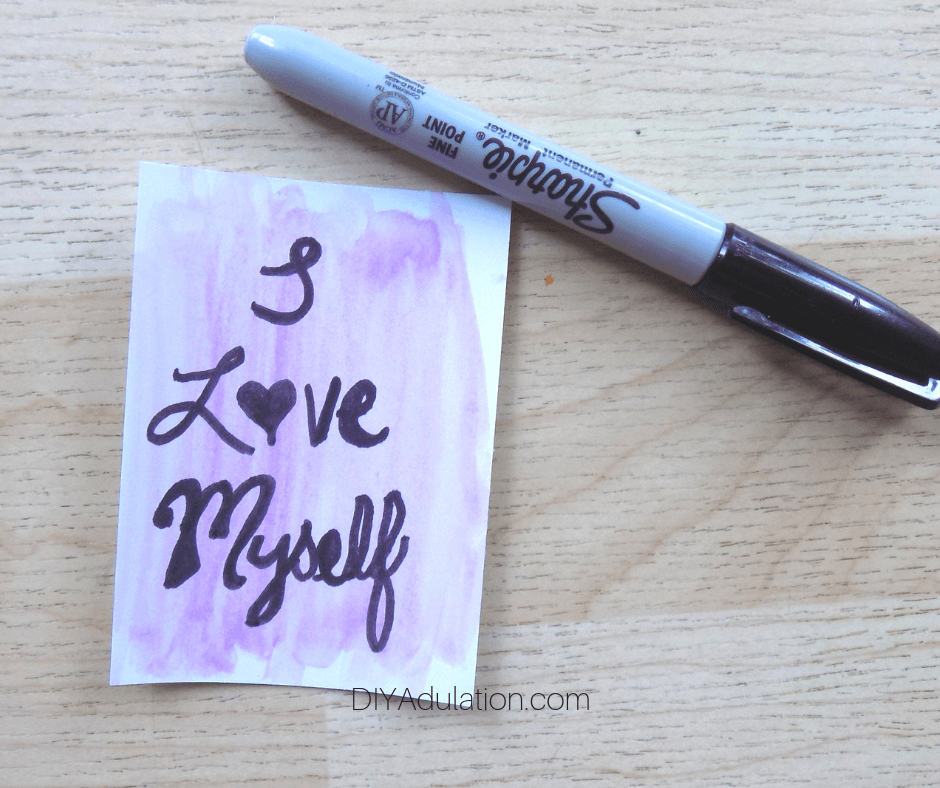
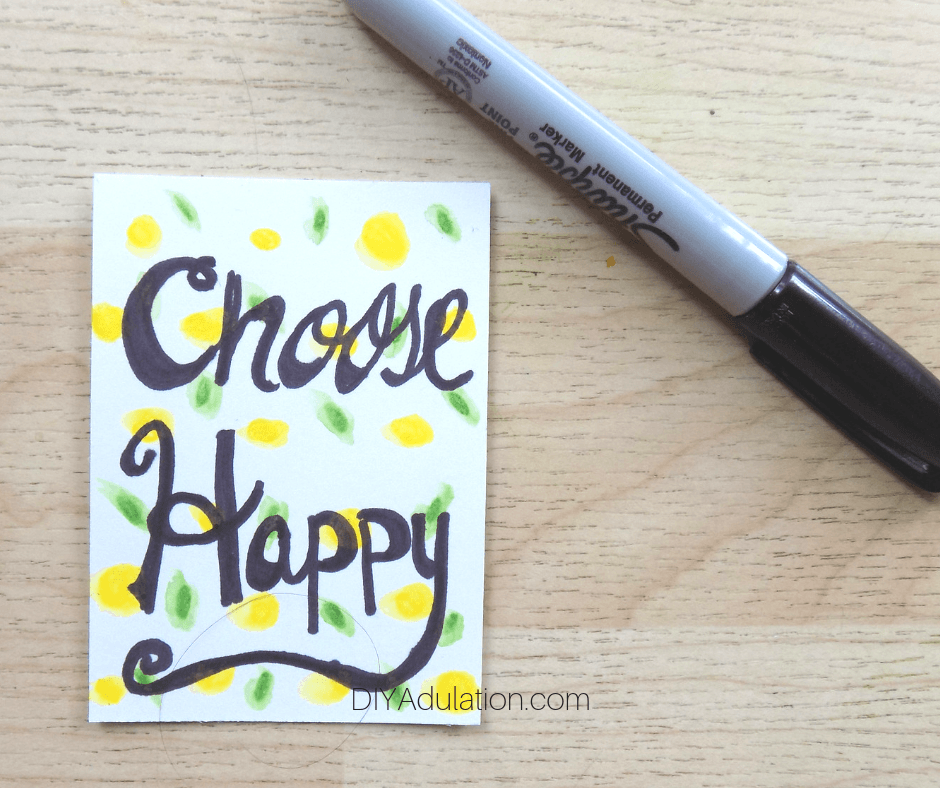
Step 5
After your cards have dried, it is time to add your positive affirmations. You can make these in fun fonts and scripts or simply write them neatly on each card. One affirmation goes on each card with permanent marker.
Note:
- If you need help with positive affirmation ideas, I’ve included some below for you.

Positive Affirmation Ideas
Choose affirmations that align with where you want to improve your confidence, self-talk, or emotions. Again, don’t feel the need to use all of these, but choose at least 10 to get you started.
- I am a strong and confident woman.
- I’m full of energy.
- I only speak to myself with love.
- I am beautiful.
- I’m successful.
- I deserve to be happy.
- I deserve love.
- My heart is filled with love and gratitude.
- I love myself.
- I’m a creative woman.
- I am full of confidence.
- I feel strong and healthy.
- I’m intelligent.
- I am motivated.
- My life is full of abundance.
- I deserve respect.
- I love to smile and laugh.
- I’m generous.
- I let go of past hurt.
- I have many talents.
- I’m creating the life of my dreams.
- I am confident in all situations.
- I’m successful in everything that I do.
- Trying new things excites me.
- I have clarity in all of my decisions.
- I deserve my dreams.
- My health and wellness is a priority.
- I’m a leader.
- I speak in love and kindness.
- I am productive and tackle tasks with purpose.

Once you have your DIY watercolor positive affirmation cards, don’t forget to pull them out once a day and read them. If you’re on the go a lot, I recommend putting them in your wallet so you always have them with you. Pull them out when you’re in the car at your kid’s practice waiting in the pick up line.
Also, if you find you have trouble remembering to read them daily, set an alarm on your phone. This can be in the morning or in the evening before bed, but set an alarm to remind you to read them. Lastly, I recommend reading them out loud to yourself if possible. There is something powerful about reading them while hearing them said aloud.
See where I’m linking up!
Don’t Forget to Pin It!
How to Rediscover Yourself After Marriage and Motherhood Series
- Introduction
- Why All Moms Need a Journal
- Determine Your Why for Self Discovery
- Find Your Cheerleaders
- DIY Positive Affirmation Cards
- Create Your SAHM Hierarchy of Needs
- The Hard Truth About Carving Out Me Time
- 5 Awesome Podcasts to Inspire Self Discovery
- How to Love Yourself First
- Stop Reacting to Life and Live Proactive
- How to Set and Protect Boundaries as a Mom
- How Moms Can Stop Being People Pleasers
- Why It’s Okay to Outgrow Relationships
- It’s Time to Break-up with Yourself
- Create a Mini Mom Oasis for Recharging
- Why Moms Should Date Themselves + How to Do It
- How to Get Your Free Time Back as a SAHM
- Turn Someday into Today
- Why You Should Throw Out Your Clothes
- Rediscover Your Old Hobbies
- How to Find New Hobbies You Love
- How to Create a Daily Self Care Routine
- Shut Down Your Negative Self Talk
- How a Haircut Can Help You Find Yourself
- Make a Bucket List You’ll Actually Complete
- Unique Alternative Ideas to Help You Find Yourself
- Why SAHM Need to Unplug Weekly
- 10 Mom Date Ideas You Can Do at Home
- 10 Mom Date Ideas to Get Out of the House
- Embracing Your Weird as a Mom
- How to Practice Mindful Reflection