Fun and Colorful Girl’s Purse

Even beginning sewers can make this fun and colorful girl’s purse! It’s super easy to make and full of flowers and sweets for your adorable little miss.

Affiliate links may be used in this post. Ordering a product through these links may result in a commission. Read the full disclosure here.

Collage of Photos of Colorful Purse with text overlay - Fun and Colorful Girl's Purse


[bctt tweet=”Make this fun and colorful girl’s purse and watch her face light up! #sewing #diypurse”]

Have you ever found a fabric that was so fun and bright that you just had to buy it? Instead of having a project that you purchase fabric for, you get the fabric and figure out the project later. If you’re anything like me, it probably happens more often than you care to admit.

That was exactly the case with this awesome fabric used to make this project. I have had the fabric for a couple of years now and just hadn’t found the right project for it.

Suddenly, when deciding what to make for the kids’ Easter baskets it hit me! My daughter loves purses so why not make her a fun and colorful girl’s purse for Easter?

Fun and Colorful Girl’s Purse Materials


Make this fun and colorful girl's purse for them to carry all of their important trinkets in and watch her face light up!

Step 1

If you haven’t already done so, cut out a piece of fabric that is 44” long by 15” wide.
 

Make this fun and colorful girl's purse for them to carry all of their important trinkets in and watch her face light up!

Step 2

Then fold your fabric in half, right sides together, so that the folded piece measures 22” long by 15” wide

Step 3

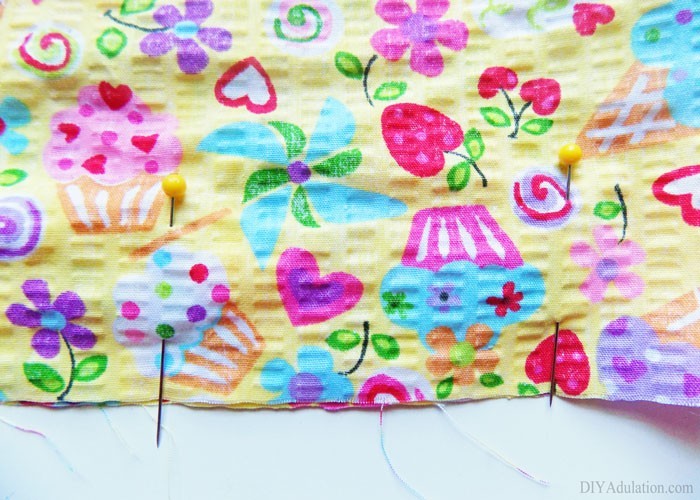
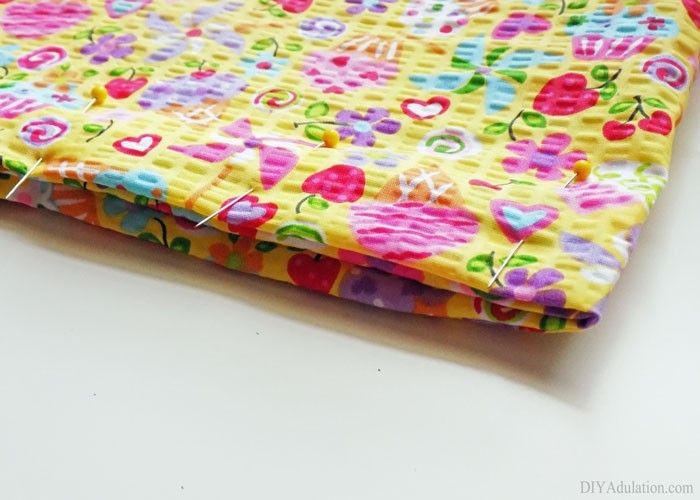
Next, pin the outside edges together (except for fold).
 

Make this fun and colorful girl's purse for them to carry all of their important trinkets in and watch her face light up!

Step 4

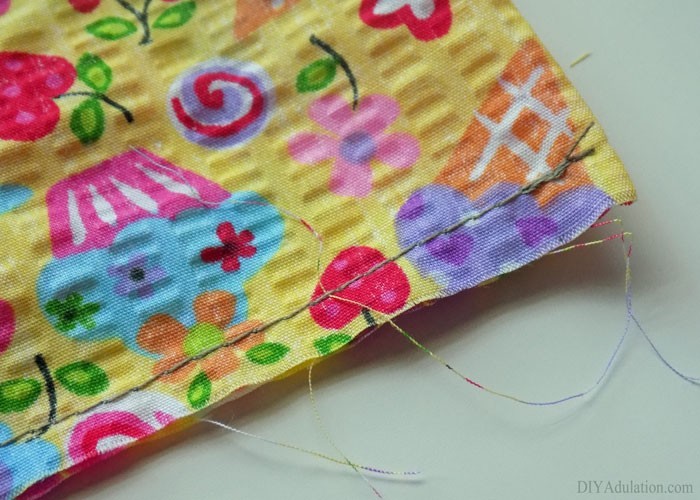
Sew the edges together leaving a gap in one corner that is 1.5” wide.


Make this fun and colorful girl's purse for them to carry all of their important trinkets in and watch her face light up!

Step 5

Turn fabric right side out by pulling it through the corner gap.


Make this fun and colorful girl's purse for them to carry all of their important trinkets in and watch her face light up!

Step 6

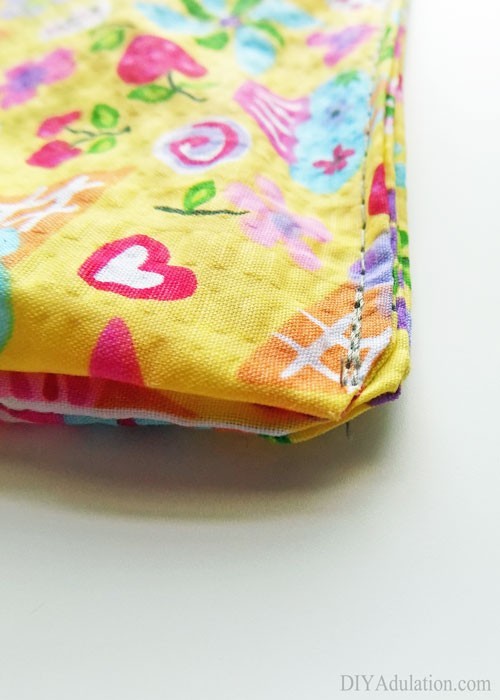
Once you’ve pulled your fabric out, fold the seam in (as pictured) and pin in place.

Step 7

Now, sew the folded seam closed.

Step 8

Fold fabric in half again so that it measured 11” long by 15” wide.
 

Make this fun and colorful girl's purse for them to carry all of their important trinkets in and watch her face light up!

Step 9

Next, pin the two 11” sides together.

Note:


Make this fun and colorful girl's purse for them to carry all of their important trinkets in and watch her face light up!

Make this fun and colorful girl's purse for them to carry all of their important trinkets in and watch her face light up!

Step 10

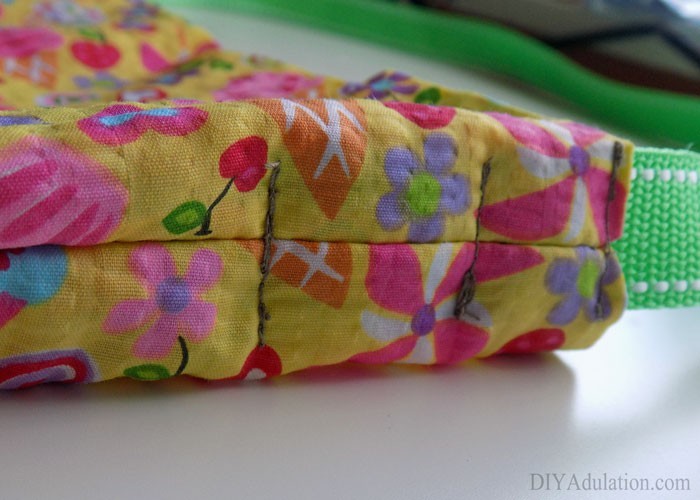
Now sew the 2 pinned sides on your fabric.
 

Make this fun and colorful girl's purse for them to carry all of their important trinkets in and watch her face light up!

Make this fun and colorful girl's purse for them to carry all of their important trinkets in and watch her face light up!

Make this fun and colorful girl's purse for them to carry all of their important trinkets in and watch her face light up!

Step 11

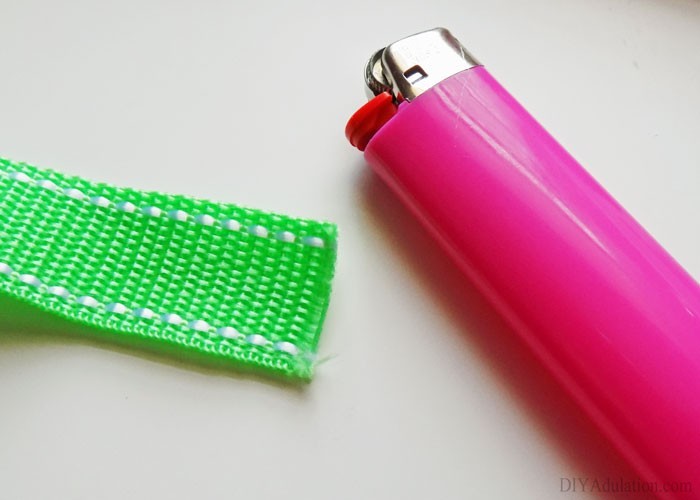
Using a lighter, burn the edges of your nylon strap by quickly passing the flame back and forth across them. This keeps the ends from fraying later.


Make this fun and colorful girl's purse for them to carry all of their important trinkets in and watch her face light up!

Step 12

Now, pin one edge of your strap to one side seam of your bag so that it measures 2” from the top of the bag.


Make this fun and colorful girl's purse for them to carry all of their important trinkets in and watch her face light up!

Step 13

Next, sew three rows of stitches on the end of the strap as pictured above to attach it to your purse.


Make this fun and colorful girl's purse for them to carry all of their important trinkets in and watch her face light up!


Step 14

Repeat steps 12 and 13 on the opposite pinned edge so that you strap is attached to both sides of the purse.
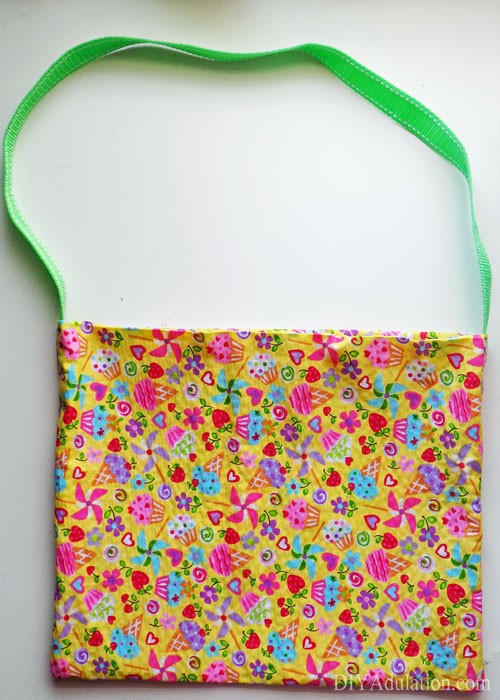
 

Make this fun and colorful girl's purse for them to carry all of their important trinkets in and watch her face light up!

Make this fun and colorful girl's purse for them to carry all of their important trinkets in and watch her face light up!

Step 15

Next, turn your purse right side out.


Make this fun and colorful girl's purse for them to carry all of their important trinkets in and watch her face light up!

Make this fun and colorful girl's purse for them to carry all of their important trinkets in and watch her face light up!

Step 16

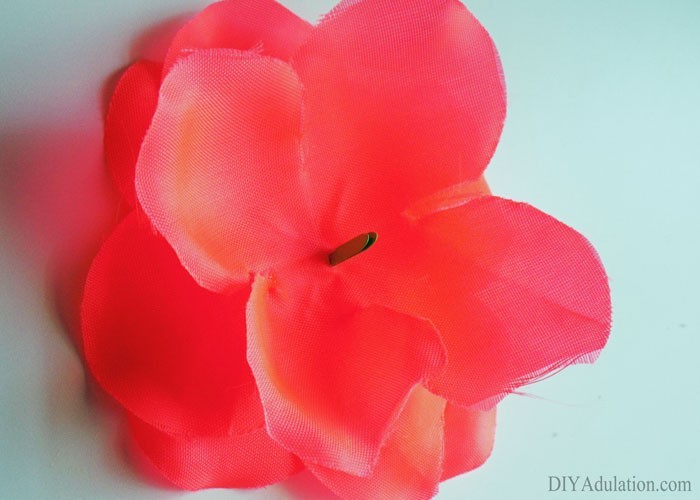
Assemble your flower by pushing your brad through the center of your flowers from the lei.


Make this fun and colorful girl's purse for them to carry all of their important trinkets in and watch her face light up!

Step 17

Then fold down the prongs of the brad to hold petals together.
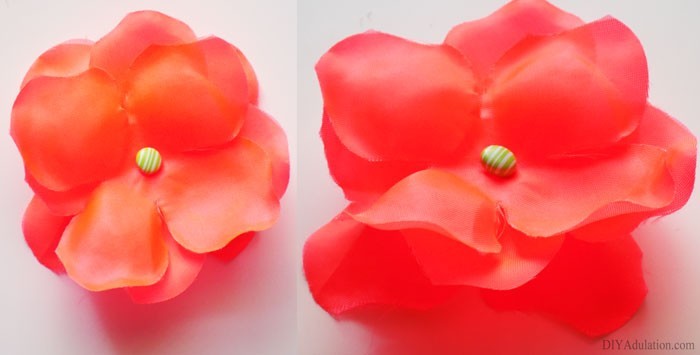
 

Make this fun and colorful girl's purse for them to carry all of their important trinkets in and watch her face light up!

Make this fun and colorful girl's purse for them to carry all of their important trinkets in and watch her face light up!

Make this fun and colorful girl's purse for them to carry all of their important trinkets in and watch her face light up!

Step 18

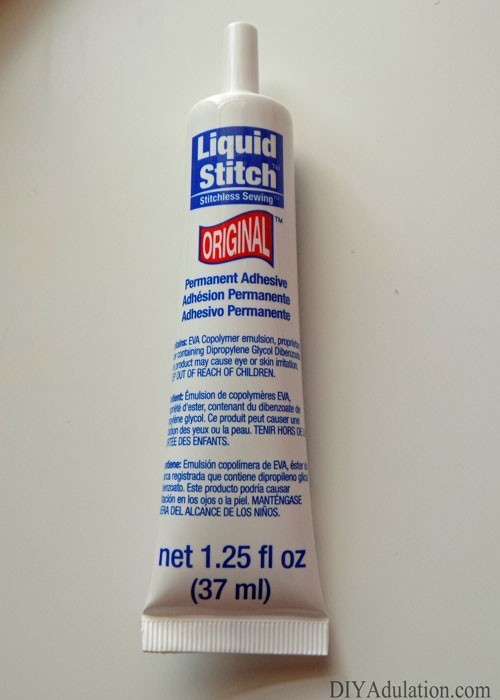
Lastly, adhere the flower to the front of your purse using Liquid Stitch.

Note:


Make this fun and colorful girl's purse for them to carry all of their important trinkets in and watch her face light up!

Step 19

Finally, allow your Liquid Stitch to dry completely before using or gifting your new purse.


Close up of Flower on Brightly Printed Fabric with text overlay - Fun and Colorful Girl's PurseThis fun and colorful girl’s purse turned out beautifully. I cannot wait to see my daughter’s face light up when she sees this in her basket on Easter morning.

If you’re looking for an easy, non-candy gift for your daughter this year, this girl’s purse is perfect! If can be completely assembled in under an hour and once the glue dries you are ready to go. Your little girl will love carrying all of her trinkets around wherever she goes in her new bag!

See where I’m linking up!

Don’t Forget to Pin It!


More Awesome Easter Projects for You:

Fun and Colorful Halloween Jars

In need of some super simple and budget-friendly new Halloween decor this year? You can’t beat these fun and colorful Halloween jars. They’re so easy to make with some glass jars and fun Halloween napkins from the dollar store!

Affiliate links may be used in this post. Ordering a product through these links may result in a commission at no extra cost to you. Read the full disclosure here.

Collage of Frankie, Witch, and Ghost Jars with text overlay - Fun and Colorful Halloween Jars


[bctt tweet=”Get ready for a simple and budget-friendly new Halloween project with these fun and colorful Halloween jars! They’re super easy to make and totally festive!” username=”diyadulation”]

For the past month, I’ve been basically stalking the Dollar Trees in my area hoping to find some of those glittery branches they have every year. While I haven’t seen those in store yet, I have found a ton of other inspiring items. I mean, do you ever leave the dollar store without buying at least a couple of items?

Lucky for you, my loss is your gain because it means tons of awesome new Halloween projects like these easy-to-make colorful Halloween jars. They are so much fun and totally fit with the fun and non-spooky theme I’m loving this year. Even better, the only items you have don’t already have in your craft stash are the napkins and possibly the cylinder vase making the entire craft only 2 bucks! I can’t think of a better deal than that!

Don’t worry. I’m going to keep hunting those sparkly branches, because I have a super fun idea for them. Until then, enjoy this latest craft project for your Halloween decor!

Close Up of Halloween Jars on Wood Background

Halloween Jars Materials

Colorful Halloween Jars Materials

Step 1

First, clean you vase and jars and allow them to dry.


Image Side Cut from Napkin next to Scissors

Step 2

Next, cut one napkin so that only the picture remains.


Measuring Napkin Around Cylinder

Step 3

Then measure it around your vase and fold the excess so that there is a slight overlap at the ends.


Excess Cut from Napkin next to Scissors

Step 4

Next, cut at the fold you made.


Mod Podge on Cylinder Vase

Attaching Napkin to Cylinder Vase

Step 5

Cover your vase in a coat of Mod Podge and begin attaching your napkin.


Halloween Napkin Attached to Cylinder Vase

Step 6

Continue until your napkin is completely wrapped around your vase.


Second Coat of Mod Podge over Halloween Napkin on Vase

Step 7

Further secure the napkin to the vase by covering the outside of the napkin with another coat of Mod Podge. Set your vase aside to dry.

Note:


Frankenstein Cut from Halloween Napkin

Step 8

Next, cut out only the vampire from a napkin. Keep as close to the outline as possible when cutting.

Trimmed Frankenstein Cutout Next to Scraps and Scissors

Note:


Mod Podge Frankenstein on Glass Jar

Step 9

Attach the vampire to one small jar using the same method you did on the vase.

Step 10

Again, go over the vampire with a second coat of Mod Podge and set the jar aside to dry.


Bat and Ghost Cut From Halloween Napkin

Step 11

Lastly, cut out the ghost and bat from the same napkin that you cut your vampire from. Again, make sure that you trim all that extra orange from around the edges.


Mod Podge Bat and Ghost on Glass Jar

Step 12

Then attach the ghost and bat to the 2 small jar with Mod Podge. Cover the outside of the ghost and bat with Mod Podge too and, again, allow it to dry.


Halloween Jars on Wood Background

Frankie, Witch, and Ghost Jars with text overlay - Fun and Colorful Halloween Jars

Once your fun and colorful Halloween jars are dry, put some electric tealights in and use them as luminaries in a vignette on your mantle for the season. You can also fill them with candy and flowers (as I did) to create a festive and practical centerpiece for your dining table. No matter which you choose, you’ll have some easy and inexpensive new Halloween decor to display through October!

See where I’m linking up!

Don’t Forget to Pin It!

Frankie, Witch, and Ghost Jars with text overlay - Fun and Colorful Halloween Jars


More Ideas You’ll Love:

6 Easy and Fun Halloween Game Ideas

Halloween isn’t all candy and costumes. It’s also a time of parties both in the classroom and at home. Plan you party fun now with these 6 easy and fun Halloween game ideas!

Affiliate links may be used in this post. Ordering a product through these links may result in a commission. Read the full disclosure here.

Collage of halloween games with text overlay - 6 Easy and Fun Halloween Game Ideas


[bctt tweet=”Be ready for all of your Halloween parties with these 6 easy and fun Halloween game ideas. Make them now so you can grab and go when it’s time to play!” username=”diyadulation”]

I know we still have a couple of months until Halloween but with all of the craziness in my house, I know I need some fun inspiration. Halloween is my favorite holiday so it’s basically my happy place.

If you need a light at the the end of the tunnel to look towards while you get through the crazy back to school season, consider this your beacon. Not to mention, you’ll totally be ahead of the game once October rolls around!


Collage of zombie body parts toss game

Zombie Body Parts Toss Game (My Pinterventures)

I absolutely love this inventive and creepy game idea! It’s not one for the classroom but perfect for a backyard Halloween party. It’s super easy to set up and fun for everyone making it a must-have for your zombie bash.


Stacked Sleeping pumpkins next to mini pillow

DIY Pumpkin Pillow Fight Game (DIY Adulation)

This adorable little game is perfect all fall long. Some painted cardboard pumpkins and miniature sewn pillows are all you need to entertain the kiddos during any fall party. It’s an especially great classroom party idea because it’s easy to transport and not the least bit spooky.


Zombie Bowling Pins next to Brain Bowling Ball

DIY Tabletop Zombie Bowling (DIY Adulation)

For older kids, you can’t go wrong with this tabletop bowling game. Take turns rolling the brain down the table to knock down as many zombies as possible. It’s also a great classroom game because it still flexes those math skills in a fun way!


Bat Pumpkin Golf Game on Table

Halloween Pumpkin Golf Game (Cookies, Coffee, and Crafts)

Have an empty cardboard box around the house? If so, turn it into your next awesome Halloween game with this super simple pumpkin golf game tutorial. Kid love the challenge of putting that ball into his vampire mouth again and again.


Halloween Scattergories Cards next to Board and Pen

Free Printable Halloween Scattergories Game (DIY Adulation)

If you love Scattergories then try out this awesome free printable Halloween version. It’s the perfect group party game for older kids and adults with themed cards about horror movies and trick-or-treating just to name a few.


Painted Pumpkin Faces Collage

Easy Painted Pumpkin Coasters Game (DIY Adulation)

This super easy little craft doubles as a game and home decor. Grab a pack of orange coaster from the dollar store and get painting. When you’re not using them to protect your table, play a fun game of coaster toss!


Collage of halloween games with text overlay - 6 Easy and Fun Halloween Game Ideas

You’ll be ready for all of your Halloween parties with these 6 easy and fun Halloween game ideas. Make them now so you can grab and go when it’s time to play, especially if you’ve got multiple school parties lined up.

See where I’m linking up!

Don’t Forget to Pin It!

Collage of halloween games with text overlay - 6 Easy and Fun Halloween Game Ideas


More Ideas You’ll Love: