Upcycled Thrift Store Tray

It’s that time again! I’ve paired up today with 19 other talented ladies to bring you a monthly Thrift Store Decor Upcycle Challenge. Each month we will create a new home decor piece from an item(s) we’ve found at a thrift store, yard sale, resale shop etc. There is no budget or specific theme so we are free to let our creativity run wild! This month I’m bringing you this beautiful upcycled thrift store tray. You can check out last month’s challenge where I made this Bathroom Organizer as well as see everyone else’s awesome upcycles.

Meet the Hosts

Thrift Store DecorUpcycle Challenge

Amanda | The Kolb Corner      Chelc| Inside the Fox Den
Erlene | My Pinterventures     Kim | Made in a Day     Sara | Twelve on Main
Debra | Shoppe No. 5      Shirley | Intelligent Domestications
Marie | DIY Adulation     Lindsay | Crazy Organized   Michelle | Our Crafty Mom
Julie | Live From Julie’s House     Dru | Polka Dot Poplars
Maureen | Red Cottage Chronicles     Pili | Sweet Things     Channell | Hobnail House
Colleen | Life on Kaydeross Creek     Ann | Duct Tape and Denim
Paula | Virginia Sweet Pea     Sherry | Savvy Apron     Stacy | Anastasia Vintage

You can also follow our board on Pinterest for more upcycled decor inspiration!


Gorgeous decor doesn't have to cost a fortune. This beautiful upcycled thrift store tray is perfect on your coffee table or as a serving tray for parties!


[bctt tweet=”A beautiful upcycled thrift store tray is perfect on your coffee table or for parties! #upcycled #diy” username=”diyadulation”]


Gorgeous decor doesn't have to cost a fortune. This beautiful upcycled thrift store tray is perfect on your coffee table or as a serving tray for parties!

Materials


Gorgeous decor doesn't have to cost a fortune. This beautiful upcycled thrift store tray is perfect on your coffee table or as a serving tray for parties!

Gorgeous decor doesn't have to cost a fortune. This beautiful upcycled thrift store tray is perfect on your coffee table or as a serving tray for parties!

Step 1

Paint your entire tray with white latex paint.

Tip:

  • Because of the material of mine, I didn’t sand or prime it first. If you are using a tray made of a harder wood or one that is lacquered, you will want to do this first.


Gorgeous decor doesn't have to cost a fortune. This beautiful upcycled thrift store tray is perfect on your coffee table or as a serving tray for parties!

Step 2

Once your paint is dry, use your tray to measure out your contact paper. Remember that you want to make it smaller than the footprint of your tray so that it will fit on the inside of the tray.


Gorgeous decor doesn't have to cost a fortune. This beautiful upcycled thrift store tray is perfect on your coffee table or as a serving tray for parties!

Step 3

Pull back the edge of the backing on your contact paper (but do not completely remove it) and press the exposed edge of the paper to the inside of your tray. Smooth the rest onto your tray by peeling the backing off a little at a time and smoothing into place.


Gorgeous decor doesn't have to cost a fortune. This beautiful upcycled thrift store tray is perfect on your coffee table or as a serving tray for parties!

Gorgeous decor doesn't have to cost a fortune. This beautiful upcycled thrift store tray is perfect on your coffee table or as a serving tray for parties!

Step 4

Seal the bottom of your tray with Mod Podge.

Note:

  • I used the gloss version on this but it you are going for a different style, you may want to use Matte instead. It simply depends on your tastes.

Step 5

Using fine grit sandpaper, lightly sand the corners, edges, and sides of your tray to give it a distressed look.


Gorgeous decor doesn't have to cost a fortune. This beautiful upcycled thrift store tray is perfect on your coffee table or as a serving tray for parties!

Gorgeous decor doesn't have to cost a fortune. This beautiful upcycled thrift store tray is perfect on your coffee table or as a serving tray for parties!

Step 6

Drill 2 holes on either side of the tray roughly 3 inches apart. Make sure that the drill bit you choose makes a hole big enough for your rope to fit through.


Gorgeous decor doesn't have to cost a fortune. This beautiful upcycled thrift store tray is perfect on your coffee table or as a serving tray for parties!

Gorgeous decor doesn't have to cost a fortune. This beautiful upcycled thrift store tray is perfect on your coffee table or as a serving tray for parties!

Step 7

Thread your rope through the holes and knot each end.


Gorgeous decor doesn't have to cost a fortune. This beautiful upcycled thrift store tray is perfect on your coffee table or as a serving tray for parties!

Step 8

Trim off any excess at the end on the knots.


Gorgeous decor doesn't have to cost a fortune. This beautiful upcycled thrift store tray is perfect on your coffee table or as a serving tray for parties!

Gorgeous decor doesn't have to cost a fortune. This beautiful upcycled thrift store tray is perfect on your coffee table or as a serving tray for parties!

Gorgeous decor doesn't have to cost a fortune. This beautiful upcycled thrift store tray is perfect on your coffee table or as a serving tray for parties!

Gorgeous decor doesn't have to cost a fortune. This beautiful upcycled thrift store tray is perfect on your coffee table or as a serving tray for parties!

Gorgeous decor doesn't have to cost a fortune. This beautiful upcycled thrift store tray is perfect on your coffee table or as a serving tray for parties!

Gorgeous decor doesn't have to cost a fortune. This beautiful upcycled thrift store tray is perfect on your coffee table or as a serving tray for parties!

This upcycled thrift store tray turned out so much different than I expected but in the best way possible. There’s a really good chance that my family members are getting decorative trays for Christmas because I want to make more so bad! Before you go, don’t miss the projects from my fellow bloggers below. You can also find previous months’ hops on our Recycled Crafts page.


Be sure to check out all of the other creative upcycle projects my fellow bloggers have come up with!


Upcycled Bathroom Organizer + Blog Hop

Thrift stores are the inspirational playgrounds of creatives. You go into these stores and it is like finding a cavern of pirate treasure. The bargain items transform in your mind. You aren’t seeing that kitschy little frame everyone else sees. You see a beautiful new jewelry organizer for your wall or an awesome new tray for your coffee table. That is why I am so excited to partner up with 19 other bloggers to make the Thrift Store Blog Hop a monthly feature! Each month we will create a new home decor piece from an item(s) we’ve found at a thrift store, yard sale, resale shop etc. There is no budget or specific theme so we are free to let our creativity run wild! This month, get organized with this easy bathroom organizer.

Affiliate links may be used in this post. Ordering a product through these links may result in a commission. Read the full disclosure here.

Meet the Hosts

Thrift Store DecorUpcycle Challenge

Amanda | The Kolb Corner      Chelc| Inside the Fox Den     
Erlene | My Pinterventures     Kim | Made in a Day     Sara | Twelve on Main    
Debra | Shoppe No. 5      Shirley | Intelligent Domestications    
Marie | DIY Adulation     Lindsay | Crazy Organized   Michelle | Our Crafty Mom    
Julie | Live From Julie’s House     Dru | Polka Dot Poplars    
Maureen | Red Cottage Chronicles     Pili | Sweet Things     Channell | Hobnail House     
Colleen | Life on Kaydeross Creek     Ann | Duct Tape and Denim      
Paula | Virginia Sweet Pea     Sherry | Savvy Apron     Stacy | Anastasia Vintage 

You can also follow our board on Pinterest for more upcycled decor inspiration!


Get organized with this upcycled thrift store bathroom organizer! Then check out projects from 19 other bloggers at the monthly Thrift Store Blog Hop!


[bctt tweet=”Get organized with this upcycled thrift store bathroom organizer + a Blog Hop! #thrift #upcycled” username=”diyadulation”]


Get organized with this upcycled thrift store bathroom organizer! Then check out projects from 19 other bloggers at the monthly Thrift Store Blog Hop!

Materials


Get organized with this upcycled thrift store bathroom organizer! Then check out projects from 19 other bloggers at the monthly Thrift Store Blog Hop!

Get organized with this upcycled thrift store bathroom organizer! Then check out projects from 19 other bloggers at the monthly Thrift Store Blog Hop!

Step 1

Remove all of the hooks from your rack.


Get organized with this upcycled thrift store bathroom organizer! Then check out projects from 19 other bloggers at the monthly Thrift Store Blog Hop!

Step 2

Remove the dowel holding the rack on. Next, pull apart the rest of the rack.

Tip:

  • The dowels may be glued together on one side. If that is the case, gently twist the dowels to loosen the glue before pulling out.


Get organized with this upcycled thrift store bathroom organizer! Then check out projects from 19 other bloggers at the monthly Thrift Store Blog Hop!

Step 3

Cover the threads of your screws with blue painters tape. This will keep them protected while you paint them.


Get organized with this upcycled thrift store bathroom organizer! Then check out projects from 19 other bloggers at the monthly Thrift Store Blog Hop!


Step 4

Place the taped screws and hooks on some newspaper (or other paint-safe surface) in a well-ventilated area. Next, spray paint them.


Get organized with this upcycled thrift store bathroom organizer! Then check out projects from 19 other bloggers at the monthly Thrift Store Blog Hop!

Get organized with this upcycled thrift store bathroom organizer! Then check out projects from 19 other bloggers at the monthly Thrift Store Blog Hop!

Step 5

While the spray paint is drying, sand all of the wooden pieces. Once you are done sanding, wipe down with a damp cloth to remove all of the residual dust.


Get organized with this upcycled thrift store bathroom organizer! Then check out projects from 19 other bloggers at the monthly Thrift Store Blog Hop!

Step 6

Flip you hooks and rotate your screws on the newspaper. Hit them with another coat of spray paint.


Get organized with this upcycled thrift store bathroom organizer! Then check out projects from 19 other bloggers at the monthly Thrift Store Blog Hop!

Step 7

Next, place your wooden pieces on some newspaper as well. Paint the pieces with your latex paint. Allow the first coat to dry.

Step 8

Cover your wooden pieces with a second coat of latex paint. Again, allow it to dry.


Get organized with this upcycled thrift store bathroom organizer! Then check out projects from 19 other bloggers at the monthly Thrift Store Blog Hop!

Get organized with this upcycled thrift store bathroom organizer! Then check out projects from 19 other bloggers at the monthly Thrift Store Blog Hop!

Get organized with this upcycled thrift store bathroom organizer! Then check out projects from 19 other bloggers at the monthly Thrift Store Blog Hop!

Get organized with this upcycled thrift store bathroom organizer! Then check out projects from 19 other bloggers at the monthly Thrift Store Blog Hop!

Step 9

Reassemble the dowel piece of your thrift store rack. To do this, place a dab of wood glue in each hole and insert the dowels. Be sure to press firmly together. Allow your wood glue to dry.


Get organized with this upcycled thrift store bathroom organizer! Then check out projects from 19 other bloggers at the monthly Thrift Store Blog Hop!

Get organized with this upcycled thrift store bathroom organizer! Then check out projects from 19 other bloggers at the monthly Thrift Store Blog Hop!

Step 10

Remove the painters tape from your screws.


Get organized with this upcycled thrift store bathroom organizer! Then check out projects from 19 other bloggers at the monthly Thrift Store Blog Hop!

Get organized with this upcycled thrift store bathroom organizer! Then check out projects from 19 other bloggers at the monthly Thrift Store Blog Hop!

Step 11

Reattach your hooks to your wooden base.

Step 12

Finish putting your thrift store rack back together.


Get organized with this upcycled thrift store bathroom organizer! Then check out projects from 19 other bloggers at the monthly Thrift Store Blog Hop!

Step 13

Hang your rack with your drill and enjoy!


Get organized with this upcycled thrift store bathroom organizer! Then check out projects from 19 other bloggers at the monthly Thrift Store Blog Hop!

Get organized with this upcycled thrift store bathroom organizer! Then check out projects from 19 other bloggers at the monthly Thrift Store Blog Hop!

Get organized with this upcycled thrift store bathroom organizer! Then check out projects from 19 other bloggers at the monthly Thrift Store Blog Hop!

Get organized with this upcycled thrift store bathroom organizer! Then check out projects from 19 other bloggers at the monthly Thrift Store Blog Hop!

Get organized with this upcycled thrift store bathroom organizer! Then check out projects from 19 other bloggers at the monthly Thrift Store Blog Hop!

Now you have some awesome new storage for your bathroom. Store your towels on it or place some baskets on it for other items. You can add even more storage by hanging some additional cute baskets from the hooks. Throw extra toilet paper, hand towels, or other important items in them. Now you’ll have all of your necessities at your fingertips. Before you go, check out the other awesome thrift store projects from my friends below!


See where I’m linking up!

Easy DIY Game Night Medal

This easy DIY game night medal is the perfect upcycled craft to take your family game night to the next competitive level. With this simple tutorial, you be finished and ready to compete in no time!

Affiliate links may be used in this post. Ordering a product through these links may result in a commission at no extra cost to you. Read the full disclosure here.

Collage of Photos of Game Night Medals with text overlay - Easy DIY Game Night Medal - DIY Adulation

[bctt tweet=”Competition is a healthy part of life. Celebrate it with this easy DIY game night medal! #diy #recycledcraft” username=”diyadulation”]

It’s no secret that family game night is big in our home.

We simply love laughing and competing over an awesome board game. We even own the Champion Monopoly. You know the one that comes with a trophy?

That got me thinking. What if we had some sort of trophy for the winner of our other games? The kids would love to have something to show off when they defeat the parents.

Thus, this easy DIY game night medal was born. It’s perfect because it is inexpensive to make and pretty!

Remember these DIY birch bark vases? This is a great DIY to use up the lids left over from that project!

 
Competition is a healthy part of life. Surprise your kiddos at the next family game night with this easy DIY game night medal and watch the fun unfold!

DIY Game Night Medal Materials


Competition is a healthy part of life. Surprise your kiddos at the next family game night with this easy DIY game night medal and watch the fun unfold!

Step 1

First, clean your baby food jar lid and then swab with rubbing alcohol. This will help ensure that the paint sticks.


Competition is a healthy part of life. Surprise your kiddos at the next family game night with this easy DIY game night medal and watch the fun unfold!

Competition is a healthy part of life. Surprise your kiddos at the next family game night with this easy DIY game night medal and watch the fun unfold!

Step 2

Next, paint the outside of your lid with gold paint. Allow it to dry before moving on.

Step 3

Then, flip your lid over and paint the inside gold too. Again, allow the paint to dry before moving on.


Competition is a healthy part of life. Surprise your kiddos at the next family game night with this easy DIY game night medal and watch the fun unfold!

Step 4 (Optional)

If needed, add a second coat of paint to the outside of your lid. Allow this coat to dry before moving on.

Tip:


Competition is a healthy part of life. Surprise your kiddos at the next family game night with this easy DIY game night medal and watch the fun unfold!

Competition is a healthy part of life. Surprise your kiddos at the next family game night with this easy DIY game night medal and watch the fun unfold!

Step 5

Once your paint is dry, punch a hole in the side of the lid using your Crop-a-dile.

Tip:

Step 6

Next, attach your jump ring through the hole.


Competition is a healthy part of life. Surprise your kiddos at the next family game night with this easy DIY game night medal and watch the fun unfold!

Step 7

Then, cut a length of ribbon roughly 24 inches long. (Yes, those are kid’s scissors in the photo… they were the closest pair I grabbed.)


Competition is a healthy part of life. Surprise your kiddos at the next family game night with this easy DIY game night medal and watch the fun unfold!

Step 8

Next thread your ribbon through the jump ring.


Competition is a healthy part of life. Surprise your kiddos at the next family game night with this easy DIY game night medal and watch the fun unfold!

Step 9

Now tie the ends of your ribbon together with a regular knot.

Step 10

Trim any excess ribbon at the end of the knot.

Tip:


Competition is a healthy part of life. Surprise your kiddos at the next family game night with this easy DIY game night medal and watch the fun unfold!

Competition is a healthy part of life. Surprise your kiddos at the next family game night with this easy DIY game night medal and watch the fun unfold!

Step 11

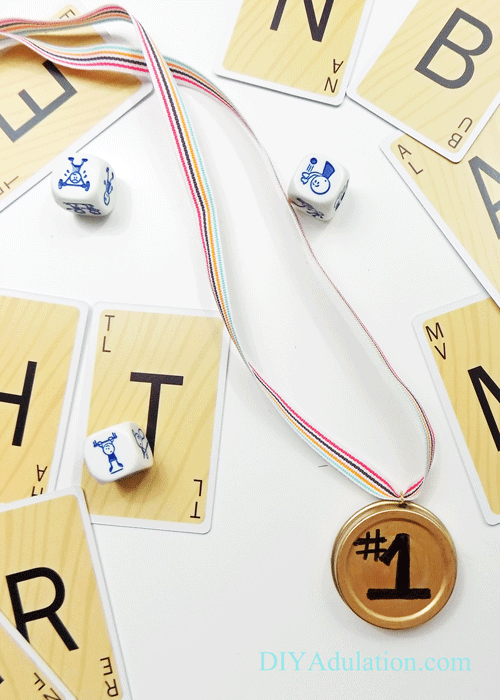
Lastly, draw “#1” in the center of your lid with a black Sharpie.

Tip:


Competition is a healthy part of life. Surprise your kiddos at the next family game night with this easy DIY game night medal and watch the fun unfold!

Competition is a healthy part of life. Surprise your kiddos at the next family game night with this easy DIY game night medal and watch the fun unfold!

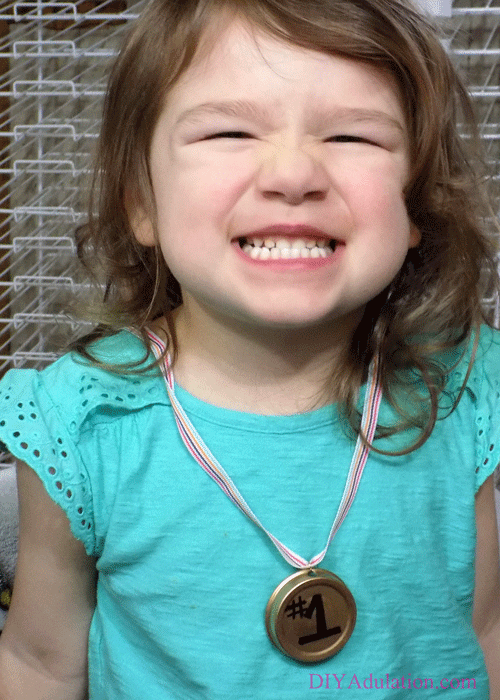
How do you like my model? She definitely took creative license in the photos and these were the best shots that I got. We had fun with it, though. I think she likes the medal, what do you think?


Competition is a healthy part of life. Surprise your kiddos at the next family game night with this easy DIY game night medal and watch the fun unfold!

Close Up of Game Night Medal next to Cards and Die with text overlay - Easy DIY Game Night Medal - DIY Adulation

Can you believe how easy this is to make? Surprise your kiddos at the next family game night with this easy DIY game night medal and watch the fun unfold!

If you’re looking for even more family game night DIY’s then check out this Family Game Night Board. It keeps the board in place while allowing it to rotate so little hands can always reach their pieces!

Now if you’ll excuse me, I’m off to pick a board game out. Possibly one that gives me the edge so I get to rock this awesome medal first. Enjoy your next family game night!

See where I’m linking up!

Don’t Forget to Pin It!

Game Night Medal next to Cards and Die with text overlay - Easy DIY Game Night Medal - DIY Adulation


More Game Night Ideas for You: