How to Make DIY Sidewalk Chalk That Glows

The night takes longer to get here in the summer but it’s still fun to stay up late and enjoy it with the kiddos. Now you can enjoy some outdoor fun during the day and after it gets dark. Find out how to make DIY sidewalk chalk the glows for all day and night fun!

Affiliate links are used on this site. Ordering a product through these links may result in a commission. Read the full disclosure here.

Collage of Sidewalk Chalk with text overlay - How to Make DIY Sidewalk Chalk that Glows


[bctt tweet=”Find out how to make DIY sidewalk chalk that glows for endless summer fun with the kiddos. From games to glowing masterpieces, kids will love it!” username=”diyadulation”]

I love sidewalk chalk as much as (if not more than) the kiddos because there are so many fun things you can do with it. Of course, you can create masterpieces on the driveway but you can do so much more than that. Use it to make a hopscotch game or create a street hockey court. Seriously, can you think of a more versatile toy?

How do you make a fantastically versatile toy even better? You make it glow in the dark! That’s exactly what I did with this easy chalk recipe. Instead of using regular pigment powder, swap it out for glow in the dark powder. It’s truly that easy.


Sidewalk Chalk on Concrete

Glowing DIY Sidewalk Chalk Materials

Step 1

First, add your plaster to a medium glass mixing bowl.


Water and Plaster in Glass Mixing Bowl

Step 2

Then add your water to the mixing bowl.


Mixed Plaster in Glass Mixing Bowl

Step 3

Mix your water and plaster together until smooth.


Divided Plaster Mixture in Small Bowls

Step 4

Once your plaster and water are mixed, separate the mixture into four smaller plastic bowls.

Tip:


Color Powder on Plaster Mixture in Small Bowls

Step 5

Add different colors of glow in the dark mica powder to each bowl of plaster mix.


Color Mixed into Plaster in Small Bowls

Step 6

Carefully mix the mica powder into the plaster mix. The mica powder can be messy and get everywhere so go slowly until it is worked into the mixture.

Tip:


Sidewalk Chalk Mix in Bottle Silicon Mold

Sidewalk Chalk Mix in Puzzle Silicon Mold

Step 7

Next, fill your silicon molds with the different color mixtures.


Dried Sidewalk Chalk Mix in Bottle Silicon Mold

Step 8

Allow your molds to set until the plaster dries.


Sidewalk Chalk Popped Out of Mold

Step 9

Pop your sidewalk chalk out and enjoy! Let them “charge” in the sun all day for fun after dark fun!


Child playing with sidewalk chalk

Stacked Sidewalk Chalk in Front of Brick Background

Glowing Sidewalk Chalk

Bonus Tip

If you want the backs of the chalk to be smooth, sand them down on concrete until smooth. Then brush off the dust. Obviously you don’t really need to do this, especially if it’s just for the kiddos to play with. If you want to give them as a gift, however, you may want to give it a try.


Glowing Pieces of Sidewalk Chalk with text overlay - How to Make DIY Sidewalk Chalk that Glows

Once you know how to make DIY sidewalk chalk that glows you’ll be set for summer fun with the kiddos. Let the kids create masterpieces on the porch then take them outside after the sun goes down to check out their glowing creations. It’s yet another way to enjoy sidewalk chalk! What other ways will you play with your new glowing sidewalk chalk? I’d love to hear in the comments!

See where I’m linking up!

Don’t Forget to Pin It!

Glowing Pieces of Sidewalk Chalk with text overlay - How to Make DIY Sidewalk Chalk that Glows


More Ideas You’ll Love:

Fun and Easy DIY Sequin Shaker Photo Magnet

Raise your hand if your little ones love playing with the magnets on the fridge! It’s great when you’re working in the kitchen and need to keep an eye on him while you cook. Now you can give kids something fun to play with that you totally don’t mind displaying on your fridge year-round. This DIY sequin shaker photo magnet is the perfect craft to do just that.

Affiliate links are used on this site. Ordering a product through these links may result in a commission. Read the full disclosure here.

Collage of Sequin Shaker Magnets with text overlay - DIY Sequin Shaker Photo Magnet


[bctt tweet=”This DIY sequin shaker photo magnet is so easy to make! It’s fun to play with but it’s also beautiful to display, plus it makes an awesome gift!” username=”diyadulation”]


All 3 of my kids went through this phase at some point in their childhood. The letter magnets were popular and then we got these monster magnets. They let the kids build their own monsters on the fridge with different faces and features. That’s what inspired this shaker photo magnet. It’s fun to play with but it’s also beautiful to display. You know how much I love multi-function decor.

These also make a great gift for grandparents. They’re so easy to make and you can fill them with pictures of all the grandkids. It’s a win-win for everyone.


Sequin Shaker Magnet next to Sequins

DIY Sequin Shaker Photo Magnet Materials


Picture next to Magnetic Container

Step 1

First, clean your magnetic container. Make sure the inside is free of any dust or debris.


Circle Traced on Picture next to Marker and Container

Step 2

Then use your container as a stencil to trace a circle on your photo with black marker.

Tip:


Circle Cut Out of Picture next to Scissors

Step 3

Next cut out your photo inside the traced line using scissors.


Picture in Container next to Scissors

Step 4

Test your cut photo to ensure it fits inside of your container. Trim any extra edges as needed.


Mounting Squares on Back of Photo next to Materials

Step 5

Once your photo fits, attach mounting squares to the back of your picture.

Tip:

Step 6

Then attach the photo to the bottom inside of your magnetic container.

Step 7

Next, add a small line of E6000 around the inside edge of the container lid.

Step 8

Before attaching it to your container, sprinkle some loose sequins in the center of lid. Try to avoid letting them touch the glue as much as possible.


Magnet on Bottom of Container

Step 9

Now carefully place the bottom of your container into the glue-lined lid.

*Important* Do not flip your container over. If you do, the glue will run and damage your photo.

Step 10

Allow your container to dry, face down, for 24 hours.


Lidded Container with Picture and Sequins Inside

Step 11

After the glue is dry, flip your container over.


Sequins Glued on Sequin Shaker Magnet Lid

Step 12

Lastly, glue sequins around the edge of your container lid. I used quick dry tacky glue to attach mine because it dries faster (duh). However, if you don’t have any, you can use E6000 to attach the sequins and then allow it to dry another 24 hours.


Sequin Shaker Magnet on Polka Dot Background

Close up of Sequin Shaker Magnet with text overlay - DIY Sequin Shaker Photo Magnet

I love how this DIY sequin shaker photo magnet turned out (the second one at least). Use it as a way to display your favorite vacation or family photos and to occupy little hands while you work on dinner. Plus, it’s budget-friendly enough to make an awesome gift for grandparents, friends, and extended family.

See where I’m linking up!

Don’t Forget to Pin It!
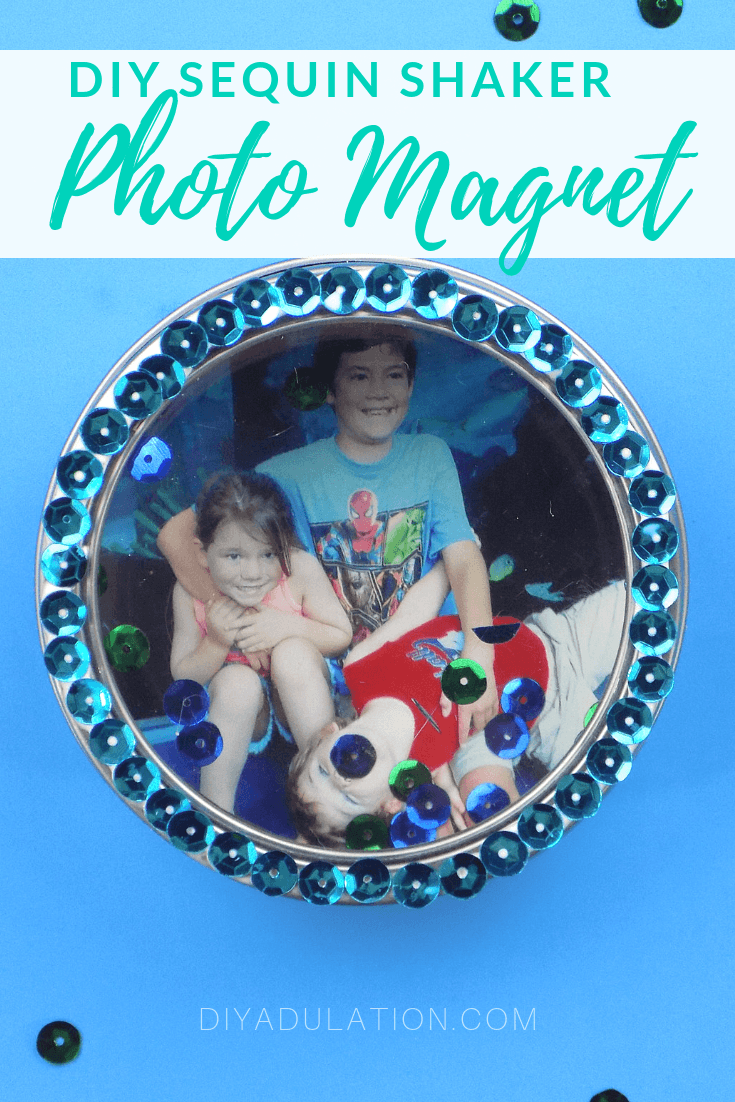
Close up of Sequin Shaker Magnet with text overlay - DIY Sequin Shaker Photo Magnet


More Ideas You’ll Love:

Meaningful Mother’s Day Gifts Kids Can Make

Mother’s Day is only a few weeks away. Don’t leave it to the last minute, start planning now. These meaningful Mother’s Day gifts kids can make are the perfect way to surprise moms and grandmas with a thoughtful gift they’ll cherish for years.

Affiliate links may be used in this post. Ordering a product through these links may result in a commission. Read the full disclosure here.

Collage of Kids Crafts with text overlay - Meaningful Mothers Day Gifts Kids Can Make


[bctt tweet=”Start planning for Mother’s Day now with these meaningful Mother’s Day gifts kids can make and surprise moms and grandmas with a gift to cherish for years!” username=”diyadulation”]

I seriously have one of the best moms in the world. I know everyone thinks their mom is the best but mine still goes out of her way every year to work with my kiddos to create incredible and sweet gifts for me on Mother’s Day. That’s why I push every year to do the same thing.

Of course, I’m also a busy mom with three kids and 3 sets of grandparents so that adds up to a lot of Mother’s Day gifts each year. That’s why it’s my mission to find meaning Mother’s Day gifts kids can make that also don’t break the bank. That’s exactly what these gifts do!


Close Up of Hands Holding Scrapbook in Lap

Kid Made Mother’s Day Storybooks

This gift is perfect for kids from 3 all the way to 17 to make for mom this Mother’s Day. They can write a true story about a time they spent together or create an entirely fiction piece for mom. After the story is written, don’t forget to take it to the next level with some awesome illustrations!


Close Up of Dragonfly Fingerprint Planter

DIY Dragonfly Fingerprint Succulent Planters

Little ones love making these dragonfly fingerprint planters for mom. They are super easy and budget-friendly to make. For moms who love plants, fill them with live succulents. If mom has more of a brown thumb, simply plop a faux succulent inside with some stones.


Birch Bark vases with fake flowers inside

DIY Birch Bark Bud Vases

These birch bark vases are seriously so easy to make. Once they’re made, fill them with wild flowers the kiddos pick themselves and surprise mom with it on Mother’s Day!


Kids Artwork on Wooden Coasters

How to Turn Kids Artwork into Coaster Sets

This is another great idea for kids of all ages. Teenagers can make the entire project alone. Little kids need an adult to burn the pictures into the coasters. These are a great gift that make a wonderful keepsake for mom.


Watercolor Sharpie Mug on Stack of Books

DIY Monogram Stenciled Sharpie Mug

With the help of stencils, this Sharpie mug is easy-peasy to make even for kids. Simply place your stencils, color them with your markers, and let it dry. Have an adult bake it and it’s ready to gift!


Red and Blue Stamped Mother's Day Card

Kid Crafted Mother’s Day Cards

These Mother’s Day cards are the perfect addition to those lovely gifts. Recycle containers to carve up a beautiful design then stamp it with paint onto a card blank. Let dry and fill with a sweet sentiment inside for mom.


Picture Framed in Sequinned Magnetic Frame

DIY Magnetic Sequin Picture Frame

This magnetic picture frame is another meaningful Mother’s Day gift kids can make. All you need are a few materials from the dollar store and you’re good to go. Fill the frame with a sweet picture of the kiddos and boom! You have a thoughtful and budget-friendly gift.


Baby Covered in Paint Next to Painted Paper

Easy Painted DIY Wrapping Paper

Of course, you need a way to wrap all of those meaningful Mother’s Day gifts. Why not make the wrapping paper as thoughtful as the gift inside? This painted DIY wrapping paper is exactly what you need to complete the package.


Collage of Kids Crafts with text overlay - Meaningful Mothers Day Gifts Kids Can Make

These Mother’s Day gift ideas are so easy, you won’t find yourself procrastinating until the weekend of to get your gifts ready. These meaningful Mother’s Day gifts kids can make have everything you need to make, wrap, and gift for all of the moms in your life.

See where I’m linking up!

Don’t Forget to Pin It!

Collage of Kids Crafts with text overlay - Meaningful Mothers Day Gifts Kids Can Make


More Ideas You’ll Love: