DIY Pumpkin Pillow Fight Game | Fall Kids Game Idea

Fall is full of festivals, parties, tailgating, and a myriad of other celebrations. It is a pretty spectacular time of year. Of course, all of these events tend to have built-in fun for adults leaving you searching for a fun fall kids game idea to include. This DIY pumpkin pillow fight game is the perfect one for indoor and outdoor events alike.

Affiliate links may be used in this post. Ordering a product through these links may result in a commission at no extra cost to you. Read the full disclosure here.

Collage of painted pumpkins with text overlay: DIY Pumpkin Pillow Fight Game Fall Kids Game Idea


[bctt tweet=”Let kids have fun knocking towers over with this easy #DIY pumpkin pillow fight #game!” username=”diyadulation”]

There is weird trait I’ve noticed that is present in both children and adults. We love knocking things over. That’s why games like bowling and Jenga are timeless classics in the world. Essentially, if we can make a game where we get to destroy the crap out of something, we’re all for it.

Ironically it doesn’t seem to matter whether the object is to do so (as in bowling) or prevent it (as in Jenga). As long as something crashes we’re in. That’s how you know your kids will love this easy little game.

It lets them exercise that destruction-loving trait inside. You set ’em up and knock ’em down. It takes no batteries, no crazy wires… none of it. Even better? It is super easy to make so you can whip it up last minute if you need to.


[bctt tweet=”Keep kids entertained during all of your fall events with this DIY pumpkin pillow fight game! It’s easy to whip up and travels easily!” username=”diyadulation”]

Pumpkin Pillow Fight Game Materials


Lidded Cardboard Pumpkin Box

Step 1

First, remove the lids from your pumpkin boxes and set them aside. You don’t need them for this project but they are perfect for this Halloween banner project.


Orange Painted Pumpkins next to a paint pallet

Step 2

Next, paint the outside of your pumpkin boxes with a coat orange acrylic paint and allow it to dry.

Step 3

Add a second coat of orange acrylic paint to your pumpkins so that no cardboard show through.

Step 4

Again, allow you paint to dry completely before moving on.

Step 5 (Optional)

Flip your pumpkins over and paint the inside of the pumpkin boxes with black acrylic paint. I think this gives them a cleaner, more finished look. Of course, if you’re in a hurry or simply like the natural cardboard look, you can skip this step.


Close Up of Orange Painted Pumpkin with Brown Painted Stem

Step 6

Next, flip your pumpkins back over and paint stems on your orange pumpkin boxes with brown acrylic paint.


Painted Pumpkins with faces

Step 7

While your brown paint dries, add the sleeping faces to the front of your pumpkins with black acrylic paint.


Close up of painted pumpkin with a face

Step 8

Finish your pumpkin design by painting green leaves on the pumpkins by the painted stems and set them aside to dry.


Bottom of white tank top with black dotted line on it

3 Sets of White Fabric Rectangles

Step 9

While your pumpkins dry, pull out your fabric and cut it into 6 rectangles that are 3 inches by 2 inches.

Tip:


Folded piece of white fabric

Step 10

Next, line up the edges of 2 cut rectangles, right sides together, and pin along the edges.

Note:


Sewn white fabric with needle and white thread

Step 11

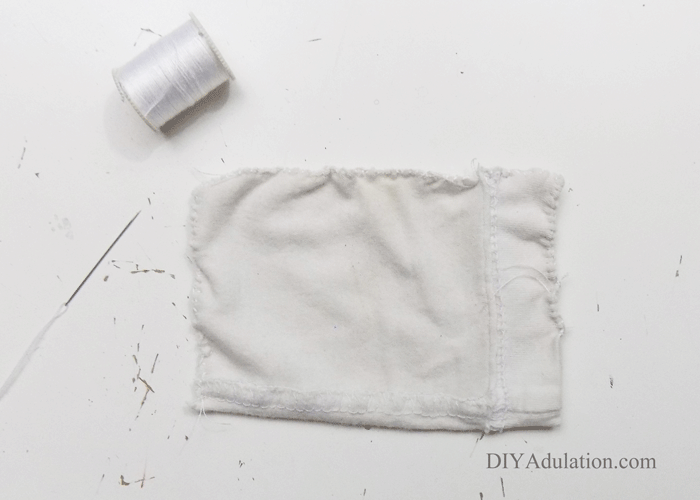
Next, sew around each of your pillows leaving a small gap to turn the fabric right side out after sewing. Be sure to pull out the pins as you stitch your edges.

Step 12

Once all of your pillows are sewn, turn them right-side out through the small gap you left when sewing.


Stuffed mini pillow next to needle and thread

Step 13

Then use that same unsewn gap to fill each pillow with Poly-Fil.


Stuffed pillow next to marbles and needle and thread

Step 14 (Optional)

Add 2-3 marbles inside each pillow to give the pillows some weight.

Tips:


Close up of sewn corner of pillow

mini white pillow

Step 15

Finish your pillows by sewing the gap closed on each pillow.


Stacked painted pumpkins

Step 16

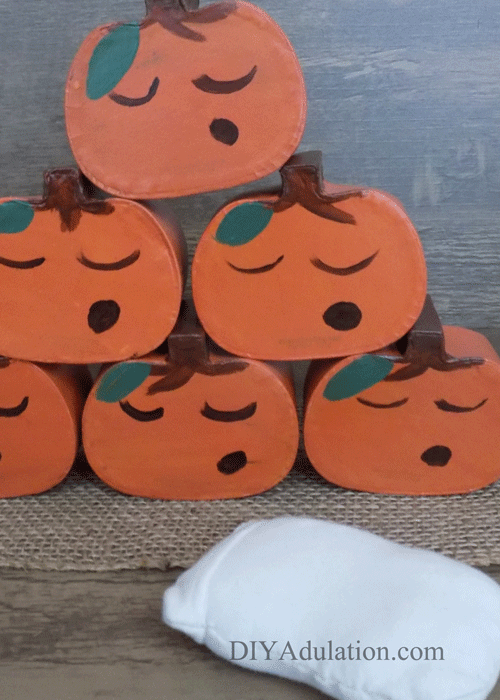
Lastly, pull your now-dry pumpkins back out and spray both the front and back with acrylic sealant. Let the sealant dry completely before playing.


Close Up Pyramid of painted pumpkins with text overlay: DIY Pumpkin Pillow Fight Game Fall Kids Game Idea

This is such an easy fall kids game idea that kids of all ages will love. Let them enjoy that super satisfying feeling when they knock something over and it’s allowed! Now you can quickly whip up this DIY pumpkin pillow fight game to keep kids entertained during all of your fall events. Store it in a gallon resealable bag to make it easy to travel with to outside events, too!

See where I’m linking up!

Don’t Forget to Pin It!

Collage of painted pumpkins with text overlay: DIY Pumpkin Pillow Fight Game Fall Kids Game Idea


More Ideas You’ll Love:


DIY Mad Scientist Hand Puppet | Easy Pretend Play for Kids

A few weeks ago, I shared these adorable DIY mermaid and narwhal hand puppets. Now it’s time to get a little crazy with this DIY mad scientist hand puppet. Let your little creative concoct crazy schemes and bring their monsters to life with play!

Affiliate links may be used in this post. Ordering a product through these links may result in a commission. Read the full disclosure here.

Collage of Mad Scientist Hand Puppet with text overlay: DIY Mad Scientist Hand Puppet


[bctt tweet=”Ready for some easy creative play? Unleash your kid’s inner scientific genius bent on world domination with this easy DIY mad scientist hand puppet.” username=”diyadulation”]

Who doesn’t feel a bit like a mad scientist sometimes. I feel that way any time I have to create dinner on the fly using only what’s in the pantry. Throw it in a pot, turn up the heat, and watch it simmer, right?

Now, your kiddos can get scientific and crazy on their own. Luckily, this isn’t going to add to your toy clutter. You can throw it in the same storage container with your other puppets and off you go.

Materials for Mad Scientist Hand Puppet


Yarn Wrapped Around a Notebook

Step 1

First, wrap the loose end of your yarn around your notebook 5-10 times.

Step 2

Cut where the yard is still attached to the skein and then cut a smaller, separate piece of yarn from the skein.


Rolled Yarn

Step 3

Next, carefully slide your wrapped yarn from the notebook and onto the smaller piece of yarn.

Step 4

Tie the smaller piece of yarn around the wrapped yarn.


Pieces of Yarn Tied Together

Step 5

Then cut through the yarn loops on either end.


One Side of Tied Yarn Frayed

Step 6

Hold one side of your tied yarn bundle firmly in your hand and comb the opposite side with a comb.

Tips:


Frayed Ends of Tied Yarn

Step 7

Repeat step 6 on the opposite side of your bundle of yarn.


Frayed Yarn Glued on Potholder

Step 8

Once your yarn is basically a big fluff ball, glue it to the top center of your potholder.

Tip:


Mad Scientist Hand Puppet

Step 9

After you have attached the hair, glue 2 large googly eyes to the potholder.


Pink Glitter Half Circle Next to a pair of Scissors

Step 10

Next, cut a wide semi-circle from a sheet of pink glitter foam. Make sure it is no wider than your potholder.


Tongue Glued on Mad Scientist Hand Puppet

Step 11

Finish your mad scientist hand puppet by gluing the foam semi-circle inside of the potholder as pictured.


Close Up of Mad Scientist Hand Puppet with text overlay: DIY Mad Scientist Hand Puppet

I love how this DIY mad scientist hand puppet turned out. In fact, I love it so much I think I’m going to make some cute little beakers and test tubes to go with it. Don’t worry, I’ll share them with you if I do.

If you still haven’t decided how to store your hand puppets, I recommend a plastic shoe box with a lid. It will also be plenty of room to store any accessories we make for it. Not bad for toy storage, don’t you think?

See where I’m linking up!

Don’t Forget to Pin It!

Collage of Mad Scientist Hand Puppet with text overlay: DIY Mad Scientist Hand Puppet


More Ideas You’ll Love:

How to Make DIY Road Trip Survival Bags for Kids

We all want to save money on our travels. One of the best ways to save on your family vacation is to drive to your destination. Even if you have to rent a car, this is still the economical choice especially if you have a large family. Before you hit the road, though, make sure you make these DIY road trip survival bags for kids for a smooth trip!

Affiliate links may be used in this post. Ordering a product through these links may result in a commission. Read the full disclosure here.

Collage of Road Trip Bags and Activities with text overlay: DIY Road Trip Survival Bags for Kids


[bctt tweet=”Road trips are a great way to save money on your family vacation. Keep your kids entertained for the ride with these DIY road trip survival bags.” username=”diyadulation”]

Let’s face it. Those miles stretching on can make you start to question the value of savings once your kids start getting cranky and hungry an hour into the drive. Fancy DVD players and portable game systems can help but they won’t keep them fed.

Additionally, do you really want them plugged in the whole trip? Instead, save your sanity and engage your kids with these DIY road trip survival bags.


3 Drawstring Bags

Step 1: Choose Your Bag

Using what you have is the best way to save money. I recommend drawstring bags if it is an option. They are convenient, inexpensive, and most importantly incredibly easy to wash.

Kids are messy! The easier to clean, the better. We used these Humana bags that I got for free at a scrapbook crop I attended. These drawstring bags from Dollar Tree are a great budget-friendly option if you don’t already have some.

Tip:


Boxes of snacks

Step 2: Delegate Snacks

Next, add some snacks to your road trip bags. Don’t just buy those single serving packages to toss in the bags. Instead, save money by purchasing full-size containers and dividing them among snack bags.

Another great way to save on snacks is to make your own. Granola bars, dried fruit, and cucumber chips are all easy and healthy alternatives to store-bought.

Tip:


Coloring Book with Crayons on Top

Stack of Activity Books

Step 3: Add Activities

Lastly, add activities to the bags. Add your kiddos’ favorite small toys such as cars, action figures, and dolls. Another great item to add is activity books and crayons.

If you need some budget-friendly ideas, here are some we love (don’t buy all of these, I simply want you to have multiple options to find what fits your kids):

Felt Stickers Book
Photo Credit: Amazon.com

Activity Books

Grab & Go Battleship Game Box
Photo Credit: Amazon.com

Games

Finger Puppets on Children's Hands
Photo Credit: Amazon.com

Toys

Purple Customizable Journal
Photo Credit: Amazon.com

For Older Kids


Drawstring bag with a towel and a water bottle

Step 4: Don’t Forget These Extras

There are some extra items that will make the trip easier that you may not think of. You will definitely be glad you have them on the trip.

Water Bottles

Towels

Wet Wipes

Sunglasses


Collage of Road Trip Bags and Activities with text overlay: DIY Road Trip Survival Bags for Kids

These DIY road trip survival bags will help you have a smooth road trip and not begrudge the money you’re saving. They also help you to monitor what your kids snack on and what they play with.

If you have an extremely long trip coming up check out these Kids Car Activity Binders complete with free printable activity sheets and a trip tracking coloring page. Simply add them to your bags before you head out and you will have everything you need to make your road trip go more smoothly.

See where I’m linking up!

Don’t Forget to Pin It!

Collage of Road Trip Bags and Activities with text overlay: DIY Road Trip Survival Bags for Kids


More Ideas You’ll Love: