Shimmery Upcycled DIY Patriotic Wreath

Are you ready for the easiest holiday wreath that you’ll ever make? This shimmery DIY patriotic wreath is so simple. All you do is wrap and repeat for a gorgeous red, white, and blue wreath to proudly display on your door this summer! Affiliate links may be used in this post. Ordering a product through these links may result in a commission. Read the full disclosure here.     Check out the written tutorial below!

The Rules:

Meet the Hosts

Angela | Simply Beautiful By Angela – Angie | Grandma Creates – Meredith | Southbound Blog – Amanda | Domestically Creative – Molly | Just a Little Creativity – Jenny | Cookies Coffee and Crafts – Michelle | Michelle James Designs – Marie | DIY Adulation – Pili | My Sweet Things – Gail | Purple Hues and Me – Denise| My Thrifty House – Emy | Semigloss Design – Michelle | Our Crafty Mom – Lynne | My Family Thyme – Chas | Chas’ Crazy Creations – Kathleen | Our Hopeful Home

Make sure you follow our board on Pinterest for more upcycled decor inspiration!


Collage of patriotic garland wreaths with bow and stars on door with text overlay - Shimmery Upcycled DIY Patriotic Wreath   [bctt tweet=”Are you ready for the easiest holiday wreath that you’ll ever make? This shimmery DIY patriotic wreath is so simple to and perfect to display on your door!” username=”diyadulation”] We are back this month with another awesome Thrift Store Upcycle Challenge! I knew I wanted to make some sort of patriotic craft but it wasn’t until I was at the thrift store that the idea solidified. If you’ve ever seen those garland wreaths at your local thrift store and thought, “Ugh, that’s hideous” and moved on: Don’t! The garland may be faded and ratty, but that plastic base underneath is pure gold for creating your own gorgeous wreath that actually fits your style. What’s even better is that the Dollar Tree always has fun and festive garland for a buck so you can grab the one you want cheaply. It’s like the perfect marriage of stylish and budget-friendly decor! I wanted to take this project a step further without adding a bunch of extra work for myself. That’s why I picked up a super fun glittery fireworks bow. It adds that extra bit of flair without adding a ton of time and work to the project, a dream for busy moms like us.   Patriotic Garland Wreath on Door

DIY Patriotic Wreath Materials

Fall Garland Wreath Fall Garland Wreath with Half of the Garland Removed from Plastic Base Plastic Wreath Base

Step 1

First, remove the existing garland on your thrift store wreath so that you have an empty wreath base to work with.  

Step 2

Next, take your red, white, and blue garland out of the packaging and start attaching it to the wreath base. Wrap one end of garland around a hook on the edge of the wreath base as pictured.   Red White and Blue Garland Wrapped on Section of Plastic Wreath Base

Step 3

Then take your garland down the front of your wreath base and wrap it around the inside hook across from the top hook you wrapped around.

Step 4

Take the garland back up and wrap around the next hook on the edge of the wreath base and continue wrapping back and forth to cover your wreath.  

Step 5

After one garland runs out, attach another garland around the same hook where the previous one ran out. Again, continue wrapping on your wreath hooks back and forth.     Garland Wrapped Plastic Wreath Base with Small Section Empty Patriotic Garland Wreath

Step 6

Continue wrapping the garland, adding more as needed, until your entire wreath is covered with garland.     Glittery Fireworks Bow with Tag

Step 7

Once your wreath is wrapped, remove the packaging from your bow but save the twist tie from the packaging.    

Step 8

Use the twist tie to attach your bow to the wreath by poking the twist tie ends through the wreath and secure them in the back.     Glittery Foam Stars on Wreath

Step 9

Lastly, glue on the glittery foam stars in sets of 3 at random on your wreath. I used one large star and 2 smaller stars in each group.     patriotic garland wreath with bow and stars on door with text overlay - Shimmery Upcycled DIY Patriotic Wreath Can you believe how freaking easy this shimmery DIY patriotic wreath is to make? It looks so pretty and festive on our door, especially when the sunlight catches it. The next time you’re at the thrift store, don’t pass up those ugly garland wreaths! Instead stock up for your holidays and create awesome, eye-catching door decor that you’ll love.

See where I’m linking up!

Don’t Forget to Pin It!

patriotic garland wreath with bow and stars on door with text overlay - Shimmery Upcycled DIY Patriotic Wreath

And now for more thrifty goodness!

Check out what my fellow upcyclers created below!

You are invited to the Inlinkz link party!

Click here to enter

Rainbow DIY Flower Mirrors Wall Art

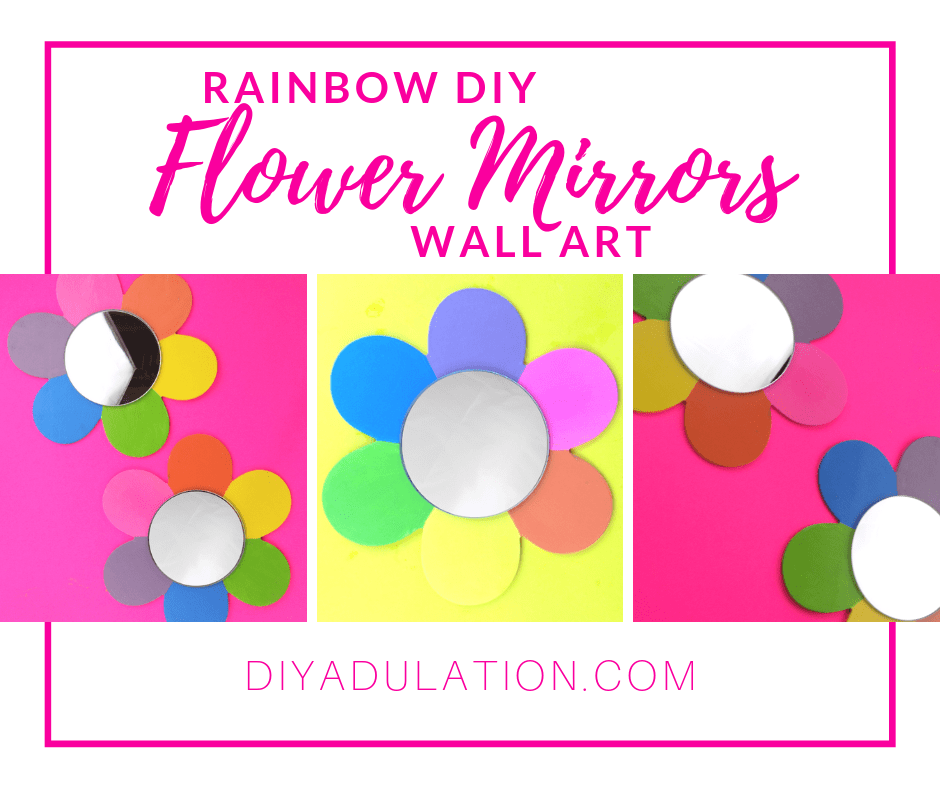
It’s time to finally tackle those boring walls in your kid’s room without spending a fortune on wall art. Instead, head to your local Dollar Tree and grab the materials to make these awesome and bright rainbow DIY flower mirrors!

Affiliate links may be used in this post. Ordering a product through these links may result in a commission. Read the full disclosure here.

Collage of Rainbow Flower Mirrors on Bright Backgrounds with text overlay - Rainbow DIY Flower Mirrors Wall Art


[bctt tweet=”No more boring walls! Find out how to create fun and colorful wall accessories on a budget with this rainbow DIY flower mirrors wall art tutorial!” username=”diyadulation”]


My daughter is starting to get bored with her walls, so much so that she’s started hanging some weird things on it. As “pretty” as that juice bottle label is, I figured it was time to give her some unique wall art that didn’t come from a beverage or the million other strange places she’s finding her decorations.

Recently I saw these flat wooden flowers at our Dollar Tree and boom! Awesome wall decor idea. Since the centers of the flowers were empty, I wanted to add a little something more. You can always find small mirrors at the Dollar Tree because of the popularity for weddings and other events so I grabbed a few of those to add that missing element.


Close Up of Rainbow Flower Mirror

All that is left to make some fun and colorful pieces of wall art are some paint and Modge Podge. Within a day you have awesome new pieces of decor to replace that craziness happening on my daughter’s walls.


DIY Flower Mirrors Materials

Rainbow Flower Mirrors Materials

Step 1

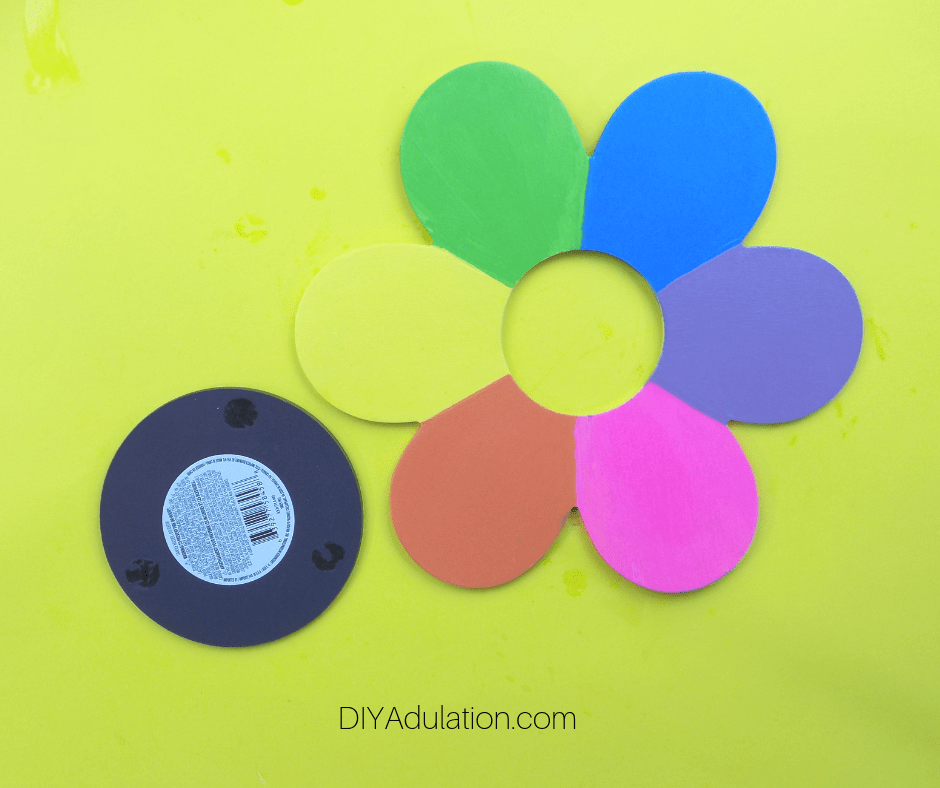
First, remove any packaging and labels from your wooden flowers.


Orange Painted Petal on Wooden Flower

Step 2

Then begin painting your flower petals starting with your orange paint. Pretend there are invisible lines running down the petal indentations while painting. This helps you separate the petals.


Wooden Flower with Orange and Yellow Painted Petals next to Paint Pallet

Step 3

Next, paint the yellow petal on your wooden flower. It should be the petal to the right of your orange flower petal.


Wooden Flower with Rainbow Painted Petals next to Paint Pallet

Step 4

Continue painting the petals of your flower in the order pictured above (orange, yellow, green, blue, purple, and pink).


Painted Rainbow Flower Drying

Step 5

After your flower is painted, set it aside and allow the paint to dry.


Rainbow Flower with Coat of Mod Podge

Step 6

Once your paint is dry, coat your entire painted flower in a layer of Mod Podge and allow it to dry.


Rainbow Flower next to Upside Down Mirror

Step 7

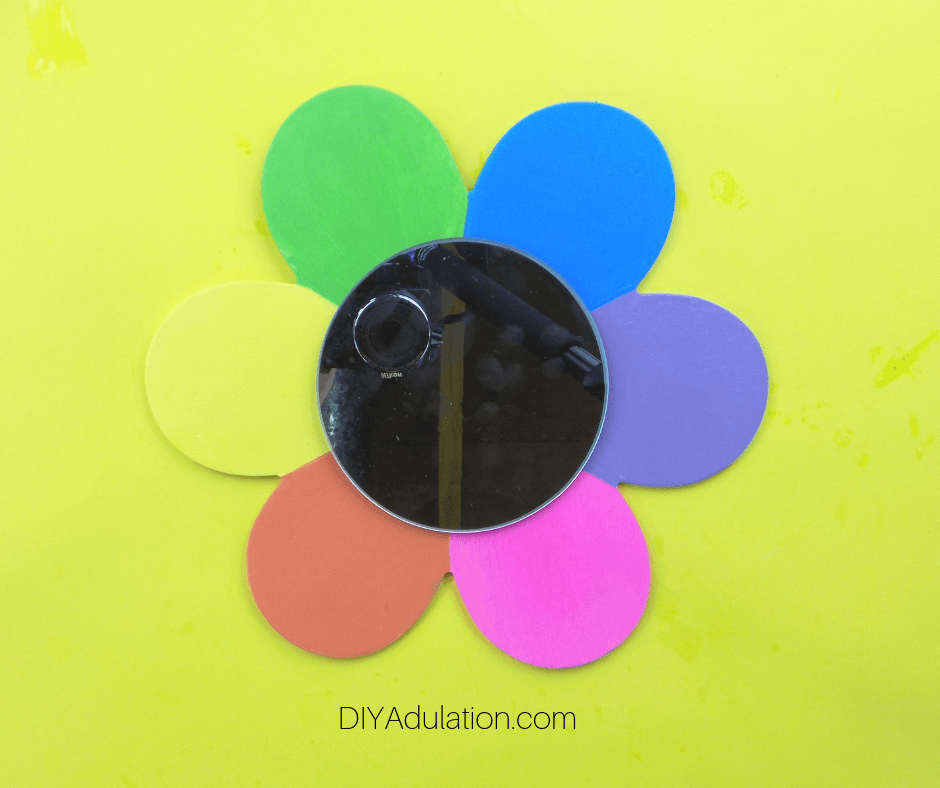
Next, remove the foam feet from the bottom of your mirror. Then adhere the mirror to the center of the dry rainbow flower with E6000.


Mirror Glued to Rainbow Flower

Step 8

Allow your glue to dry 24 hours before hanging your flower mirror.

Repeat these steps to make as many flower mirrors as you need. I only made 2 but I totally want to head back to the Dollar Tree to grab the materials to make a few more. My daughter loves them for her room!


Flower Mirrors on Pink Background with text overlay - Rainbow DIY Flower Mirrors Wall Art

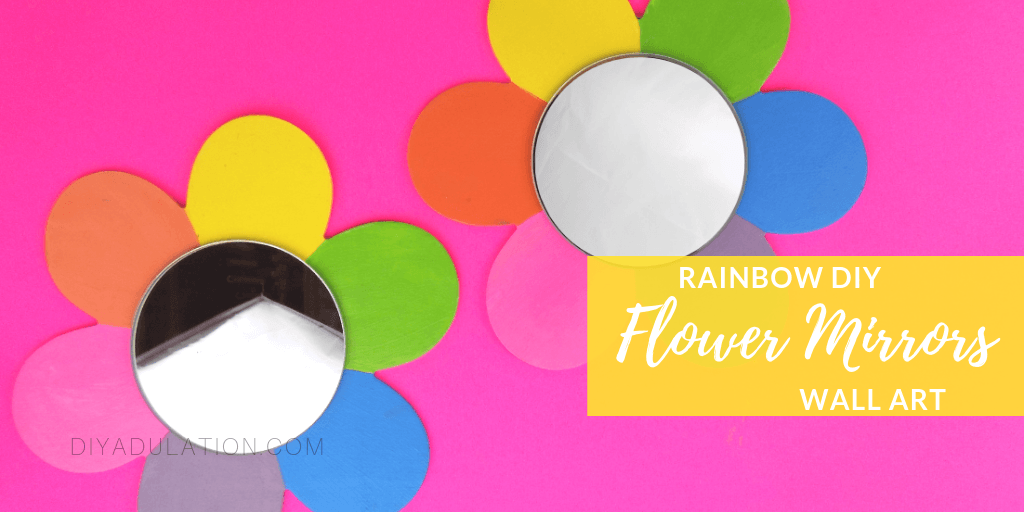
These rainbow DIY flower mirrors are the perfect easy wall decor for a kids room or a play room. Of course, if you’re like me, they also look great in the living room to brighten it up. Instead of messing around with adding a hanger to the back of the flower, use a Command Picture Strip to hang them on the wall. The small size work fine because these aren’t very heavy even with the mirror attached. Clean them as needed with a slightly damp cloth and you’re good to go!

See where I’m linking up!

Don’t Forget to Pin It!

Flower Mirrors on Pink Background with text overlay - Rainbow DIY Flower Mirrors Wall Art


More Ideas You’ll Love:


Fun and Easy DIY Sequin Shaker Photo Magnet

Raise your hand if your little ones love playing with the magnets on the fridge! It’s great when you’re working in the kitchen and need to keep an eye on him while you cook. Now you can give kids something fun to play with that you totally don’t mind displaying on your fridge year-round. This DIY sequin shaker photo magnet is the perfect craft to do just that.

Affiliate links are used on this site. Ordering a product through these links may result in a commission. Read the full disclosure here.

Collage of Sequin Shaker Magnets with text overlay - DIY Sequin Shaker Photo Magnet


[bctt tweet=”This DIY sequin shaker photo magnet is so easy to make! It’s fun to play with but it’s also beautiful to display, plus it makes an awesome gift!” username=”diyadulation”]


All 3 of my kids went through this phase at some point in their childhood. The letter magnets were popular and then we got these monster magnets. They let the kids build their own monsters on the fridge with different faces and features. That’s what inspired this shaker photo magnet. It’s fun to play with but it’s also beautiful to display. You know how much I love multi-function decor.

These also make a great gift for grandparents. They’re so easy to make and you can fill them with pictures of all the grandkids. It’s a win-win for everyone.


Sequin Shaker Magnet next to Sequins

DIY Sequin Shaker Photo Magnet Materials


Picture next to Magnetic Container

Step 1

First, clean your magnetic container. Make sure the inside is free of any dust or debris.


Circle Traced on Picture next to Marker and Container

Step 2

Then use your container as a stencil to trace a circle on your photo with black marker.

Tip:


Circle Cut Out of Picture next to Scissors

Step 3

Next cut out your photo inside the traced line using scissors.


Picture in Container next to Scissors

Step 4

Test your cut photo to ensure it fits inside of your container. Trim any extra edges as needed.


Mounting Squares on Back of Photo next to Materials

Step 5

Once your photo fits, attach mounting squares to the back of your picture.

Tip:

Step 6

Then attach the photo to the bottom inside of your magnetic container.

Step 7

Next, add a small line of E6000 around the inside edge of the container lid.

Step 8

Before attaching it to your container, sprinkle some loose sequins in the center of lid. Try to avoid letting them touch the glue as much as possible.


Magnet on Bottom of Container

Step 9

Now carefully place the bottom of your container into the glue-lined lid.

*Important* Do not flip your container over. If you do, the glue will run and damage your photo.

Step 10

Allow your container to dry, face down, for 24 hours.


Lidded Container with Picture and Sequins Inside

Step 11

After the glue is dry, flip your container over.


Sequins Glued on Sequin Shaker Magnet Lid

Step 12

Lastly, glue sequins around the edge of your container lid. I used quick dry tacky glue to attach mine because it dries faster (duh). However, if you don’t have any, you can use E6000 to attach the sequins and then allow it to dry another 24 hours.


Sequin Shaker Magnet on Polka Dot Background

Close up of Sequin Shaker Magnet with text overlay - DIY Sequin Shaker Photo Magnet

I love how this DIY sequin shaker photo magnet turned out (the second one at least). Use it as a way to display your favorite vacation or family photos and to occupy little hands while you work on dinner. Plus, it’s budget-friendly enough to make an awesome gift for grandparents, friends, and extended family.

See where I’m linking up!

Don’t Forget to Pin It!

Close up of Sequin Shaker Magnet with text overlay - DIY Sequin Shaker Photo Magnet


More Ideas You’ll Love: