Delicious Warm Taco Dip Recipe without Cream Cheese

Tacos should not be relegated to Tuesdays. Tacos and taco related dishes are great for any day of the week, especially parties. This delicious warm taco dip recipe without cream cheese is the perfect way to get your taco fix quickly and easily.

Affiliate links may be used in this post. Ordering a product through these links may result in a commission. Read the full disclosure here.

Collage of Taco Dip Photos with text overlay - Delicious Warm Taco Dip Recipe


[bctt tweet=”Even non-cream cheese loving friends can enjoy delicious taco dip during celebrations. This delicious warm taco dip recipe is amazing and so easy to make.” username=”diyadulation”]

Seriously, can you ever have enough tacos? If you didn’t answer no, I don’t know if we can be friends anymore. Just kidding… sort of.

When you love tacos as much as I do, you’re always looking for new ways to enjoy that delicious flavor. Unfortunately most parties serve the taco dip with cream cheese and that’s not my thing. I’m not as picky an eater as I used to be but I still can’t stand cream cheese (even in desserts, gasp!).


Taco Dip Topped with Jalapenos next to Corn Chips on Plate

That’s what is so great about this delicious warm taco dip recipe. It is made with zero cream cheese. It gets its creaminess from yummy sour cream instead. Even if you like cream cheese, you’ll still flip for this cheesy, taco-y, melt-in-your-mouth dip! Top it with some jalapeno slices for extra spice or additional shredded cheese for the cheese lovers. Either way it’s sure to be a crowd pleaser for even your pickiest guests.


Close Up of Fingers Dipping Chip in Taco Dip

Warm Taco Dip Ingredients


Ground Turkey in Stock Pot

Browning Ground Turkey in Stock Pot

Step 1

First, brown your ground turkey in a stock pot.


Water and Browned Ground Turkey in Stock Pot

Step 2

Next, add in 2 cups of water.


Taco Seasoning on Ground Turkey in Stock Pot

Step 3

Then stir in your taco seasoning and bring the mixture to a boil.


Taco Meat Cooking in Stock Pot

Step 4

Continue boiling for 10 minutes. Be sure to stir frequently while you do.


Simmering Taco Meat Cooking in Stock Pot

Step 5

Turn down the heat and simmer for an additional 10 minutes.


Shredded Cheese on Taco Meat in Stock Pot

Melted Cheese Stirred into Taco Meat

Step 6

Next, stir in 3 cups of shredded cheese until well combined with taco meat.


Mixing Sour Cream into Cheese and Taco Meat

Step 7

Lastly, mix in your sour cream and serve immediately.


Close Up of Jalapeno Topped Taco Dip

Optional:

This is absolutely delicious on its own but I love to add jalapeno slices for an extra kick. If you don’t like spicy then you can omit them. Serve this warm taco dip with corn chips for dipping and you’re good to go.


Bowl of Taco Dip Next to Corn Chips
Close up of Hand Dipping Chip in Taco Dip with text overlay - Delicious Warm Taco Dip Recipe

Now even my non-cream cheese loving friends can enjoy delicious taco dip during celebrations. This delicious warm taco dip recipe is amazing and so easy to make. If you want to munch on it while binge watching Santa Clarita Diet, I won’t tell. Can’t promise the kiddos won’t pitch a fit if they catch you though.

This recipe is also perfect to keep in your arsenal for last minute party dishes. It comes together quickly and is still delicious if you have to reheat it. It’s a win-win party appetizer.

See where I’m linking up!

Don’t Forget to Pin It!

Bowl of Taco Dip Next to Corn Chips with text overlay - Delicious Warm Taco Dip Recipe


More Ideas You’ll Love:

DIY Sequin Magnetic Picture Frame

Is your fridge covered in photos from family and friends like ours? If so you’ve probably noticed that they are looking a little dingy and word from dust and grease. Now you can protect those precious photos and dress up your refrigerator at the same time with this easy DIY sequin magnetic picture frame!

Affiliate links may be used in this post. Ordering a product through these links may result in a commission. Read the full disclosure here.

Collage of Photos of Magnetic Sequin Picture Frame with text overlay - DIY Magnetic Sequin Picture Frame


[bctt tweet=”Fridge covered in photos? Now you can easily and frugally protect those precious photos on your fridge with this DIY sequin magnetic picture frame.” username=”diyadulation”]

I love getting photos of friends and family in the mail. Admittedly, most of them come during the holidays but it’s still wonderful, especially if it’s from loved ones who live far away that we don’t see often.

The last time I changed out the photos with the most recent ones, I noticed that the old ones were in poor condition from the myriad of meals we cook. You don’t want to throw out the old photos simply because you’re displaying updated ones. Unfortunately, some of them are in such bad shape you don’t have a choice.


Picture Framed in Sequinned Magnetic Frame

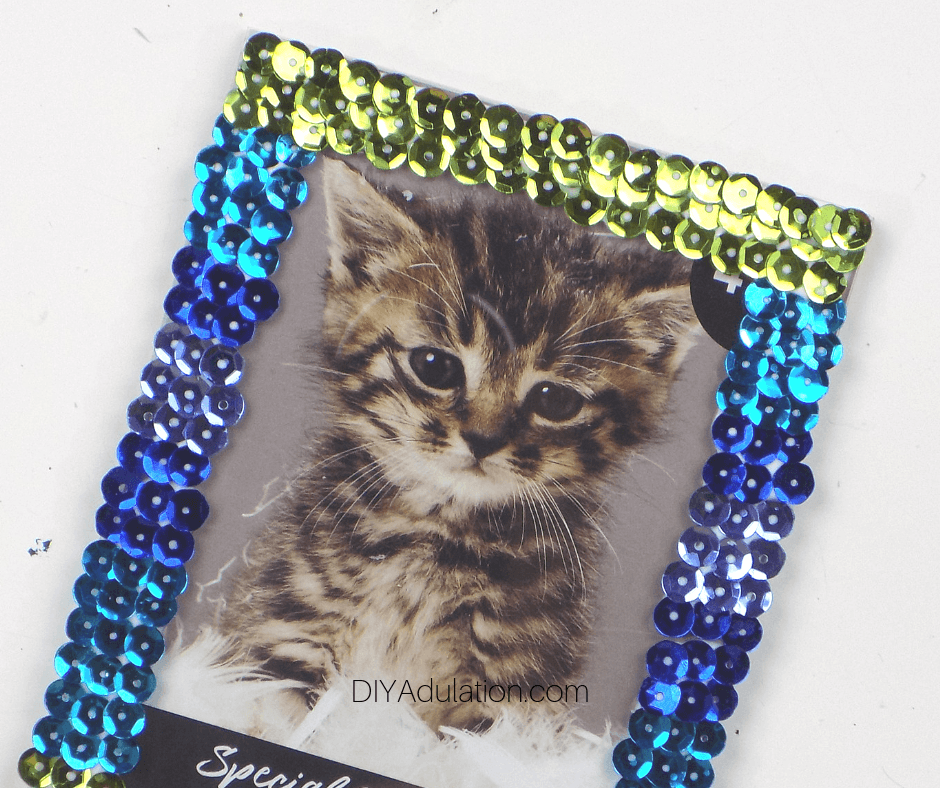
Instead of not displaying the photos or risking ruining them, you can protect them with a DIY sequin magnetic picture frame. It’s super easy to make and budget friendly, especially if you get your frames at the Dollar Tree like I did. One multi-pack of sequins from the Dollar Tree can make 4+ frames putting you pennies over a dollar per frame. You seriously can’t beat that! (Plus, hello, sparkly!)


Sequined Magnetic Picture Frame Materials

DIY Sequin Magnetic Picture Frame Materials

Step 1

First, remove your magnetic picture frame from the packaging.

Note:

Step 2

Next, determine the order you want to attach your sequins. Since all of mine were varying shades of blue and green, I put them in order from most green to most blue.

Step 3

Then, add a thin section of glue to the bottom of the frame.


Close Up of Sequins on Magnetic Picture Frame

Step 4

Begin attaching a line of sequins along the bottom edge of the frame and working your way up.

Step 5

Continue until you have 3 rows of one color, adding glue as needed to your frame.

Step 6

Once you have your first 3 rows of sequins glued, add a small amount of glue on the side edges of your frame being sure to leave the center open for your picture to show through.

Tip:

Step 7

Now, continue adding your sequins in rows of 3, again, being sure to leave the center of the frame open for your picture to show through. This is another reason why leaving the paper insert is important. Use it as a reminder to leave the center of your frame clear.


Close Up of Sequins on Top Half of Magnetic Picture Frame

Step 8

Once you reach the top half inch or so of your frame, again add a thin layer of glue across the entire top and attach 3 rows of sequins.


Picture Framed in Sequinned Magnetic Frame on Polka Dot Background

Step 9

Check all of the edges to ensure that no glue has seeped down then set aside to dry.


Magnetic Sequin Picture Frame on Polka Dot Background with text overlay - DIY Magnetic Sequin Picture Frame

Now you can easily and frugally protect those precious photos on your fridge with this DIY sequin magnetic picture frame. It is so simple to make and it makes changing out those cherished photos easy. These make wonderful simple gifts too. Add a photo of your own kiddos and give to grandparents for a thoughtful, handmade gift that doesn’t break the bank.

See where I’m linking up!

Don’t Forget to Pin It!

Magnetic Sequin Picture Frame on Teal Background with text overlay - DIY Magnetic Sequin Picture Frame


More Ideas You’ll Love:

Low and No Prep Easy Craft Ideas for Kids

School breaks always hold a lot of promise for fun and family time. Execution leaves a something to be desired sometimes. If your plans aren’t quite what you hoped, whip out the craft supplies and try out these easy craft ideas for kids.

Affiliate links may be used in this post. Ordering a product through these links may result in a commission. Read the full disclosure here.

Collage of Craft Projects with text overlay - Fun and Easy Craft Ideas for Kids


[bctt tweet=”These easy craft ideas for kids are the perfect low-prep activities to keep in your arsenal for school breaks, snow days, and more.” username=”diyadulation”]

Before we get onto the crafts, I want to remind you that the Merry Monday link party is now bi-weekly. If you’re looking to link up, you can add your newest posts for the week to the party here.

Now, let’s get onto the crafty fun with these easy craft ideas for kids. They’re all super easy and you likely already have the supplies on hand. I love doing crafts with the kids because they always enjoy it (even if they’ve made it a hundred times) and it is a great to spend time together as a family. These are some of our favorites.


Painted canvas next to painted rocks

DIY Painted Canvas Play Set

This adorable easy craft takes rock painting to the next level. Create painted scenes on canvas and then paint rocks to coordinate and BOOM! Instant pretend play set. Save money and buy in bulk with those canvas multi-packs!


Glittery notebook next to pen

Fun and Glittery DIY Notebook

Does your kiddo love writing or drawing? If so, teach her how to make her own glittery DIY notebook with this easy tutorial.


Pompom monsters next to craft supplies

DIY Mini Pompom Monsters

These little pompom monsters are not only super cute, they also double as fun stickers. The backing on the feet can totally come off to stick to notebooks, folders, or anything else you let kiddos put stickers on.


Glittery Boys Door Sign

Easy DIY Bedroom Door Sign

Let your little ones get crafty and put their personal touch on their rooms with this simple craft. Some sticky foam and sticker letters is all you need to create this DIY bedroom door sign.


Hanging children's artwork

DIY Children’s Artwork Display

Tired of the billions of artwork pieces laying around the house from the kids? This kids craft idea is perfect for organizing all of that artwork on bedroom/playroom walls easily.


Paper flowers hanging on a wall

DIY Kids Paper Flower Wall Art

Build your own colorful garden indoors with these giant paper flowers. They’re colorful, pretty, and super fun to make. It’s a great way to brighten up boring walls.


Googly eye framed monogram

DIY Googly Eye Monogram

What is it with kids having overflowing collections of googly eyes? These fun monograms are an easy way to use some of them up in a new and creative way.


Stamp next to stamped paper

Make Your Own Coloring Book

You’re never too old for coloring books. Now you can easily create custom coloring books with these easy tutorial. Make them as simple or complex as you want and then grab the crayons.


Collage of Craft Projects with text overlay - Fun and Easy Craft Ideas for Kids

These easy craft ideas for kids are the perfect low-prep activities to keep in your arsenal for school breaks, snow days, and more. I recommend storing kids crafts supplies in these plastic organizers for easy storage and organization. It’s what we use and the kiddos know what art supplies they can use (without getting into yours) and everything is at your fingertips when you need it.

See where I’m linking up!

Don’t Forget to Pin It!

Collage of Craft Projects with text overlay - Fun and Easy Craft Ideas for Kids


More Ideas You’ll Love: