Don’t let the frigid weather and lack of park days get you down. If you’re looking for a fun, springtime kid’s craft to belay this cold snowy weather then you’ll love this paper plate preschool rainbow craft. It’s inexpensive, easy to make, and a bright and colorful reminder that warmer weather will be here soon.
Affiliate links may be used in this post. Ordering a product through these links may result in a commission. Read the full disclosure here.

[bctt tweet=”If you’re looking for a fun, springtime kid’s craft to brighten up this cold snowy weather then you’ll love this paper plate preschool rainbow craft!” username=”diyadulation”]
Even though it’s March over here, it sure doesn’t feel like it. It has been cold and snowy and, frankly, I’m over it. At this rate, spring break is going to look more like winter break.
It’s no secret that the winter is my least favorite season. Give me sunshine and soaring temperatures any day. Since I can’t control the weather we’re bringing some brightness into our home with this super cute rainbow craft.


Preschool Rainbow Craft Materials

Step 1
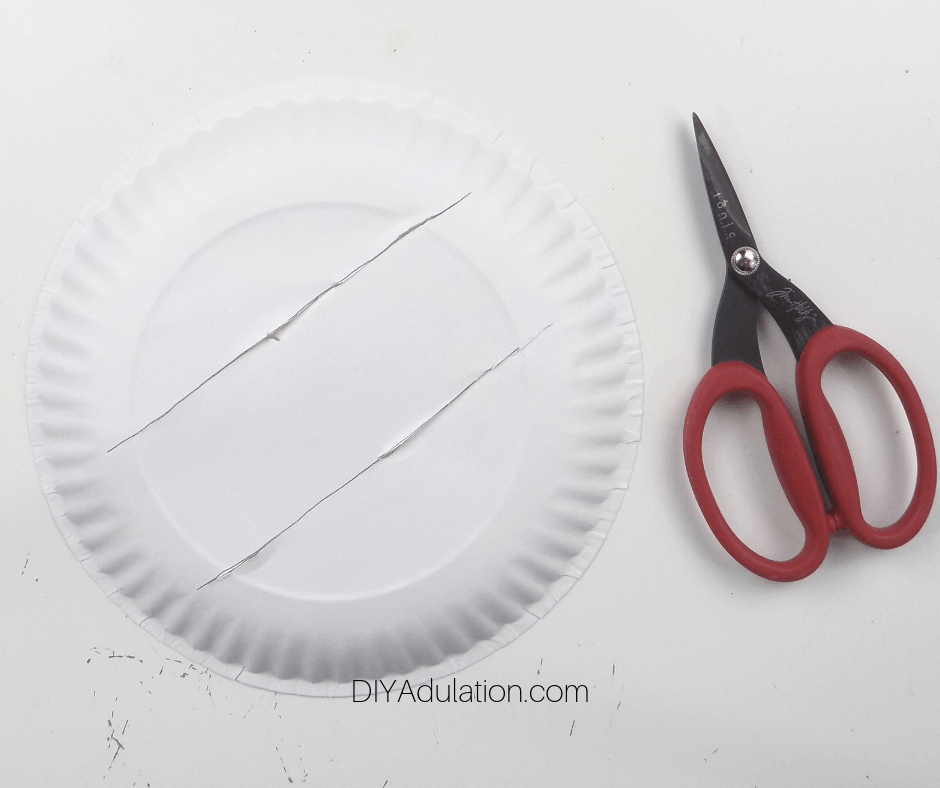
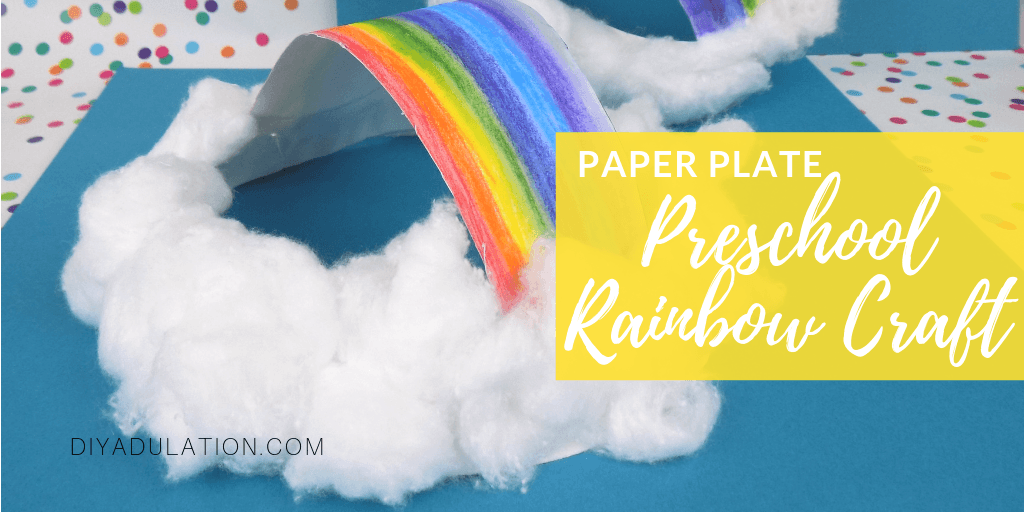
First, draw 2 lines down the center of the plate as pictured. You want them to extend to the wavy outside of the plate edge.
Step 2
Next, poke a hole in the center of the lines and cut along each one.
Note:
- Mom, if the lines are a little jagged you can trim them after your kid has cut them.

Step 3
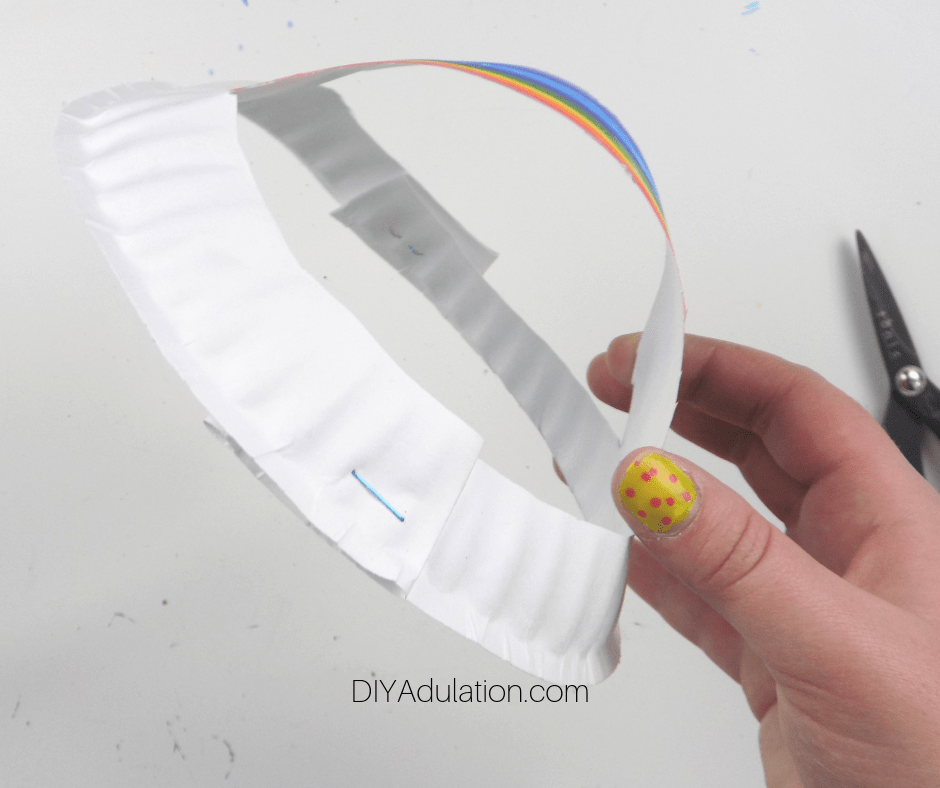
Then cut around the outer edge of the of the plate from the end of each line using the scalloped edge as a guide. This should leave 2 half circles cut out of the plate as pictured.

Step 4
After you’ve cut out the half circles, color lines on the center piece of the paper plate in the colors of the rainbow (red, orange, yellow, green, blue, indigo, violet).

Step 5
Once the colors are drawn on the plate, use a paint brush dipped in water to turn the lines into watercolor. Have kiddos rinse the brush in between colors to keep them from blending.
Step 6
Allow the water to dry before moving on.
Step 7
Next, fold the edge on one side of the paper plate over on one side to pop the rainbow up and staple into place.

Step 8
Repeat step 7 on the second side of the paper plate.
Step 9
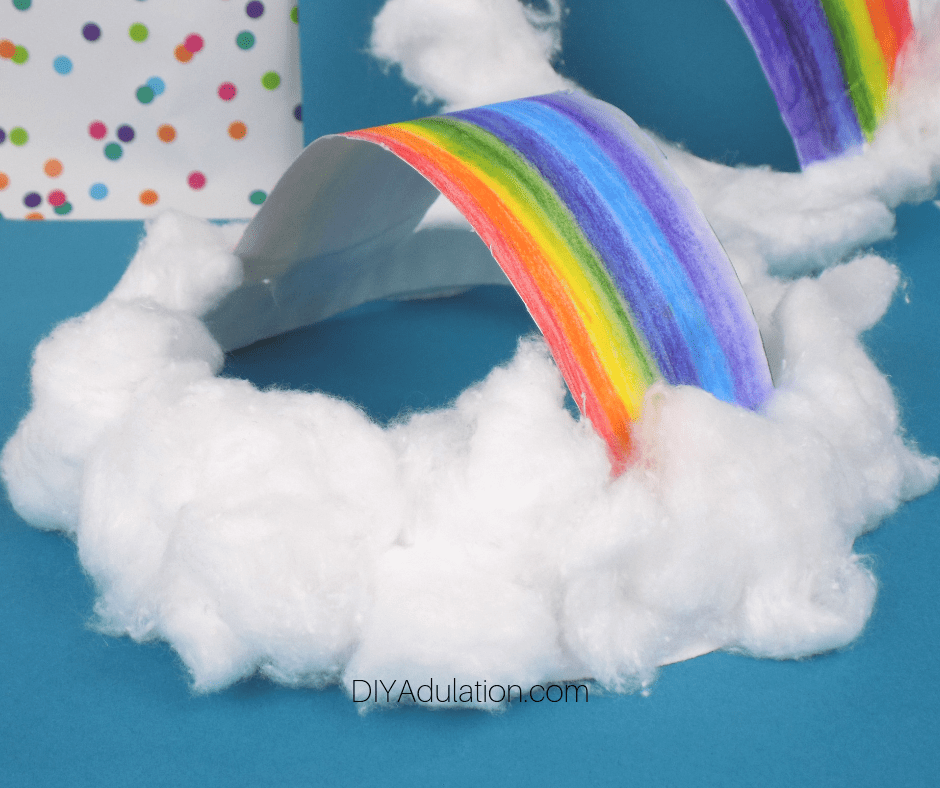
Once your edges are stapled, line with glue around them.

Step 10
Then pull apart and fluff up cotton balls and stick them to the glued edges.

Step 11
Continue adding fluffed up cotton balls until the edge of the plate is covered.

Step 12
Allow everything to dry before playing.
Tip:
- I recommend setting them on a piece of parchment paper to dry because the kiddos get a little crazy with glue and it will drip. Trust me, it’s not easy pulling it off of paper when it’s dry.
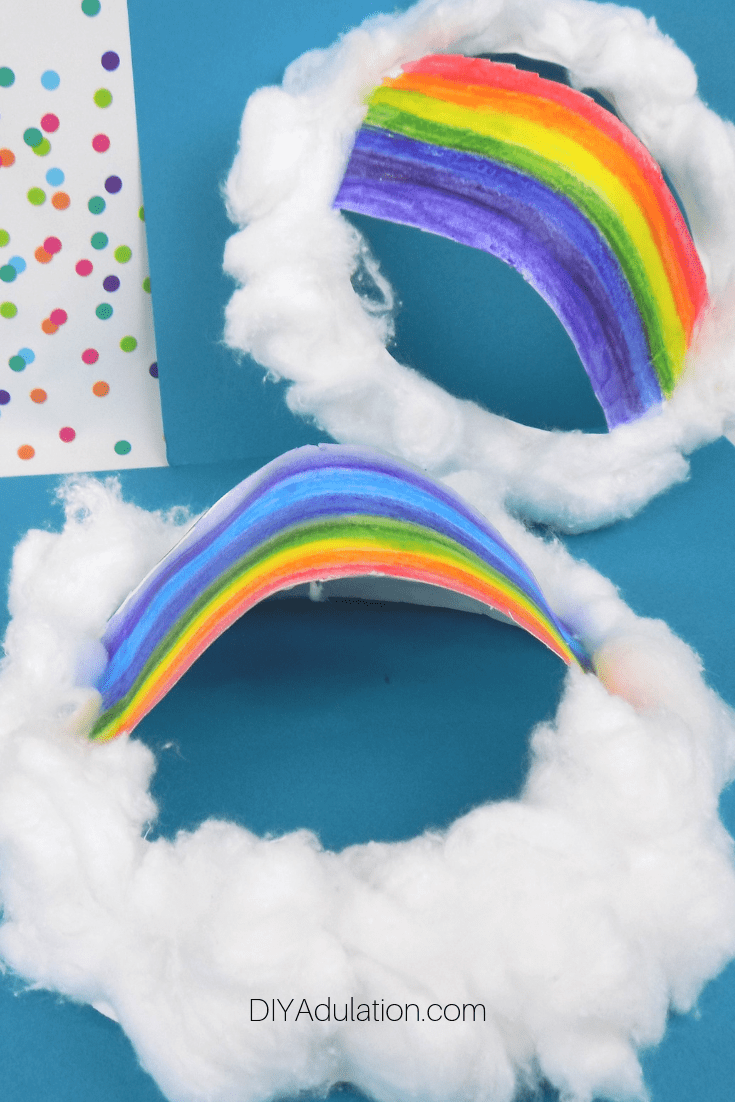
This paper plate preschool rainbow craft is perfect for spring or St. Patrick’s Day. Display your creations by poking a small hole in the top and threading with string. Then hang them from the ceiling for a colorful and pretty “sky”. It’s the perfect way to bring a little spring inside while it’s still so cold and dismal outside.
See where I’m linking up!
Don’t Forget to Pin It!

More Ideas You’ll Love: