How organized are your kitchen counters? A lot of people claim that your counters should be cleared daily but for some people that’s not an option. When you have a small kitchen, utilizing counter space is a given. Making it pretty with a DIY kitchen utensils organizer is just a gorgeous bonus!
Affiliate links may be used in this post. Ordering a product through these links may result in a commission. Read the full disclosure here.

[bctt tweet=”Keeping everything off of your counter isn’t exactly an option when you have a small kitchen. Keep it pretty with this DIY kitchen utensils organizer!” username=”diyadulation”]
Believe me when I say that my kitchen is tiny. Like, your master bathroom is bigger than my kitchen. That means that every bit of space has to be utilized as efficiently as possible.
It also means that there is no way to get out of storing items on the counter. For the longest time I have a had this crock that was handed down to me to organize my larger cooking utensils. The problem? It is so not my taste, aesthetically. And yet, this little guy has been sitting on my counter for years.
Finally, I decided it was time for a makeover. Now it is a beautiful piece of decor that keeps my counter organized! I even love looking at while I prepare meals (although that may fade with time… I’ll keep you posted).

Materials

Step 1
First, clean your ceramic crock with soap and water. Dry with a towel or air dry completely before moving on.

Step 2
Next, cover the ceramic crock with Paris Flea Market rescue restore paint and allow to dry.

Step 3
Add a second coat of paint and, again, allow it to dry completely before moving on.

Note:
- Make sure you paint the edges as well. See the picture above for reference.

Step 4
While your paint dries, pull out your mesh stencil alphabet set and cut apart the second half (only 26 of the letters).
Step 5
Then, pull out the letters you need for the crock makeover: U, T, E, N, S, I, L, O, R, G, A, Z.

Step 6
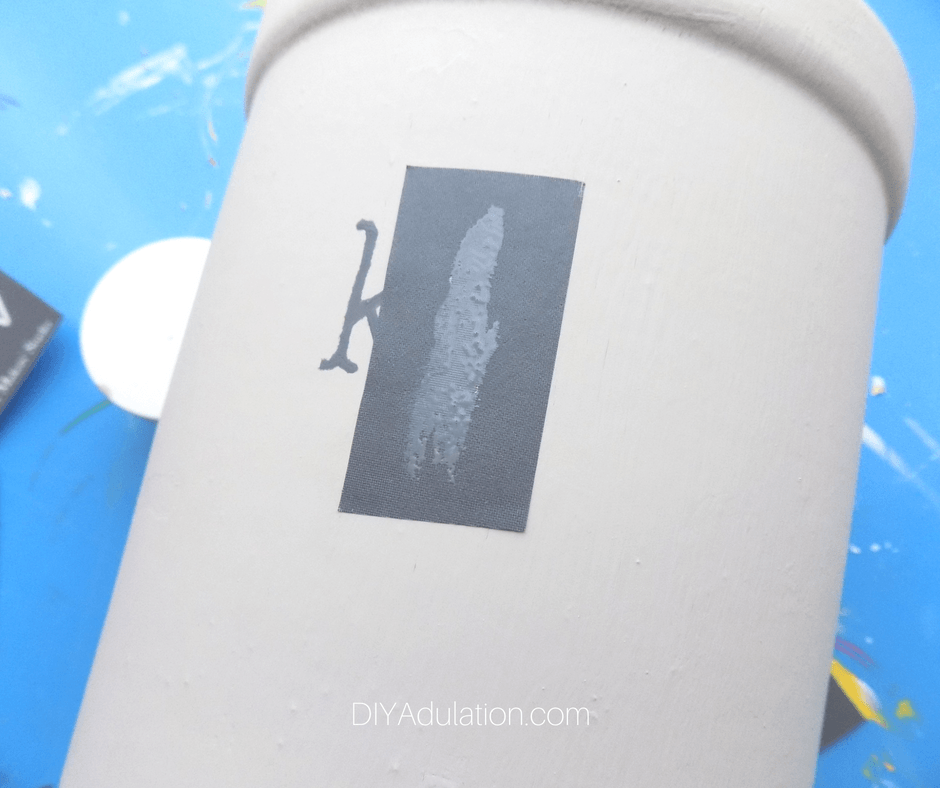
After your second coat of paint has dried, place your letter stencils one at a time on your crock and dab with your dome brush dipped in Southern Gentleman rescue restore paint.

Step 7
Carefully pull the stencil off and let the letter dry before moving on. Immediately rinse out your stencil and set it aside to dry.


Tip:
- This is the longest part of the process. If you would like it to go faster, you can space your letters farther apart so that you can immediately move to the next letter. I didn’t like the look of that, so I chose to wait in between.

Step 8 (Optional)
After you finish stenciling your letters, add 2 small hearts (included with the alphabet stencil set) to your crock as pictured.
Step 9 (Optional)
Lastly, add a coat of matte sealer to your painted crock after all of the paint dries.
Note:
- This is totally optional but it will make the paint more durable for cleaning and everyday use.

This DIY kitchen utensils organizer makeover was so easy to do. I can’t believe I waited so long to take it on. Seriously, I’ve owned this thing for over 10 years and never once did anything with it besides wash it occasionally. Now, it is the perfect piece of decor for my kitchen.
Learn from my mistake and don’t let that ugly organizer sit on your counter any longer. Grab your paint and give that baby a makeover! Turn it into a piece you love and enjoy using. There’s no reason your decor can’t be pretty and practical!
See where I’m linking up!
Don’t Forget to Pin It!

More Ideas You’ll Love: