Meaningful Mother’s Day Gifts Kids Can Make

Mother’s Day is only a few weeks away. Don’t leave it to the last minute, start planning now. These meaningful Mother’s Day gifts kids can make are the perfect way to surprise moms and grandmas with a thoughtful gift they’ll cherish for years.

Affiliate links may be used in this post. Ordering a product through these links may result in a commission. Read the full disclosure here.

Collage of Kids Crafts with text overlay - Meaningful Mothers Day Gifts Kids Can Make


[bctt tweet=”Start planning for Mother’s Day now with these meaningful Mother’s Day gifts kids can make and surprise moms and grandmas with a gift to cherish for years!” username=”diyadulation”]

I seriously have one of the best moms in the world. I know everyone thinks their mom is the best but mine still goes out of her way every year to work with my kiddos to create incredible and sweet gifts for me on Mother’s Day. That’s why I push every year to do the same thing.

Of course, I’m also a busy mom with three kids and 3 sets of grandparents so that adds up to a lot of Mother’s Day gifts each year. That’s why it’s my mission to find meaning Mother’s Day gifts kids can make that also don’t break the bank. That’s exactly what these gifts do!


Close Up of Hands Holding Scrapbook in Lap

Kid Made Mother’s Day Storybooks

This gift is perfect for kids from 3 all the way to 17 to make for mom this Mother’s Day. They can write a true story about a time they spent together or create an entirely fiction piece for mom. After the story is written, don’t forget to take it to the next level with some awesome illustrations!


Close Up of Dragonfly Fingerprint Planter

DIY Dragonfly Fingerprint Succulent Planters

Little ones love making these dragonfly fingerprint planters for mom. They are super easy and budget-friendly to make. For moms who love plants, fill them with live succulents. If mom has more of a brown thumb, simply plop a faux succulent inside with some stones.


Birch Bark vases with fake flowers inside

DIY Birch Bark Bud Vases

These birch bark vases are seriously so easy to make. Once they’re made, fill them with wild flowers the kiddos pick themselves and surprise mom with it on Mother’s Day!


Kids Artwork on Wooden Coasters

How to Turn Kids Artwork into Coaster Sets

This is another great idea for kids of all ages. Teenagers can make the entire project alone. Little kids need an adult to burn the pictures into the coasters. These are a great gift that make a wonderful keepsake for mom.


Watercolor Sharpie Mug on Stack of Books

DIY Monogram Stenciled Sharpie Mug

With the help of stencils, this Sharpie mug is easy-peasy to make even for kids. Simply place your stencils, color them with your markers, and let it dry. Have an adult bake it and it’s ready to gift!


Red and Blue Stamped Mother's Day Card

Kid Crafted Mother’s Day Cards

These Mother’s Day cards are the perfect addition to those lovely gifts. Recycle containers to carve up a beautiful design then stamp it with paint onto a card blank. Let dry and fill with a sweet sentiment inside for mom.


Picture Framed in Sequinned Magnetic Frame

DIY Magnetic Sequin Picture Frame

This magnetic picture frame is another meaningful Mother’s Day gift kids can make. All you need are a few materials from the dollar store and you’re good to go. Fill the frame with a sweet picture of the kiddos and boom! You have a thoughtful and budget-friendly gift.


Baby Covered in Paint Next to Painted Paper

Easy Painted DIY Wrapping Paper

Of course, you need a way to wrap all of those meaningful Mother’s Day gifts. Why not make the wrapping paper as thoughtful as the gift inside? This painted DIY wrapping paper is exactly what you need to complete the package.


Collage of Kids Crafts with text overlay - Meaningful Mothers Day Gifts Kids Can Make

These Mother’s Day gift ideas are so easy, you won’t find yourself procrastinating until the weekend of to get your gifts ready. These meaningful Mother’s Day gifts kids can make have everything you need to make, wrap, and gift for all of the moms in your life.

See where I’m linking up!

Don’t Forget to Pin It!

Collage of Kids Crafts with text overlay - Meaningful Mothers Day Gifts Kids Can Make


More Ideas You’ll Love:

DIY Sea Glass Picture Frame

Are you looking for an easy and budget-friendly piece of coastal decor? This DIY sea glass picture frame is a gorgeous craft that comes together quickly and easily. Give it as a gift or use it to display (and protect) precious photos on your fridge!

Affiliate links may be used in this post. Ordering a product through these links may result in a commission. Read the full disclosure here.

Collage of Picture Frame with text overlay - Easy DIY Sea Glass Picture Frame


[bctt tweet=”This DIY sea glass picture frame is so easy to make and totally budget-friendly. That makes a wonderful gift for friends and family (or yourself).” username=”diyadulation”]

I love the calmness and tranquility of coastal decor even though I tend to gravitate towards bright and colorful style. Luckily, I still get to enjoy the style because my mom loves it. (Also I still hold out hope that one day I’ll have a vacation home on the beach I can go nuts with.)


Picture in Sea Glass Magnetic Frame

Whether you love the coastal style for your own home or simply want a pretty way to display the photos on your fridge, this DIY sea glass picture frame is the perfect easy craft for you. As I said above, it also makes a fantastic gift for parents and grandparents. Mother’s Day is coming up soon (hint hint). Head to your local Dollar Tree and you’re all set to get crafting.


Magnetic Sea Glass Frame Materials

DIY Sea Glass Picture Frame Materials


Magnetic Picture Frame Removed from Packaging

Step 1

First, remove your magnetic picture frame from the packaging.

Tip:


Close Up of Sea Glass Glued to Frame

Step 2

Start attaching your sea glass by adding larger pieces of sea glass to the corners of your frame and gluing them into place.

Tip:

Step 3

Next, start to fill in the area between the corners with smaller pieces of sea glass. Use various sizes to create as even an edge around the frame as possible.


Sea Glass Glued to Frame

Step 4

Continue gluing small pieces of sea glass onto the frame. Mix and match the colors as you want.

Step 5

After you have the main frame outlined, fill in any desired areas with additional small pieces of sea glass.

Step 6

Then check all of the edges to ensure that no glue has seeped down them.

Tip:

Step 7

Lastly, set aside your frame to dry for at least 24 hours before using.


Angled Close Up of Sea Glass Picture Frame

Smiling Child in Picture Frame with text overlay - Easy DIY Sea Glass Picture Frame

Once your DIY sea glass picture frame has dried simply add your photo and hang it on your refrigerator. This is so easy to make and totally budget-friendly. It also makes a wonderful gift for friends and family. Add it to your own coastal decor or surprise someone with it for a beautiful beachy display.

See where I’m linking up!

Don’t Forget to Pin It!

Smiling Child in Picture Frame with text overlay - Easy DIY Sea Glass Picture Frame


More Ideas You’ll Love:

Pressed Flower DIY Bookmark Craft

Getting lost in a book is one of the greatest joys of all time. That’s why there are so many bibliophiles out there. If you’re looking for an easy gift for a book loving mom or simply want a pretty way to keep your place, this pressed flower DIY bookmark is perfect!

Affiliate links may be used in this post. Ordering a product through these links may result in a commission. Read the full disclosure here.

Pressed Flower Bookmark on Lined Journal with text overlay - Beautiful Pressed Flower DIY Bookmark


[bctt tweet=”This pressed flower DIY bookmark is seriously beautiful and easy to make. Perfect to give as a gift or keep your place in your current reads!” username=”diyadulation”]

Even though I love books, I’ve never made acquiring bookmarks a priority. Like any busy mom reader, I simply stuck whatever was handy and close by in the pages to save my spot. I think the most recent was a Wonder Woman trading card one of the kids gave me.

This month’s Bring on the Crafts Blog Hop is the perfect opportunity to finally change that up. This month the challenge is flowers and this beautiful bookmark definitely fits the bill. The bright and pretty flowers are so cheerful to look at. It is also a lot less likely to fall out of the book (which the card totally did more than once).


Close up of Pressed Flower Bookmark with Tassels on Lined Journal

You can totally press your own flowers for this craft. I chose to buy mine because I was having trouble getting the vibrant colors to stay. That will be next month’s test project, figuring out how to do that. Speaking of, if you have any tips, I’d love to hear them!


Materials for Pressed Flower Bookmarks

Pressed Flower DIY Bookmark Materials

Step 1

First, put on your protective gloves. Handling epoxy resin without having them on is dangerous.


Mixed Resin next to Pressed Flowers

Step 2

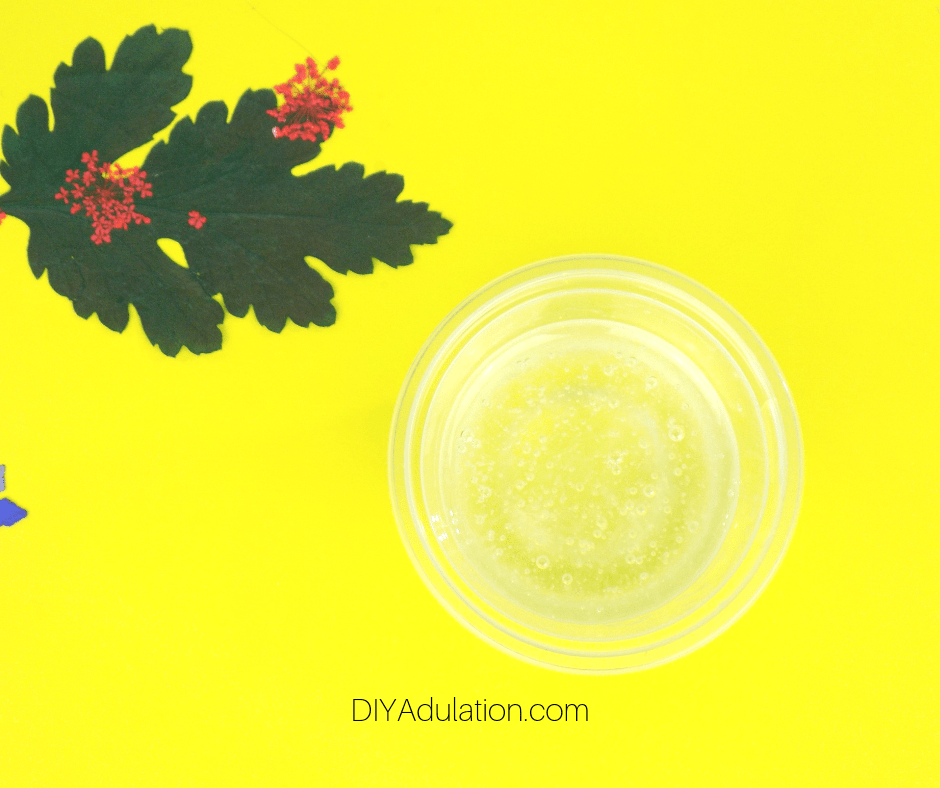
Add 2 tbsp of each element of your epoxy resin to your small plastic cup.

Step 3

Use your popsicle stick to stir the mixture together.

Step 4

Next, pour a small amount of the resin into your mold and spread it around to cover the bottom of the mold.


Pressed Flowers in Resin in Bookmark Mold

Step 5

Once there is a small layer of resin in the bottom of your mold, arrange your flowers in it as you want them designed.

Note:


Clear Resin over Pressed Flowers in Bookmark Mold

Step 6

After all of your flowers are arranged, cover them with the remaining epoxy resin. Do this slowly so that you don’t overfill your mold. Also take care to make sure every crevice is filled. You can carefully use your popsicle stick to spread it if necessary, especially around the hole at the top of the mold.


Cured Resin Pressed Flower Bookmark in Mold

Step 7

Allow your bookmark to cure for at least 24 hours before moving on. Try not to move it if at all possible because this can shift your flowers and ruin your arrangement.

Step 8

After the resin is cured, remove your bookmark from the mold.

Step 9

Next sand any rough edges on your bookmark.

Step 10

Then sand the hole in the top of the bookmark so that it doesn’t cut your ribbon with use.

Step 11

Wipe down any areas you sanded with a damp cloth.


Pressed Flower Bookmark with Tassels Attached

Step 12

Now, cut a piece of ribbon and attach it to your bookmark with a slipknot.


Close up of Pressed Flower Bookmark

Close up of Bottom of Pressed Flower Bookmark

Pressed Flower Bookmark on Lined Journal with text overlay - Beautiful Pressed Flower DIY Bookmark

This pressed flower DIY bookmark is seriously beautiful and easy to make. The set of flowers that I bought is enough to make multiple bookmarks so you can make one for all of the book loving moms in your life (and one for you too). If you really want to take your gift to the next level, add one of your favorite books along with the bookmark. That’s the ultimate awesome Mother’s Day gift!

See where I’m linking up!

Don’t Forget to Pin It!

Pressed Flower Bookmark on Lined Journal with text overlay - Beautiful Pressed Flower DIY Bookmark


Bring on the Crafts 700 x 550

Bring on the Crafts — A Craft & DIY Blog Hop

On the first Friday of each month, a group of DIY and crafty bloggers join forces. Together with hosts Marie from The Inspiration Vault and Habiba from Craftify My Love, they bring you the #BringontheCrafts blog hop. Each blogger creates a fun craft or DIY project to share that follows a monthly materials theme. April’s theme is Flowers! Each blogger chooses their own craft to make as long as they love it and it uses Flowers in the project.

Our April Co-hosts

Jenny at Cookies, Coffee and CraftsHeather at Glitter on a Dime • Marie at DIY Adulation

Michele at Coastal BohemianCoastal Bohemian • Terri at Our Good LifeOur Good Life • Gail at Purple Hues & Me

Join in on the fun! If you’d like to participate next month, you can request to join our Bring on the Crafts Facebook Group. Next month’s theme is Stamps!

Not a blogger, but a creative mind none the less!? Don’t worry, Share your awesome creations in our Craft Cult Facebook Group. This is also a great place to ask craft & DIY related questions and find inspiration for your next project.

Now let’s see all of those amazing Craft and DIY Projects!

You are invited to the Inlinkz link party!

Click here to enter