Easy Painted DIY Wrapping Paper Kid’s Craft

When you need to save money and pay off debt multi-purpose projects are a busy mom’s best friend. School breaks with the kids can tempt you to blow your budget on activities and outings. Kill multiple birds with one stone and make this easy painted DIY wrapping paper.

Affiliate links may be used in this post. Ordering a product through these links may result in a commission. Read the full disclosure here.

Collage of Finger Painted Wrapping Paper and Kids Painting with text overlay: Easy Painted DIY Wrapping Paper Kid's Craft


[bctt tweet=”This easy painted DIY wrapping paper lets kids get to be creative and messy + keeps a supply of unique wrapping paper on hand! #kidscraft ” username=”diyadulation”]

This is one of our favorite activities during school breaks. The kids get to be creative and messy. We always have a supply of unique wrapping paper for gifts on hand. It’s also budget friendly! 

I love that this craft is easy and fun for kids of all ages. Even the splattered hand prints of babies look adorable on the end product. Family members will love getting gifts wrapped in such thoughtful paper.


Finger Painted Craft Paper

Note:

Materials


Paper taped to dining room table with paint

Paper taped to dining room table with paint

Step 1

First, cover your dining room table with craft paper. Use painters tape to secure the ends.

Tip:


Messy baby finger painting

Step 2

Next, put some finger paint on the each paint tray.


Messy baby finger painting

Messy baby finger painting

Kids Finger Painting Craft Paper

Unpainted paper on table with messy paint tray on top

Step 3

Let the kids go nuts painting the paper. If the fill one area, simply have them switch seats to another area until the entire paper surface is covered.

Step 4

Allow the paint to dry completely before removing the paper from your table.

Step 5

To store, roll the dried painted paper and secure with rubber bands until needed.


Messy baby finger painting

Little boy with painting shirt on

Finger Painted Craft Paper

Bonus Tips:


Finger Painted Wrapping Paper with text overlay: Easy Painted DIY Wrapping Paper Kid's Craft

This easy painted DIY wrapping paper is the perfect creative activity for bored kiddos. Fill your school break calendar with budget-friendly activities like this to dominate mom life. Stay on top of your financial goals while you’re at it. Nothing can stop you this year!

One last bonus tip before you go: If you make this as often as we do, you might want to put the year in multiple places on the back. This will let friends and family know what age the kiddos painted it. Grandparents love this!

See where I’m linking up!

Don’t Forget to Pin It!

Collage of Finger Painted Wrapping Paper and Kids Painting with text overlay: Easy Painted DIY Wrapping Paper Kid's Craft


More Ideas You’ll Love:

Easy Unique Kid Crafted Mother’s Day Cards

When you are paying off debt the little things make it harder to stay on track than the big things. Little things like a card for mom on Mother’s Day. She deserves a little something, right? This year, save money and make something special for mom with these easy kid crafted Mother’s Day cards.

Affiliate links may be used in this post. Ordering a product through these links may result in a commission. Read the full disclosure here.

Kids sitting at a table and paint stamped card with text overlay: Easy + Unique Kid Created Mother's Day Card


[bctt tweet=”These easy kid crafted Mother’s Day cards will mean so much more than anything you’ll find on a store shelf!” username=”diyadulation”]

This is such a super fun way to have some quality craft time with the kids and make something moms will love to get! Part of what I love about projects like this is how excited my kids get when their grandmothers open these handmade creations. They can’t wait to tell them all about it and these are the memories that they will carry with them long after they have their own kids. Besides, it’s fun to play with paint (even if it gets messy).


Pile of crafts supplies

Materials


Piece of styrofoam with center cut out

Step 1

First, cut out the flat part of the Styrofoam veggie container.

Tip:


2 Rectangular Pieces of Green Foam

Step 2

Next, cut the flat piece of styrofoam in half so that it is roughly the size of the front of your cards.

Tip:


Green foam rectangle with a mechanical pencil

Step 3

Then give one piece of foam and one mechanical pencil to each child and let them go nuts designing whatever they want.

Tips:


Blue paint on foam stamp

Step 4

After they have finished their designs, apply paint to the foam design. You can do this with a foam brush or you can let the kids do it with their fingers. It simply depends on how big of a mess you want to clean up.


Blue paint stamped red card

Blue paint stamped gray card

Step 5

Next, stamp the painted design onto the front of the card. Do this for as many cards as you need (adding paint as needed). Then rinse off the foam with hot water. The best part is that you can save it and reuse it as many times as you want.

Step 6

You can write a message on the inside of the card, or if your child is writing have him personalize it with his own message.


Collage of Paint Stamped Mother's Day Cards with text overlay: Easy + Unique Kid Crafts Mother's Day Card

You can stay on a budget and give mom something special too. These easy kid crafted Mother’s Day cards will mean so much more to everyone involved than anything you’ll find on a store shelf!

You can make as many cards as you need and mom or grandma can frame the unique artwork to hang on the wall. Kids will be proud to be a part of the opening and excited to see it every time they visit.

See where I’m linking up!

Don’t Forget to Pin It!

Collage of Paint Stamped Mother's Day Cards with text overlay: Easy + Unique Kid Crafts Mother's Day Cards


More Ideas You’ll Love:

DIY Harry Potter Golden Egg

We are back with the Movie Monday Challenge! This month I’m going full nerd with this DIY Harry Potter Golden Egg!

Guess what! It is made with simple materials that come together to create a gorgeous piece of covert nerd decor for your home. Even better, it is a fun way to inject your nerd style into your Easter decor.

Affiliate links may be used in this post. Ordering a product through these links may result in a commission. Read the full disclosure here.

Collage of Harry Potter Golden Egg Pictures with text overlay: DIY Harry Potter Golden Egg


[bctt tweet=”This #DIY #HarryPotter Golden Egg is the most fun egg project you will ever make!” username=”diyadulation”]

Materials


Blue Plastic Egg

Step 1

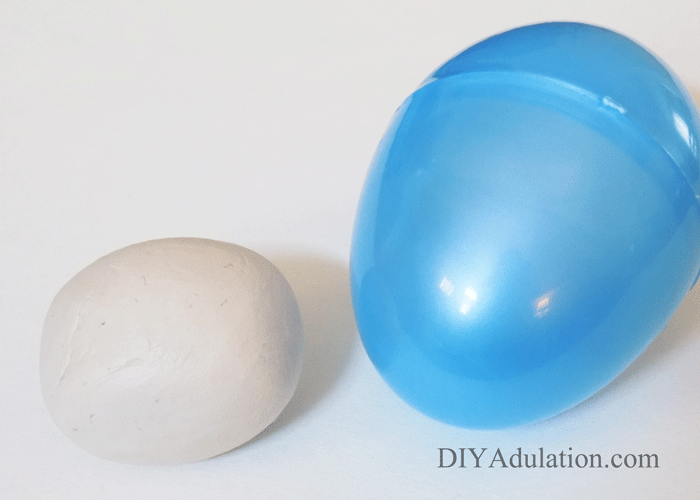
Start with a clean plastic egg. The color doesn’t matter because you will be covering it.


Ball of clay next to plastic egg

Step 2

Next, pull out a piece of air dry clay and roll into a ball as pictured.


Clay covered plastic egg

Step 3

Then flatten your ball of clay and use it to cover your egg. It helps to roll the egg in your hands to evenly spread the clay. Be sure to pinch the seams and flatten them.


lines carved on clay egg

Step 4

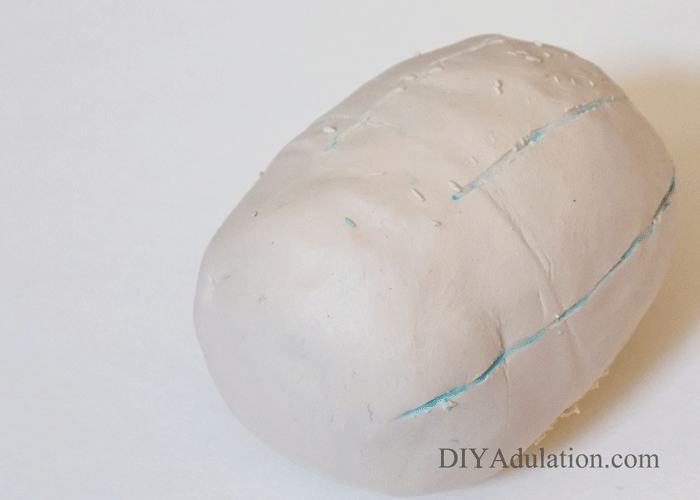
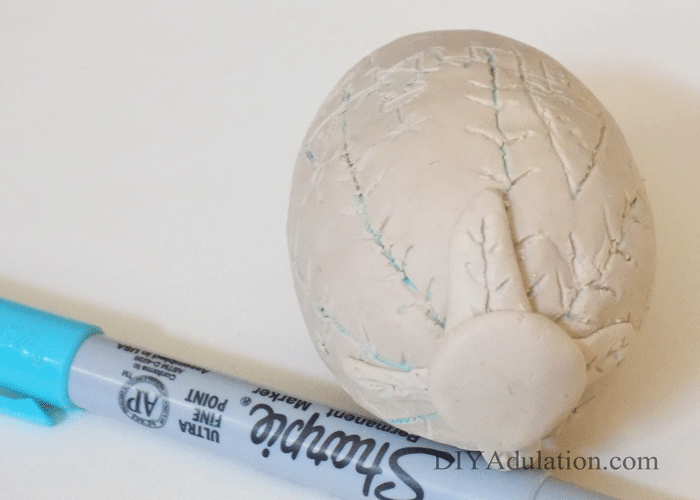
Start carving your design with your ultra fine point marker. Carve lines down from a center point on the top of your egg.


Carved Clay Egg

Step 5

Next, carve the building in the picture above starting with the outline then moving onto the smaller details.

Tip:


Carve Clay Egg

Step 6

Continue carving the design as you see in the photo above. Again, start with the larger outlines and then move on to the smaller details.


Carve Clay Egg

Step 7

Lastly, add the design on the left of the first building you carved. Use the photo above for reference.

Step 8

Repeat carving steps 4 through 7 on the opposite side of your egg.


Carved Clay Egg

Step 9

Finally, carve cross hatched lines along the long vertical carved lines.


Large Oblong Piece of Clay

Step 10

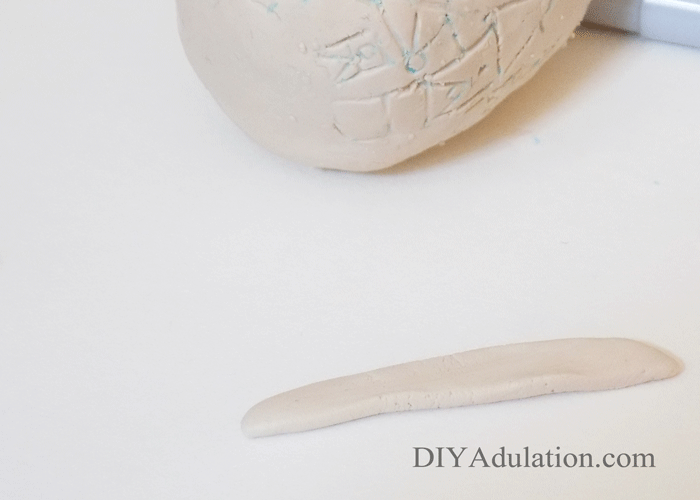
Now pull out a small piece of clay and roll it slightly oblong.


2 small oblong pieces of clay

Step 11

Split your small piece of clay in half.


small flattened piece of clay

Step 12

Next, roll out each half of clay into a rope and flatten. Use the picture above for reference.


Crossed clay on top of clay egg

Step 13

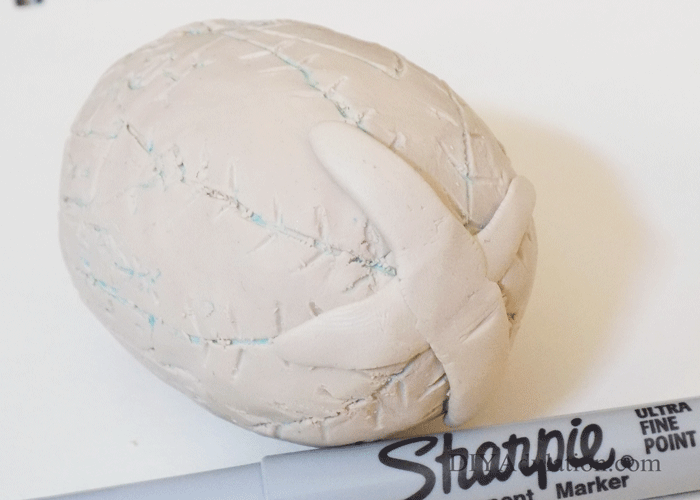
Place the flattened pieces criss-crossed on the top of your egg as pictured.


Carved clay on top of clay egg

Step 14

Add a line down the center of each fourth of your criss-crossed clay pieces.


Carved clay on top of clay egg

Step 15

Then add cross hatches as pictured above.


Close up of small ball of clay

Step 16

Pull out a small piece of clay and roll it into a ball.


circle clay embellishment on clay covered egg

Step 17

Flatten the ball and attach it to the top of your egg.


Decorative top of carved clay egg

Step 18

Finish off your egg with a tiny, flattened clay ball.


Dried carved clay egg

Step 19

Allow the clay to dry completely before moving on. Follow the directions on your packaging. For example, the Crayola clay that I used calls for 2-3 days dry time depending on thickness.

Tip:


Gold painted carved egg

Step 20

After your clay has dried completely, cover it in gold enamel paint. Let it dry completely.

Step 21 (Optional)

Touch up any areas with gold paint as needed. Mine did not so I skipped this step.

Step 22

Now cover one half of your egg with black acrylic paint. This is easiest if you put a dollop on your finger and spread it over the egg. Pay special attention to the carved areas.
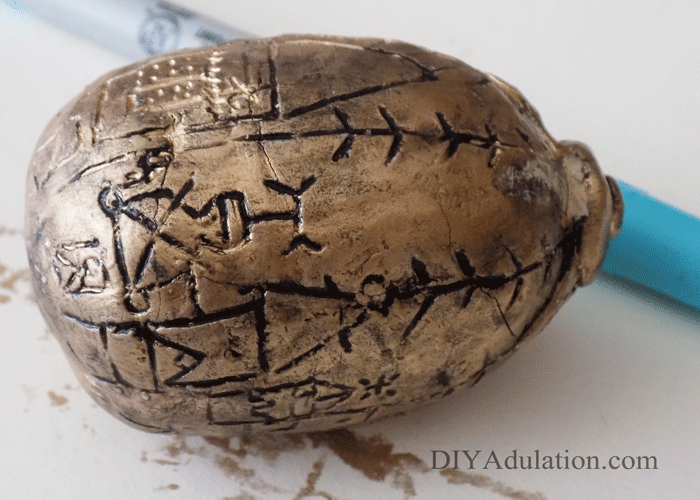
 

Close up of black paint on carved egg

Step 23

Immediately use a paper towel to wipe off the excess black acrylic paint.


Close up of black paint on carved egg

Step 24

Repeat steps 22 and 23 on the remaining part of your egg.


Close up of black paint on carved egg

Step 25

Allow your paint to dry to completely and you’re good to go!


Harry Potter Golden Egg

Collage of Harry Potter Golden Egg Pictures with text overlay: DIY Harry Potter Golden Egg

This DIY Harry Potter Golden Egg is the most fun egg project I have ever made. It is the perfect new covert nerd decor for your home. Originally I was going to use it as Easter decor but I love it so much it is going to be out year-long.

Now it’s time to check out the other awesome projects my friends made for this month’s Movie Monday Challenge! See all of the creativity at work below.

See where I’m linking up!

On the last (or fourth) Monday of each month, a group of bloggers participate in a #MovieMondayChallenge, hosted by C’mon Get Crafty! We decide on a topic, genre, or specific movie to use for inspiration and everyone gets free reign to create something wonderful!

This month’s challenge was. . . . KIDS! Everyone was allowed to choose their own favorite film so long as it was inspired by the challenge word.

Now let’s see what everyone else was inspired to create for this month’s #MovieMondayChallenge!! If you’d like to join our Facebook group, you can request an invite here.


Don’t Forget to Pin It!

Collage of Harry Potter Golden Egg Pictures with text overlay: DIY Harry Potter Golden Egg