DIY Debt Payoff Chalkboard for Debt-Free Living

A DIY debt payoff chalkboard keeps your debt payoff in your face so that you will not only be reminded of them constantly but also so that you can see your progress visually. That will help you keep your momentum up and propel you forward during the days when the last thing you want to do is cook dinner. 

Affiliate links may be used in this post. Ordering a product through these links may result in a commission at no extra cost to you. Read the full disclosure here.

Collage of White Framed Chalkboard with Colorful Bar Graphs on it and text overlay: DIY Debt Payoff Chalkboard


[bctt tweet=”Keep your debt payoff momentum with a DIY debt payoff chalkboard! #diy #chalkboard #debtfree” username=”diyadulation”]

Getting out of debt takes discipline and dedication. It sucks but the truth is, it takes a lot of work. At this point you’ve set your budget, created goals to propel you forward, and you’re starting to chip away.

When we started this journey it was sobering to see how much debt we truly had. It was additionally shocking to me to see what those original loan amounts were for my student loans.

I have been deferring them for 8 years and while that kept us from having to make payments, it also meant that they continued accruing interested on the initial loan amount. Yikes!

Even though our income has actually gone down (my husband became salaried and lost all of the overtime pay we used to count on), we’ve finally had enough. We paid off our credit cards this month and now only have the student loans remaining.

Because this is such a huge chunk of our debt, I needed to be able to see what we are working towards. We need to see the progress we are making or it will feel like we’re stuck under this mountain. With this DIY debt payoff chalkboard I can see the progress grow with each payment.


Wooden Thrift Store Frame with garden scene inside

DIY Debt Payoff Chalkboard Materials
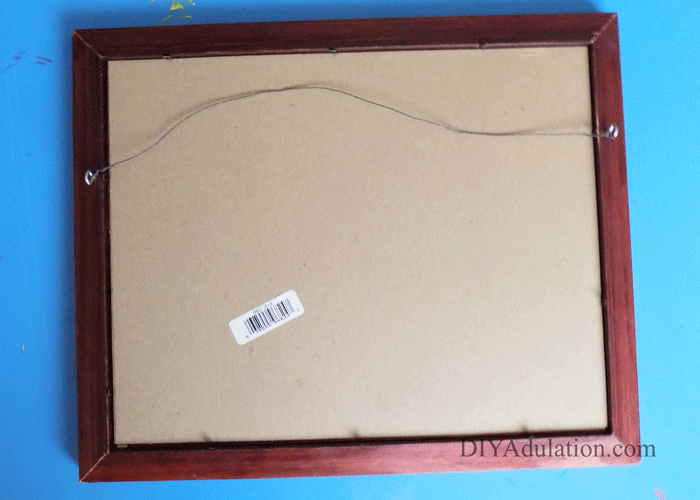
 

Back of Wooden Thrift Store Frame

Step 1

First, flip your frame over and begin disassembling it.


Empty Wooden Thrift Store Frame

Step 2

After everything is out of your frame, set the glass and inserts aside for now.


White Painted Empty Frame

Step 3

Next, flip your empty frame back over and add a coat of white acrylic paint to it. Allow your paint to dry completely.
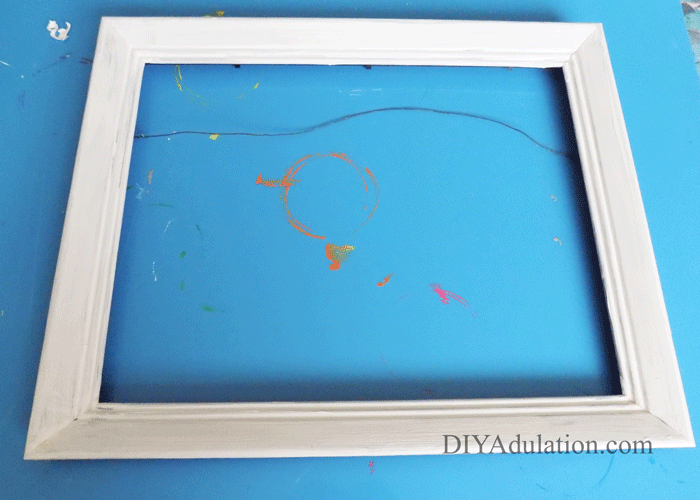
 

White Painted Empty Frame

Step 4

After your first coat has dried, add a second coat of white acrylic paint to the frame and let dry.

Step 5 (Optional)

If needed, add a third coat of paint to your frame. Mine required this but lighter woods and unfinished woods will not.


Glass Insert from Frame

Step 6

As your paint dries, pull out the glass insert from your frame.
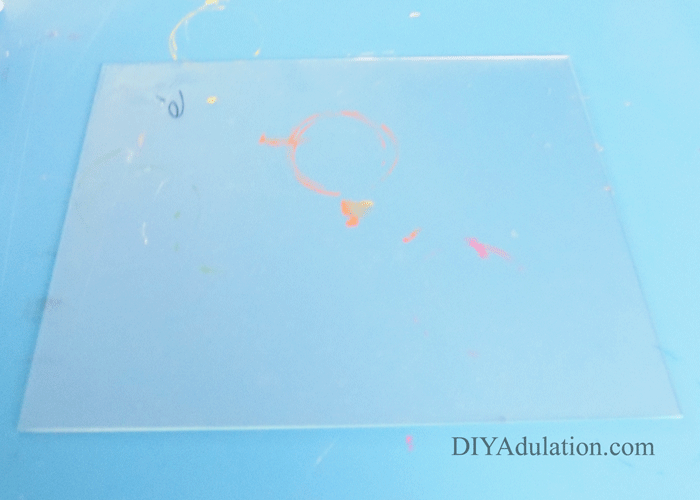
 

Glass Insert from Frame

Step 7

Thoroughly clean your glass insert. If yours has the price written on the glass and Windex doesn’t remove it, try a little rubbing alcohol.

Tip:

  • Do not skip this step. You may think it is unnecessary since we are covering it but the contact paper will not stick securely if it isn’t clean.
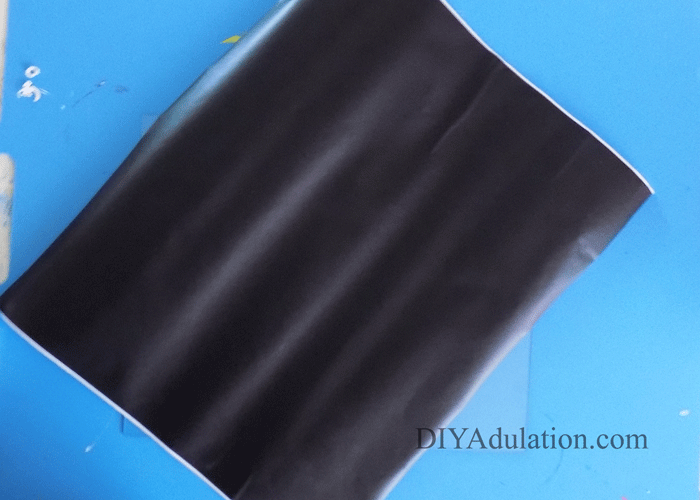
 

Rectangular Piece of Chalkboard Contact Paper

Step 8

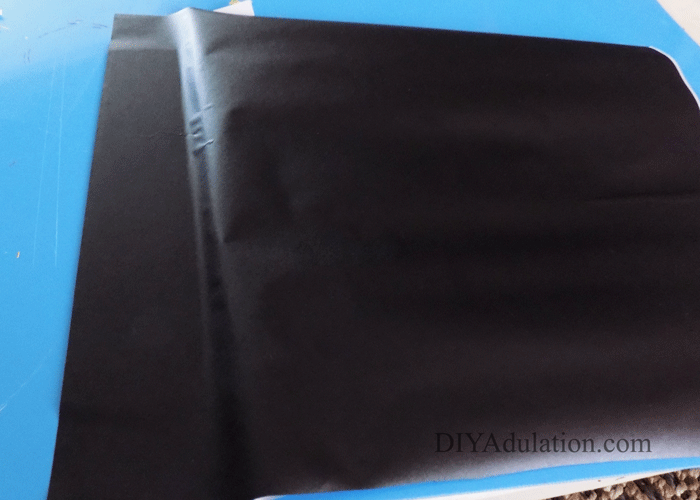
Next, cut a piece of chalkboard contact paper slightly larger than your glass insert. You want at least an inch of overlap on every side.


Chalkboard Contact Paper Being attached to Glass Insert

Step 9

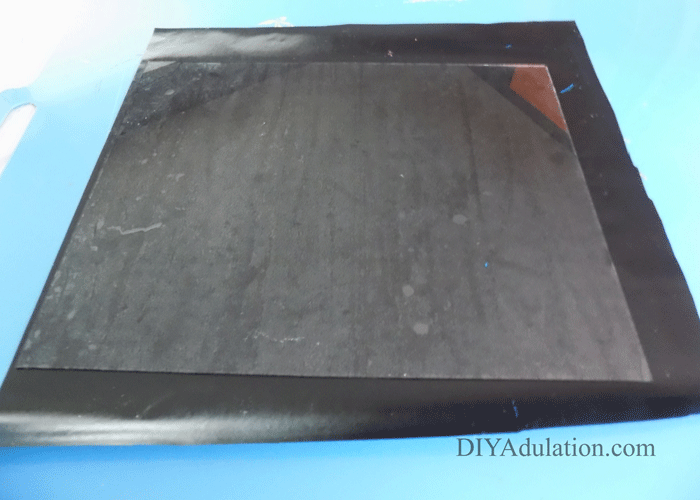
Begin attaching your contact paper by peeling back a small piece of the backing and firmly pressing it to your glass insert. Smooth out any air bubbles as you go.


Glass Insert Covered in Chalkboard Contact Paper

Step 10

Continue attaching your contact paper, smoothing out the bubbles, until your glass is completely covered.


Glass Insert Covered in Chalkboard Contact Paper

Step 11

Now, carefully turn your covered glass insert over.


Folded Edge of Chalkboard Contact Paper on the Back of the Glass Insert

Folded Edge of Chalkboard Contact Paper on the Back of the Glass Insert

Step 12

Fold up the overages on the sides as pictured above.


Glass Insert Covered in Chalkboard Contact Paper

Step 13

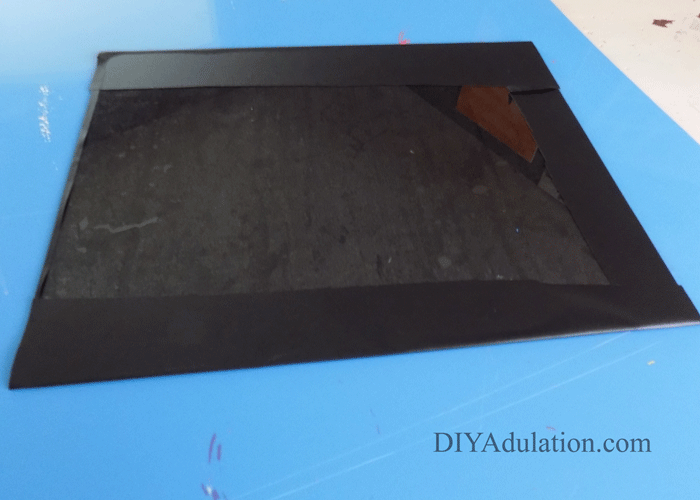
Again, flip your glass insert back over and be sure that all of the air bubbles are removed.


White Painted Empty Frame

Step 14

After you have finished covering the glass insert, set it to the side and seal your dry frame with acrylic sealant. All the sealant to dry completely.

Tip:

  • Be sure to do this in a well-ventilated area.


Back of Chalkboard Insert inside of frame

Step 15

Next, flip your dry frame over and place your glass insert back in with the chalkboard side facing out.


Cardboard backing inside of frame

Step 16

Then return your cardboard backing to your frame.


Close up of back of frame with prongs pressed down

Step 17

Re-secure the backing of your frame according to its design.


White Frame with Chalkboard

Step 18

Now turn your chalkboard over and pullout your chalk and ruler.

Note:

  • You also want to have your debt snowball list in front of you. Don’t know what a debt snowball is? Read all about it in The Total Money Makeover.


Close up of chalkboard with multicolored horizontal lines

Step 19

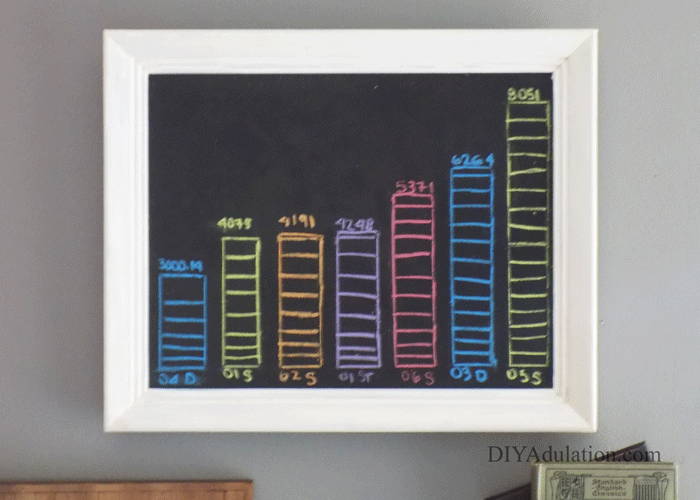
Use your ruler to create horizontal lines across the bottom of your chalkboard. You need one line for every debt.


Chalkboard with colorful horizontal lines and a bar graph on the right

Step 20

Begin creating your bar graph starting on the far right of your chalkboard. This should represent the largest debt you have. Each line on my graph represents $500.


White Framed Chalkboard with Colorful Bar Graphs on it

Step 21

Continue creating your bar graph from right to left, working your way down to the smallest debt. The rectangles at the top of some of my bars represent an uneven amount that is less that $500. I tried to keep the representational of the extra amount but did it by hand.

Step 22

Next, fill in the name of the corresponding debts at the bottom of each bar graph. Add the total debt amount to the top of each bar graph.


White Framed Chalkboard with Colorful Bar Graphs on it hanging on a wall

Step 23

Lastly, hang your DIY debt payoff chalkboard somewhere prominent in your house. We hung ours by the front door so we will see it daily.


White Framed Chalkboard with Colorful Bar Graphs on it

White Framed Chalkboard with Colorful Bar Graphs on it and text overlay: DIY Debt Payoff Chalkboard

Now that we have this visual representation of our remaining debt the next little goal I’m looking forward to is erasing one of these paid off loans from the board. Even better, when you are finally debt free this chalkboard can be used for reminders or love notes to each other. No use creating something that can’t become a permanent piece of useful decor. How does it feel seeing all of your debt laid out? Is it shocking or better than you expected? Let me know in the comments and soon we’ll dive into lifestyle changes that will keep you from ever being in this place again.

See where I’m linking up!

Don’t Forget to Pin It!

Collage of White Framed Chalkboard with Colorful Bar Graphs on it and text overlay: DIY Debt Payoff Chalkboard


More Ideas You’ll Love:

DIY Seven Evil Exes Frame | Scott Pilgrim vs. The World Craft

Have you seen Scott Pilgrim vs. The World? If not, I totally recommend it. It is hysterical and quirky in a way that speaks to the heart of a nerd like me. That is why it is my romance choice for this month’s Movie Monday Challenge. It is not the typical romance movie which is why I love it. (Not that I don’t enjoy traditional romances, too.) This DIY seven evil exes frame is the perfect reminder that love can be fun and totally crazy at the same time.

Affiliate links may be used in this post. Ordering a product through these links may result in a commission at no extra cost to you. Read the full disclosure here.

Looking for a DIY Valentine's gift this year? This DIY seven evil exes frame is the perfect reminder that love can be fun and totally crazy at the same time. Then check out the rest of the Movie Monday Challenge crafts!

This movie is close to my heart. My husband and I went to see it when we were dating. I’m pretty sure he only went out of boyfriend obligation because I couldn’t get anyone else to go with me. We are sitting there and the entire theater is silent. Then the scene when they point out Scott’s only possessions in the apartment comes on and I died laughing. I was immediately embarrassed at how loud I was but then something kind of awesome happened. Everyone else in the theater relaxed and we were all laughing hysterically throughout the movie. It was such a fun movie experience.


[bctt tweet=”Celebrate your nerdy love story with this DIY seven evil exes frame! #MovieMonday #ScottPilgrim” username=”diyadulation”]

Looking for a DIY Valentine's gift this year? This DIY seven evil exes frame is the perfect reminder that love can be fun and totally crazy at the same time. Then check out the rest of the Movie Monday Challenge crafts!

DIY Seven Evil Exes Frame Materials


Looking for a DIY Valentine's gift this year? This DIY seven evil exes frame is the perfect reminder that love can be fun and totally crazy at the same time. Then check out the rest of the Movie Monday Challenge crafts!

Step 1

First, select 7 chipboard x’s. It doesn’t matter what colors they are. I do recommend choosing multiple sizes and styles.


Looking for a DIY Valentine's gift this year? This DIY seven evil exes frame is the perfect reminder that love can be fun and totally crazy at the same time. Then check out the rest of the Movie Monday Challenge crafts!

Step 2

Paint your x’s with red acrylic paint and set them aside to dry.


Looking for a DIY Valentine's gift this year? This DIY seven evil exes frame is the perfect reminder that love can be fun and totally crazy at the same time. Then check out the rest of the Movie Monday Challenge crafts!

Step 3

Next, place your disassembled frame on the top, left corner of the black and white hearts paper.

Tip:

  • Make sure that you do not have it right up to the edge. See the picture above for reference.


Looking for a DIY Valentine's gift this year? This DIY seven evil exes frame is the perfect reminder that love can be fun and totally crazy at the same time. Then check out the rest of the Movie Monday Challenge crafts!

Step 4

Trace the inside and outside of the frame. Then draw an “X” in the center.


Looking for a DIY Valentine's gift this year? This DIY seven evil exes frame is the perfect reminder that love can be fun and totally crazy at the same time. Then check out the rest of the Movie Monday Challenge crafts!

Step 5

Cut out around your traced lines, leaving extra around the edges as pictured. Also, cut the corners out as you see above.


Looking for a DIY Valentine's gift this year? This DIY seven evil exes frame is the perfect reminder that love can be fun and totally crazy at the same time. Then check out the rest of the Movie Monday Challenge crafts!

Step 6

Then cut out the “X” in the center and trim the flaps slightly. (You will need to use your scissors for this part, not the paper cutter.)


Looking for a DIY Valentine's gift this year? This DIY seven evil exes frame is the perfect reminder that love can be fun and totally crazy at the same time. Then check out the rest of the Movie Monday Challenge crafts!

Step 7

Next, cover the front of your frame in Mod Podge.


Looking for a DIY Valentine's gift this year? This DIY seven evil exes frame is the perfect reminder that love can be fun and totally crazy at the same time. Then check out the rest of the Movie Monday Challenge crafts!

Step 8

Place your frame face-down on the cut out paper. Use your traced lines as a placement guide.


Looking for a DIY Valentine's gift this year? This DIY seven evil exes frame is the perfect reminder that love can be fun and totally crazy at the same time. Then check out the rest of the Movie Monday Challenge crafts!

Step 9

Add more Mod Podge to your paper flaps on the inside and mold them to the inside of your frame.


Looking for a DIY Valentine's gift this year? This DIY seven evil exes frame is the perfect reminder that love can be fun and totally crazy at the same time. Then check out the rest of the Movie Monday Challenge crafts!

Step 10

Repeat step 9 for the outside flaps as well.

Tip:

  • You may need to hold he flaps firmly to the sides for a few second to make sure that they stay in place.

Step 11

Set you frame to the side to dry.


Looking for a DIY Valentine's gift this year? This DIY seven evil exes frame is the perfect reminder that love can be fun and totally crazy at the same time. Then check out the rest of the Movie Monday Challenge crafts!

Looking for a DIY Valentine's gift this year? This DIY seven evil exes frame is the perfect reminder that love can be fun and totally crazy at the same time. Then check out the rest of the Movie Monday Challenge crafts!

Step 12

Next, cut a small piece of the black and white hearts paper for the front of your card. You want it to be smaller than the card is.


Looking for a DIY Valentine's gift this year? This DIY seven evil exes frame is the perfect reminder that love can be fun and totally crazy at the same time. Then check out the rest of the Movie Monday Challenge crafts!

Step 13

Then cut a piece of orange cardstock to fit inside the black and white hearts piece.


Looking for a DIY Valentine's gift this year? This DIY seven evil exes frame is the perfect reminder that love can be fun and totally crazy at the same time. Then check out the rest of the Movie Monday Challenge crafts!

Step 14

Attach the orange cardstock to the center of the white and black hearts piece with your glue runner.


Looking for a DIY Valentine's gift this year? This DIY seven evil exes frame is the perfect reminder that love can be fun and totally crazy at the same time. Then check out the rest of the Movie Monday Challenge crafts!

Step 15

Next, write “I’m Glad You Beat My XXXXXXX” on your matted orange cardstock.


Looking for a DIY Valentine's gift this year? This DIY seven evil exes frame is the perfect reminder that love can be fun and totally crazy at the same time. Then check out the rest of the Movie Monday Challenge crafts!

Step 16

Attach your matted cardstock to the center of the front of your card.


Looking for a DIY Valentine's gift this year? This DIY seven evil exes frame is the perfect reminder that love can be fun and totally crazy at the same time. Then check out the rest of the Movie Monday Challenge crafts!

Step 17

Now pull your frame and x’s back over and glue the x’s to your frame with E6000 as pictured.


Looking for a DIY Valentine's gift this year? This DIY seven evil exes frame is the perfect reminder that love can be fun and totally crazy at the same time. Then check out the rest of the Movie Monday Challenge crafts!

Step 18

Let your E6000 dry then reassemble your frame.


Looking for a DIY Valentine's gift this year? This DIY seven evil exes frame is the perfect reminder that love can be fun and totally crazy at the same time. Then check out the rest of the Movie Monday Challenge crafts!

This DIY seven evil exes frame turned out fantastically! As you may have guessed, my husband ended up loving Scott Pilgrim vs. The World too. That’s why this year I am giving him this DIY seven evil exes frame and card for Valentine’s Day. It is a sweet reminder of one of our favorite dates and an accurate representation of our nerdy love story.

Now it is time to check out all of the other awesome romance-inspired crafts in the Movie Monday Challenge Blog Hop. What is your favorite romance movie? See if you can find a craft to go with it below!

See where I’m linking up!

Don’t Forget to Pin It!

Looking for a DIY Valentine's gift this year? This DIY seven evil exes frame is the perfect reminder that love can be fun and totally crazy at the same time. Then check out the rest of the Movie Monday Challenge crafts!


On the last (or fourth) Monday of each month, a group of bloggers participate in a #MovieMondayChallenge, hosted by C’mon Get Crafty! We decide on a topic, genre, or specific movie to use for inspiration and everyone gets free reign to create something wonderful!


This month’s challenge was. . . . “Romance! Everyone was allowed to choose their own favorite romantic film for this challenge.

Now let’s see what everyone else was inspired to create for this month’s #MovieMondayChallenge!! If you’d like to join our Facebook group, you can request an invite here.

INLINKZ:


DIY Monogram Stenciled Sharpie Mug

How many Sharpie mug tutorials do you have saved on Pinterest?

Now tell me how many of those you have made.

Don’t feel bad. I have a ton pinned, too, and I’ve made… zero. I haven’t made any, until now. That’s what makes this new blog hop so much fun. We are finally making those pins we keep saving but never find the time to make. This month I made a DIY monogram stenciled Sharpie mug based on this awesome tutorial from Delicious and DIY.

Affiliate links may be used in this post. Ordering a product through these links may result in a commission at no extra cost to you. Read the full disclosure here.


Find out how to make this DIY monogram stenciled Sharpie mug. It is seriously easy and can be customized to your style. Then check out the rest of the Pinterest Challenge Blog Hop!


[bctt tweet=”Find out how easy it is to make this #DIY #monogram stenciled #Sharpiemug!” username=”diyadulation”]

Find out how to make this DIY monogram stenciled Sharpie mug. It is seriously easy and can be customized to your style. Then check out the rest of the Pinterest Challenge Blog Hop!

Materials


Find out how to make this DIY monogram stenciled Sharpie mug. It is seriously easy and can be customized to your style. Then check out the rest of the Pinterest Challenge Blog Hop!

Step 1

Start by placing your large middle initial stencil on your mug as pictured.


Find out how to make this DIY monogram stenciled Sharpie mug. It is seriously easy and can be customized to your style. Then check out the rest of the Pinterest Challenge Blog Hop!

Step 2

Next, add you first initial in the small stencil to the left of your middle initial.

Tip:

  • It is okay if the stencils overlap. Do what works for your design.


Find out how to make this DIY monogram stenciled Sharpie mug. It is seriously easy and can be customized to your style. Then check out the rest of the Pinterest Challenge Blog Hop!

Step 3

Finish the monogram by adding your last initial in the small stencil to the right of your middle initial.


Find out how to make this DIY monogram stenciled Sharpie mug. It is seriously easy and can be customized to your style. Then check out the rest of the Pinterest Challenge Blog Hop!

Step 4

Add the decorative underline stencil beneath your monogram.


Find out how to make this DIY monogram stenciled Sharpie mug. It is seriously easy and can be customized to your style. Then check out the rest of the Pinterest Challenge Blog Hop!

Step 5

Then begin adding your butterfly stencils.


Find out how to make this DIY monogram stenciled Sharpie mug. It is seriously easy and can be customized to your style. Then check out the rest of the Pinterest Challenge Blog Hop!

Step 6

Continue until you have the desired number of butterflies.

Step 7

Pull out your pink, green, and orange paint markers. If they are new, press the tip down repeatedly on a piece of paper until the paint comes out.


Find out how to make this DIY monogram stenciled Sharpie mug. It is seriously easy and can be customized to your style. Then check out the rest of the Pinterest Challenge Blog Hop!

Step 8

Start adding paint by dabbing your green paint marker at random over your stencils.


Find out how to make this DIY monogram stenciled Sharpie mug. It is seriously easy and can be customized to your style. Then check out the rest of the Pinterest Challenge Blog Hop!

Step 9

Next, do the same with your pink paint marker.


Find out how to make this DIY monogram stenciled Sharpie mug. It is seriously easy and can be customized to your style. Then check out the rest of the Pinterest Challenge Blog Hop!

Step 10

Lastly, fill in the remaining areas of your stenciled design with your orange paint marker.


Find out how to make this DIY monogram stenciled Sharpie mug. It is seriously easy and can be customized to your style. Then check out the rest of the Pinterest Challenge Blog Hop!

Step 11

Carefully start removing your stencils while your paint is still wet.

Tip:

  • Some of the paint ran a little but since I was going for a watercolor look, this added to it. If you are going for a crisp design, go lighter on your paint when dabbing on the stencils.

Step 12

Continue until all of your stencils are removed from the mug.


Find out how to make this DIY monogram stenciled Sharpie mug. It is seriously easy and can be customized to your style. Then check out the rest of the Pinterest Challenge Blog Hop!

Find out how to make this DIY monogram stenciled Sharpie mug. It is seriously easy and can be customized to your style. Then check out the rest of the Pinterest Challenge Blog Hop!

Note:

  • I didn’t like the look with only 2 butterflies after the stencils were removed so I added a 3rd butterfly.


Find out how to make this DIY monogram stenciled Sharpie mug. It is seriously easy and can be customized to your style. Then check out the rest of the Pinterest Challenge Blog Hop!

Step 13

Allow your paint to dry completely before moving on.

Step 14

Bake your cup in the over according to the tutorial on Delicious and DIY.

Tips:

  • Although she doesn’t say this, I put my cup in the cold oven while it pre-heated. I worried that putting a cold cup (it is winter, after all) in a hot oven would make it crack.
  • After the timer went off, I turned off the oven and cracked the door. This allowed the cup to cool down slowly, again to prevent it from cracking.


Find out how to make this DIY monogram stenciled Sharpie mug. It is seriously easy and can be customized to your style. Then check out the rest of the Pinterest Challenge Blog Hop!

Find out how to make this DIY monogram stenciled Sharpie mug. It is seriously easy and can be customized to your style. Then check out the rest of the Pinterest Challenge Blog Hop!

Find out how to make this DIY monogram stenciled Sharpie mug. It is seriously easy and can be customized to your style. Then check out the rest of the Pinterest Challenge Blog Hop!

Find out how to make this DIY monogram stenciled Sharpie mug. It is seriously easy and can be customized to your style. Then check out the rest of the Pinterest Challenge Blog Hop!

That’s all there is to this DIY monogram stenciled Sharpie mug. It is seriously easy and can be customized to your style. Don’t forget to check out Delicious and DIY to show her some love for the awesome idea! Then come back here and check out the other creations in the Pinterest Challenge Blog Hop. Hopefully we’ll inspire you to start making all of those awesome ideas you keep pinning.

See where I’m linking up!

Don’t Forget to Pin It!

Find out how to make this DIY monogram stenciled Sharpie mug. It is seriously easy and can be customized to your style. Then check out the rest of the Pinterest Challenge Blog Hop!

To join next month’s challenge, click here to sign-up ⇒ February Pinterest Challenge


Now let’s see what other things Pinterest inspired! Head over and visit the other hosts to see what they crafted, cooked, built, or tried!

Pinterest Challenge

Erlene – My Pinterventures • Shirley – Intelligent Domestications

Michelle – Our Crafty Mom • Molly – Just a Little Creativity

Marie – DIY AdulationJenny – Cookies Coffee and Crafts

Joanne – Our Unschooling JourneyEmily – Domestic Deadline

Roseann – This Autoimmune Life • Trisha – Blowing Away Out West

Sam – Raggedy Bits • Lynne – My Family Thyme • Beverly – Across the Blvd.

Debra – Shoppe No. 5 • Lauren – Mom Home Guide • Emily – Domestic Deadline

Heather – Glitter on a Dime •  Gwen – Geez, Gwen! • Blake – Style Island 

Kristie – Teadoodles • Kelly – Under A Texas Sky • Candice – Fearlessly Creative Mammas

Chelc – Inside the Fox Den • Megan – C’mon Get Crafty