8 Easy Jar Crafts for Halloween and Fall +MM 173

Don’t you just love inexpensive and easy décor ideas? Each week I am blown away by the unique and creative ideas shared at the Merry Monday link party. This is especially true of the recycled crafts. You can’t help but look at them and think, “Oh my gosh, that is so clever!” These crafts prove that creativity and ingenuity go hand-in-hand. That’s why this week I am featuring 8 easy jar crafts for Halloween and fall. These bloggers have created some amazing décor that is crazy easy to make.

These 8 easy jar crafts for Halloween and fall prove that creativity and ingenuity go hand-in-hand. They will make you think, “Omgosh, that is so clever!”


[bctt tweet=”These 8 easy #jarcrafts for Halloween and #fall make you think, “Omgosh, that is so clever!” ” username=”diyadulation”]


These 8 easy jar crafts for Halloween and fall prove that creativity and ingenuity go hand-in-hand. They will make you think, “Omgosh, that is so clever!”

Decorative Glass Jars for Fall (Angie at The Country Chic Cottage)

The metallic pops on this white jar make is a truly stunning piece of décor. You won’t believe how incredibly easy it is to make, either.


These 8 easy jar crafts for Halloween and fall prove that creativity and ingenuity go hand-in-hand. They will make you think, “Omgosh, that is so clever!”

Plaid Jars for the Fall (Carrie at Curly Crafty Mom)

Can you believe that these plaid jars are made with paint?! Her tutorial makes it easy to achieve the look on your own recycled jars.


These 8 easy jar crafts for Halloween and fall prove that creativity and ingenuity go hand-in-hand. They will make you think, “Omgosh, that is so clever!”

Indoor Fairy Garden (Angie at The Country Chic Cottage)

This little vignette is perfect for fall. Anyone else want to make a bunch of different ones to display on the mantel or is it just me?


These 8 easy jar crafts for Halloween and fall prove that creativity and ingenuity go hand-in-hand. They will make you think, “Omgosh, that is so clever!”

Sugar Skull Mason Jar Craft (Ann at Ann’s Entitled Life)

Love sugar skulls? Then this easy jar craft is for you. It is adorable and playful… basically perfect for your Day of the Dead celebration!


These 8 easy jar crafts for Halloween and fall prove that creativity and ingenuity go hand-in-hand. They will make you think, “Omgosh, that is so clever!”

Concrete Mason Jar Planter (Angie for Resin Crafts)

I seriously love everything about this planter. The modern look of the concrete mixed with that classic Mason jar design is gorgeous and practical.


These 8 easy jar crafts for Halloween and fall prove that creativity and ingenuity go hand-in-hand. They will make you think, “Omgosh, that is so clever!”

Homemade Chalk Paint Recipe Jars (Erlene at My Pinterventures)

Not only is she showing you how to make these gorgeous jars for your fall décor, she is also sharing her recipe for homemade chalk paint. Score!


These 8 easy jar crafts for Halloween and fall prove that creativity and ingenuity go hand-in-hand. They will make you think, “Omgosh, that is so clever!”

Funny Jar O’ Monsters made from Spoons (Susan at Suzy’s Sitcom)

This is a great jar craft to get the kids in on making. The monsters are so super cute and fun. Kids will love making them almost as much as playing with them.


These 8 easy jar crafts for Halloween and fall prove that creativity and ingenuity go hand-in-hand. They will make you think, “Omgosh, that is so clever!”

Recycle a Glass Jar (Licia at Hobby e Creativita)

Have an old jar and a doily? Then you have everything you need to make this gorgeous luminary.


These 8 easy jar crafts for Halloween and fall prove that creativity and ingenuity go hand-in-hand. They will make you think, “Omgosh, that is so clever!”

Which one of these 8 easy jar crafts for Halloween and fall is your favorite? I absolutely love those plaid ones. They are perfect fall décor all season long. Looks like I’m going to have to run out and buy some yogurt so I can save the jars for this project! Now that you’ve checked out the features it is time to get the party started! Link up your latest ideas or simply check out all of the amazing posts being shared. See you down there!

Don’t Forget to Pin It!

These 8 easy jar crafts for Halloween and fall prove that creativity and ingenuity go hand-in-hand. They will make you think, “Omgosh, that is so clever!”

DIY Glowing Pirate Trick-or-Treat Bag

Do your kids normally carry those generic tick-or-treat bags or pumpkin buckets for Halloween? That is what our family usually does but as the kids get older they are requesting costumes that have more accessories. What not try something different this year with us? This DIY glowing pirate trick-or-treat bag lets you coordinate the entire buccaneer look. It also increases visibility of your little one to help keep your child safe. The best part is that this can be worn across your children to free up their hands for swords, hooks, and holding your hand. Add all of that up and you have one awesome and practical costume accessory.

Affiliate links may be used in this post. Ordering a product through these links may result in a commission at no extra cost to you. Read the full disclosure here.

This DIY glowing pirate trick-or-treat bag lets you coordinate the entire buccaneer look, increases visibility of your kid, and frees up little hands.


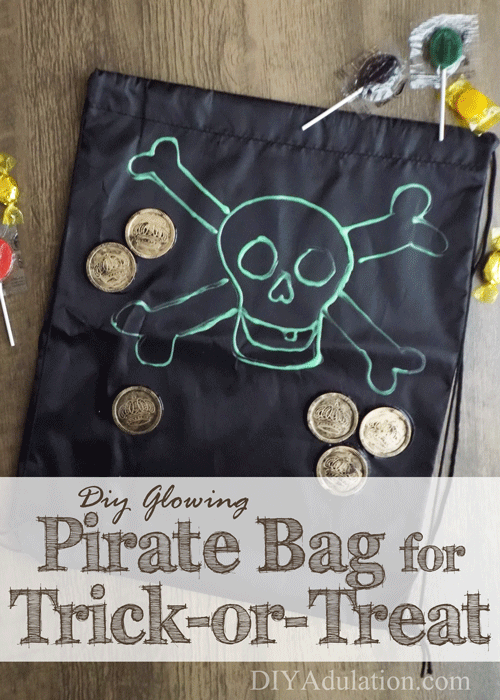
[bctt tweet=”This #DIY glowing #pirate trick-or-treat #bag increases visibility and frees up little hands!” username=”diyadulation”]

Materials


This DIY glowing pirate trick-or-treat bag lets you coordinate the entire buccaneer look, increases visibility of your kid, and frees up little hands.

Step 1

Open up your jumbo checkers game.


This DIY glowing pirate trick-or-treat bag lets you coordinate the entire buccaneer look, increases visibility of your kid, and frees up little hands.

Step 2

Set your red checkers and the board aside.

Note:

  • You will not be using them for this project.


This DIY glowing pirate trick-or-treat bag lets you coordinate the entire buccaneer look, increases visibility of your kid, and frees up little hands.

This DIY glowing pirate trick-or-treat bag lets you coordinate the entire buccaneer look, increases visibility of your kid, and frees up little hands.

Step 3

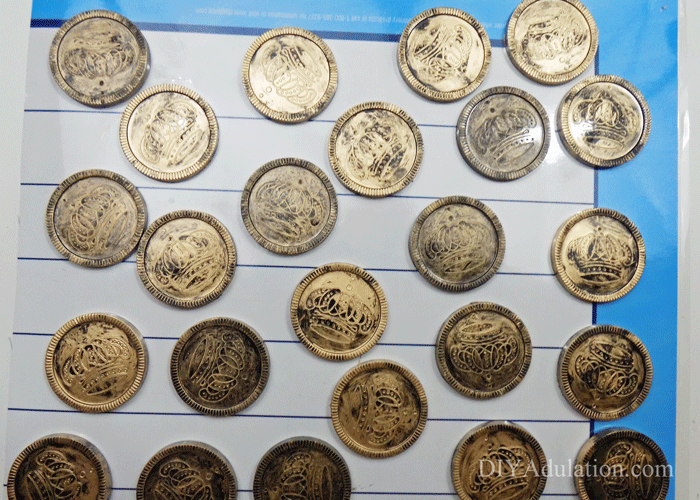
Now paint your black checkers with gold enamel paint.

Tips:

  • Do not completely cover the checkers. You want some of the black to show through the paint.
  • One brush dip should by enough to paint 2-3 checkers.


This DIY glowing pirate trick-or-treat bag lets you coordinate the entire buccaneer look, increases visibility of your kid, and frees up little hands.

Step 4

Set you painted checkers aside to dry.


This DIY glowing pirate trick-or-treat bag lets you coordinate the entire buccaneer look, increases visibility of your kid, and frees up little hands.

Step 5

Now pull out your drawstring bag.


This DIY glowing pirate trick-or-treat bag lets you coordinate the entire buccaneer look, increases visibility of your kid, and frees up little hands.

Step 6

Next, paint the outline of your skull in the top center of your bag with glow fabric paint.


This DIY glowing pirate trick-or-treat bag lets you coordinate the entire buccaneer look, increases visibility of your kid, and frees up little hands.

Step 7

Then add your skull’s eye sockets, nose cavity, and mouth.


This DIY glowing pirate trick-or-treat bag lets you coordinate the entire buccaneer look, increases visibility of your kid, and frees up little hands.

Step 8

Start painting the crossbones starting at the top left of your skull.


This DIY glowing pirate trick-or-treat bag lets you coordinate the entire buccaneer look, increases visibility of your kid, and frees up little hands.

Step 9

Continue painting the crossbones.

Tip:

  • Make sure that the opposite corner bones line up as though they continue behind your skull.

Step 10

Set your bag aside and let the fabric paint dry completely.


This DIY glowing pirate trick-or-treat bag lets you coordinate the entire buccaneer look, increases visibility of your kid, and frees up little hands.

Step 11

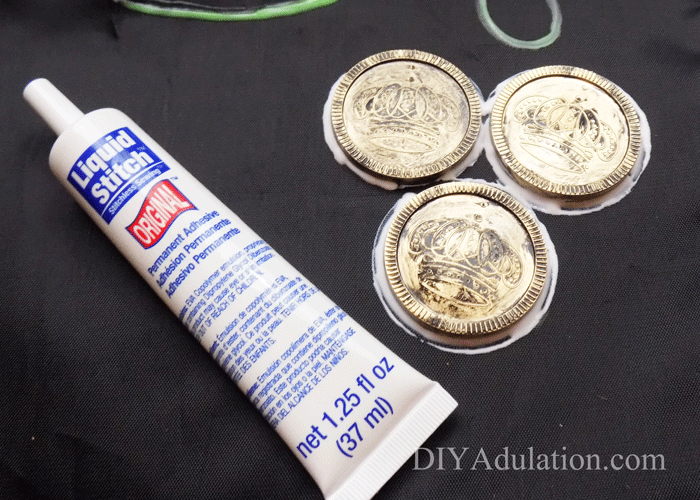
After all of your paint has dried, add Liquid Stitch to the bottom edge of your checkers.


This DIY glowing pirate trick-or-treat bag lets you coordinate the entire buccaneer look, increases visibility of your kid, and frees up little hands.

Step 12

Next, stick the checkers to your bag.


This DIY glowing pirate trick-or-treat bag lets you coordinate the entire buccaneer look, increases visibility of your kid, and frees up little hands.

Step 13 (Optional)

Add an additional line of Liquid Stitch around edges of the attached checkers to further secure them.


This DIY glowing pirate trick-or-treat bag lets you coordinate the entire buccaneer look, increases visibility of your kid, and frees up little hands.

Step 14

Let the glue dry completely.

Tip:

  • I let mine dry for 24 hours just to be sure everything was secure.


This DIY glowing pirate trick-or-treat bag lets you coordinate the entire buccaneer look, increases visibility of your kid, and frees up little hands.

This DIY glowing pirate trick-or-treat bag lets you coordinate the entire buccaneer look, increases visibility of your kid, and frees up little hands.

Now your kids can have a hands-free treat collector this Halloween. This DIY glowing pirate trick-or-treat bag is also great in case you end up having to carry it for the younger children while the older ones finish trick-or-treating. There is a 5 year gap between our oldest and youngest child. The 8 year old lasts much longer than the 3 year old as is expected. When that happens, I can throw this bag on my back and still have free hands and arms for the wee ones. Come back tomorrow to see the coordinating costumes for this bag and get some great face painting tutorials! See you then! **Update** The costumes and face paint will go live on Monday. Thanks!!

See where I’m linking up!

Don’t Forget to Pin It!

This DIY glowing pirate trick-or-treat bag lets you coordinate the entire buccaneer look, increases visibility of your kid, and frees up little hands.

DIY Mini Pumpkin Lanterns :: Easy Fall Decor Idea

Fall is officially near and that can only mean that Halloween is right around the corner. My inner child is crazy giddy right now. Don’t get me wrong, I love the fun, freedom, and heat of summer. It doesn’t speak to my soul like fall. The beautiful colors, pumpkins everywhere, and the chill in the air all create an ethereal atmosphere that is pure comfort. Whether you love the fall or not, you can’t deny that September is the official go ahead to start your fall decorating. These easy DIY mini pumpkin lanterns are the perfect little addition to your fall mantle.

Affiliate links may be used in this post. Ordering a product through these links may result in a commission at no extra cost to you. Read the full disclosure here.

These easy DIY mini pumpkin lanterns are the perfect little addition to your fall mantle or bookshelves this season. Find out how to make them now!


[bctt tweet=”These easy #DIY mini #pumpkin lanterns are the perfect little addition to your fall mantle!” username=”diyadulation”]

Materials


These easy DIY mini pumpkin lanterns are the perfect little addition to your fall mantle or bookshelves this season. Find out how to make them now!

Step 1

Remove the lids from 4 pumpkin boxes and set the lids aside.

Note:


These easy DIY mini pumpkin lanterns are the perfect little addition to your fall mantle or bookshelves this season. Find out how to make them now!

These easy DIY mini pumpkin lanterns are the perfect little addition to your fall mantle or bookshelves this season. Find out how to make them now!

Step 2

Next, paint the inside of each pumpkin box with your black acrylic paint.

Step 3

Let the paint dry completely.


These easy DIY mini pumpkin lanterns are the perfect little addition to your fall mantle or bookshelves this season. Find out how to make them now!

Step 4

Then cut out 2 small triangle eyes on each pumpkin box with your utility knife.

Tips:

  • Cut from the inside of your pumpkin (the part you painted black) to keep the box from bending or collapsing while cutting.
  • Also cut on top of a cutting mat to protect your work surface.


These easy DIY mini pumpkin lanterns are the perfect little addition to your fall mantle or bookshelves this season. Find out how to make them now!

Step 5

Next, cut a mouth beneath the eyes on each pumpkin box with your utility knife.

Tip:

  • Again, cut from the inside and on top of a cutting mat.


These easy DIY mini pumpkin lanterns are the perfect little addition to your fall mantle or bookshelves this season. Find out how to make them now!

Step 6

Turn your pumpkin boxes over and cover the outside of each one with black acrylic paint.

Step 7

Allow the paint to dry completely before moving on.


These easy DIY mini pumpkin lanterns are the perfect little addition to your fall mantle or bookshelves this season. Find out how to make them now!

Step 8

Next, add a light layer of orange paint over the black paint on the outside of your pumpkin boxes.

Tip:

  • The layer should be light enough that you can see the black show through.

Step 9

Let your orange paint dry.


These easy DIY mini pumpkin lanterns are the perfect little addition to your fall mantle or bookshelves this season. Find out how to make them now!

Step 10

Lastly, add electric tea lights to your lanterns and place where you would like to display them.

**Warning**

Do not use actual flames with these. They are flammable. Use electronic candles only.


These easy DIY mini pumpkin lanterns are the perfect little addition to your fall mantle or bookshelves this season. Find out how to make them now!

These easy DIY mini pumpkin lanterns are the perfect little addition to your fall mantle or bookshelves this season. Find out how to make them now!

These easy DIY mini pumpkin lanterns are the perfect little addition to your fall mantle or bookshelves this season. Find out how to make them now!

These easy DIY mini pumpkin lanterns are the perfect little addition to your fall mantle or bookshelves this season. Find out how to make them now!

These DIY mini pumpkin lanterns turned out so fantastically. Add them to stacked books on your mantle for gorgeous fall décor. I also paired mine with a brown pillar candle on a wrought-iron pedestal. It adds that touch of vintage spook that is perfect. Don’t forget to check out the Sweet DIY Pumpkin Banner that is made with the lids to the pumpkin boxes. Then come back next week for a fun Halloween game made from the boxes. Can you believe one little item can lead to so much fall fun?! Talk about an awesome buy to rock your autumn season.

See where I’m linking up!

Don’t Forget to Pin It!

These easy DIY mini pumpkin lanterns are the perfect little addition to your fall mantle or bookshelves this season. Find out how to make them now!