DIY Custom Beer Mugs for St. Patrick’s Day

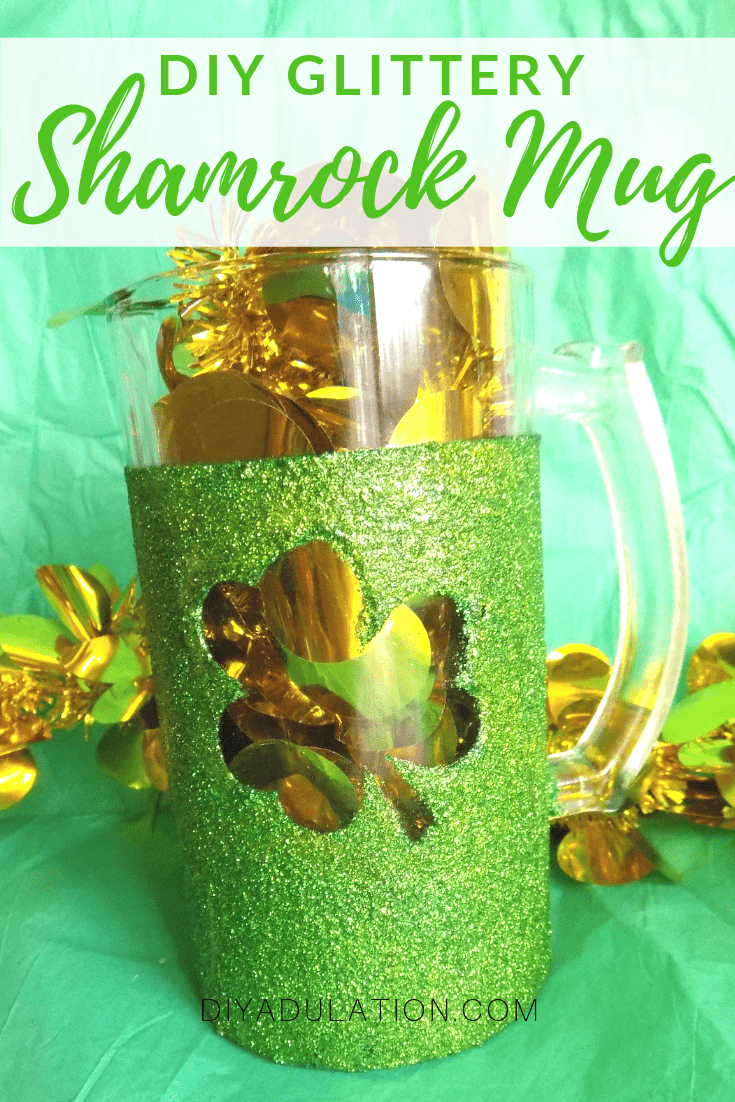
It’s March 1st and that can only mean one thing: It’s time to start crafting for St. Patrick’s Day! As promised on Sunday, here is the first green craft for the year. These DIY custom beer mugs for St Patrick’s Day are easy to make and the perfect home for your green beer this year.

Affiliate links may be used in this post. Ordering a product through these links may result in a commission. Read the full disclosure here.

Collage of Glitter Shamrock Beer Mugs with text overlay - Custom Beer Mugs for St Patricks Day


[bctt tweet=”Grab the glitter and Mod Podge! These DIY custom beer mugs for St Patrick’s Day are easy to make and the perfect home for your green beer this year.” username=”diyadulation”]

This month I’m trying out a new fun blog hop. Every month we are given a craft medium and we have to create a DIY project with it. You know how much I love a challenge and this month is Mod Podge! Of course, that is the perfect excuse to pull out the glitter.


Close up of Glittery Shamrock Mugs on Green Background

These DIY custom beer mugs for St. Patrick’s Day are full of sparkle and fun, perfect for any celebration. No worries if you’re not a beer drinker. They can totally be filled with whatever you want, like this family-friendly Lucky Lime Punch Recipe!

Even better, these babies are dishwasher safe on the top rack after they are fully cured. The wait time is the worst part of this project but the end result is so worth it. Not to mention, it’s a super easy craft to actually make.


Close up of Glittery Shamrock Mugs on Wood Background

Custom Beer Mugs Materials


2 Clear Glass Steins on Their Sides

Step 1

First, clean your mugs with rubbing alcohol as recommended on the Mod Podge instructions.


Blue Painters Tape on Top of Clear Glass Stein

Step 2

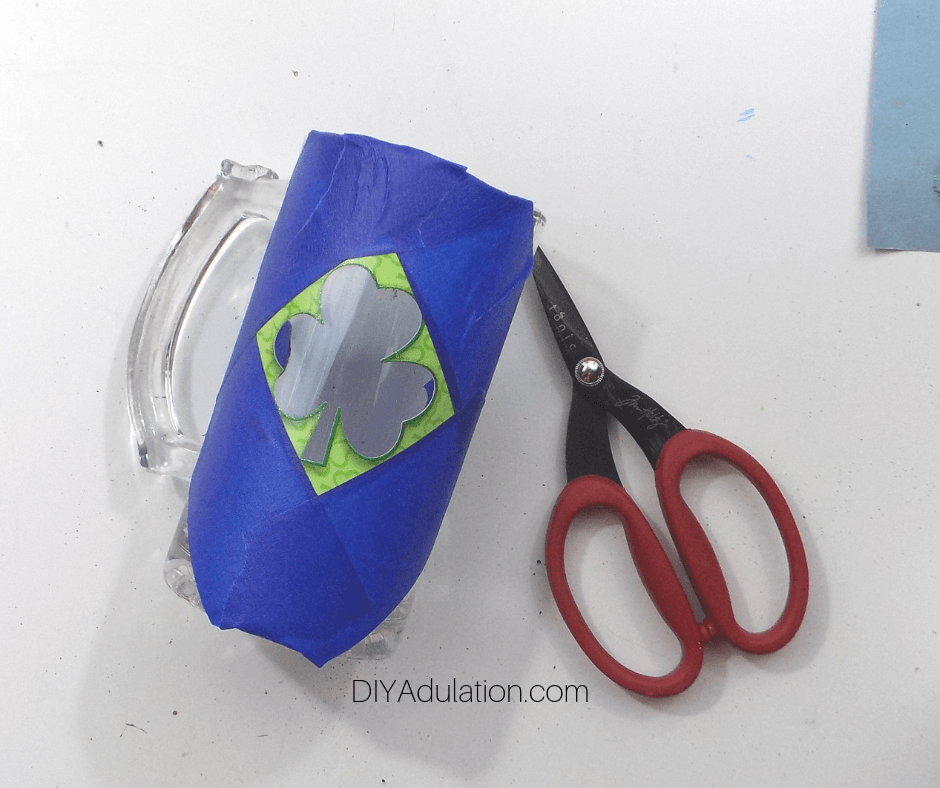
Next, add a strip of blue painter’s tape to the top of one of your clear glass steins. It should be at least 2 inches wide from the lip of the stein.


Shamrock Sticker and Blue Painters Tape on Clear Glass Stein

Step 3

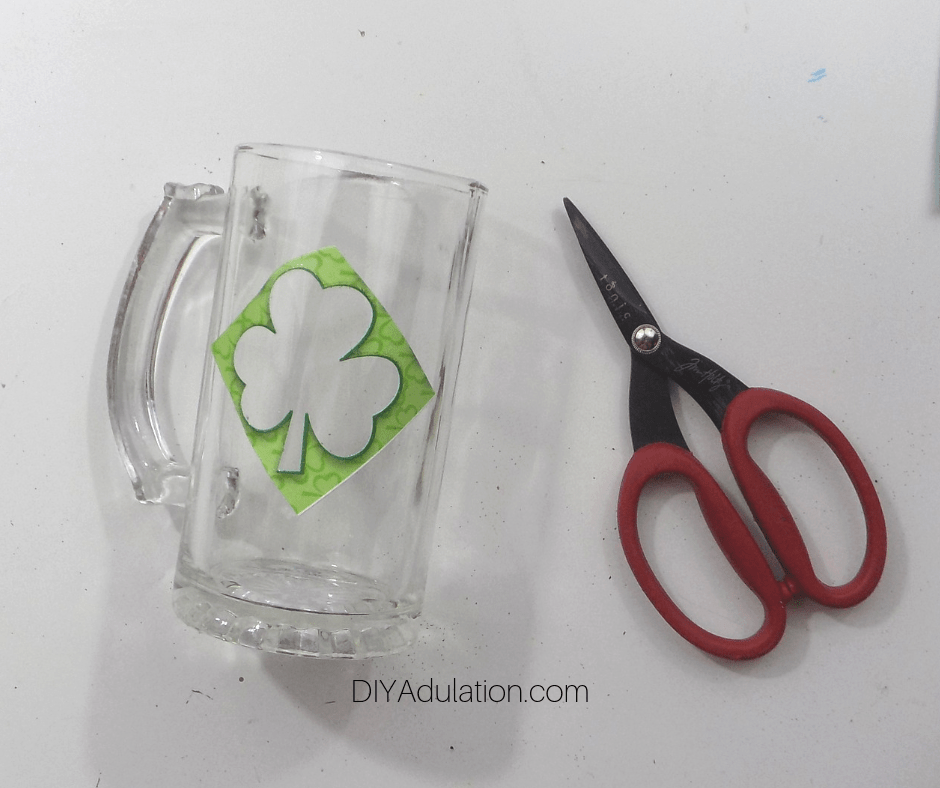
Now, attach one of your shamrock stickers to the front of the glass stein. Be sure to press it down firmly to ensure it is nicely adhered to the glass.


Mod Podge on Clear Glass Stein with Shamrock Sticker

Step 4

Then cover your clear glass stein in a layer of Mod Podge. Do not cover the handle.

Step 5

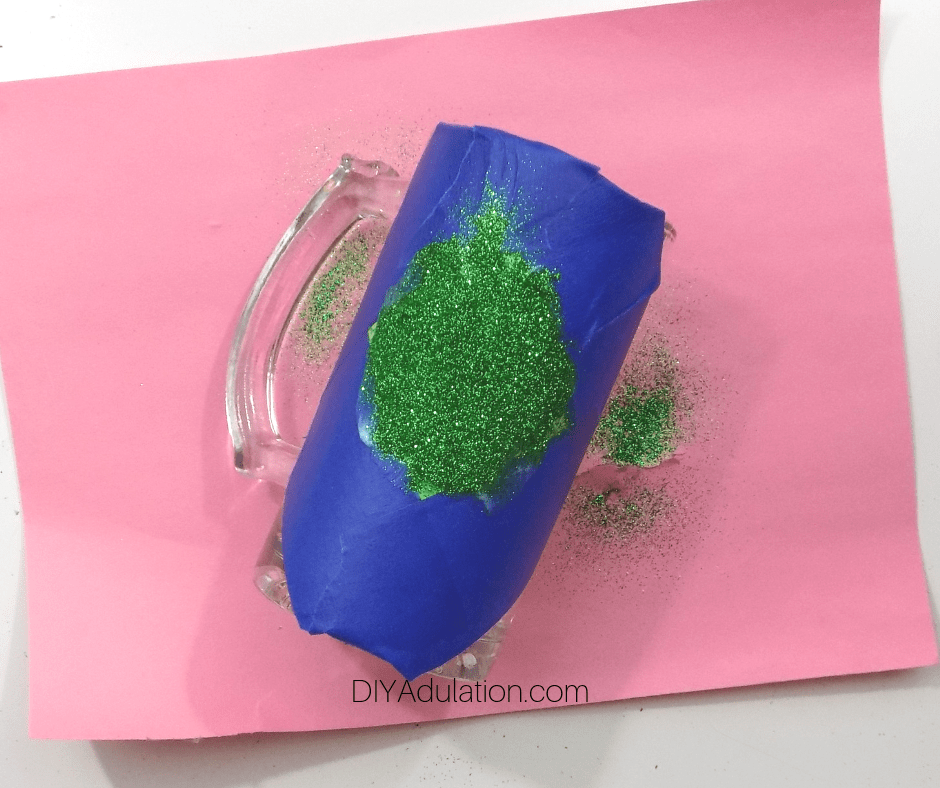
Before adding glitter, place a piece of construction paper on your work surface. This protects the surface and also makes it easy to return excess glitter to the container.


Hand Holding Green Glitter Covered Stein

Step 6

Next, generously coat with green glitter. Shake off the excess as needed and return the excess to your container when you finish.

Step 7

If needed, touch up any areas that need additional glitter. You want a nice even coat on your stein.


Hand Holding Green Glitter Stein with Shamrock in Center

Hand Holding Green Glitter Stein with Blue Tape Removed and Shamrock in Center

Step 8

Then carefully remove the shamrock sticker and painters tape from your stein. Touch up any areas where the Mod Podge seeped under the tape or sticker.


Dried Green Glitter Stein with Shamrock Window

Step 9

Set your stein to the side and allow to dry for 2-3 hours.


Shamrock Sticker Negative Cut Out of Sticker Sheet next to Scissors

Step 10

Next, cut the shamrock sticker outline out of your sticker sheet.


Shamrock Sticker Negative on Clear Glass Stein next to Scissors

Step 11

Carefully place the shamrock outline on your glass stein, again firmly press the edges to ensure they are stuck to the glass.


Blue Painters Tape Around Edges of Shamrock Sticker Negative on Clear Glass Stein next to Scissors

Step 12

Because the edges on the shamrock outline are so thin, press painters tape around them.


Mod Podge on Shamrock on Clear Glass Stein

Step 13

Now, add a coat of Mod Podge to the shamrock.


Green Glitter over Stencil on Stein

Step 14

Again, place a piece of construction paper under the stein and cover the shamrock in a generous coat of green glitter.


Green Glitter Shamrock on Clear Glass Stein

Step 15

Then carefully remove the painters tape and shamrock sticker outline.

Step 16

As before, touch up any areas where the Mod Podge seeped under.

Step 17

Now set your stein aside and allow to dry for 2-3 hours.


Additional Coat of Mod Podge on Green Glitter Stein with Shamrock Window

Additional Coat of Mod Podge on Glitter Shamrock Clear Glass Stein

Step 18

After your steins are dry, add another coat of Mod Podge to each. Take care to only cover the glittery areas.

Step 19

Again, allow the steins to dry another 2-3 hours.

Step 20

Repeat steps 18 and 19 two more times. Make sure you allow each coat to dry before adding the next.

Step 21

Lastly, allow your steins to cure for 28 days. Once they are cured, they are dishwasher safe on the top rack.


Close up of Glittery Shamrock Mugs next to Garland

Close up of Glitter Shamrock Beer Mug with text overlay - Custom Beer Mugs for St Patricks Day

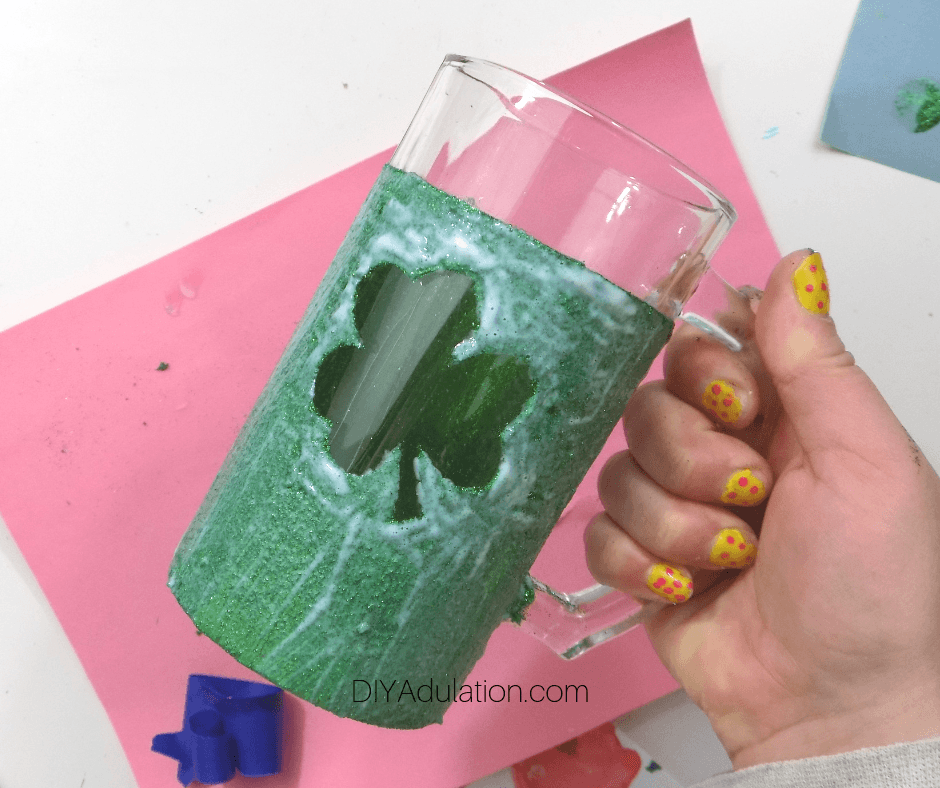
I’m totally in love with how these DIY custom beer mugs for St. Patrick’s Day turned out! They are glittery, pretty, and green… everything you want for a fun holiday. Share one with a girlfriend or give one to hubs to use (I recommend keeping the extra glittery one for yourself because, shiny). Either way, you’ll love sipping your favorite festive drink out of this DIY creation.

See where I’m linking up!

Don’t Forget to Pin It!

Close up of Glitter Shamrock Beer Mug with text overlay - Custom Beer Mugs for St Patricks Day


Bring on the Crafts 700 x 550

Bring on the Crafts — A Craft & DIY Blog Hop

On the first Wednesday of each month, a group of DIY and crafty bloggers join forces. Together with hosts Marie from The Inspiration Vault and Habiba from Craftify My Love, they bring you the #BringontheCrafts blog hop. Each blogger creates a fun craft or DIY project to share that follows a monthly materials theme. March’s theme is Mod Podge! Each blogger chooses their own craft to make as long as they love it and it uses Mod Podge in the project.

Our March Co-hosts

Jenny at Cookies, Coffee and Crafts • Gail at Purple Hues and Me
Heather at Glitter on a Dime • Marie at DIY Adulation • Janet at Try It – Like It

Join in on the fun! If you’d like to participate next month, you can request to join our Bring on the Crafts Facebook Group. Next month’s theme is Flowers!

Not a blogger, but a creative mind none the less!? Don’t worry, Share your awesome creations in our Craft Cult Facebook Group. This is also a great place to ask craft & DIY related questions and find inspiration for your next project.

Now let’s see all of those amazing Craft and DIY Projects!

Inlinkz Link Party


More Ideas You’ll Love:

Easy Upcycled Easter Napkin Rings for your Table

Creating a beautiful Easter table doesn’t have to cost a fortune. Save money and add elegant place settings to your table when you make these easy upcycled Easter napkin rings. They come together quickly and easily turn a regular plate into an inviting decor piece.

Affiliate links may be used in this post. Ordering a product through these links may result in a commission. Read the full disclosure here.

Collage of Easter Napkin Rings and Easter Place Setting with text overlay - Easy Upcycled Easter Napkin Rings


[bctt tweet=”Creating a beautiful Easter table doesn’t have to cost a fortune. Save money and add elegance to your table with these easy upcycled Easter napkin rings.” username=”diyadulation”]

Easter with my in-laws is a large, casual affair. When we eat, it’s buffet style and you find a seat where you can. It’s nice but it can be equally nice to have a properly set table with a family style meal. My family is much smaller so we can all fit at one table during the holidays.

The really great part is that I get the best of both worlds. These Easter napkin rings are great for my smaller family gathering. They’re exactly what you need to dress up your Easter table too. Don’t worry, though. They are super easy to make, not-to-mention fast.


Easter Napkin Ring with Napkin Inside on Plate

Craft Supplies next to Flowers and Shower Curtain Rings

Easter Napkin Rings Materials

Step 1

First, cut a length of craft ribbon that is 16-24 inches depending on the width of your ribbon. (The thinner your ribbon, the longer the length needs to be.)

Step 2

Next, place a small dot of hot glue on the inside of your shower ring at the place where it snaps closed.


End of Ribbon Glued to Shower Ring

Step 3

Now press the end of your length of ribbon into the glue and begin wrapping the ribbon around the shower curtain ring.


Close up of Shower Ring Wrapped in Ribbon

Step 4

Continue wrapping the ribbon until the entire shower ring is covered, then secure the end using hot glue. Trim off any excess ribbon and set to the side.

Step 5

Repeat steps 1-4 until your have the desired number of shower rings that you need covered.

Tips:


Square Piece of Burlap

Step 6

Next, cut a piece of burlap that is 5” long from your roll.


Hand Folding Piece of Burlap

Step 7

Now, fold the unfinished sides to the middle and secure with hot glue.

Note:


Hand Holding Small Folded Piece of Burlap

Step 8

Next, fold the finished sides to the middle and, again, secure with hot glue.


Close up of Glitter Eggs and Leaf on Burlap

Step 9

Then, flip your burlap piece over so that the glued edges are on the bottom and glue 2 glittered eggs to it as pictured.

Step 10

Next, glue one of your leaves to the burlap so that the stem rests between the 2 eggs. (See the picture above step 9 for reference.)


Close up of Front Easter Napkin Ring in Row

Step 11

Lastly, attach a small flower to your burlap with hot glue.

Step 12

Again, repeat steps 6-11 until you have the number of burlap adornments needed to match your wrapped rings.


Close up of 2 Easter Napkin Rings

Step 13

Finish by gluing all of your burlap adornments to your rings.


Close up of Easter Napkin Ring with one in the Background

Close up of Easter Napkin Ring with Napkin Inside

Easter Napkin Rings with text overlay - Easy Upcycled Easter Napkin Rings

These easy upcycled Easter napkin rings will have your place settings holiday ready in no time. Simply place your napkins through your napkin rings and set the table! You’ll feel good saving money while still having an elegant table for guests. Not to mention, it totally gives you an excuse to get crafty this week. Totally a win-win!

See where I’m linking up!

Don’t Forget to Pin It!

Easter Place Setting with text overlay - Easy Upcycled Easter Napkin Rings


More Ideas You’ll Love:

Easy Valentine Scrapbook | Perfect for Gifting

Do you struggle to find time to scrapbook like you used to? This easy Valentine scrapbook is the perfect project for busy moms because you can work as you have time and pack it all away when you don’t. Even better, you’ll never lose your creative place because it comes with step-by-step instructions to make it easy.

This is a sponsored post written by me on behalf of Close to My Heart. I’ve used their products for years and am so excited to share them with you! All ideas and opinions are my own, as always.

Collage of Scrapbook Pages with text overlay - Easy Valentine Scrapbook


[bctt tweet=”This easy Valentine scrapbook is the perfect way for busy moms to enjoy making beautiful pages in the time they have. It totally makes a great gift too! #ad” username=”diyadulation”]

I first came across Close to My Heart products at a crop I attended years ago. It was seriously love at first site. They are beautiful designs and versatile products that get better and better every year.

I own tons of their stamps and their Cricut cartridges but I had never tried one of their scrapbook kits until now. Oh my gosh! They are awesome and so easy to use. They even give you the page sleeves!

These are the perfect kits for busy moms who can only squeeze in scrapbooking here and there. (Although you should totally ready How to Get Your Free Time Back as a SAHM.) Because you are following step-by-step instructions, you can easily come back to the project later and not forget what you were designing.


Close to My Heart Scrapbook Pages

Before we get to the tutorial, I want you to know that this one is a little different than normal. Your kit actually comes with step-by-step instructions. Instead of writing out all of these steps, I’m going to give you an abridged version with my tips and tricks to make it easier.

Some of the instructions are a little unclear and some I felt were in the wrong order. The instructions will absolutely work to get your beautiful scrapbook made. That’s totally one of the perks of Close to My Heart products. They have so many products that make your life easier and these kits are no exception.

Valentine Scrapbook Materials


Close to My Heart Open Scrapbook Kit Box

Step 1

The very first step is to open your kit and get everything organized.


Cut Out Scrapbook Elements

Step 2

Then you want to get all of your elements cut out.

Notes:


Cut Out Paper Elements for Pages

Step 3

Once you have all of your elements ready, you also want to cut out the papers as instructed. You can also label these for easier reference later.


Love Design Scrapbook Page

Step 4

Next, make your first page of your Valentine scrapbook. Again, because the kit comes with instructions, I’m not including the step-by-step for each page. However, you can see a photo of each step of page creation above the steps for every page except the first.


Photo collection of scrapbook page creation for easy Valentine Scrapbook

Step 5

Then make your second page.


Photo collection of scrapbook page creation for easy Valentine Scrapbook

Step 6

Continue and make the third page.


Photo collection of scrapbook page creation for easy Valentine Scrapbook

Step 7

Next make the fourth page of your Valentine scrapbook.


Photo collection of scrapbook page creation for easy Valentine Scrapbook

Photo collection of scrapbook page creation for easy Valentine Scrapbook

Step 8

Lastly, make the 5th and 6th pages of your Valentine scrapbook.


Love 2 Page Scrapbook Layout

2 Page Beautiful Title Scrapbook Layout

2 Page You Are So Loved Scrapbook Layout

Step 9

Once all of your pages are complete, slip them into an album or the page inserts that come with your kit.

Note:

Tips and Tricks

The instructions tell you to put on Shimmer Trim after adding embellishments… while you can do this, if you’re trying to make it look like the pictures, put it on a step or 2 earlier.

One really cool element that I LOVE is that the sequins come with adhesive on them! This is so convenient.

As I said above, one downfall is that is a lot of cutting upfront. Don’t skip this step, though. It makes the entire assembly so much easier when each element is ready to go before starting.


After you’ve finished your easy Valentine scrapbook, there are still plenty of materials leftover to make some gorgeous cards. This is perfect if you’re plan to give the scrapbook as a gift.


Collage of Scrapbook Pages with text overlay - Easy Valentine Scrapbook

This easy Valentine scrapbook is the perfect way for busy moms to enjoy making beautiful pages and they make a great gift too! Be sure to visit my friend Heather’s Close to My Heart website to order your kit today! Be sure to check out all of the other awesome kits while you’re there too. They’re all totally beautiful and easy to make.

See where I’m linking up!

Don’t Forget to Pin It!

Collage of Scrapbook Pages with text overlay - Easy Valentine Scrapbook


More Ideas You’ll Love: