Upcycled DIY Bank for Guys Night Fund

Are you looking for an easy Valentine gift for your husband this year? This upcycled DIY bank for guys night fund is the perfect gift for hubs that doesn’t break the bank (haha, get it?). Even better, you can make it without even leaving the house. Score!

Affiliate links may be used in this post. Ordering a product through these links may result in a commission. Read the full disclosure here.

Wood Bank next to Candle with text overlay - Upcycled DIY Bank for Guys Night Fund


[bctt tweet=”Looking for an easy Valentine gift for your husband this year? This upcycled DIY bank for guys night fund is the perfect gift for hubs on a budget.” username=”diyadulation”]

Between decluttering and fighting over our military pay, the last thing I want to do is run out and buy more stuff for hubs this Valentine’s Day. Of course, I still want to surprise him with a little gift and this upcycled DIY bank for guys night fund is exactly what I need. It uses up leftover packaging. It’s creative and thoughtful and it’s an easy way to say, “I love you”.

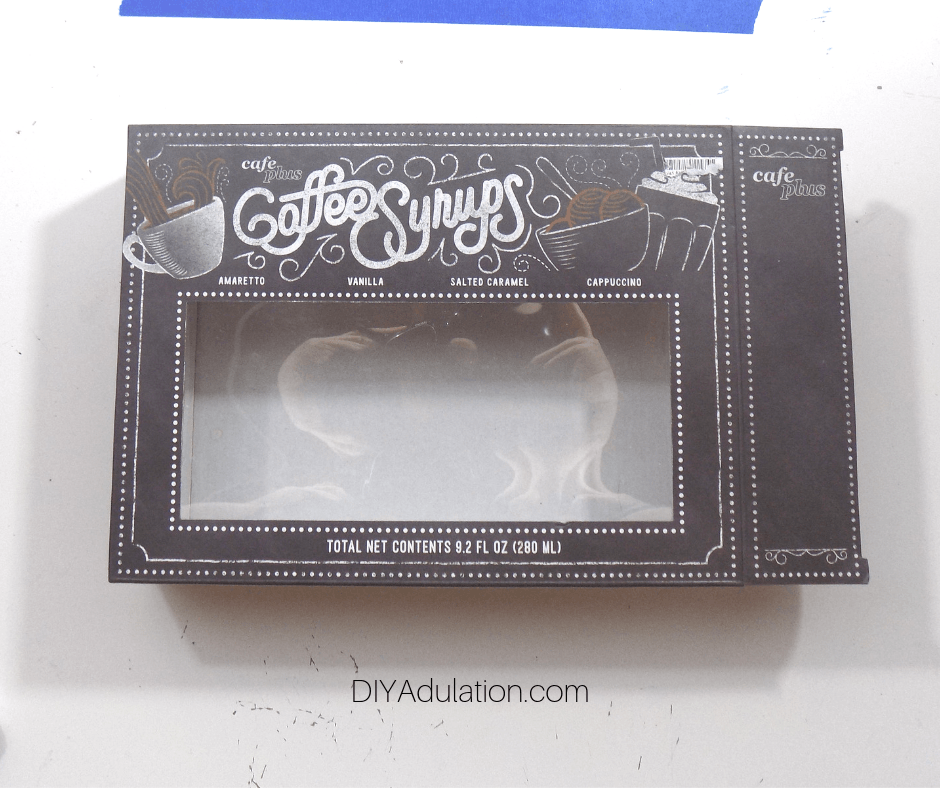
If you got a bunch of those kits or sets for Christmas last month then you already have what you need to make this super simple craft. Rescue one from the recycling bin and grab your craft supplies to make this awesome gift today!


Guys Night DIY Bank next to Map Candle

Materials for Guys Night Fund


Empty Coffee Syrups Box

Step 1

First, make sure your box is clean and empty.


Glob of Black Paint on Back of Box

Step 2

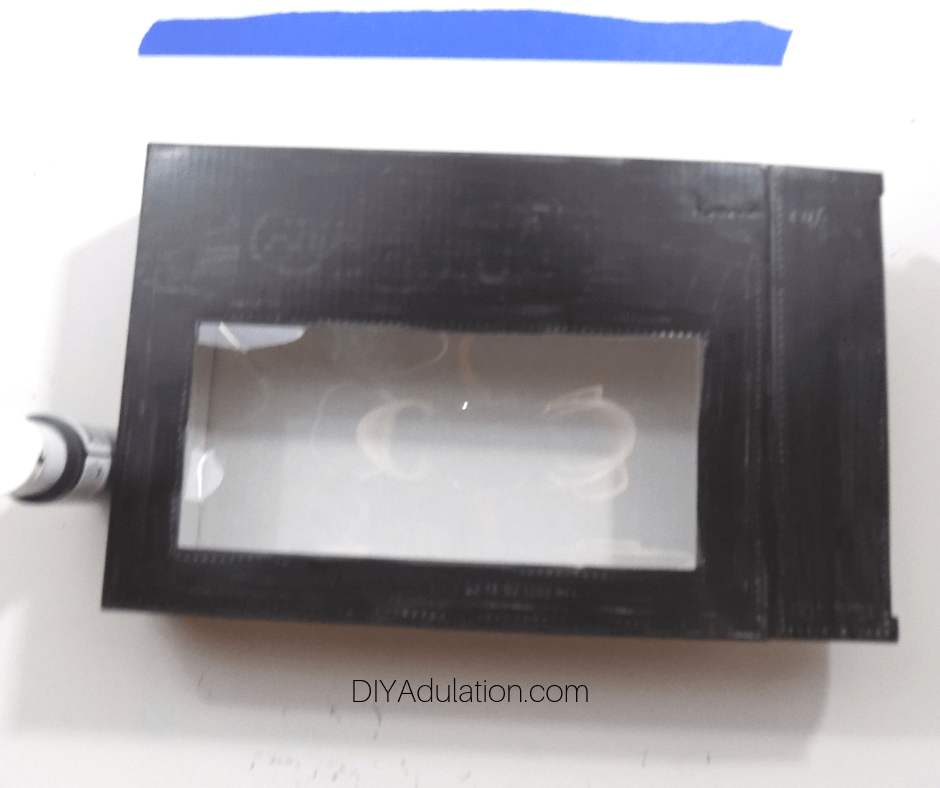
Next, begin painting the box with black acrylic paint.


Back of Black Painted Box

Front of Black Painted Box

Step 3

Cover your entire box with paint and then allow the paint to dry.


Decorative Wood Tape Around Box

Step 4

After your paint is dry, wrap your decorative tape around the box to measure the length you need.

Note:


Trimmed Decorative Wood Tape Around Box

Step 5

While your decorative tape is still wrapped around your box, trim the amount needed from your tape roll.
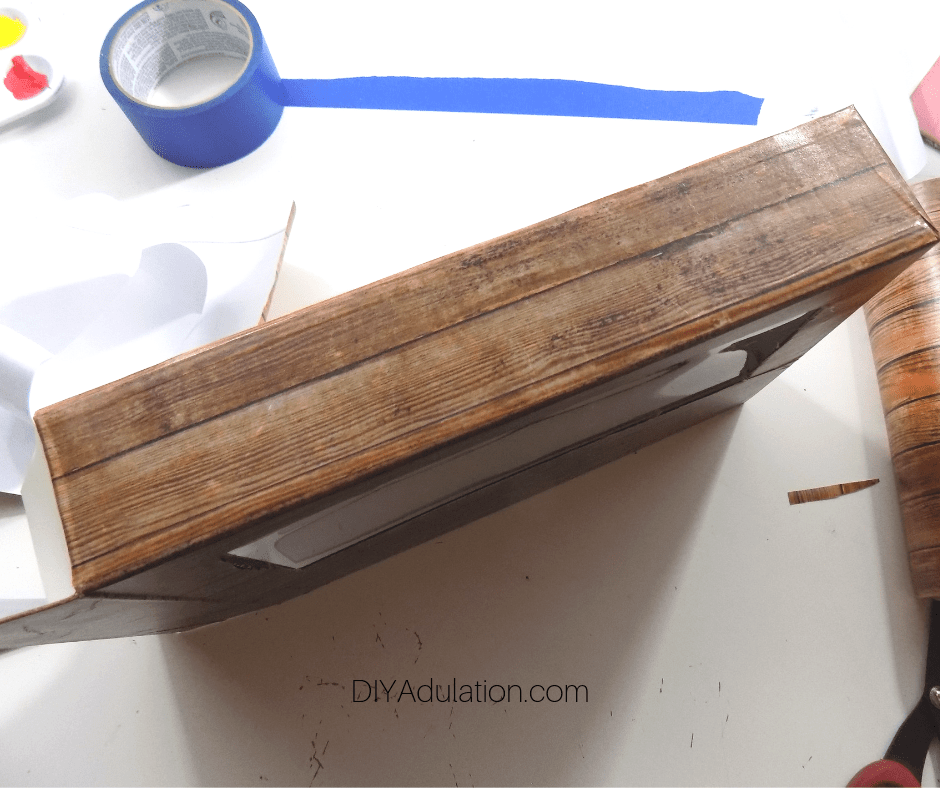
 

Decorative Wood Tape Attached to Edge of Box

Step 6

Once your tape is trimmed, begin attaching it to the front of your box starting at the open edge.

Step 7

Continue attaching your tape until you reach the edge of the view panel.


Blue Painters Tape Attached to Edge Window in Box

Step 8

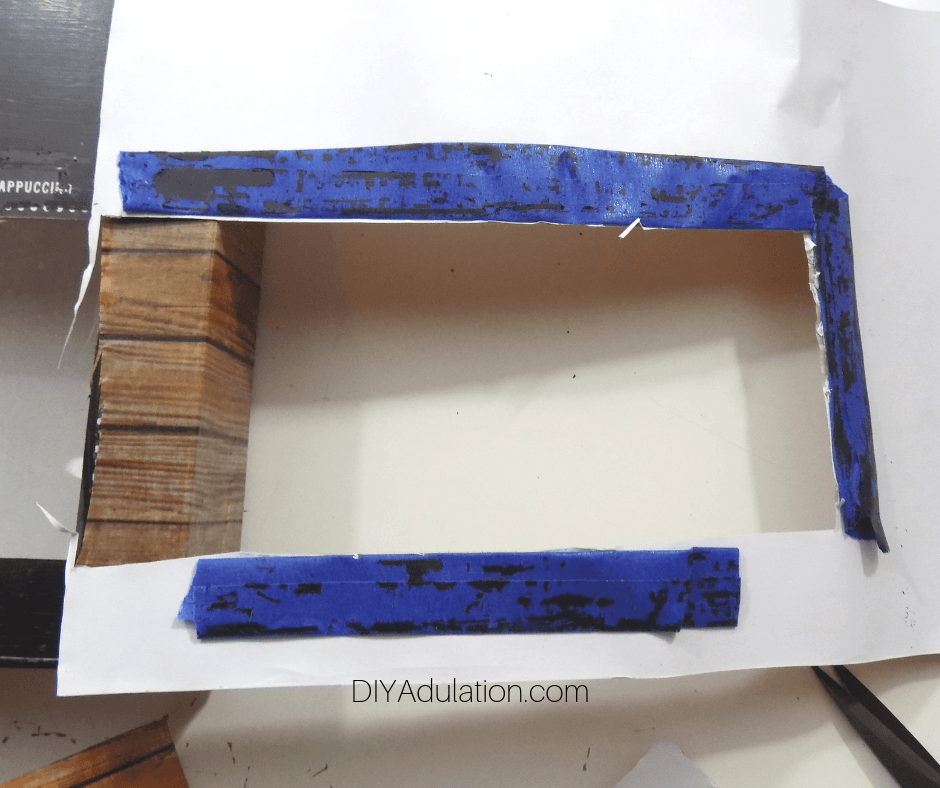
Next, place rolled pieces of blue painters tape around the edges of the view panel.

Step 9

Then place your decorative tape with the paper backing still on over the painters tape.


Blue Painters Tape Attached to Backing on Tape

Step 10

Carefully peel back your decorative tape, keeping the painters tape in place on the paper backing and lifting it from the box.


Rectangle Cut Out Inside Blue Painters Tape Attached to Backing on Tape

Step 11

Next, cut out the rectangle between the painters tape.


Tape Attached to Box With Window Cutout

Step 12

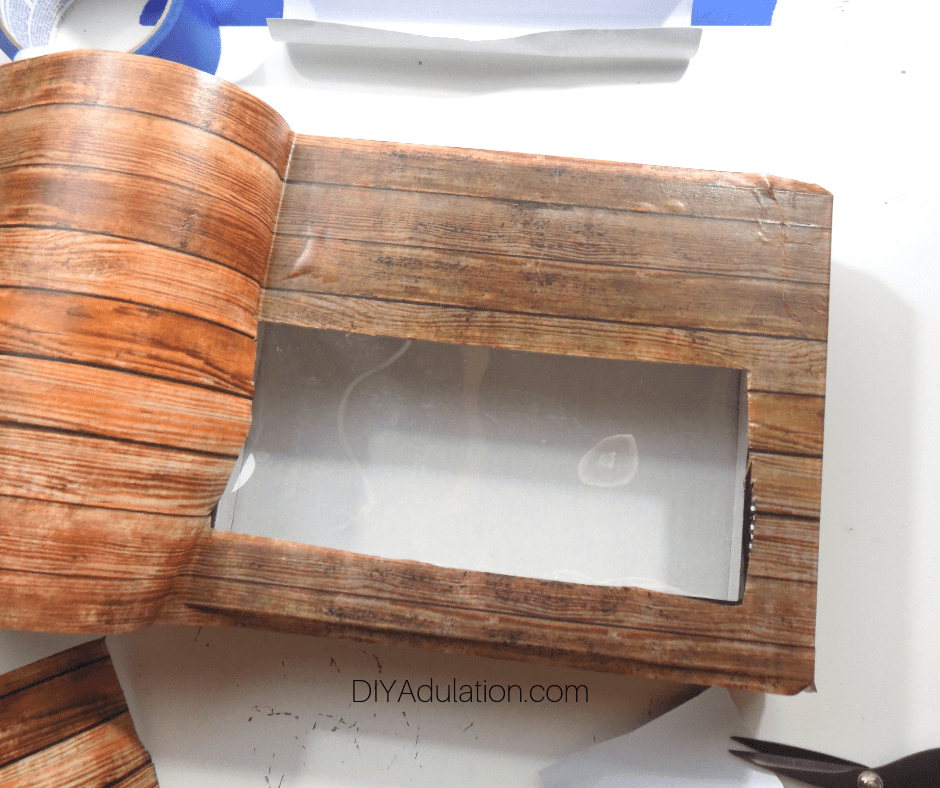
After you have cut out the rectangle, resume attaching your decorative tape to your box. Ensure that your rectangle lines up with the view panel in the box.


Tape Attached to Back of Box

Step 13

Continue attaching your decorative tape all the way around your box.


Folded Tape Edge on Box

Step 14

Once you reach the edge of your box opening, fold the tape inside the box.
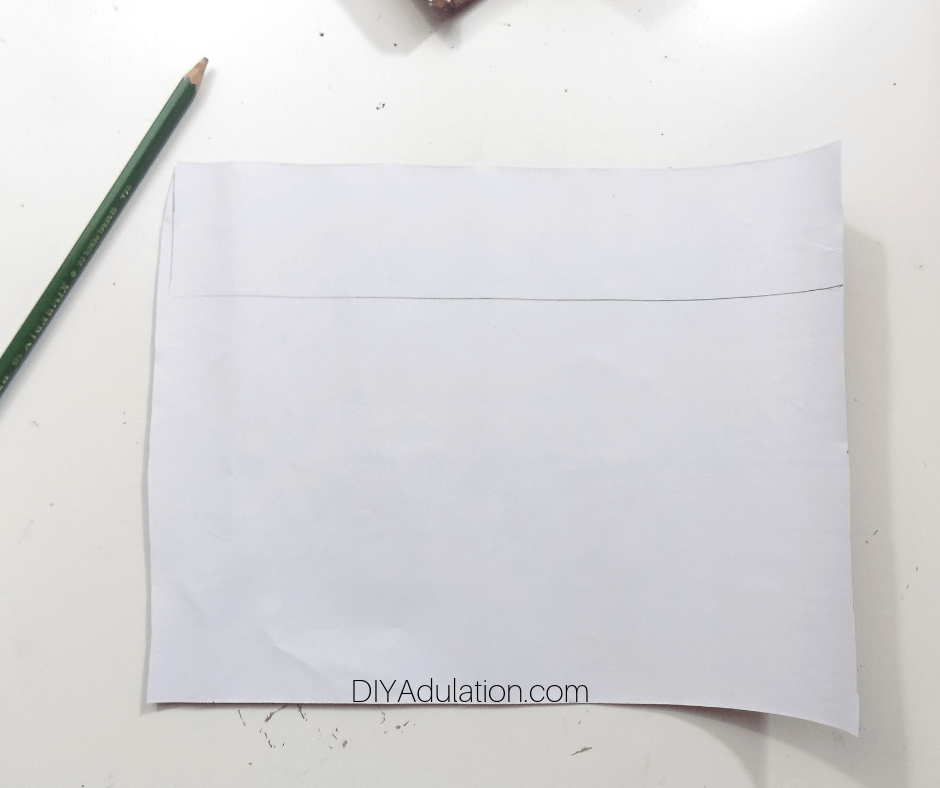
 

Pencil Measurement on Tape Backing

Close Up of Pencil Measurement on Tape Backing

Step 15

Now, measure the uncovered edge of your box on the tape and mark with a pencil.
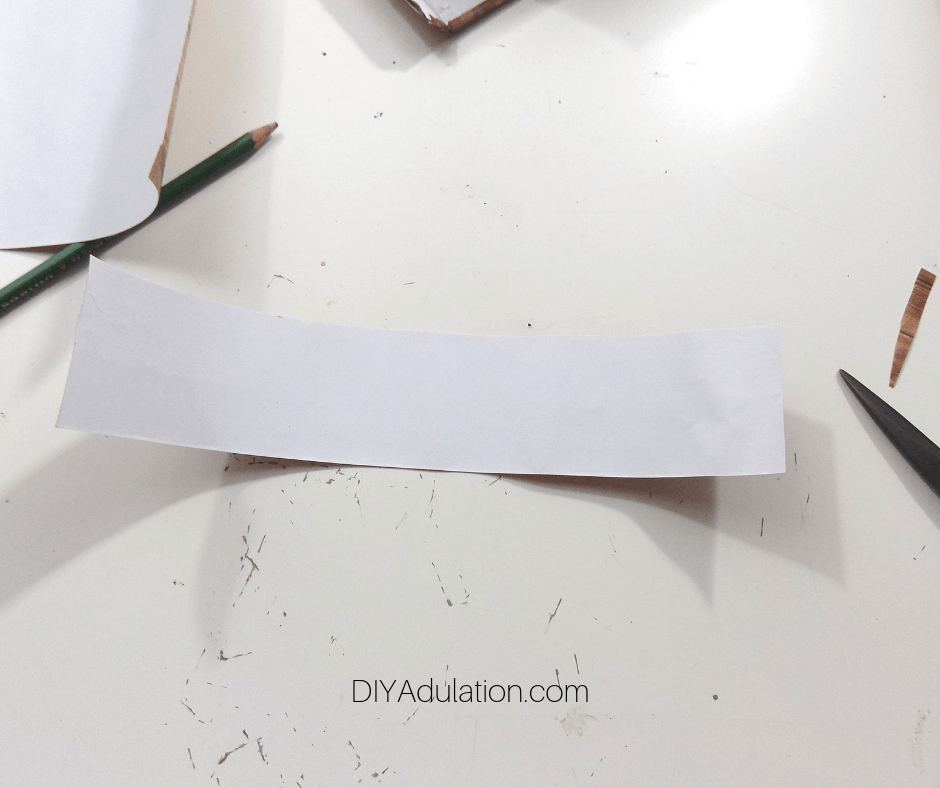
 

Cut Out Piece of Decorative Tape

Step 16

Next, cut out the tape inside of the pencil lines.


Decorative Tape on Edge of Box

Step 17

Attach the cut piece of decorative tape to the edge of your box.

Step 18

Repeat steps 15 through 17 for the remaining uncovered side of your box.
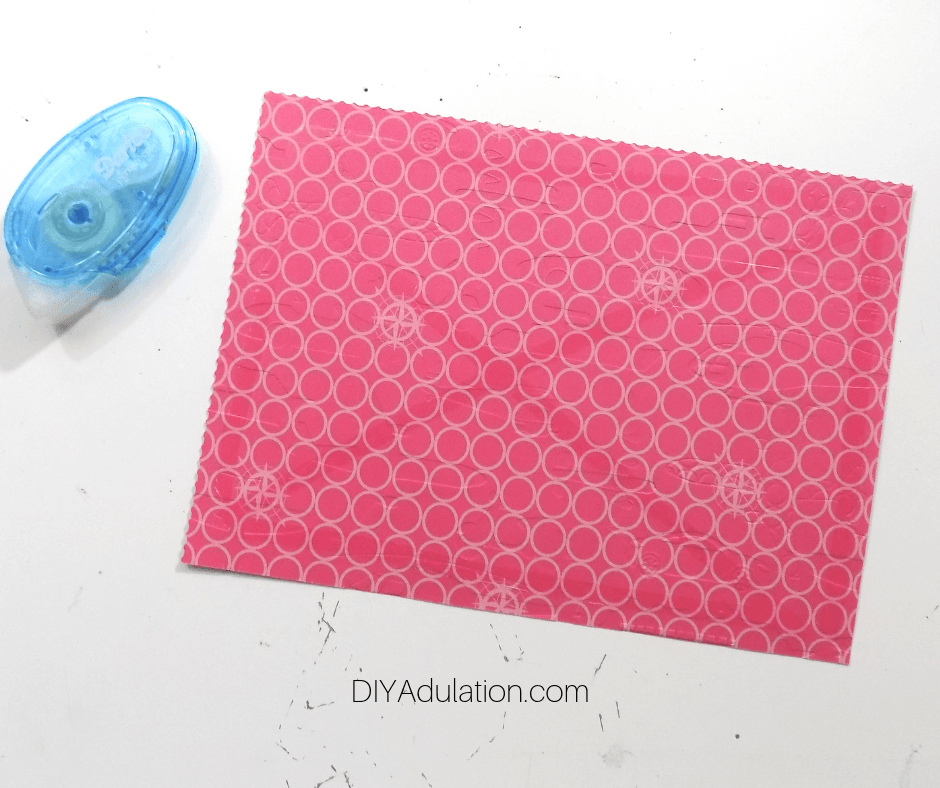
 

Colorful Travel Sheet of Cardstock

Step 19

After your box is covered, pull out your piece of decorative cardstock.


Measuring Decorated Box On Cardstock

Close Up of Pencil Line on Cardstock

Step 20

Flip it over and use your box to measure the size you need and mark it with a pencil.


Back of Cut Out Piece of Cardstock

Step 21

Next, use your paper cutter to cut 1/4 inch inside all of your pencil marks.

Step 22

Try sliding your cut out cardstock into your box. If it doesn’t fit, trim the edges more.


Tape on the Back of Cardstock

Step 23

Once your cardstock fits inside of your box, add adhesive to the back of it with your glue runner.


Decorative Cardstock Inside of Box

Step 24

Then attach the cardstock to the inside of your box.


Money Slot Cut Into Top of Box

Step 25

Next, cut an opening for the money in the top of your box.

Tip:


Striped Chipboard Letters

Step 26

Now pull out your chipboard letters and lay out the ones you need.


Striped Chipboard Letters Laid Out on Box

Step 27

Lay out your letters on the box until you have your desired placement.


Guys Night Letter Attached to Box

Step 28

Then attach the letters 1 at a time by lifting them from their place, applying adhesive with your glue runner, and replacing in the spot.


Close Up of Guys Night Letter Attached to Box

Angled View of Guys Night DIY Bank next to Map Candle

Wood Bank next to Candle with text overlay - Upcycled DIY Bank for Guys Night Fund

Take your gift to the next level by adding some money to the fund before gifting. This upcycled DIY bank for guys night fund is the perfect easy gift to surprise your guy with this year. Even better, you can create the perfect thoughtful gift for him without even leaving the house. Seriously, does it get any better than that?

See where I’m linking up!

Don’t Forget to Pin It!

Wood Bank next to Candle with text overlay - Upcycled DIY Bank for Guys Night Fund


More Ideas You’ll Love:

Get Organized This Year with these DIY Projects

Are you ready to make this year the year that you get organized? Don’t feel like you have to shell out hundreds or thousands of dollars to make it happen. You can totally get organized this year with these DIY projects!

Organization Ideas with text overlay - Get Organized This Year with these DIY Projects


[bctt tweet=”Are you ready to make this year the year that you get organized? You can totally get organized this year with these DIY projects!” username=”diyadulation”]

We are doing a massive declutter this this year. We have so much stuff in our home that we are drowning in it. In fact, we have so much stuff that even hubs is on board with getting rid of it. That’s like, unicorn level awesome.

Of course, after we’re done decluttering, everything that is left needs to be organized. That’s where these DIY projects come in!

Magnetic chalkboard hanging on wall

Easy DIY Magnetic Chalkboard for the Kitchen (Anika’s DIY Life)

Organization is always best when it’s beautiful and this magnetic chalkboard doesn’t disappoint. It keeps you organized and looks gorgeous on your wall!

Yellow coffee table with storage bins

DIY Giant Fabric Bins (The Scrap Shoppe Blog)

Do you need a place to wrangle all of those new toys Santa brought the kiddos? These fabric bins hold a ton and are perfect for quick clean-ups.

Close up of gold and wood jewelry organizer

DIY Geometric Industrial Wall Jewelry Hanger (Made in a Day)

If you’re tired of your jewelry sitting jumbled on your dresser or in drawers then this DIY is perfect for you. It’s a gorgeous way to not only organize but display all of those beautiful accessories.

Organized Office Supplies

Ways to Make Your Home Office Work for You (Two Purple Couches)

This one doesn’t actually share any DIY projects but her tips for making your office work you can apply to all areas of your house. It’s difficult to organize something if you don’t know exactly how you’ll use it. I totally recommend you read this before starting any organization projects.

Decorative storage boxes in cube shelf

How to Upcycled Cardboard Boxes into Decorative Storage (Domestically Creative)

Do you need some sturdy yet pretty storage boxes for your cube organizer? These upcycled beauties are perfect and so super simple to make.

Crate wagons on porch

How to Make Wagons Out of Crates (Rain on a Tin Roof)

Even though she used these for Christmas, I think they make awesome toy storage! Make one easily for each kid and (hopefully) the mess will at least travel with them. A mom can dream, right?

Metal shelves hanging on the wall

How to Make Industrial Metal Shelves (Simply Designing)

Next on the list are these industrial beauties. Shelves are always a great way to utilize wall space for organization. These industrial shelves look great holding all of your remaining stuff after you finish decluttering.

Pink honeycomb organizer in drawer

DIY Drawer Organizer (DIY Adulation)

Don’t forget to keep your drawers organized too. For less than a dollar you can make super functional honeycomb organizers for your drawers easily!

Organization Ideas with text overlay - Get Organized This Year with these DIY Projects

Finally get organized this year with these DIY projects. Don’t forget to declutter your stuff before you try to get organized. Holding on to things that don’t serve you and you don’t love is a waste of your time.

Now let’s head down to this week’s Merry Monday link party! Share your awesome new ideas with us and don’t forget to check out what everyone else is sharing. See you down there!

Don’t Forget to Pin It!

Organization Ideas with text overlay - Get Organized This Year with these DIY Projects

DIY Shimmery Ice Cream Soaps | Stocking Stuffer Idea

Are you tired of stocking full of junk that your kids don’t need? Even when you fill them with gifts that aren’t candy, you still find the small toys and art supplies broken all over the house. This year, add a little something kids will love but is still practical like these DIY shimmery ice cream soaps.

Collage of Ice Cream Soaps with text overlay - DIY Shimmery Ice Cream Soaps

Welcome to Day 12 of the Fourth Annual 12 Days of Christmas Series!

DIY Christmas Ideas and Recipes you can use this year! DIY Christmas Decor and Games Ideas #12daysofChristmas

We have teamed up with 50 plus bloggers to bring you a oodles of DIY Ideas and Recipes to make your holiday season merrier. There are 12 different posts in the series and we have spread them out over a four week period with three posts per week. Now is the time to subscribe!

GO HERE for the complete list of Dates and Topics plus a collection of most popular holiday ideas including ornaments, games, recipes and more from all 50 plus talented bloggers!

It’s Day 12 and we are ready to Hang the Stockings by the Chimney with Care!


Ice Cream Soap without Stick next to Sprinkles

I can’t believe it’s the last day of this year’s 12 Days of Christmas blog hop. This has been so much fun and absolutely inspiring. If you’ve missed any of the days, you can find a complete list of projects right here.

Since we’re getting down to the wire on Christmas I wanted to end with a super easy stocking stuffer idea. Too often, we get caught up in finding the perfect gift that we forget all about the stockings. These DIY shimmery ice creams soaps are a super quick and easy gift you can whip up in time for Christmas.

In case you don’t have all of the materials, I’ve included links to all of them on Amazon so that you can get them quickly and finish off your list before the big day. 


Ice Cream Soaps with Sticks Wrapped in Cellophane

DIY Shimmery Ice Creams Soaps Materials


Block of Melt and Pour Goats Milk Soap

Step 1

First, measure out 4.5 oz. of your soap base.


Shredded Goats Milk Soap

I use an old cheese grater to grate my soap base so that it melts more quickly. This also makes it much easier to get the exact amount that you need.


Step 2

Next, place your 4.5 oz. of soap base into your pouring pot.


Step 3

Then measure out 2 oz. of unrefined shea butter and add it into your pouring pot as well.


Step 4

Add a half inch of water to a sauce pot and bring it to a boil.

"

Step 5

After your water is boiling, turn the heat down to medium and place your filled pouring pot inside.


Step 6

Next, melt your soap base and shea butter, stirring frequently.


Orange Melted Soap in Pouring Pot

Step 7

Once your soap and shea butter are melted, add in .1 oz of orange mica powder (or whatever color you want) and stir until combined.

Note:

If you use the set that I link to above, that’s an entire bag.


Step 8

Next, stir in 10-15 drops of orange essential oil.


Close Up of Ice Cream Pops Molds

Step 9 (Optional)

Place your sticks in place on your mold.

Tips:


Close Up of Filled Ice Cream Pops Molds

Step 10

Now, pour your melted base into your molds. Again, if not using the sticks, only fill them about halfway (just to the bottom of the stick opening).


Lid on Ice Cream Pops Molds

Step 11

Add the lid to your mold to protect your soaps while they cool.


Ice Cream Soaps with Sticks Wrapped in Cellophane

Step 12

Lastly, after your soaps have cooled completely, remove them from the molds and wrap in cellophane to gift!

You can absolutely freeze these if necessary to ensure that they come cleanly out of the molds. Let them cool about 20 minutes before freezing so that bubbles and other imperfections can settle beforehand.


Ice Cream Soaps with Sticks Wrapped in Cellophane with text overlay - DIY Shimmery Ice Cream Soap

These DIY shimmery ice cream soaps are the perfect no-junk stocking stuffers that kids will totally love. They also make fantastic classroom gifts or even party favors. Before you head to Amazon to order your supplies, it’s time to check out the other awesome stocking ideas from my friends below!

Don’t Forget to Pin It!

Pink Ice Cream Soaps with text overlay - DIY Shimmery Ice Cream Soaps

Scroll down for even more Christmas Stocking Ideas you can use this holiday season!