Easy and Inexpensive Father’s Day Gifts to DIY

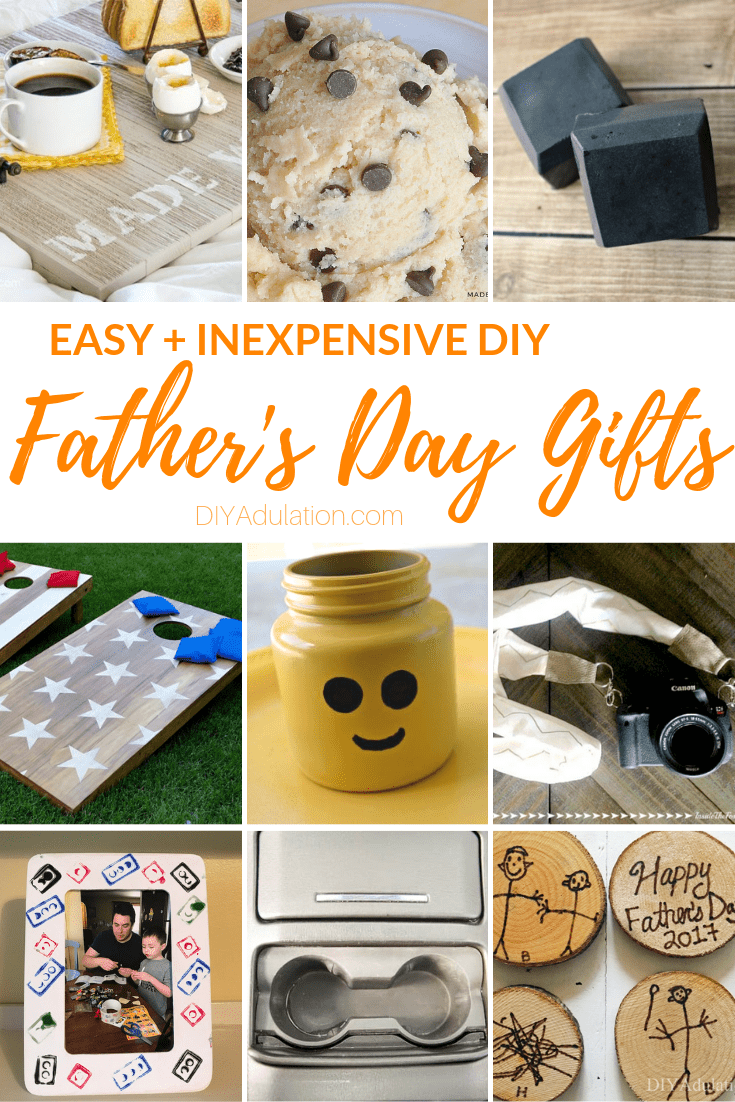
Do you find it hard to come up with thoughtful gifts for Dad that don’t totally blow your budget? It’s even harder when you add in the granddads. Luckily, you can still give a meaningful gift that he’ll love without spending hundreds of dollars when you pick one of these Father’s Day gifts to DIY.

Affiliate links may be used in this post. Ordering a product through these links may result in a commission. Read the full disclosure here.

Collage of Fathers Day Gifts with text overlay - Easy and Inexpensive DIY Fathers Day Gifts


[bctt tweet=”You can surprise Dad with a meaningful gift this year and protect your budget at the same time with these easy and inexpensive Father’s Day gifts to DIY!” username=”diyadulation”]

For some reason, I always get stumped when it comes to gifting my Papa. He has a billion tools, half of which I don’t even know what they are. He also collects vinyl but since he has a 30 year head start on me, there’s not much I can find that he doesn’t have.

That means getting pretty creative when it comes to Father’s Day. Of course, when it comes to creating something from the kiddos, it’s easier. They could give him a half-eaten piece of candy and he’d think it’s the greatest thing ever, I swear.

If you’re stumped on what to get the dad in your life this year, try making him something instead. From delicious edibles to kid-crafted gifts, you’ll find something for every father on any budget (even free) in the ideas below!


Lego Stamped Frame

Lego Stamped Gift for Dad (Cookies, Coffee, and Crafts)

The next time Dad is building a Lego creation with the kiddos, snap a picture. Then surprise him with it in a cool Lego stamped frame for Father’s Day!


Stars and stripes wooden cornhole boards on yard

DIY Cornhole Boards (A Wonderful Thought)

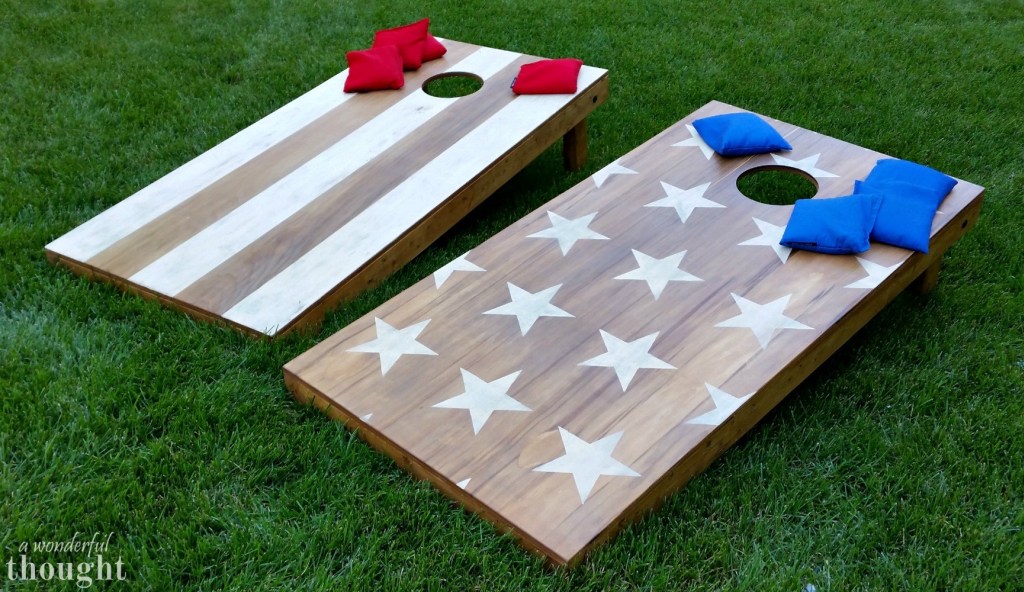
Give a gift to help him blow off steam and relax after a long day at work. These DIY cornhole boards are a fun outdoor game to enjoy with his friends or with the kiddos.


Camera with fabric camera strap

DIY Camera Strap (Inside the Fox Den)

Is Dad a photography enthusiast? If so, he’ll love getting this DIY camera strap for Father’s Day. Easily customize it to fit Dad’s individual style and give him a fun new way to wear his favorite accessory.


Charcoal Body Bars on Wood Background

Homemade Charcoal Body Bar (Coupons and Freebies Mom)

Help him enjoy clearer skin (on a budget) with this awesome body bar recipe. Because yes, even Dad deserves a little self care.


Lego head pencil holder on yellow plate

DIY Lego Head Marker Holder (Drugstore Divas)

Another fun Lego gift for dads is this super cute marker holder. Even if he doesn’t work a desk job, he can still use an organizer. It can store pencils or screwdrivers in his workshop or put it on his bedside table for watches and Chapstick.


Breakfast on Wooden Serving Tray

Wooden Breakfast Tray DIY (5 Minutes for Mom)

This fun gift idea is the perfect way to serve Dad a delicious pancake breakfast on Father’s Day. Let him enjoy some peace, quiet, and syrup before facing the day.


Close up of scoop of edible cookie dough

Edible Chocolate Chip Cookie Dough (Made in a Day)

Speaking of food, who doesn’t love getting a delicious treat as a gift? Make edible chocolate chip cookie dough and put it in a pretty container for Dad to enjoy. Actually, you may want to make a double-batch so you can taste-test it for him.

Essential Oil Soap Recipe for Men (3 Boys and a Dog)

Sometimes dads stink. When mine comes home from a drill weekend in the field, it’s a little extra, let me tell you. Now you can give him a gift that benefits you both with this manly smelling homemade soap.


Clean Car Cup Holders

How to Clean a Car (Simply Designing)

Acts of service don’t cost a thing. If you’re looking for a super budget-friendly gift idea that’s still incredibly meaningful then clean his car for Father’s Day. This article will help you get every nook and cranny sparkly clean for him.


Wood coasters with kids artwork

How to Turn Kids Artwork into Coasters (DIY Adulation)

Years later, all the dads in our life still love these coasters. Just like photos of little ones playing with Papaw, these are snapshots into your kid’s childhood that will be cherished by dads and grandpas alike.


Collage of Fathers Day Gifts with text overlay - Easy and Inexpensive DIY Fathers Day Gifts

You can surprise Dad with a meaningful gift this year and protect your budget at the same time. These easy and inexpensive Father’s Day gifts to DIY are perfect for doing just that. Let Dad and Grandpa know how much they mean to you this June with a thoughtful gift from the heart.

Don’t Forget to Pin It!

Collage of Fathers Day Gifts with text overlay - Easy and Inexpensive DIY Fathers Day Gifts

Easy Homemade Baked French Fries Recipe

sFrench fries are totally delicious. Unfortunately, they aren’t all that great for you. Lighten up your favorite side dish with this homemade baked french fries recipe for all of the flavor without the fried fattiness.

Affiliate links may be used in this post. Ordering a product through these links may result in a commission. Read the full disclosure here.

Collage of Fries next to Ketchup with text overlay - Homemade Baked French Fries


[bctt tweet=”These homemade baked french fries are seriously yummy. Crispy on the outside but tender on the inside. Plus, you’re saving money every time you make them!” username=”diyadulation”]

I love french fries. Actually, I love carbs period. That’s why I’m so impressed with people who totally rock the KETO diet. Like, the results look awesome, but the path to get there seem less fun.

If you’re looking for a healthier take on your fries, try out this baked version. It’s still delicious (and not as good for you as a salad) but it doesn’t have all of that frying oil or processed ingredients like what you get at the restaurant.

More importantly you’ll save money. One bag of frozen fries at the store are easily $3.00 or more. At a restaurant you’ll pay at least a dollar for a single serving. These babies only use a few potatoes from a $2.00 bag leaving you plenty leftover for additional meals. Ka-ching!


Fries next to Ketchup on Plate

Baked French Fries Ingredients

Step 1

First, line a baking sheet with parchment paper and preheat your oven to 425° Fahrenheit.


Washed Russet Potatoes

Step 2

Next, wash your potatoes with water to get rid of any dirt or dust.


Sliced Russet Potato on Wood Background

Step 3

Then slice your potatoes lengthwise until you have disks.


Fry cut Potatoes in Bowl

Step 4

After your potatoes are sliced, cut the disks into fries and place in a glass mixing bowl.


Oil on Fry cut Potatoes in Bowl

Step 5

Once all of your potatoes are cut and in the bowl, add your cooking oil to the mixing bowl.


Close Up of Seasonings on Fries

Step 6

Next add in your paprika and garlic powder.

Step 7

Lastly, add in your salt.


Seasoning Mixed on Fries

Step 8

Mix your fries, oil, and seasonings. Coat the cut potatoes thoroughly.


Seasoned Fries on Parchment Lined Tray

Step 9

Place your fries in a single layer on the parchment lined baking sheet.

Note:

Step 10

Bake your fries at 425° F for 15 minutes.


Flipped Seasoned Fries on Parchment Lined Tray

Step 11

Flip your fries after 15 minutes. Then bake 20 more minutes (or until the outsides are lightly browned and crispy).


Close Up of Baked Fries in Bowl

Close Up of Ketchup on Fry

Plate of Fries next to Ketchup with text overlay - Homemade Baked French Fries

These homemade baked french fries are seriously yummy. Crispy on the outside but tender on the inside. Even better, you’re saving money on your groceries every time you make them! Serve these babies with some ketchup and these delicious spicy Hawaiian chicken sliders for a weeknight dinner the whole family will love.

Homemade Baked French Fries

Fries next to Ketchup on Plate
Prep Time 10 minutes
Cook Time 25 minutes
Total Time 35 minutes

Ingredients

  • 4-5 Medium Russet Potatoes
  • 5-6 tablespoons Cooking Oil
  • 1 tablespoon Paprika
  • 1 tablespoon Garlic Powder
  • 1/2 teaspoon Salt

Instructions

  1. First, line a baking sheet with parchment paper and preheat your oven to 425° Fahrenheit.
  2. Next, wash your potatoes with water to get rid of any dirt or dust.
  3. Then slice your potatoes lengthwise until you have disks.
  4. After your potatoes are sliced, cut the disks into fries and place in a glass mixing bowl.
  5. Once all of your potatoes are cut and in the bowl, add your cooking oil to the mixing bowl.
  6. Next add in your paprika and garlic powder.
  7. Lastly, add in your salt.
  8. Mix your fries, oil, and seasonings until they are well coated.
  9. Place your fries in a single layer on the parchment lined baking sheet.
  10. Bake your fries at 425° F for 15 minutes.
  11. Then flip your fries and bake an additional 20 minutes until the outsides are lightly browned and crispy.

See where I’m linking up!

Don’t Forget to Pin It!

Plate of Fries next to Ketchup with text overlay - Homemade Baked French Fries


More Ideas You’ll Love:

Fun and Easy DIY Sequin Shaker Photo Magnet

Raise your hand if your little ones love playing with the magnets on the fridge! It’s great when you’re working in the kitchen and need to keep an eye on him while you cook. Now you can give kids something fun to play with that you totally don’t mind displaying on your fridge year-round. This DIY sequin shaker photo magnet is the perfect craft to do just that.

Affiliate links are used on this site. Ordering a product through these links may result in a commission. Read the full disclosure here.

Collage of Sequin Shaker Magnets with text overlay - DIY Sequin Shaker Photo Magnet


[bctt tweet=”This DIY sequin shaker photo magnet is so easy to make! It’s fun to play with but it’s also beautiful to display, plus it makes an awesome gift!” username=”diyadulation”]


All 3 of my kids went through this phase at some point in their childhood. The letter magnets were popular and then we got these monster magnets. They let the kids build their own monsters on the fridge with different faces and features. That’s what inspired this shaker photo magnet. It’s fun to play with but it’s also beautiful to display. You know how much I love multi-function decor.

These also make a great gift for grandparents. They’re so easy to make and you can fill them with pictures of all the grandkids. It’s a win-win for everyone.


Sequin Shaker Magnet next to Sequins

DIY Sequin Shaker Photo Magnet Materials


Picture next to Magnetic Container

Step 1

First, clean your magnetic container. Make sure the inside is free of any dust or debris.


Circle Traced on Picture next to Marker and Container

Step 2

Then use your container as a stencil to trace a circle on your photo with black marker.

Tip:


Circle Cut Out of Picture next to Scissors

Step 3

Next cut out your photo inside the traced line using scissors.


Picture in Container next to Scissors

Step 4

Test your cut photo to ensure it fits inside of your container. Trim any extra edges as needed.


Mounting Squares on Back of Photo next to Materials

Step 5

Once your photo fits, attach mounting squares to the back of your picture.

Tip:

Step 6

Then attach the photo to the bottom inside of your magnetic container.

Step 7

Next, add a small line of E6000 around the inside edge of the container lid.

Step 8

Before attaching it to your container, sprinkle some loose sequins in the center of lid. Try to avoid letting them touch the glue as much as possible.


Magnet on Bottom of Container

Step 9

Now carefully place the bottom of your container into the glue-lined lid.

*Important* Do not flip your container over. If you do, the glue will run and damage your photo.

Step 10

Allow your container to dry, face down, for 24 hours.


Lidded Container with Picture and Sequins Inside

Step 11

After the glue is dry, flip your container over.


Sequins Glued on Sequin Shaker Magnet Lid

Step 12

Lastly, glue sequins around the edge of your container lid. I used quick dry tacky glue to attach mine because it dries faster (duh). However, if you don’t have any, you can use E6000 to attach the sequins and then allow it to dry another 24 hours.


Sequin Shaker Magnet on Polka Dot Background

Close up of Sequin Shaker Magnet with text overlay - DIY Sequin Shaker Photo Magnet

I love how this DIY sequin shaker photo magnet turned out (the second one at least). Use it as a way to display your favorite vacation or family photos and to occupy little hands while you work on dinner. Plus, it’s budget-friendly enough to make an awesome gift for grandparents, friends, and extended family.

See where I’m linking up!

Don’t Forget to Pin It!

Close up of Sequin Shaker Magnet with text overlay - DIY Sequin Shaker Photo Magnet


More Ideas You’ll Love: