Printable DIY Reasons I Love You Valentine Book Gift

Valentines Day isn’t just a holiday for couples. It is a lot of fun to get the kiddos involved too. That’s exactly what this printable DIY Reasons I Love You Valentine book gift does! It’s the perfect craft to shower Dad with love this year.

Affiliate links may be used in this post. Ordering a product through these links may result in a commission. Read the full disclosure here.

Collage of photos of Valentine Book next to Crayons with text overlay - Printable DIY Reasons I Love You Valentine Book Gift


[bctt tweet=”Dad will love getting this printable DIY Reasons I Love You Valentine book gift from the kiddos! It’s a sweet way to let him know how much he means to you.” username=”diyadulation”]

This activity was fun for all of the kiddos and when we had 3 days off of school in one week, I decided it was the perfect time to whip it out. Some of the kiddos struggled with what to write/draw so it also sparked some wonderful conversation with them about what Papa does with them and for them.

If you’re looking for an adorable way to show Dad some love this Valentine’s Day then this craft is perfect for you!


9 Reasons I Love You Valentine Book Next to Crayons

Materials for Valentine Book Gift


Printed Reasons I Love You Coloring Sheets

Step 1

First, print out the Reasons I Love You coloring sheets. You will need 1 cover for each child and 1 inside page for each year of the child’s age.

For example:


 width=

Cut Out Coloring Sheets

Step 2

Once you’ve printed the number of pages you need cut them in half using a paper cutter.


Close Up of Lines of Paper Lined Up on Cutter

Note:


Colored Covered of Valentine Book Next to Crayons

Step 3

Next, allow your kids to color the covers of their books. This will likely take the most amount of time.


Crayon Drawing on I Love You Because Page

Step 4

After the covers have been colored, have your kids fill out each “I Love You Because” page. Younger kids can draw pictures of what they love about Dad while older kids can write the reason they love him.

Tip:


Hole Punch Next to Colored Book Cover

Arrows Pointing to Holes in Book Cover

Step 5

Next, assemble the books together. Mom can do this or you can include the kiddos. Start by lining up the pages for 1 book and punch 2 holes on the left edge.


Length of Ribbon Next to Craft Supplies

Step 6

Then cut a length of ribbon a few inches longer than the length of the book. This is how you bind the book.


Ribbon Threaded Through Holes in Book

Step 7

Thread the length of ribbon through the punched holes from the back so that the loose ends are in the front of the book.


Ribbon Tied on Colored Book

Step 8

Lastly, tie the ends of the ribbon in a bow to hold the book together.

Tip:


9 Reasons I Love You Valentine Book next to Crayons with text overlay - Printable DIY Reasons I Love You Valentine Book Gift

Dad will love getting this printable DIY Reasons I Love You Valentine book gift from the kiddos this year! It’s such a sweet way to let him know how much he means to all of you. Bonus, this easy craft makes a great snow day activity when you need a bit of calm. One last note, my daughter didn’t like her first cover so she asked me to print a second one so she could redo it. If your little one is a perfectionist like mine, you may want to go ahead and print some extra sheets for mistakes.

See where I’m linking up!

Don’t Forget to Pin It!

9 Reasons I Love You Valentine Book next to Crayons with text overlay - Printable DIY Reasons I Love You Valentine Book Gift


More Ideas You’ll Love:

DIY Hand Print Turkey Shirt | Thanksgiving Kids Craft

Sometimes during this time of year we get so caught up in everything we have to do that the kiddos can feel a little left out. This is especially true for the youngest ones still at home. Take a time out this weekend and make this DIY hand print turkey shirt with your kiddos for them to wear on the big day.

Affiliate links may be used in this post. Ordering a product through these links may result in a commission. Read the full disclosure here.

Collage of Smiling Boy Wearing a Hand Print Turkey Shirt with text overlay - DIY Hand Print Turkey Shirt

[bctt tweet=”Take a break this weekend and enjoy some crafty fun with this DIY hand print turkey shirt. It’s quick to make and you get some quality time together!” username=”diyadulation”]

This year has thrown into sharp contrast how busy the holidays get for us. In addition to my oldest being in more activities, my husband has been in Louisiana since October 22 for a military training. Good old Murphy is asserting his presence while I’m single-momming it.

A Visit from Murphy

This included my youngest getting Croup which I had never even heard of before. I must have gotten lucky with the older two, but at almost midnight on Halloween night, I heard my son wake up sounding like he couldn’t breath. Talk about scary! I was ready to rush him to the ER until I talked to my momma (God bless her) and she told me what it sounded like.

We slept propped up on the couch the rest of that night and headed to the doctor the next morning. He is since doing so much better, but it really made me look at how on the go we are. Some of the things are outside of my control such as holidays and after-school activities, but how often am I working on Christmas presents instead of hanging out with my kid this time of year? The answer is too often.

That’s why we decided to take a break and enjoy some crafty fun with this DIY hand print turkey shirt. It doesn’t take long but we had so much fun making it. We also got some quality momma and baby time. I want that for you and your kiddos too!


Smiling Boy Wearing a Hand Print Turkey Shirt

DIY Hand Print Turkey Shirt Materials


White T-Shirt Laying Flat

Step 1

First, lay out your t-shirt. Depending on the age of your kids, you may want to put it on a protected surface like old newspaper.


White T-Shirt with Box Inside

Step 2

Next, put your cardboard inside of the shirt to separate the front and the back. This keeps your paint from seeping through the fabric and marking the back. It also keeps the sides from getting stuck to each other.


Yellow Hand Print on White T-Shirt

Step 3

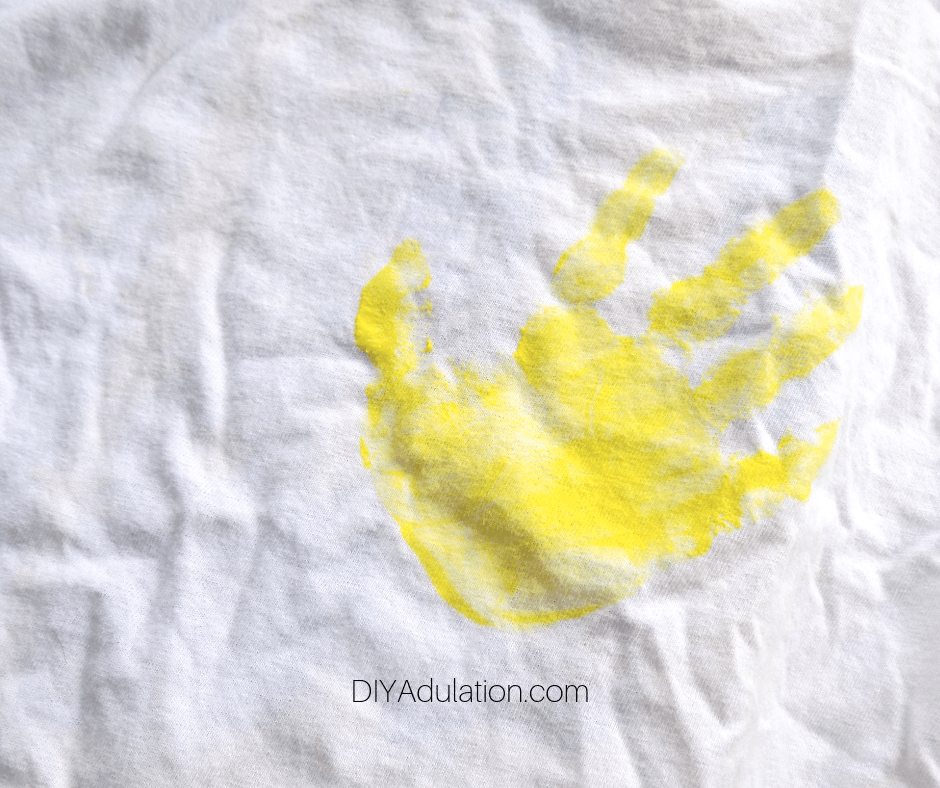
Begin placing hand prints on the shirt by covering your kid’s hand with fabric paint and having him press the hand firmly, fingers fanned out, down on the t-shirt. Clean any remaining paint from your child’s hand.


Colorful Hand Prints on White T-Shirt

Step 4

Continue adding hand prints in different colors, fanning out like feathers. Be sure to clean his hand between each paint color.


Black Hand Print over Colorful Hand Prints on White T-Shirt

Step 5

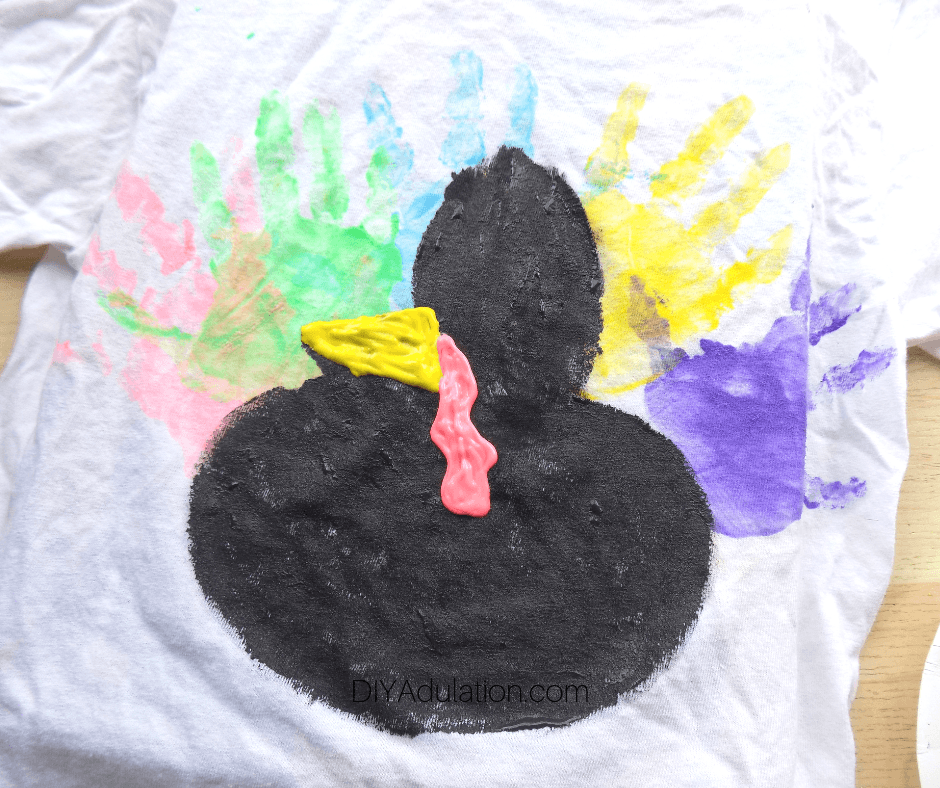
Lastly, add some black paint to your child’s hand and have him press his hand firmly down in the center, fingers together and thumb sticking out. Again, clean the paint off of your kid’s hand.


Black Turkey over Colorful Hand Prints on White T-Shirt

Step 6

Now, take your paint brush and fill out the turkey shape using the black hand print as a guide. The thumb becomes the beak and the hand is the head. Don’t forget a bulbous body that hits all of the colorful hand prints.

Step 7

Allow your paint to dry before moving on.


Black Turkey with Beak and Snood over Colorful Hand Prints on White T-Shirt

Step 8

After your paint has dried, add a yellow beak and pink (or red) snood.

Step 9

Again, allow your paint to dry completely.

Step 10

Once your paint is dry, toss the shirt in the dryer for 20 minutes to set the fabric paint.


Smiling Boy in Hand Print Turkey Shirt with Arms Out

DIY Hand Print Turkey Shirt Care

When washing your turkey shirt, flip it inside out to protect the paint, especially the beak and snood. After washing, you can dry it as you would any other plain t-shirt.


Close up of Hand Print Turkey Shirt with text overlay - DIY Hand Print Turkey Shirt

This DIY hand print turkey shirt is so much fun to make, especially with toddlers. They laugh and squeal when you put the paint on their hands and it’s absolutely adorable. Be sure to have your camera ready for some fantastic candid shots. Then on Thanksgiving, throw on your turkey shirts and some sweaters and you’re ready to go. Pretty awesome, huh?

See where I’m linking up!

Don’t Forget to Pin It!

Smiling Boy Wearing a Hand Print Turkey Shirt with text overlay - DIY Hand Print Turkey Shirt

More Ideas You’ll Love:

Paper Plate Turkey Craft for Kids

How many crafty things are you making for your Thanksgiving this year? From festive place settings to a gorgeous wreath for the door, chances are you are enjoying your fair share of creating. It’s time to let the kids in on the crafty Thanksgiving fun with this paper plate turkey craft for kids.

Affiliate links may be used in this post. Ordering a product through these links may result in a commission. Read the full disclosure here.

Collage of Paper Plate Turkey with text overlay - Paper Plate Turkey Craft for Kids


[bctt tweet=”Gather your craft supplies and grab the kiddos! It’s time to let the kids in on the crafty Thanksgiving fun with this paper plate turkey craft for kids.” username=”diyadulation”]

Kids can feel left out during the craziness of Thanksgiving, especially if you’re hosting. Add to that the days they get off from school while you’re preparing and it’s even worse.

I have 2 kiddos in school right now and one still at home which means that school breaks totally jack up our routine. That’s why I make a point to enjoy fun crafts like these with the kiddos during this time of year.

This lets us connect and create together when they have my undivided attention. This makes it easier for them when I’m busy cooking in the kitchen or out Black Friday shopping during the Thanksgiving holiday.


Paper Plate next to Brown Paint

Paper Plate Turkey Craft Materials


Brown Painted Paper Plate

Step 1

First, paint your paper plate brown and set it aside to dry.

Tips:


Feathers Glued to Back of Paper Plate

Step 2

After your paint has dried, flip your paper plate over and begin gluing feathers to the back of the plate.


Layers of Feathers Glued to Back of Paper Plate

Step 3

Add a second row of feathers to the back so that you have a nice full plume. Allow your glue to dry before moving on.

Tip:


Googly Eyes Glued on Brown Paper Plate

Step 4

Once your glue has dried, flip the plate back over and glue on the googly eyes.


Yellow Beak Painted on Brown Paper Plate

Red Painted Snood on Brown Paper Plate

Step 5

Lastly, paint a yellow beak and the red snood (the thing hanging off of the beak) using your finger.


Paper Plate Turkey Next to Feathers

Step 6

Allow everything to dry before playing with your new turkeys.


Paper Plate Turkey with text overlay - Paper Plate Turkey Craft for Kids

This paper plate turkey craft is so cute and kiddos love making it! Have your kids make 4 of them and glue them into a ‘box’ with hot glue for a super cute centerpiece for the kid’s table this Thanksgiving. Kids will love having their artwork displayed as part of the big dinner and you can totally put a cup of crayons in the middle for easy entertainment while they wait to eat.

See where I’m linking up!

Don’t Forget to Pin It!

Paper Plate Turkey with text overlay - Paper Plate Turkey Craft for Kids


More Ideas You’ll Love: