Rainy days happen, even during summer break. Easy crafts you can pull out at a moment’s notice are your best friend. This fun and glittery DIY notebook is one such craft to keep in your busy mom toolbox.
Affiliate links may be used in this post. Ordering a product through these links may result in a commission at no extra cost to you. Read the full disclosure here.

[bctt tweet=”Add to your summer fun with this glittery DIY notebook! #diy #kidscraft” username=”diyadulation”]
This is the next Creative Play Kit summer craft. If you don’t know what the Creative Play Kit is, you can read about it in Bust Summer Boredom with Weekly Crafts.
I confess that this craft is just as much for me as it is for the kiddos. Let’s be fair, can you ever really have too many fun notebooks? I totally recommend getting in on this crafty fun right along with your kids.
Another great thing about these notebooks is that they also keep the fun going long after you have finished making them. The best part of a brand new glittery DIY notebook is filling it with creative writings and pictures.
That sounds like a fun summer afternoon for everyone!
Materials for 1 Glittery DIY Notebook
- Adhesive Glitter Foam Sheet
- Construction Paper (5-8 Sheets)
- 1 Chenille Stem
- Foam Letter Stickers
- Foam Smiley Face Stickers
- Hole Punch
- Scissors

Step 1
First, use your foam glitter sheet to measure and cut your stack of construction paper.
Tip:
- This will work out to cutting the construction paper roughly in half.
Step 2
Next, stack your 2 cut sets of construction paper together.

Step 3
Once you have stacked your construction paper, fold the stacks in half like a book.
Tip:
- It is necessary to press firmly on the folded edge because the thickness of the construction makes the folding a lot more difficult. If you have trouble, use a heavy book to help you.

Step 4
After you have securely folded your construction paper, it is time to punch holes along the folded edge.
Tip:
- This can be incredibly difficult. If you have trouble punching holes through the thickness, use a hammer and nail. Mom, place the fold on a piece of scrap wood and tap holes with the hammer and nail along it.
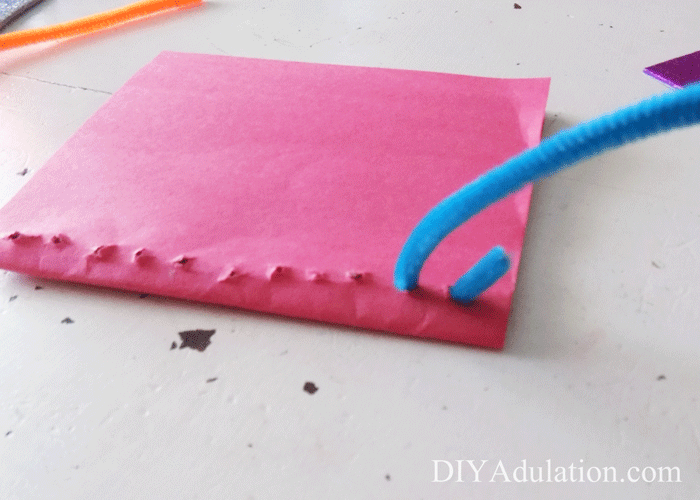
Step 5
Now run a chenille stem through the punched holes as pictured above. This binds the book.

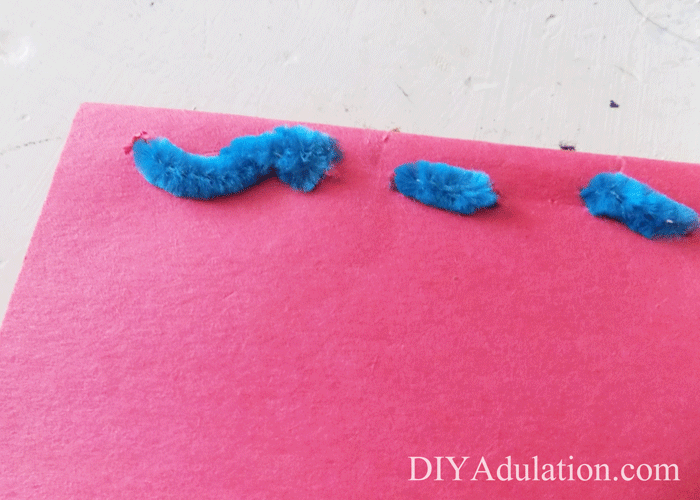
Step 6
After your pages are bound, trim the ends of the chenille stem and secure them. Do this by twisting the ends around the threaded stem.

Step 7
Next, peel back half of your glitter foam sheet backing. Press the side of the bound construction paper onto the exposed side of the foam sheet.
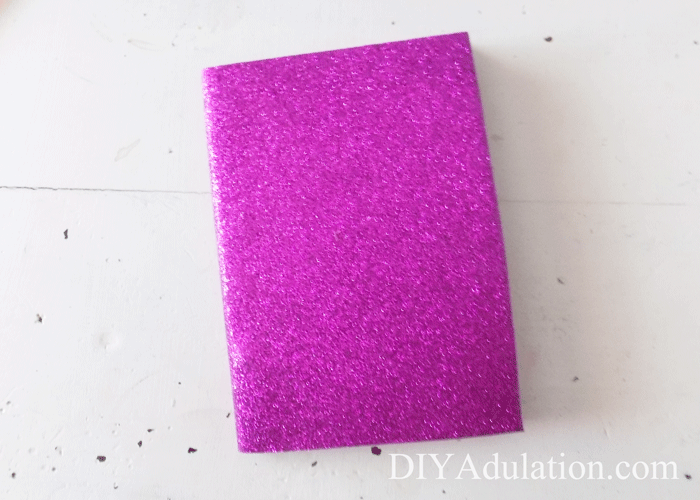
Step 8
Then remove the remaining backing and wrap the foam around the bound construction paper like a book.
Tip:
- Press the glitter foam starting at the binding and proceeding to the edge of your paper.
Step 9
Lastly, trim any excess paper where necessary on the book. This includes any paper that is outside of the glitter cover.

Step 10
Next, add foam letters to spell out “Notes” along the edge of the cover.
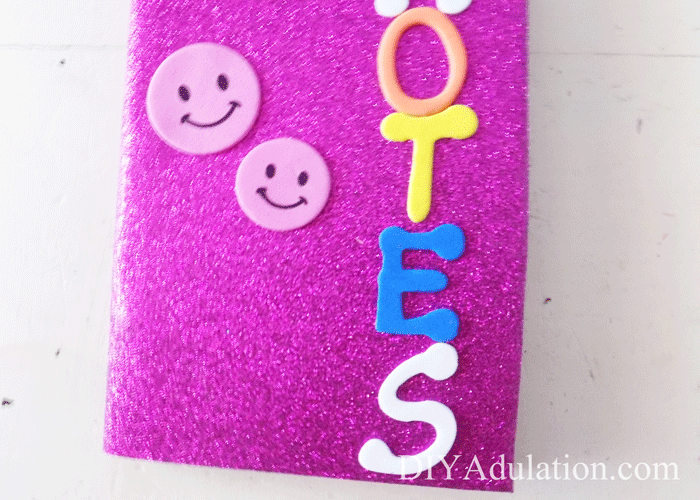
Step 11
Embellish the cover with smiley face stickers to finish off your notebook.

Seriously, how much fun is this glittery DIY notebook? It’s fun to look at, fun to make, and fun to fill.
It is also the perfect rainy day summer activity. You can use it to keep the kiddos entertained all summer long. Take them on the go or make a set of them for back to school. No matter which you choose this little craft will let you and the kids get creative together everywhere this summer!
See where I’m linking up!
Don’t Forget to Pin It!

More Ideas You’ll Love: