DIY Sequin Magnetic Picture Frame

Is your fridge covered in photos from family and friends like ours? If so you’ve probably noticed that they are looking a little dingy and word from dust and grease. Now you can protect those precious photos and dress up your refrigerator at the same time with this easy DIY sequin magnetic picture frame!

Affiliate links may be used in this post. Ordering a product through these links may result in a commission. Read the full disclosure here.

Collage of Photos of Magnetic Sequin Picture Frame with text overlay - DIY Magnetic Sequin Picture Frame


[bctt tweet=”Fridge covered in photos? Now you can easily and frugally protect those precious photos on your fridge with this DIY sequin magnetic picture frame.” username=”diyadulation”]

I love getting photos of friends and family in the mail. Admittedly, most of them come during the holidays but it’s still wonderful, especially if it’s from loved ones who live far away that we don’t see often.

The last time I changed out the photos with the most recent ones, I noticed that the old ones were in poor condition from the myriad of meals we cook. You don’t want to throw out the old photos simply because you’re displaying updated ones. Unfortunately, some of them are in such bad shape you don’t have a choice.


Picture Framed in Sequinned Magnetic Frame

Instead of not displaying the photos or risking ruining them, you can protect them with a DIY sequin magnetic picture frame. It’s super easy to make and budget friendly, especially if you get your frames at the Dollar Tree like I did. One multi-pack of sequins from the Dollar Tree can make 4+ frames putting you pennies over a dollar per frame. You seriously can’t beat that! (Plus, hello, sparkly!)


Sequined Magnetic Picture Frame Materials

DIY Sequin Magnetic Picture Frame Materials

Step 1

First, remove your magnetic picture frame from the packaging.

Note:

Step 2

Next, determine the order you want to attach your sequins. Since all of mine were varying shades of blue and green, I put them in order from most green to most blue.

Step 3

Then, add a thin section of glue to the bottom of the frame.


Close Up of Sequins on Magnetic Picture Frame

Step 4

Begin attaching a line of sequins along the bottom edge of the frame and working your way up.

Step 5

Continue until you have 3 rows of one color, adding glue as needed to your frame.

Step 6

Once you have your first 3 rows of sequins glued, add a small amount of glue on the side edges of your frame being sure to leave the center open for your picture to show through.

Tip:

Step 7

Now, continue adding your sequins in rows of 3, again, being sure to leave the center of the frame open for your picture to show through. This is another reason why leaving the paper insert is important. Use it as a reminder to leave the center of your frame clear.


Close Up of Sequins on Top Half of Magnetic Picture Frame

Step 8

Once you reach the top half inch or so of your frame, again add a thin layer of glue across the entire top and attach 3 rows of sequins.


Picture Framed in Sequinned Magnetic Frame on Polka Dot Background

Step 9

Check all of the edges to ensure that no glue has seeped down then set aside to dry.


Magnetic Sequin Picture Frame on Polka Dot Background with text overlay - DIY Magnetic Sequin Picture Frame

Now you can easily and frugally protect those precious photos on your fridge with this DIY sequin magnetic picture frame. It is so simple to make and it makes changing out those cherished photos easy. These make wonderful simple gifts too. Add a photo of your own kiddos and give to grandparents for a thoughtful, handmade gift that doesn’t break the bank.

See where I’m linking up!

Don’t Forget to Pin It!

Magnetic Sequin Picture Frame on Teal Background with text overlay - DIY Magnetic Sequin Picture Frame


More Ideas You’ll Love:

Crock Pot Corned Beef and Cabbage Dinner

Crock Pot meals are seriously a busy mom’s best friend. Holidays are no exception. That’s why you’ll love this easy Crock Pot corned beef and cabbage! With only 4 ingredients that you dump and forget, it’s the perfect dish to enjoy this St. Patrick’s Day.

Affiliate links may be used in this post. Ordering a product through these links may result in a commission. Read the full disclosure here.

Collage of Plates of Corned Beef and Cabbage on a Plate with text overlay - Crock Pot Corned Beef and Cabbage


[bctt tweet=”With moist and tender meat and melt in your mouth cabbage, this Crock Pot corned beef and cabbage dinner is the most delicious easy recipe you’ll ever eat!” username=”diyadulation”]

I absolutely love corned beef. The first time I had it, I only took some to be polite to the hosts of a St. Patrick’s Day party I attended. I’m so glad I did because 1 bite and I was in love. It is incredible!

If you’ve never tried it, this fool-proof Crock Pot corned beef and cabbage recipe is a fantastic way to give it a try. The corned beef is tender and flavorful and the cabbage melts in your mouth. It’s sure to be your new go-to recipe.


Close up of Corned Beef next to Cabbage on Plate

Crock Pot Corned Beef and Cabbage Ingredients


Head of Cabbage Next to Knife on Cutting Board

Quartered Head of Cabbage Next to Knife on Cutting Board

Step 1

First, rinse your head of cabbage and cut into quarters.

Step 2

Then remove the core from each cabbage quarter.


Sliced Cabbage Next to Knife on Cutting Board

Bowl of Sliced Cabbage

Step 3

Next, slice each cabbage quarter down the length so that you have small strips of fresh cabbage and set aside in a bowl.


Corned Beef in Crock Pot

Step 4

Place your corned beef brisket in your Crock Pot, fat side down.


Seasoned Corned Beef in Crock Pot

Step 5

Then top the brisket with the seasoning packet included.


Sliced Cabbage in Crock Pot

Step 6

Next, top the brisket with all of your cut up cabbage slices.

Note:


Butter on Sliced Cabbage in Crock Pot

Step 7

Add butter to the top of the cabbage. Don’t worry about mixing it in.

Step 8

Lastly, pour your chicken stock over the top of the cabbage, spreading around where you pour it.


Lid on Crock Pot

Step 9

Add the lid to your Crock Pot and turn on high heat.

Step 10

Cook for 6 hours on high.

Note:


Sliced Corned Beef and Cabbage on a Plate

Overhead of Corned Beef next to Cabbage on Plate

This is great on its own but you can also serve it with fried potatoes for crunch or mashed potatoes for creamy. Both will taste delicious but we prefer the crunch of crispy fried potatoes. Carrots are also a great way to add additional vegetables to the meal but we usually skip them.


Corned Beef next to Cabbage on Plate

Sliced Corned Beef and Cabbage on a Plate with text overlay - Crock Pot Corned Beef and Cabbage

This Crock Pot corned beef and cabbage dinner is the most delicious and easy recipe you’ll ever eat. Even the kiddos love when we make this dish, which is high praise coming from broccoli Nazis. Even better, this recipe makes 10 servings so you can invite friends and family over for dinner. Or, you can just munch on the leftovers for a couple of days. Don’t worry. It’s just as delicious reheated.

Yield: 8-10 Servings

Crock Pot Corned Beef and Cabbage

Crock Pot Corned Beef and Cabbage
Prep Time 10 minutes
Cook Time 5 hours
Total Time 5 hours 10 minutes

Ingredients

  • Corned Beef Brisket
  • 1 Head of Cabbage
  • 1/4 Cup of Butter or Margarine
  • 1/2 Cup Chicken Stock

Instructions

  1. First, rinse your head of cabbage and cut into quarters.
  2. Then remove the core from each cabbage quarter.
  3. Next, slice each cabbage quarter down the length so that you have small strips of fresh cabbage and set aside in a bowl.
  4. Place your corned beef brisket in your Crock Pot, fat side down.
  5. Then top the brisket with the seasoning packet included.
  6. Next, top the brisket with all of your cut up cabbage slices.
  7. Add butter to the top of the cabbage. Don’t worry about mixing it in.
  8. Lastly, pour your chicken stock over the top of the cabbage, spreading around where you pour it.
  9. Add the lid to your Crock Pot and turn on high heat.
  10. Cook for 5 hours on high.

Recommended Products

As an Amazon Associate and member of other affiliate programs, I earn from qualifying purchases.

See where I’m linking up!

Don’t Forget to Pin It!

Sliced Corned Beef and Cabbage on a Plate with text overlay - Crock Pot Corned Beef and Cabbage


More Ideas You’ll Love:

How to Organize Kids Papers to Keep Clutter Gone

How many times have you cleaned off the table and found piles of your kids papers? From schoolwork to artistic creations, these papers can clutter up your home quickly. Take back your home and find out how to organize kids papers.

Affiliate links may be used in this post. Ordering a product through these links may result in a commission. Read the full disclosure here.

Coloring Sheets and School Papers with text overlay - How to Organize Kids Papers


[bctt tweet=”Are you sneaking stacks of kids papers out of the house? Keep your kitchen table and counters clear with these tips for how to organize kids papers.” username=”diyadulation”]

My kids love sharing their creations and worksheets from school with me. My kindergartner especially wants to share every single sheet, drawing, and Scholastic reader with me. I love that she is so excited about it, but she also fights me on getting rid of the papers.

Like most moms, I occasionally wait until she isn’t around and toss them anyway. The problem with that is she isn’t learning to discern what is important to keep and what is not. Right now it all seems important to her and she needs my guidance.

Now, you can guide your child and keep the clutter down with these tips for how to organize kids papers. There may still be the occasional behind-the-pack pitch, but most of the time you will teach your kids to start discerning for themselves.


Open School Journal Binder with Pens Scattered

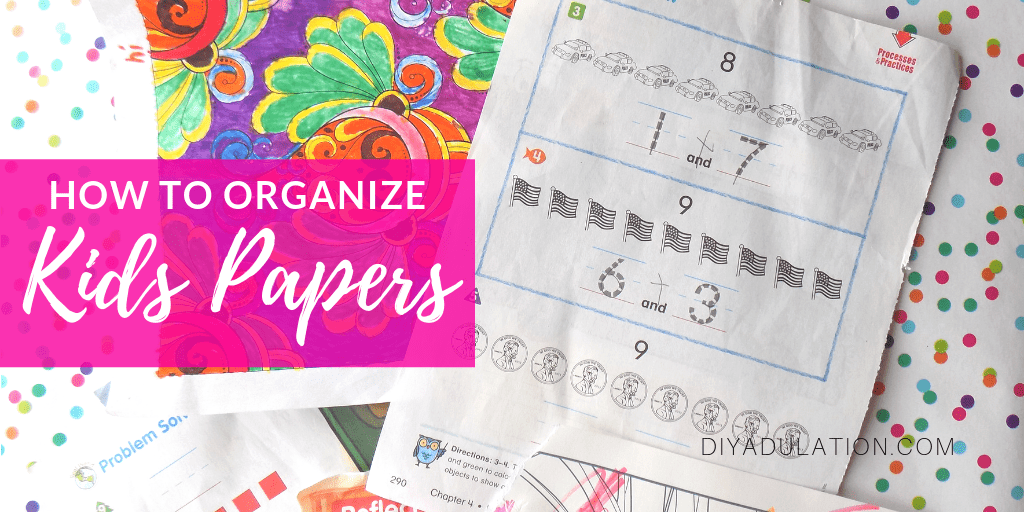
Organize School Papers

Kids love sharing everything they learn during the day. Of course, do you really need 10 sheets of your child tracing letters or a year’s worth of spelling tests? My favorite way to wrangle these papers is with these DIY School Year Journals.

Place a folder in the back of the journal for kids to store the papers they want to keep. If your child tries to keep everything, eventually the folder gets too full. When that happens, teach her to go through what she has and decide what is truly important to her.

Organize Kids Artwork

Kids collect a plethora of artwork. In one crafty session at home we end up with 20+ new masterpieces. To cut down on the clutter, kiddos can pick their favorite creations to be displayed in one of these art frames.

These frames are the absolute best because they open up and have storage inside for additional artwork. When we replace the displayed artwork with a new one, the old one goes into the storage pocket. When the kids are older, they each get to take their frame with them and will have all of their favorite artwork from their childhood.


Kids Artwork Hanging on Wall

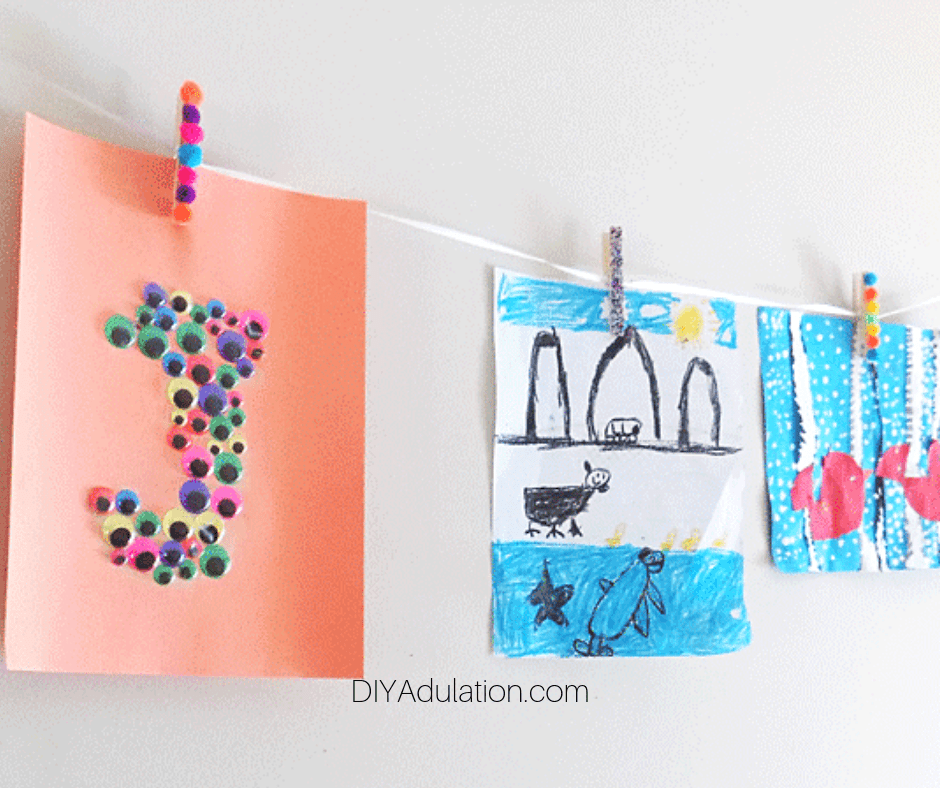
If you don’t want to buy frames, you can DIY this kids artwork display. Hang it on the wall in the kids room and let them display their creations. You can also add the rule that when they want to add a new piece of art, they have to choose an old one to get rid of.

Organize Kids Personal Documents

When it comes to organizing kids personal documents, they should be kept with the rest of the family’s important documents. There are quite a few options for organizing these documents such as a file cabinet, family binder, and digitally. Read this post about how to organize personal information now for ideas on how to organize those important papers.


Pile of School Papers and Coloring Sheets

Go Digital to Organize Kids Papers

If you’re ready to deep dive into decluttering your papers, go digital to organize kids papers. This is super easy. Get a large flash drive for each child. As they bring home papers that they want to keep, scan them into your computer and add the digital file to the flash drive.

Keep it even more organized and itemize files into folders labeled by year. Again, when your kids grow up and move out, the flash drive goes with them. It’s a beautiful memento for them to treasure in adulthood.


Coloring Sheets and School Papers with text overlay - How to Organize Kids Papers

Keep your kitchen table and counters clear with these tips for how to organize kids papers. Guide your kids to learn how to discern between the important papers and the ones they won’t miss. You still might have to sneak a few out but it will be so much better.

See where I’m linking up!

Don’t Forget to Pin It!

Coloring Sheets and School Papers with text overlay - How to Organize Kids Papers


More Ideas You’ll Love: