Easy Homemade Fruit and Nut Trail Mix Recipe

Healthy snacks that kids will actually eat but don’t take a lot of effort on your part are hard to come by. Luckily this easy homemade fruit and nut trail mix recipe covers both. Simply throw your ingredients in a bowl and mix for a delicious and hearty snack that kids will happily munch on.

Affiliate links may be used in this post. Ordering a product through these links may result in a commission. Read the full disclosure here.

Collage of photos of Trail Mix with text overlay - Easy Homemade Fruit and Nut Trail Mix


[bctt tweet=”Healthy snacks that kids will actually eat but don’t take a lot of effort on your part are here with this easy homemade fruit and nut trail mix recipe!” username=”diyadulation”]

We recently went shopping for the food for our upcoming vacation. If the kiddos had their way we would have left the store with a cart full of Lunchables and chips. Yeah, that’s not happening. Of course, we still needed food for out trip so I decided to grab the ingredients to make this crazy easy trail mix.

You want to be able to easily disperse the delicious snack to the kids so I totally recommend parsing it out into individual servings right after you mix it. Then, whether or not it’s for the road or simply a grab-and-go snack, you’re stocked with something kiddos can easily grab and enjoy.

This trail mix is easily customizable as well. I like this specific mix because they still get the sweet with the dried cranberries and banana chips without adding M&M’s or another super sugary candy. The walnut add a nice energy boost and the sunflower kernels are that extra notion that sets it over the top.


Close Up of Bowl of Trail Mix

Fruit and Nut Trail Mix Ingredients

Step 1

First, pull out a large mixing bowl.

Step 2

The put all of your ingredients into the mixing bowl.

Step 3

Carefully mix everything together with a rubber spatula.

Step 4

Use a ladle to separate the trail mix among 12 resealable bags.

Close Up of Hand Holding Trail Mix

Variations:

You can replace the dried fruits with your fruit of choice. I do recommend choosing at least one that is higher in sweetness to compliment the nuts. The same goes for the nuts. Add your favorite nuts and seeds as long as you use the same amounts recommended in the ingredients. I prefer shelled seeds because of the ease but your could totally add pumpkin or sunflower seeds still in the shells. We’re simply lazy. When we want our snack, we don’t want extra steps.


Close up of Trail Mix with text overlay - Easy Homemade Fruit and Nut Trail Mix

We absolutely love this easy homemade fruit and nut trail mix recipe! These babies are all bagged up and ready for our 16 hour road trip this weekend. Luckily, this recipe makes enough that I can grab a few without feeling guilty for stealing from the kids (I mean, it’s not like it’s Halloween candy or something). Reusable snack cups are another great storage option but I opted for bags since we’re going to be on the road. If you’re simply making these for after school snacks, I totally recommend a reusable option instead, whether it is snack bags or containers.

Easy Homemade Fruit and Nut Trail Mix Recipe

Close Up of Bowl of Trail Mix
Prep Time 5 minutes
Total Time 5 minutes

Ingredients

  • 10 oz Shelled Walnuts
  • 6 oz Dried Cranberries
  • 10 oz Roasted Sunflower Kernels (Unsalted)
  • 12 oz Banana Chips

Instructions

  1. First, pull out a large mixing bowl.
  2. The put all of your ingredients into the mixing bowl.
  3. Carefully mix everything together with a rubber spatula.
  4. Use a ladle to separate the trail mix among 12 resealable bags.

See where I’m linking up!

Don’t Forget to Pin It!

Close up of Bowl of Trailmix with text overlay - Easy Homemade Fruit and Nut Trail Mix


More Ideas You’ll Love:


Patriotic Glitter Sensory Jar for 4th of July

Are you looking for a fun and mesmerizing daytime activity for the kiddos this 4th of July? This patriotic glitter sensory jar is a great toy that offsets the craziness and volume of the fireworks. It’s also a fun way to introduce some calming down time if the kiddos start fighting or being mean during the rest of the daytime festivities.

Affiliate links may be used in this post. Ordering a product through these links may result in a commission. Read the full disclosure here.

Collage of Blue Glitter and Stars Sensory Jars with text overlay - Patriotic Glitter Sensory Jar


[bctt tweet=”This patriotic glitter sensory jar is a fun way to introduce calming down time if the kiddos start fighting during the rest of the daytime festivities.” username=”diyadulation”]

This year my family got some inflatable pools for the kiddos to play with on the Fourth. I know they are going to have a blast with the surprise but I also know that there are bound to be some tears and fighting because, hello, they’re my kids. I wanted a creative way to institute a time-out of sorts without totally ruing the fun.

That’s why I made this patriotic glitter sensory jar. It’s still like a toy and fun to shake and watch the swirls. However, it is also the perfect way to have one of the kiddos sit and calm down before going back to play.


Patriotic Glitter Sensory Jar on Blue Background

Of course it’s simply a bonus that I can swirl it and play with it when it’s not in use by the kiddos. Score! I could seriously watch the glitter swirling all day. Mommy time-outs are totally a thing, right?


Patriotic Sensory Jar Materials

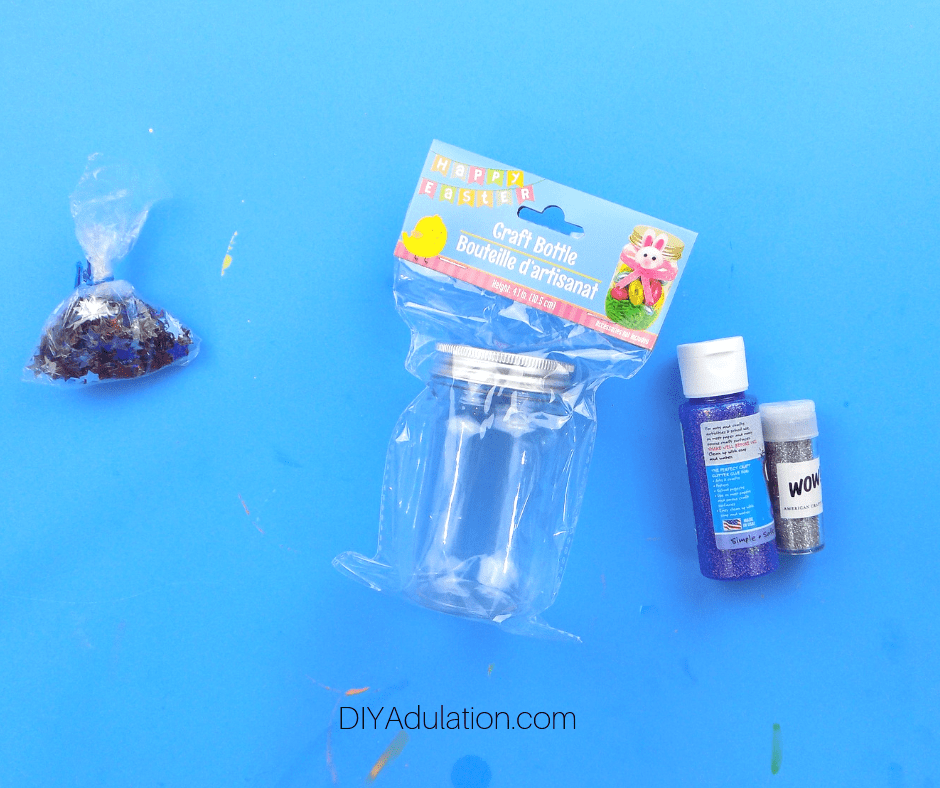
Patriotic Glitter Sensory Jar Materials

Note: I got all of my supplies except the silver glitter, confetti, and E6000 at my local Dollar Tree.

Blue Glitter Glue in Jar next to Glitter Container

Step 1

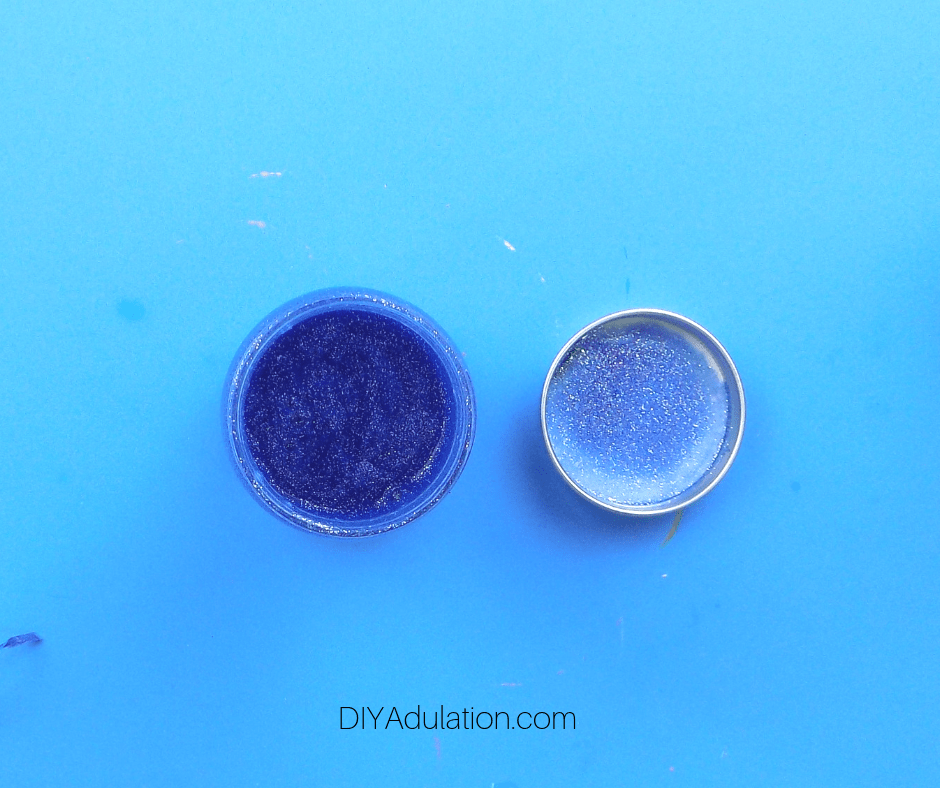
First, empty your container of blue glitter glue into your jar.

Tip:

Step 2

Next, pour in your desired amount of loose silver glitter into the jar.


Blue Glitter Glue and Water Mixed in Jar

Step 3

Fill the rest of your jar with hot water stopping just short of the lip. Then put the lid back on and shake vigorously to combine.


Stars Confetti on Mixture in Jar

Step 4

Lastly, add your metallic stars confetti and again return the lid and shake to combine it all together.


Step 5

Then place a line of E6000 along the inside edge of your lid.

Tip:

Step 6

Screw your lid tightly onto your jar and allow to sit 24 hours for the glue to dry.


Glue on Jar Lid next to Patriotic Garland

Hand Holding Patriotic Glitter Sensory Jar with Garland on Lid

Step 7

After your glue has dried, use hot glue to attach a small amount of patriotic garland to the top of your patriotic glitter sensory jar.

Tip:


Hand Holding Patriotic Glitter Sensory Jar with Garland on Lid with text overlay - Patriotic Glitter Sensory Jar

Allow your mixture to cool before using the patriotic glitter sensory jar. The glitter will fall faster while the water is still hot. It swirls longer before falling once the mixture is cooled. If you don’t have any patriotic garland, don’t let that stop you from making this baby. It’s still a ton of fun even without the extra dash of festive. I use the leftovers from some of the other 4th of July crafts below so I already had it on hand. You know I can’t resist a bit of decoration on pretty much anything.

See where I’m linking up!

Don’t Forget to Pin It!

Blue Glitter Sensory Jar with text overlay - Patriotic Glitter Sensory Jar


More Ideas You’ll Love:

Shimmery Upcycled DIY Patriotic Wreath

Are you ready for the easiest holiday wreath that you’ll ever make? This shimmery DIY patriotic wreath is so simple. All you do is wrap and repeat for a gorgeous red, white, and blue wreath to proudly display on your door this summer! Affiliate links may be used in this post. Ordering a product through these links may result in a commission. Read the full disclosure here.     Check out the written tutorial below!

The Rules:

Meet the Hosts

Angela | Simply Beautiful By Angela – Angie | Grandma Creates – Meredith | Southbound Blog – Amanda | Domestically Creative – Molly | Just a Little Creativity – Jenny | Cookies Coffee and Crafts – Michelle | Michelle James Designs – Marie | DIY Adulation – Pili | My Sweet Things – Gail | Purple Hues and Me – Denise| My Thrifty House – Emy | Semigloss Design – Michelle | Our Crafty Mom – Lynne | My Family Thyme – Chas | Chas’ Crazy Creations – Kathleen | Our Hopeful Home

Make sure you follow our board on Pinterest for more upcycled decor inspiration!


Collage of patriotic garland wreaths with bow and stars on door with text overlay - Shimmery Upcycled DIY Patriotic Wreath   [bctt tweet=”Are you ready for the easiest holiday wreath that you’ll ever make? This shimmery DIY patriotic wreath is so simple to and perfect to display on your door!” username=”diyadulation”] We are back this month with another awesome Thrift Store Upcycle Challenge! I knew I wanted to make some sort of patriotic craft but it wasn’t until I was at the thrift store that the idea solidified. If you’ve ever seen those garland wreaths at your local thrift store and thought, “Ugh, that’s hideous” and moved on: Don’t! The garland may be faded and ratty, but that plastic base underneath is pure gold for creating your own gorgeous wreath that actually fits your style. What’s even better is that the Dollar Tree always has fun and festive garland for a buck so you can grab the one you want cheaply. It’s like the perfect marriage of stylish and budget-friendly decor! I wanted to take this project a step further without adding a bunch of extra work for myself. That’s why I picked up a super fun glittery fireworks bow. It adds that extra bit of flair without adding a ton of time and work to the project, a dream for busy moms like us.   Patriotic Garland Wreath on Door

DIY Patriotic Wreath Materials

Fall Garland Wreath Fall Garland Wreath with Half of the Garland Removed from Plastic Base Plastic Wreath Base

Step 1

First, remove the existing garland on your thrift store wreath so that you have an empty wreath base to work with.  

Step 2

Next, take your red, white, and blue garland out of the packaging and start attaching it to the wreath base. Wrap one end of garland around a hook on the edge of the wreath base as pictured.   Red White and Blue Garland Wrapped on Section of Plastic Wreath Base

Step 3

Then take your garland down the front of your wreath base and wrap it around the inside hook across from the top hook you wrapped around.

Step 4

Take the garland back up and wrap around the next hook on the edge of the wreath base and continue wrapping back and forth to cover your wreath.  

Step 5

After one garland runs out, attach another garland around the same hook where the previous one ran out. Again, continue wrapping on your wreath hooks back and forth.     Garland Wrapped Plastic Wreath Base with Small Section Empty Patriotic Garland Wreath

Step 6

Continue wrapping the garland, adding more as needed, until your entire wreath is covered with garland.     Glittery Fireworks Bow with Tag

Step 7

Once your wreath is wrapped, remove the packaging from your bow but save the twist tie from the packaging.    

Step 8

Use the twist tie to attach your bow to the wreath by poking the twist tie ends through the wreath and secure them in the back.     Glittery Foam Stars on Wreath

Step 9

Lastly, glue on the glittery foam stars in sets of 3 at random on your wreath. I used one large star and 2 smaller stars in each group.     patriotic garland wreath with bow and stars on door with text overlay - Shimmery Upcycled DIY Patriotic Wreath Can you believe how freaking easy this shimmery DIY patriotic wreath is to make? It looks so pretty and festive on our door, especially when the sunlight catches it. The next time you’re at the thrift store, don’t pass up those ugly garland wreaths! Instead stock up for your holidays and create awesome, eye-catching door decor that you’ll love.

See where I’m linking up!

Don’t Forget to Pin It!

patriotic garland wreath with bow and stars on door with text overlay - Shimmery Upcycled DIY Patriotic Wreath

And now for more thrifty goodness!

Check out what my fellow upcyclers created below!

You are invited to the Inlinkz link party!

Click here to enter