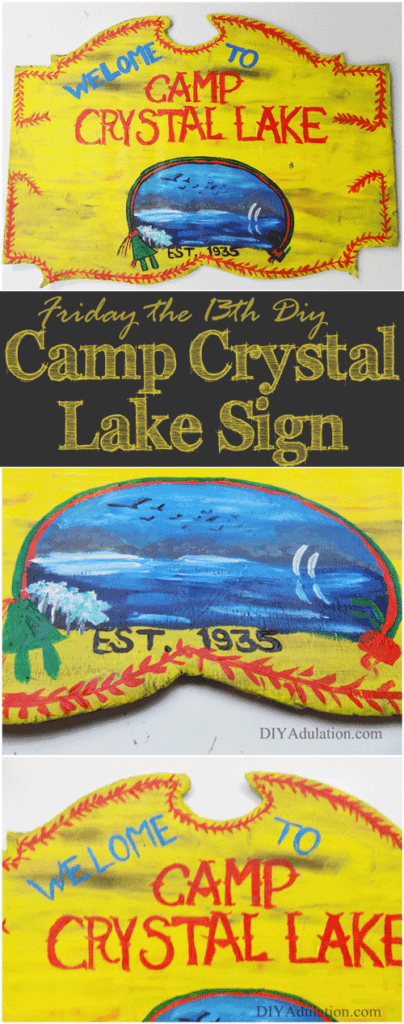
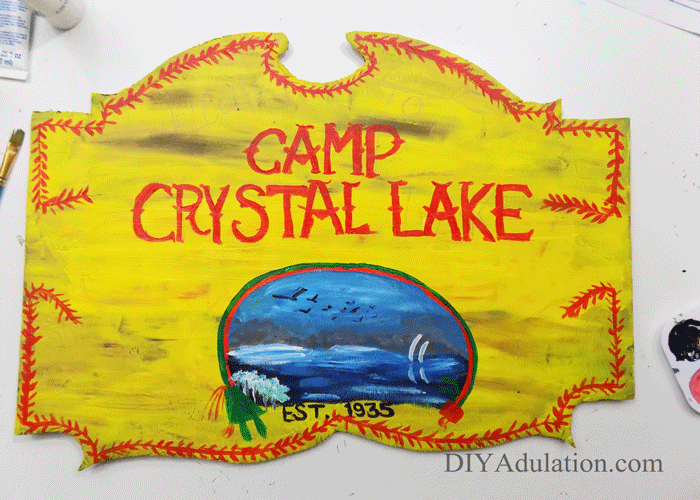
It is time for another awesome Movie Monday Challenge! This month we are focusing on Halloween movies which I am crazy excited about because horror films are my absolute favorite. I can’t get enough of them. That’s why it totally made sense to pick a classic horror film for this challenge. Friday the 13th is an iconic, cult horror film that everyone at least recognizes even if they haven’t seen it. It is time to pay homage to this classic film by making this DIY Camp Crystal Lake sign. Don’t forget to stick around until the end to see what Halloween movies everyone else picked for the challenge!
Affiliate links may be used in this post. Ordering a product through these links may result in a commission at no extra cost to you. Read the full disclosure here.

[bctt tweet=”Pay homage to #Fridaythe13th with this #DIY Camp Crystal Lake sign for Halloween!” username=”diyadulation”]
Materials
- Piece of Foam Board
- Black Marker
- Pencil
- Scissors (You definitely want this pair for this project)
- Brown Acrylic Paint (Because so many colors are used, I recommend this set)
- Yellow Acrylic Paint
- Red Acrylic Paint
- Green Acrylic Paint
- Black Acrylic Paint
- Blue Acrylic Paint
- White Acrylic Paint
- Assortment of Paint Brushes
- Plastic Paint Tray
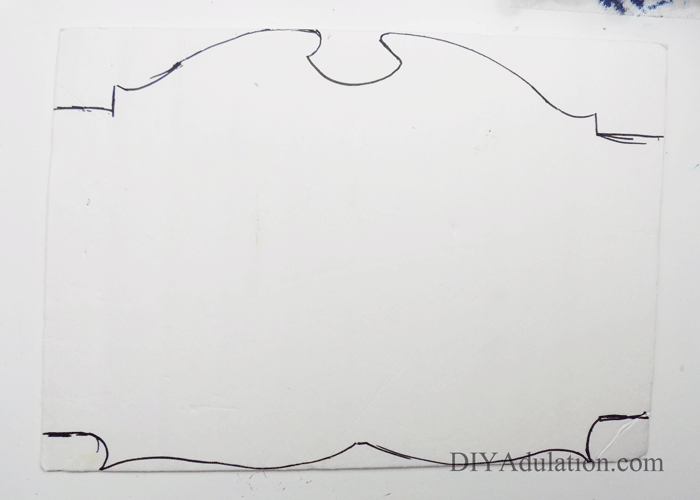
Step 1
First, outline your sign on your foam board.
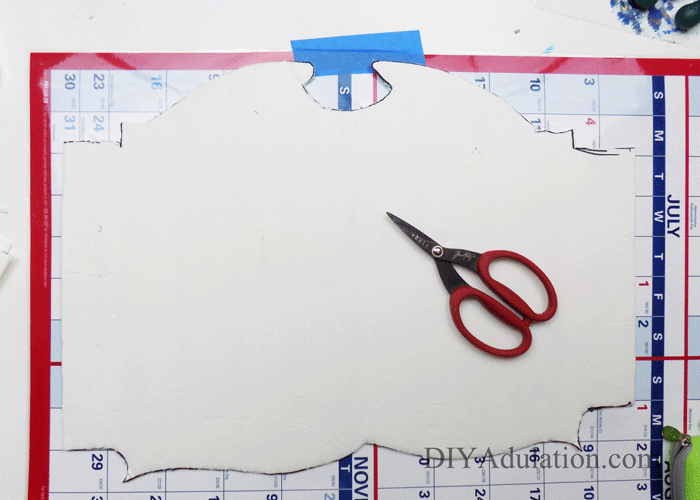
Step 2
Cut out your sign with your Tim Holtz scissors.
Note:
- These scissors have a shorter blade length and let you cut out your sign without destroying the foam.
Step 3
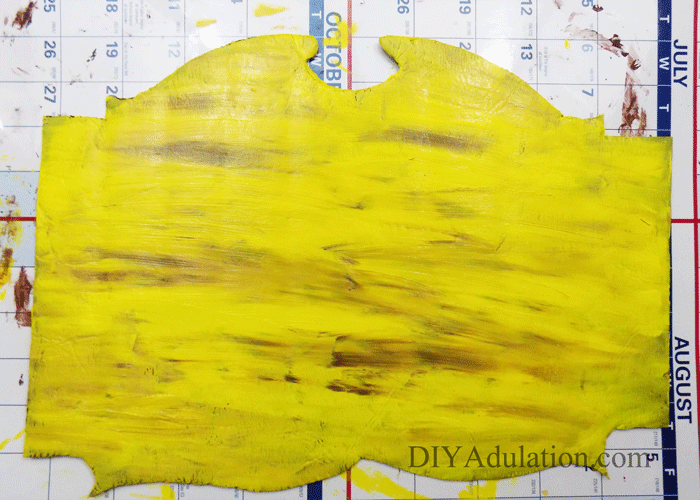
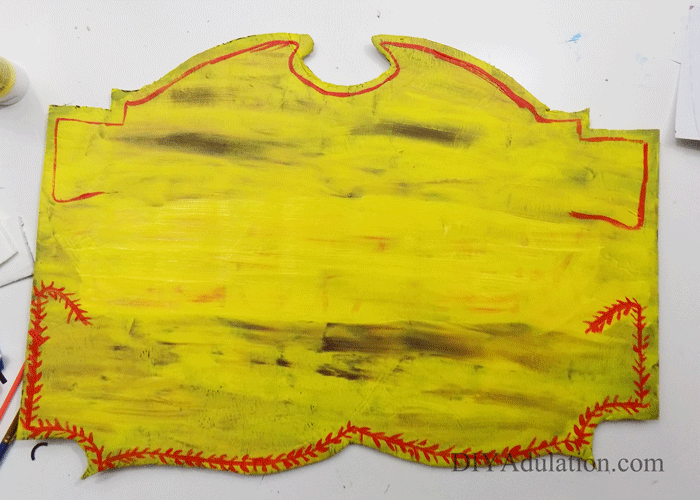
Paint the entire sign brown with a large paint brush.
Step 4
Let the brown paint dry (almost) completely.
Tip:
- You want some of the paint to still be wet to mix with the yellow you are about to add.
Step 5
Next, paint yellow over your entire sign.
Step 6
This time let all of your paint dry completely.
Step 7
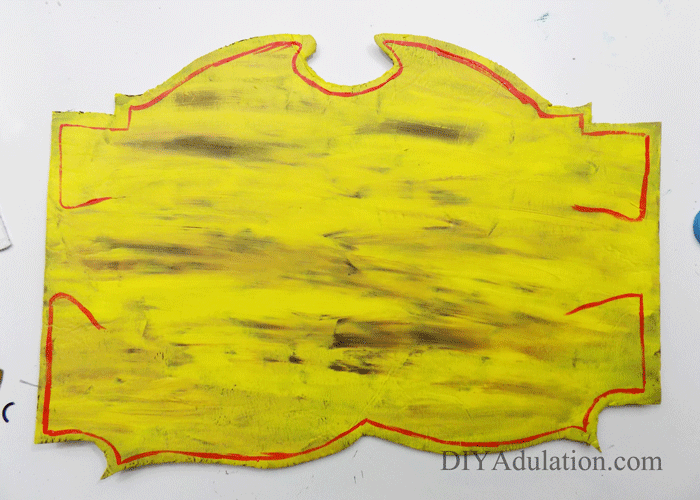
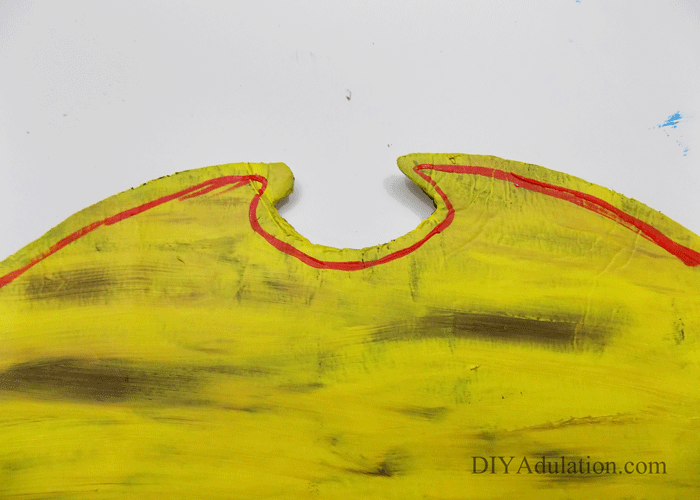
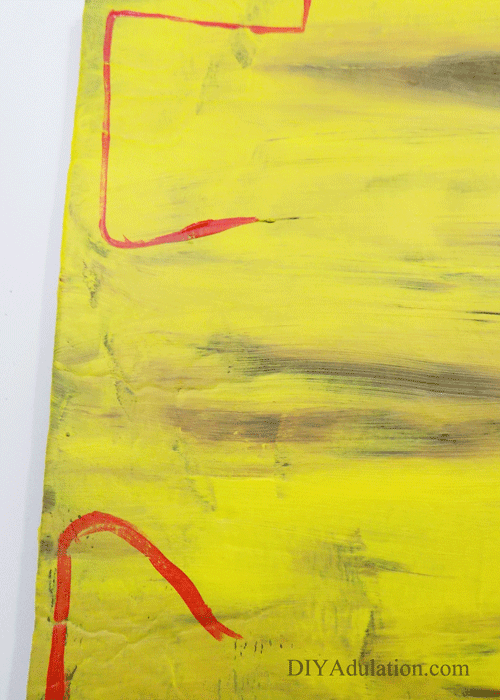
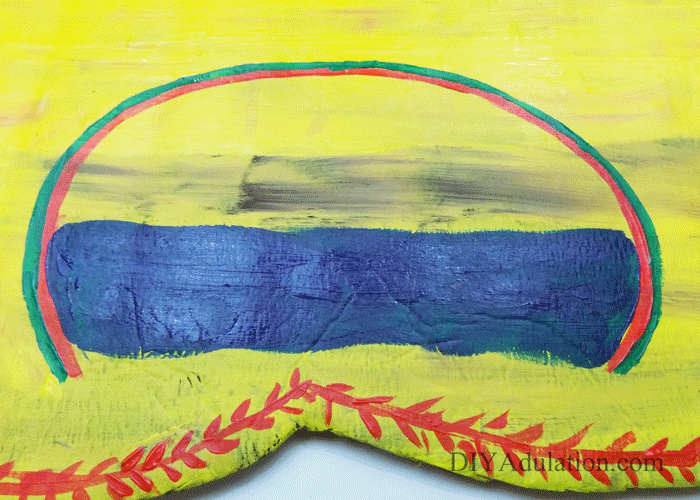
Next, paint the red outline around your sign with a small, detail paint brush as pictured.
Step 8
Begin adding the details to the outline by adding short brush strokes coming out from the line.
Step 9
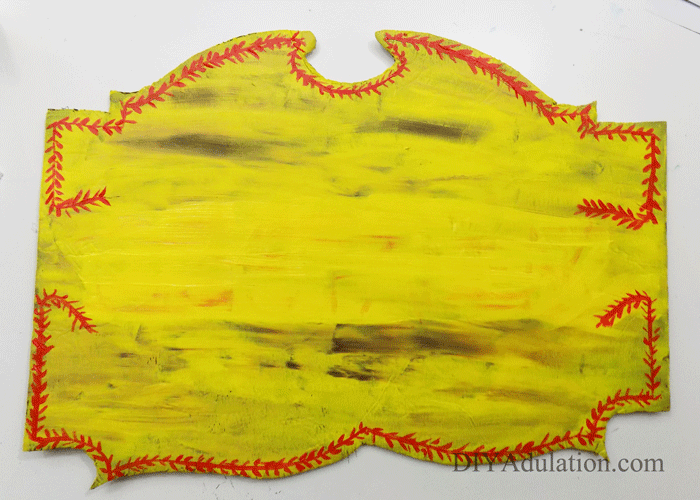
Continue adding the details until your entire red outline is completed.
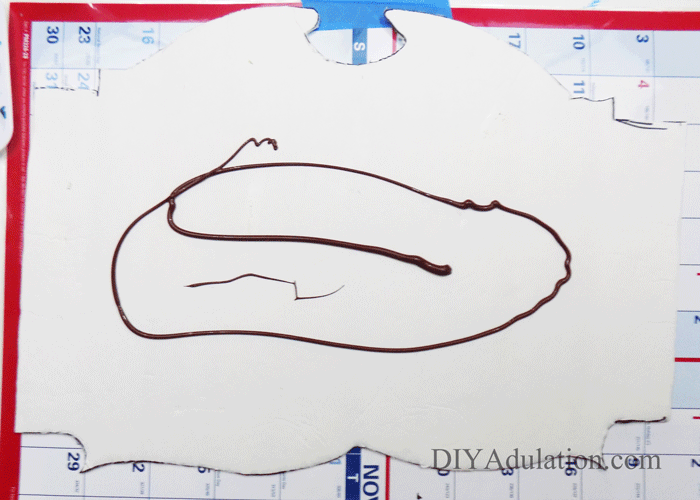
Step 10
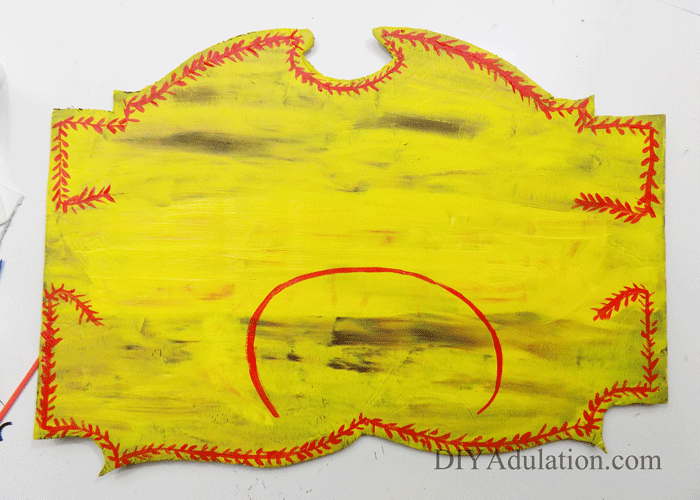
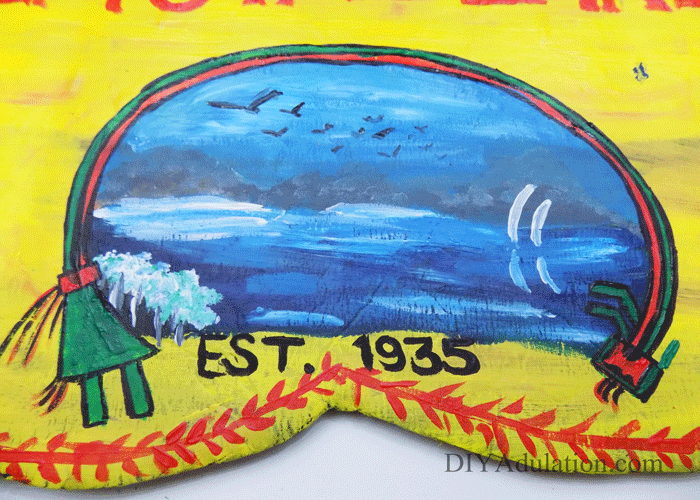
Next, paint a red semi-circle in the bottom center of your sign.
Step 11
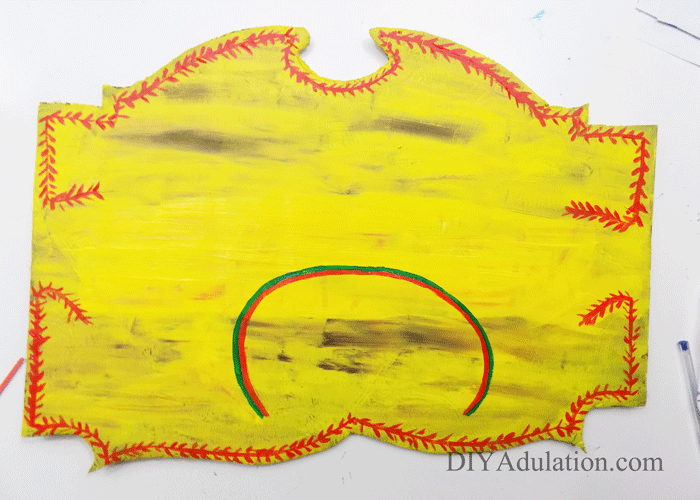
Add a green semi-circle around the red one.
Step 12
Then mix a touch of black paint with your blue paint and paint the water inside your semi-circle.
Tip:
- Use a larger brush for this than your detail brush.
Step 13
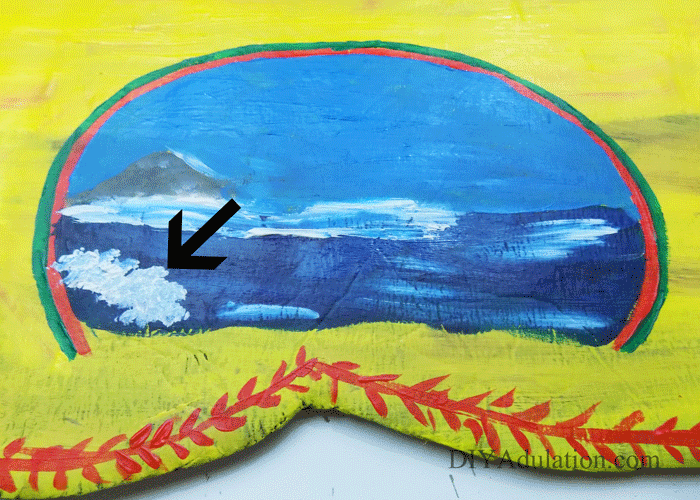
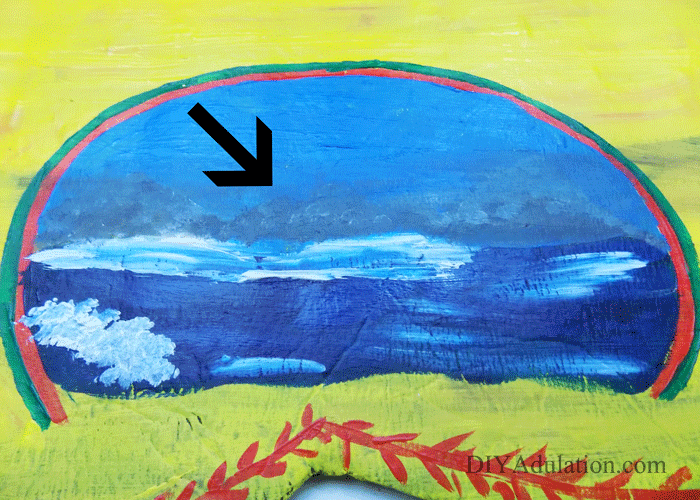
Add a more significant amount of white paint to your blue mix until you get a sky blue color and paint the sky.
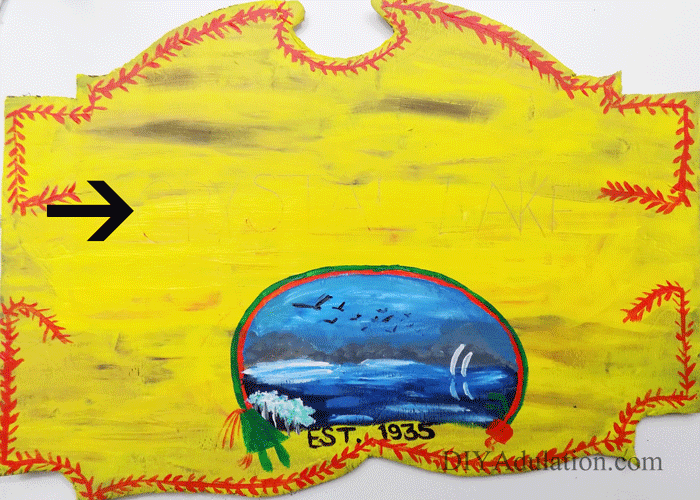
Note:
- The arrow in the photo above is showing where the white brush strokes go in step 15.
Step 14
Next, paint grey hills in the background and add white details to your scene.
Step 15
Also add white brush strokes to the bottom left of your scene.
Step 16
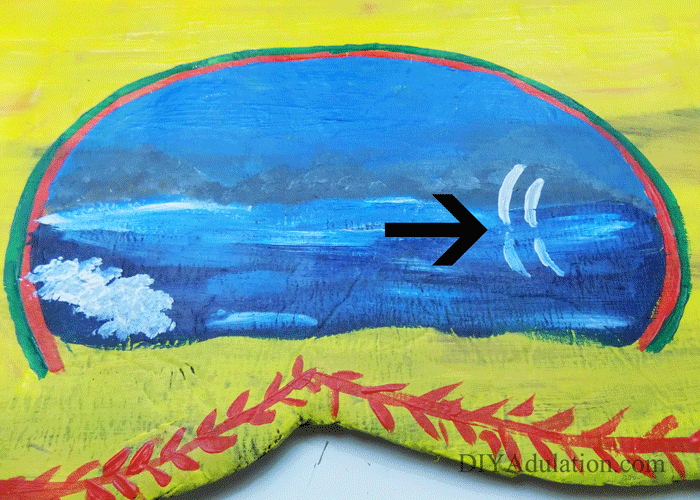
Then add your boats and the reflections on the water.
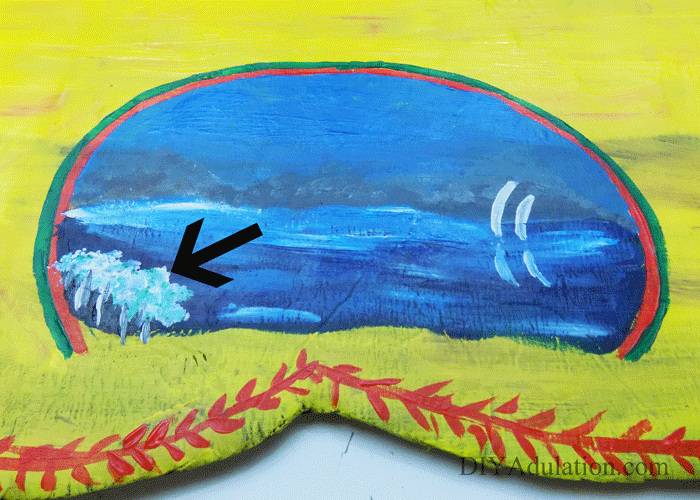
Step 17
Next, add the tree details in green and black to the bottom left corner where your white brush strokes are.
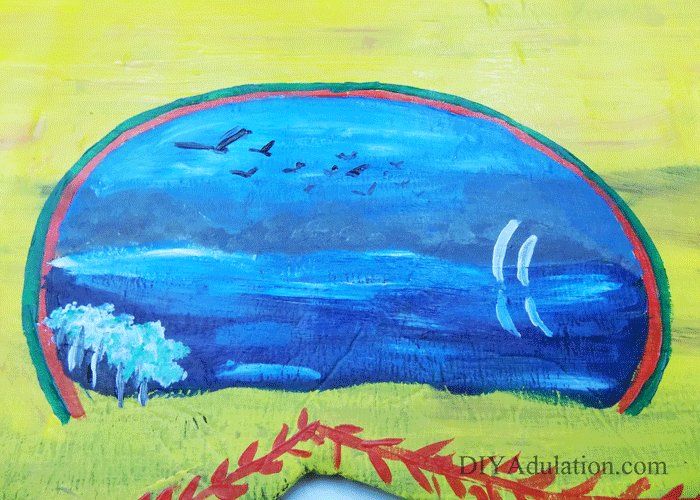
Step 18
Lastly, add birds to the sky.
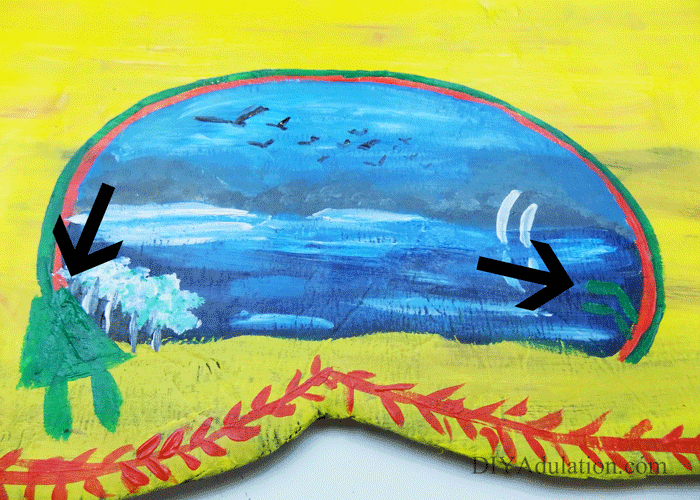
Step 19
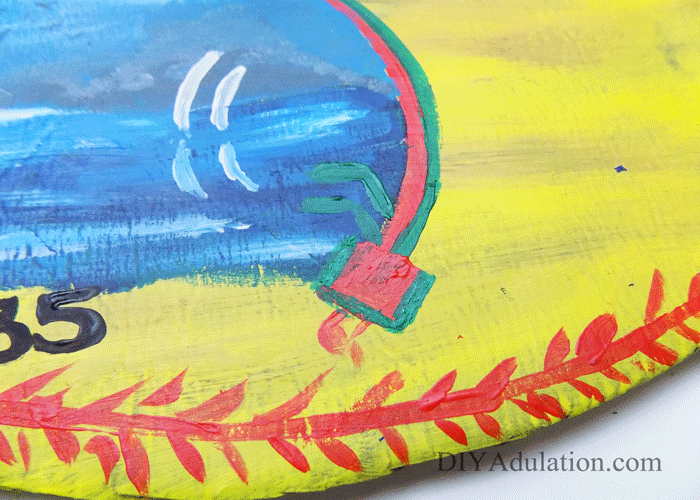
Paint a green body on the left of your semi-circle and 2 green arms on the right.

Step 20
Then paint a red head and red details.
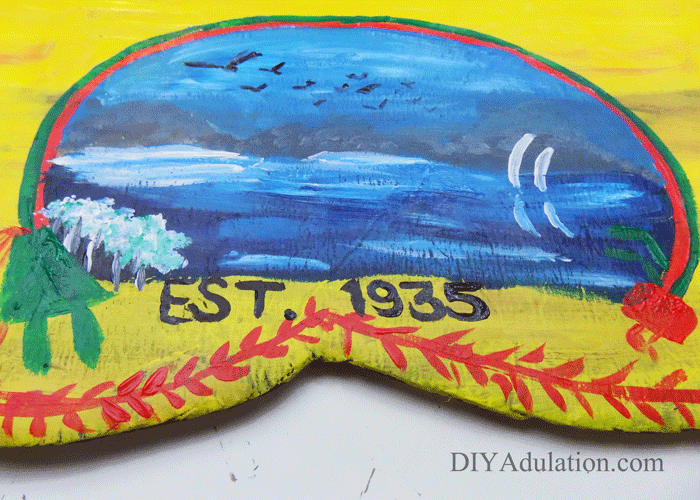
Step 21
Paint “EST. 1935” in black under your painted scene.
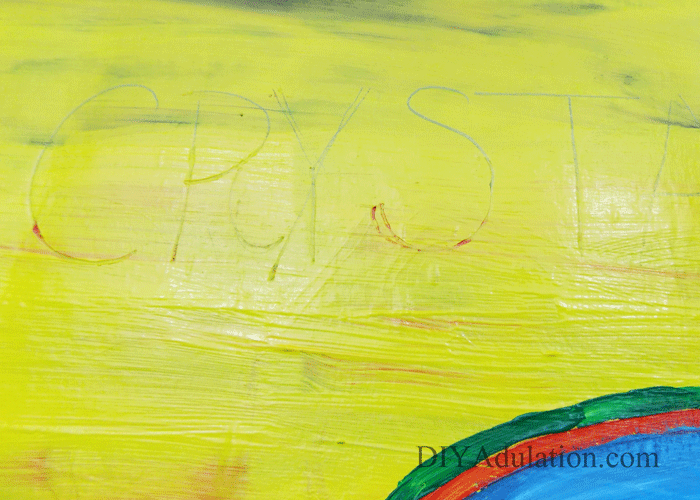
Step 22
Next, write “CRYSTAL LAKE” centered above your painted scene with pencil.
Step 23
Write “CAMP” centered about that.
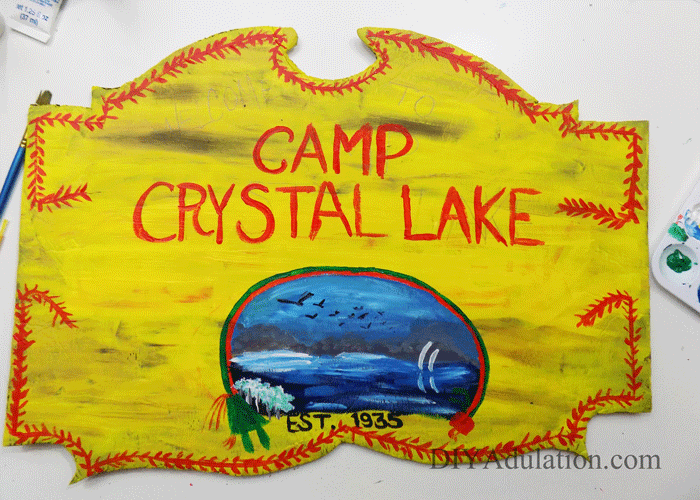
Step 24
Paint the words red with your detail brush.
Step 25
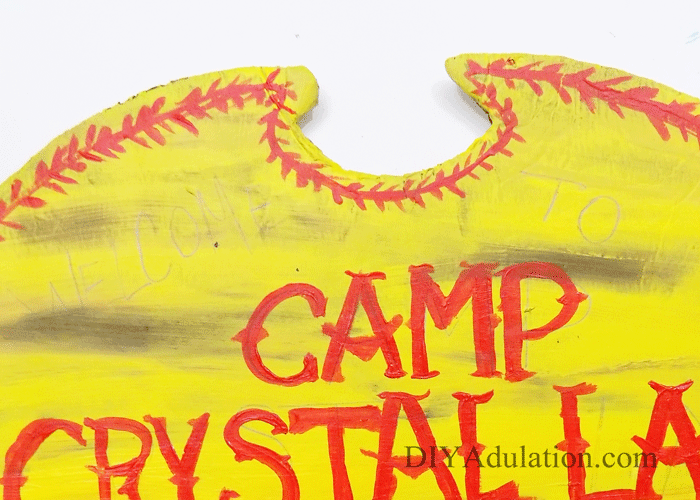
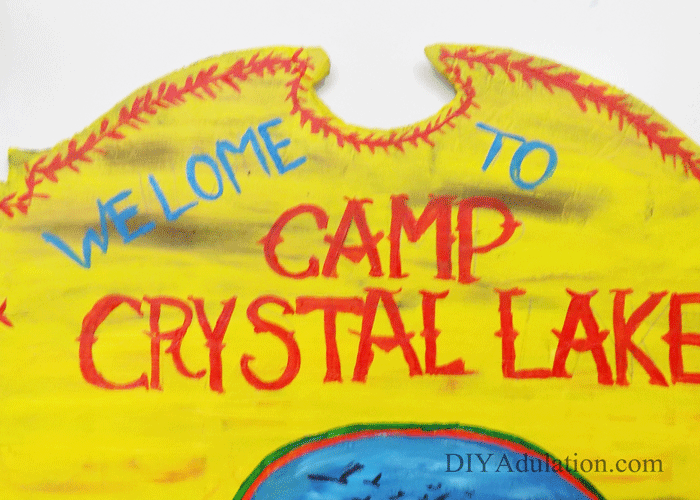
Add the words “WELCOME TO” in pencil at the top of your sign.
Step 26
Add the details to the “CAMP CRYSTAL LAKE” letters as pictured above.
Step 27
Next, paint the words “WELCOME TO” in your sky blue.

Step 28
Add a red rectangle above your green body.
Step 29
Paint a green outline around the red head.
Step 30
Lastly, outline everything in black as pictured and let your sign dry completely.
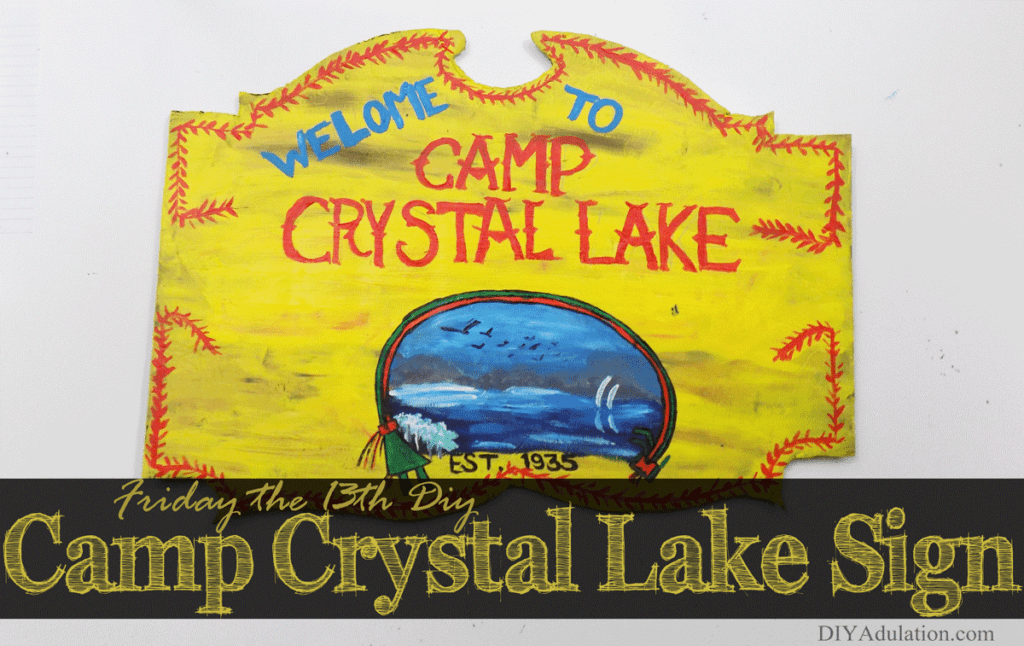
I know it is a lot of painting but this DIY Camp Crystal Lake sign turned out fabulous. Now we have another awesome piece of covert nerd décor in our home which is my favorite way to decorate. In fact, this piece could easily be left out year-round since there is nothing about it that screams, “Halloween”. If you decide to display this outside be sure to spray the entire piece with a protective sealant so that it doesn’t get ruined. I would also recommend bringing it inside during storms. Now it is time to see what my friends created for this month’s Movie Monday Challenge. Definitely stop by and give them some love! Speaking of great signs, a compay called LightSpeed have this great new technology that makes the coolest looking signs! My friend told me about it, they use an LED Exposure Unit to make mess free beautiful patterns that costs so much less to make then traditional painting.
See where I’m linking up!
On the last Monday of each month, a group of bloggers participate in a #MovieMondayChallenge, hosted by C’mon Get Crafty! We decide on a topic, genre, or specific movie to use for inspiration and everyone gets free reign to create something wonderful!
This month’s challenge was. . . . HALLOWEEN!!!! Everyone was allowed to choose their own favorite Halloween-themed film for this challenge.
Now let’s see what everyone else was inspired to create for this month’s #MovieMondayChallenge!! If you’d like to join our Facebook group, you can request an invite here.
Don’t Forget to Pin It!