DIY Haunted House Makeover : Thrift Store Décor

It is time for the Monthly Thrift Store Décor Upcycle Challenge. This month we are keeping with our Halloween momentum and I am crazy excited about it. I picked up this Christmas house from Goodwill last November and immediately knew I wanted to turn it into a haunted house. The snow on the rood and the many windows are perfect for a creepy piece of Halloween décor. Keep reading to find out how to make your own DIY haunted house makeover.

Affiliate links may be used in this post. Ordering a product through these links may result in a commission at no extra cost to you. Read the full disclosure here.

Thrift Store Decor Upcycle Challenge

The Rules:

Meet the Hosts

Amanda | Domestically Creative Michelle | Our Crafty Mom
Victoria | Dazzle While Frazzled Pili | Sweet Things Debra | Shoppe No. 5
Chelc | Inside the Fox Den Jeannee | Centsably Creative Michelle | Michelle James Designs
Molly | Just a Little Creativity Angela | Simply Beautiful by Angela

Marie | DIY Adulation Denise | My Thrifty House Lindsay | Crazy Organized
Florence | Vintage Southern Picks Shirley | Intelligent Domestications

Make sure you follow our board on Pinterest for more upcycled decor inspiration!

This DIY haunted house makeover will have you running to the thrift store to find your own Christmas statue! Find out how to make it now!


[bctt tweet=”#DIY haunted house makeover from a thrift store Christmas statue! #repurposeit” username=”diyadulation”]

Materials


This DIY haunted house makeover will have you running to the thrift store to find your own Christmas statue! Find out how to make it now!

Step 1

First, cover your entire house in black acrylic paint and let it dry.


This DIY haunted house makeover will have you running to the thrift store to find your own Christmas statue! Find out how to make it now!

Step 2

Next, paint the front door brown.


This DIY haunted house makeover will have you running to the thrift store to find your own Christmas statue! Find out how to make it now!

Step 3

Then mix a small amount of brown paint with your purple paint and paint all of the windows on your house.


This DIY haunted house makeover will have you running to the thrift store to find your own Christmas statue! Find out how to make it now!

Step 4

Next, mix a small amount of white and brown paint and paint the trim of the door.


This DIY haunted house makeover will have you running to the thrift store to find your own Christmas statue! Find out how to make it now!

This DIY haunted house makeover will have you running to the thrift store to find your own Christmas statue! Find out how to make it now!

Step 5

Add the same lightened brown paint to the trim of your house.


This DIY haunted house makeover will have you running to the thrift store to find your own Christmas statue! Find out how to make it now!

Step 6

Then add some of the brown and purple mixed paint to random shingles of your roof.


This DIY haunted house makeover will have you running to the thrift store to find your own Christmas statue! Find out how to make it now!

Step 7

Touch up any areas that need it and allow the paint to dry.

Step 8

Spray your entire house with acrylic sealant and let it dry.


This DIY haunted house makeover will have you running to the thrift store to find your own Christmas statue! Find out how to make it now!

Step 9

While your sealant dries, cut small pieces of birch bark to look like boards for the windows.


This DIY haunted house makeover will have you running to the thrift store to find your own Christmas statue! Find out how to make it now!

Step 10

Next, glue the boards across all of the bottom windows on your house.


This DIY haunted house makeover will have you running to the thrift store to find your own Christmas statue! Find out how to make it now!

Step 11

Now select some plastic Halloween toys to embellish your house with, including one skeleton bookmark.


This DIY haunted house makeover will have you running to the thrift store to find your own Christmas statue! Find out how to make it now!

This DIY haunted house makeover will have you running to the thrift store to find your own Christmas statue! Find out how to make it now!

Step 12

Cut the bottom off of your skeleton bookmark.


This DIY haunted house makeover will have you running to the thrift store to find your own Christmas statue! Find out how to make it now!

Step 13

Next, attach the skeleton to the top front window on your house with hot glue.


This DIY haunted house makeover will have you running to the thrift store to find your own Christmas statue! Find out how to make it now!

Step 14

Then glue small toys over each wreath on your house.


This DIY haunted house makeover will have you running to the thrift store to find your own Christmas statue! Find out how to make it now!

Step 15

Add a board across the window directly above the door and one board next to the door.


This DIY haunted house makeover will have you running to the thrift store to find your own Christmas statue! Find out how to make it now!

Step 16

Next, pull off a small amount of fake spider web.


This DIY haunted house makeover will have you running to the thrift store to find your own Christmas statue! Find out how to make it now!

This DIY haunted house makeover will have you running to the thrift store to find your own Christmas statue! Find out how to make it now!

Step 17

Add the spider webs to the roof of the house.

Tip:

  • You may need to add dabs of hot glue to keep the spider webs in place at the edges of the roof.


This DIY haunted house makeover will have you running to the thrift store to find your own Christmas statue! Find out how to make it now!

This DIY haunted house makeover will have you running to the thrift store to find your own Christmas statue! Find out how to make it now!

Step 18

Lastly, glue a plastic spider or 2 on the spider webs.


This DIY haunted house makeover will have you running to the thrift store to find your own Christmas statue! Find out how to make it now!

This DIY haunted house makeover will have you running to the thrift store to find your own Christmas statue! Find out how to make it now!

This DIY haunted house makeover will have you running to the thrift store to find your own Christmas statue! Find out how to make it now!

This DIY haunted house makeover turned out fantastically! The fun colors of the plastic Halloween toys make it more playfully spooky so that it doesn’t scare the kiddos. If you want to up the creep factor, stick with the white toys exclusively or paint the toys bronze before adding them to your haunted house. Whichever style you choose, you will have a fun and thrifty new piece of Halloween décor. We’re not done with the upcycled fun yet. Check out the other thrift store projects from my friends below!

See where I’m linking up!

Don’t Forget to Pin It!

This DIY haunted house makeover will have you running to the thrift store to find your own Christmas statue! Find out how to make it now!

And now for more thrifty goodness!

Check out what my fellow upcyclers created below!

DIY Spooky Spider Web Halloween Lantern

This DIY spooky spider web lantern is so easy to make and budget-friendly you will want to make several different size ones to create a spooky vignette. #ad

Seasonal holiday décor is always a great way to energize your home’s style. Unfortunately, you don’t always have hundreds of dollars to spend on holiday decorations. This frugal momma sure doesn’t. That is why Dollar Tree is so fantastic. They have a ton of ready-made Halloween décor at rock bottom prices to get your home ready for October. They also have a variety of items that can be used to create your own unique holiday décor on a budget. For example, this DIY spooky spider web Halloween lantern only cost me $5.00 to make! You can make your own budget décor piece with the tutorial below.

This DIY spooky spider web lantern is so easy to make and budget-friendly you will want to make several different size ones to create a spooky vignette. #ad


[bctt tweet=”Create this budget-friendly #DIY spooky spider web #lantern for Halloween! #ad” username=”diyadulation”]

Materials


This DIY spooky spider web lantern is so easy to make and budget-friendly you will want to make several different size ones to create a spooky vignette. #ad

Step 1

First, remove all of the packaging from your frames.


This DIY spooky spider web lantern is so easy to make and budget-friendly you will want to make several different size ones to create a spooky vignette. #ad

Step 2

Next, disassemble each of your frames.

Note:

  • Set the cardboard backings and paper inserts to the side.


This DIY spooky spider web lantern is so easy to make and budget-friendly you will want to make several different size ones to create a spooky vignette. #ad

Step 3

Add spider web to the glass inserts and return to your frame.

Tips:

  • Go heavy on the spider web to help add to the creep factor.
  • You may need to cut the extra spider web with scissors. If so, cut it after securing the glass back into the frame. This will help hold it in place better.


This DIY spooky spider web lantern is so easy to make and budget-friendly you will want to make several different size ones to create a spooky vignette. #ad

Step 4

Continue step 3 until each piece of glass is covered in spider web and returned to the frames.


This DIY spooky spider web lantern is so easy to make and budget-friendly you will want to make several different size ones to create a spooky vignette. #ad

Step 5

Next, add glue to the back, right edge of one frame.

Note:

  • It doesn’t matter which frame you choose.


This DIY spooky spider web lantern is so easy to make and budget-friendly you will want to make several different size ones to create a spooky vignette. #ad

Step 6

Attach a second frame to the glued edge.

Step 7

Add more glue to the left side of the first frame.

Tip:

  • The “first frame” is the one that you added glue to in step 5.


This DIY spooky spider web lantern is so easy to make and budget-friendly you will want to make several different size ones to create a spooky vignette. #ad

Step 8

Next, attach your 3rd frame to the glue line.

Step 9

Add glue to the left and right edges of your loose frame.


This DIY spooky spider web lantern is so easy to make and budget-friendly you will want to make several different size ones to create a spooky vignette. #ad

Step 10

Press the 3 attached frames into the glue covered edges.


This DIY spooky spider web lantern is so easy to make and budget-friendly you will want to make several different size ones to create a spooky vignette. #ad

Step 11

Next, trim 2 of the cardboard frame backings to match the width of the top of your lantern.


This DIY spooky spider web lantern is so easy to make and budget-friendly you will want to make several different size ones to create a spooky vignette. #ad

Step 12

Remove the props from the back of your cardboard pieces and glue them to the frames and at the center where they meet.


This DIY spooky spider web lantern is so easy to make and budget-friendly you will want to make several different size ones to create a spooky vignette. #ad

This DIY spooky spider web lantern is so easy to make and budget-friendly you will want to make several different size ones to create a spooky vignette. #ad

Step 13

After attaching the cardboard piece to your lantern, paint the undersides of them black.


This DIY spooky spider web lantern is so easy to make and budget-friendly you will want to make several different size ones to create a spooky vignette. #ad

Step 14

Next, touch up any brown areas on top with black paint.


This DIY spooky spider web lantern is so easy to make and budget-friendly you will want to make several different size ones to create a spooky vignette. #ad

This DIY spooky spider web lantern is so easy to make and budget-friendly you will want to make several different size ones to create a spooky vignette. #ad

Step 15

Then cut the back off of your spider ring.


This DIY spooky spider web lantern is so easy to make and budget-friendly you will want to make several different size ones to create a spooky vignette. #ad

Step 16

Lastly, glue the spider to your lantern.


This DIY spooky spider web lantern is so easy to make and budget-friendly you will want to make several different size ones to create a spooky vignette. #ad

This DIY spooky spider web lantern is so easy to make and budget-friendly you will want to make several different size ones to create a spooky vignette. #ad

This DIY spooky spider web lantern is so easy to make and budget-friendly you will want to make several different size ones to create a spooky vignette. #ad

Once your lantern is finished, place it over 2 electronic candles. I used tea lights in the photos but I think electronic pillar candles would look fantastic as well. This DIY spooky spider web lantern is so easy to make that you will want to make several different size ones to create a spooky vignette. Luckily, you can create many of them guilt-free with Dollar Tree. Looking for more frugal DIY Halloween décor? Check out these Mini Pumpkin Lanterns or this awesome DIY Buffy Hush box. Don’t forget to come back on Thursday for the Thrift Store Haunted House Makeover.

See where I’m linking up!

Don’t Forget to Pin It!

This DIY spooky spider web lantern is so easy to make and budget-friendly you will want to make several different size ones to create a spooky vignette. #ad

Friday the 13th DIY Camp Crystal Lake Sign

It is time for another awesome Movie Monday Challenge! This month we are focusing on Halloween movies which I am crazy excited about because horror films are my absolute favorite. I can’t get enough of them. That’s why it totally made sense to pick a classic horror film for this challenge. Friday the 13th is an iconic, cult horror film that everyone at least recognizes even if they haven’t seen it. It is time to pay homage to this classic film by making this DIY Camp Crystal Lake sign. Don’t forget to stick around until the end to see what Halloween movies everyone else picked for the challenge!

Affiliate links may be used in this post. Ordering a product through these links may result in a commission at no extra cost to you. Read the full disclosure here.

Friday the 13th is an iconic, cult horror film! Pay homage to this classic film by making this DIY Camp Crystal Lake sign for Halloween!

[bctt tweet=”Pay homage to #Fridaythe13th with this #DIY Camp Crystal Lake sign for Halloween!” username=”diyadulation”]

Materials

Friday the 13th is an iconic, cult horror film! Pay homage to this classic film by making this DIY Camp Crystal Lake sign for Halloween!

Step 1

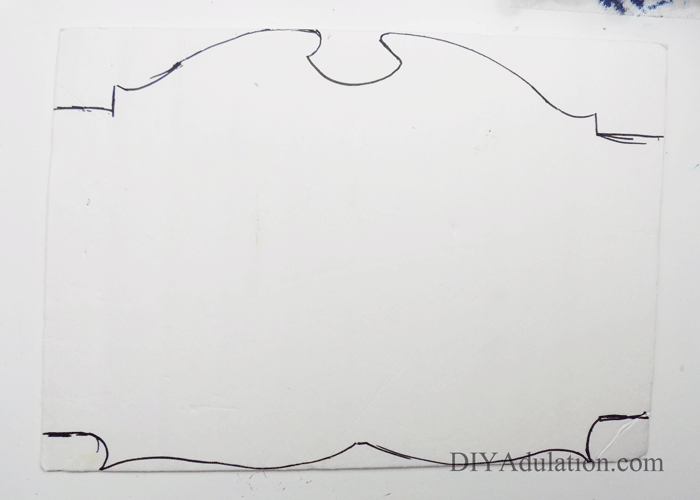
First, outline your sign on your foam board.
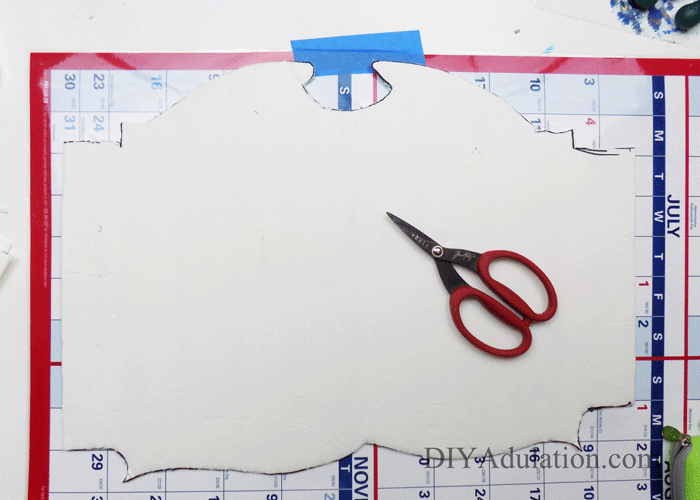
Friday the 13th is an iconic, cult horror film! Pay homage to this classic film by making this DIY Camp Crystal Lake sign for Halloween!

Step 2

Cut out your sign with your Tim Holtz scissors.

Note:

  • These scissors have a shorter blade length and let you cut out your sign without destroying the foam.
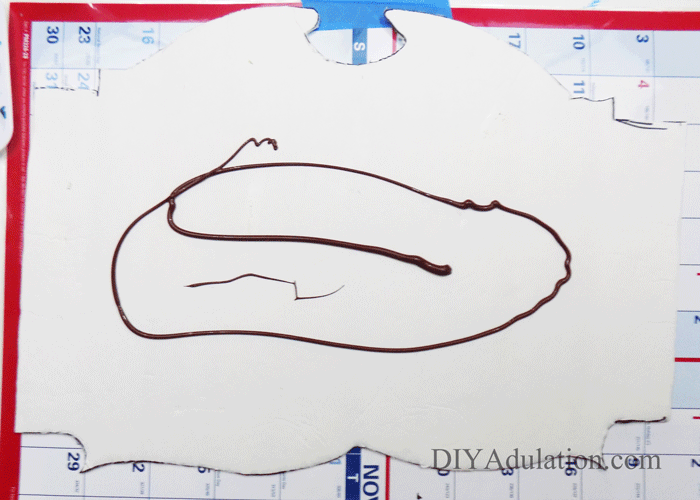
Friday the 13th is an iconic, cult horror film! Pay homage to this classic film by making this DIY Camp Crystal Lake sign for Halloween!

Step 3

Paint the entire sign brown with a large paint brush.

Step 4

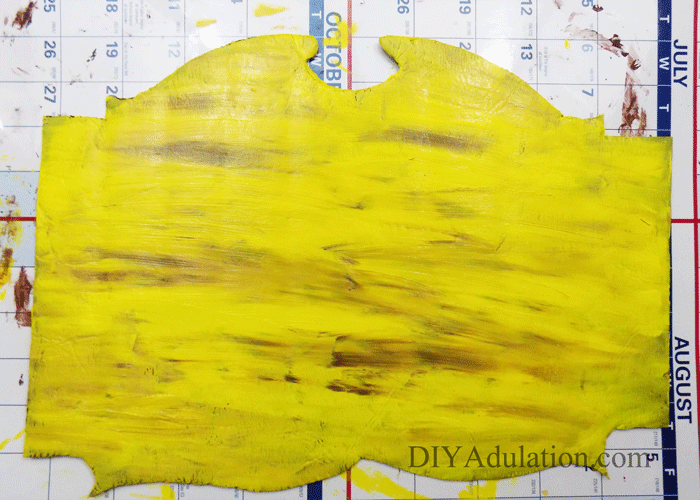
Let the brown paint dry (almost) completely.

Tip:

  • You want some of the paint to still be wet to mix with the yellow you are about to add.
Friday the 13th is an iconic, cult horror film! Pay homage to this classic film by making this DIY Camp Crystal Lake sign for Halloween!

Step 5

Next, paint yellow over your entire sign.

Step 6

This time let all of your paint dry completely.
Friday the 13th is an iconic, cult horror film! Pay homage to this classic film by making this DIY Camp Crystal Lake sign for Halloween!

Friday the 13th is an iconic, cult horror film! Pay homage to this classic film by making this DIY Camp Crystal Lake sign for Halloween!

Friday the 13th is an iconic, cult horror film! Pay homage to this classic film by making this DIY Camp Crystal Lake sign for Halloween!

Step 7

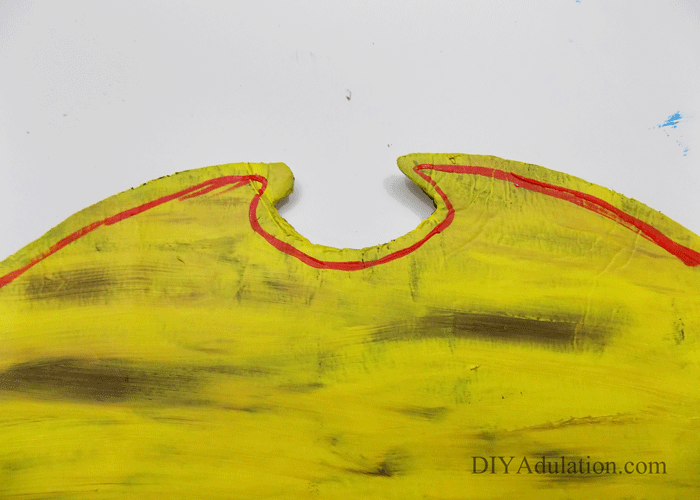
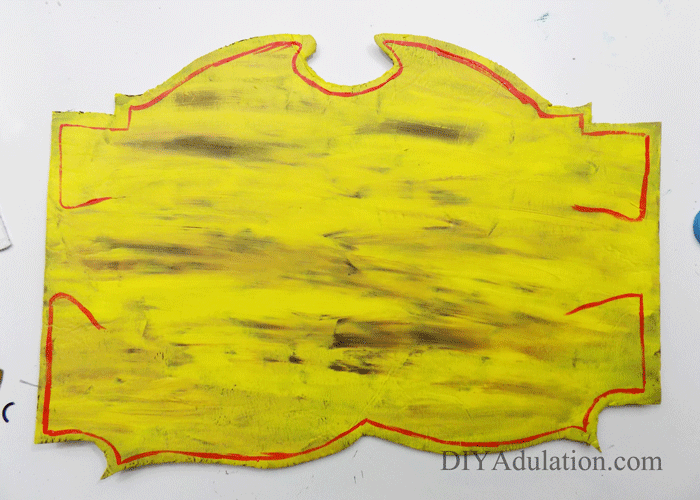
Next, paint the red outline around your sign with a small, detail paint brush as pictured.
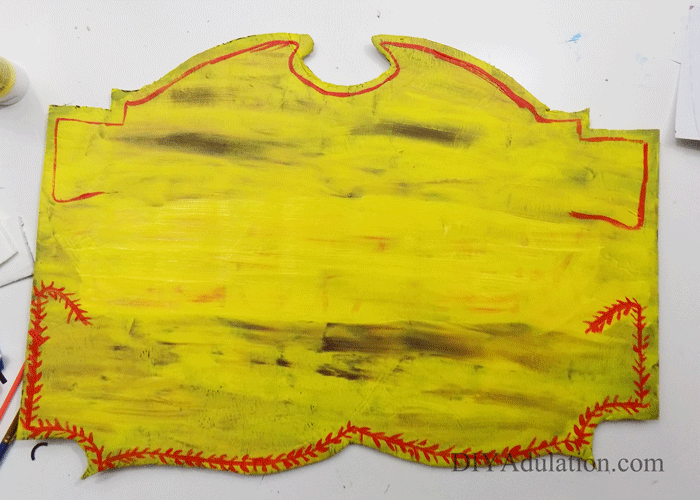
Friday the 13th is an iconic, cult horror film! Pay homage to this classic film by making this DIY Camp Crystal Lake sign for Halloween!

Step 8

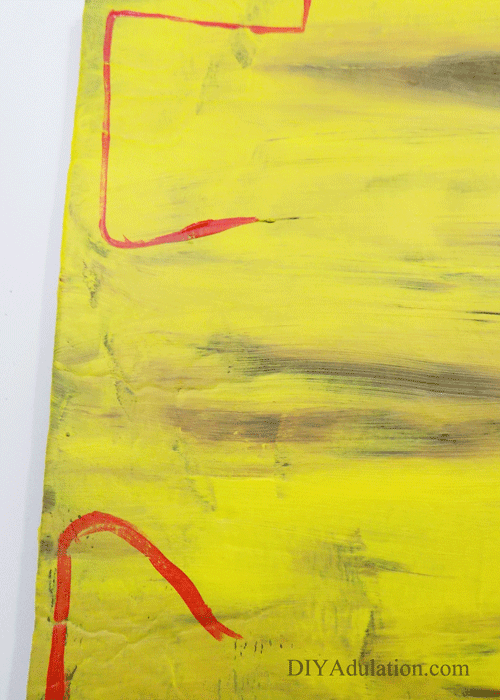
Begin adding the details to the outline by adding short brush strokes coming out from the line.
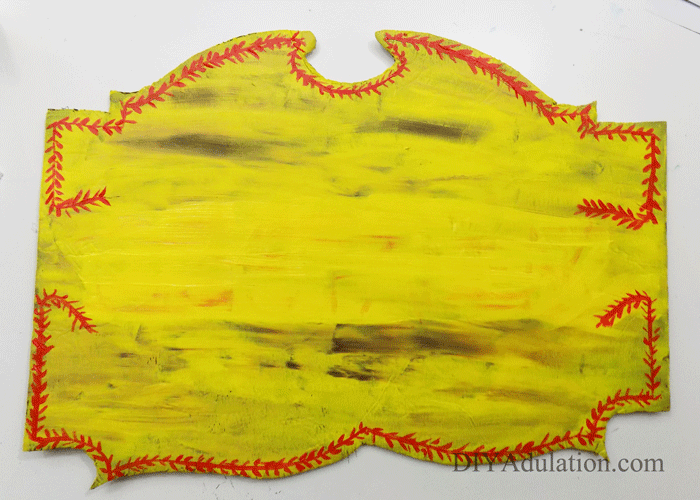
Friday the 13th is an iconic, cult horror film! Pay homage to this classic film by making this DIY Camp Crystal Lake sign for Halloween!

Step 9

Continue adding the details until your entire red outline is completed.
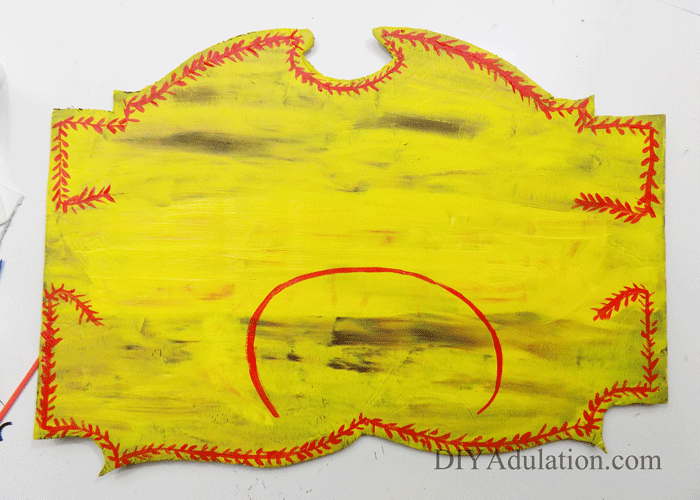
Friday the 13th is an iconic, cult horror film! Pay homage to this classic film by making this DIY Camp Crystal Lake sign for Halloween!

Step 10

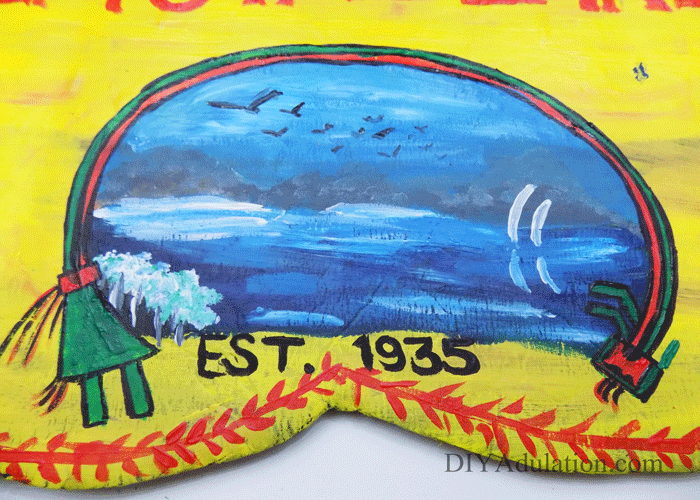
Next, paint a red semi-circle in the bottom center of your sign.
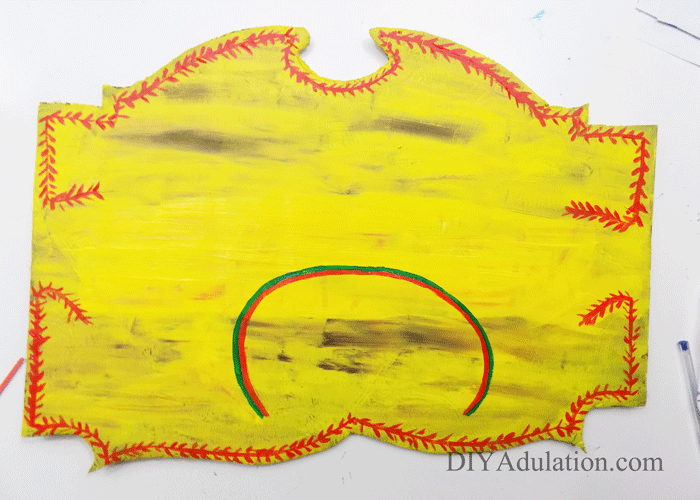
Friday the 13th is an iconic, cult horror film! Pay homage to this classic film by making this DIY Camp Crystal Lake sign for Halloween!

Step 11

Add a green semi-circle around the red one.
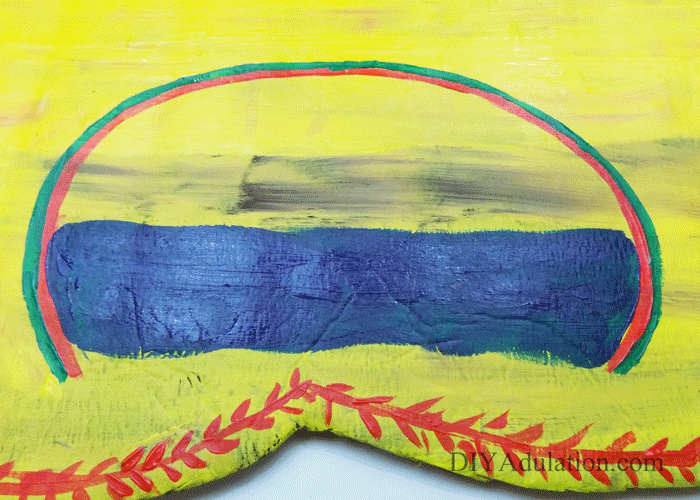
Friday the 13th is an iconic, cult horror film! Pay homage to this classic film by making this DIY Camp Crystal Lake sign for Halloween!

Step 12

Then mix a touch of black paint with your blue paint and paint the water inside your semi-circle.

Tip:

  • Use a larger brush for this than your detail brush.
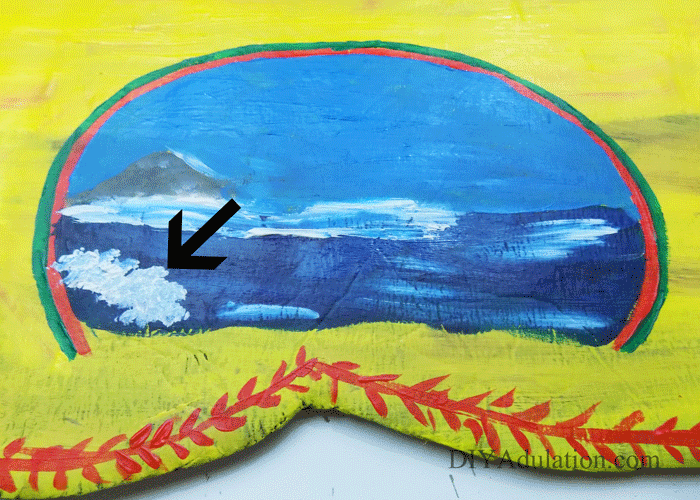
Friday the 13th is an iconic, cult horror film! Pay homage to this classic film by making this DIY Camp Crystal Lake sign for Halloween!

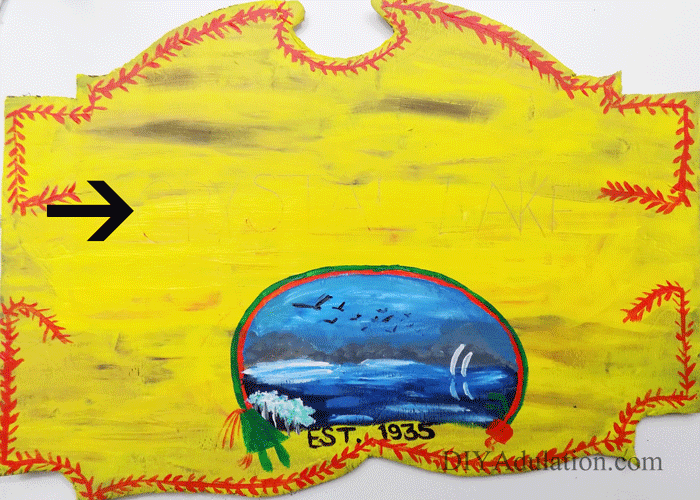
Step 13

Add a more significant amount of white paint to your blue mix until you get a sky blue color and paint the sky.

Note:

  • The arrow in the photo above is showing where the white brush strokes go in step 15.
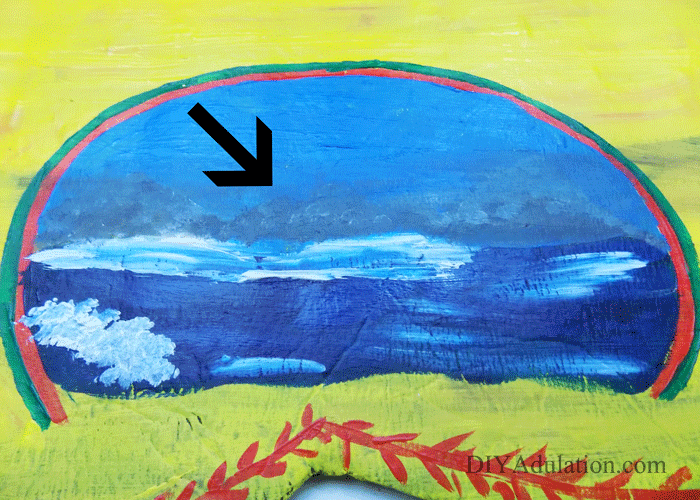
Friday the 13th is an iconic, cult horror film! Pay homage to this classic film by making this DIY Camp Crystal Lake sign for Halloween!

Step 14

Next, paint grey hills in the background and add white details to your scene.

Step 15

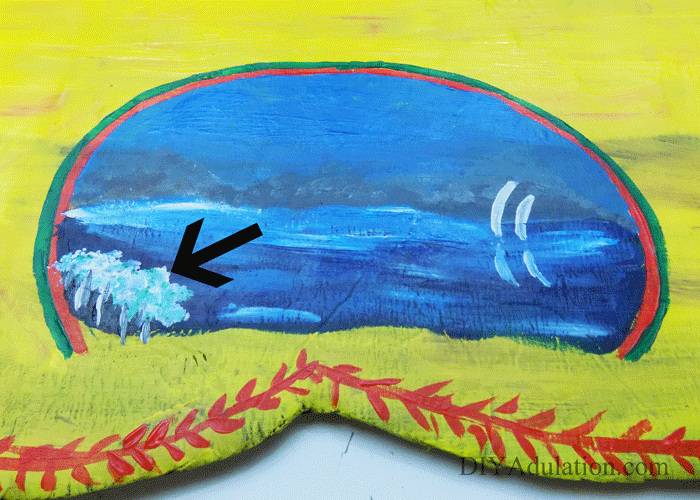
Also add white brush strokes to the bottom left of your scene.
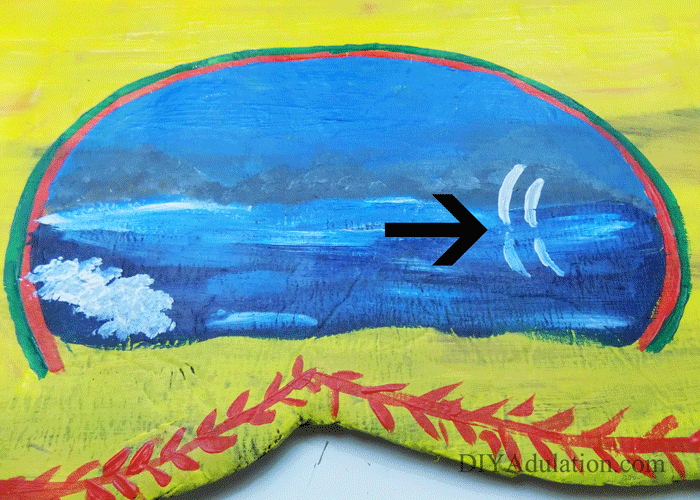
Friday the 13th is an iconic, cult horror film! Pay homage to this classic film by making this DIY Camp Crystal Lake sign for Halloween!

Step 16

Then add your boats and the reflections on the water.
Friday the 13th is an iconic, cult horror film! Pay homage to this classic film by making this DIY Camp Crystal Lake sign for Halloween!

Step 17

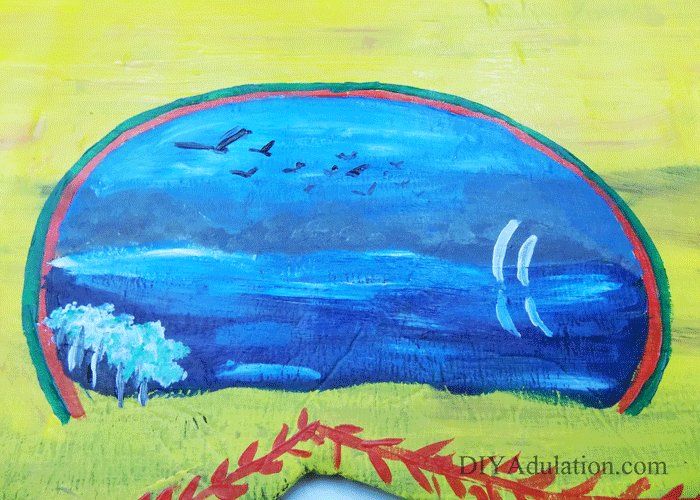
Next, add the tree details in green and black to the bottom left corner where your white brush strokes are.
Friday the 13th is an iconic, cult horror film! Pay homage to this classic film by making this DIY Camp Crystal Lake sign for Halloween!

Step 18

Lastly, add birds to the sky.
Friday the 13th is an iconic, cult horror film! Pay homage to this classic film by making this DIY Camp Crystal Lake sign for Halloween!

Step 19

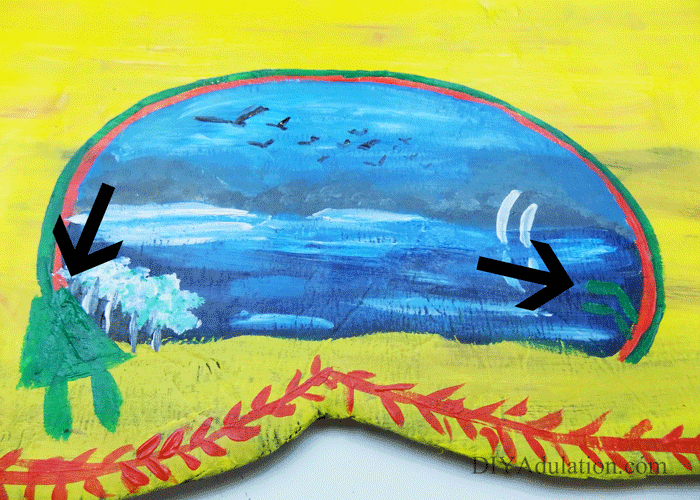
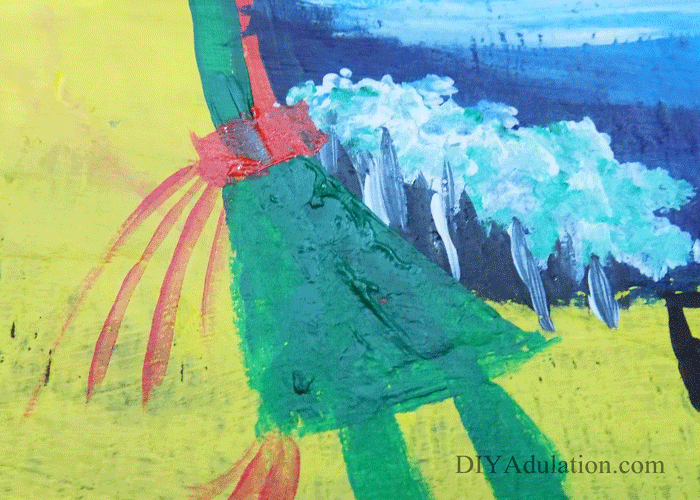
Paint a green body on the left of your semi-circle and 2 green arms on the right.
Friday the 13th is an iconic, cult horror film! Pay homage to this classic film by making this DIY Camp Crystal Lake sign for Halloween!

Step 20

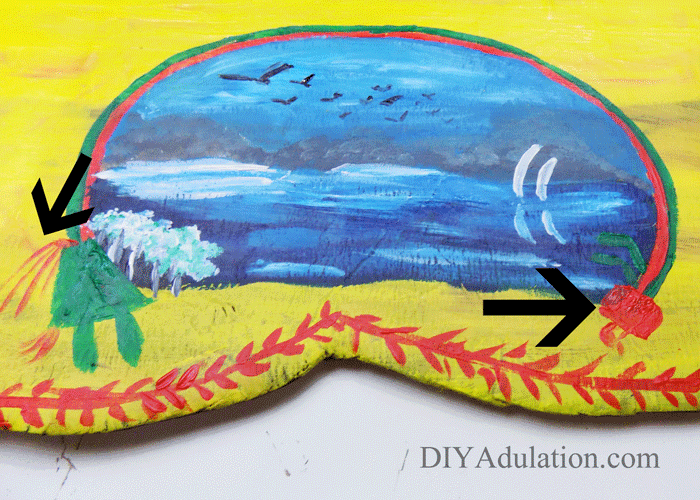
Then paint a red head and red details.
Friday the 13th is an iconic, cult horror film! Pay homage to this classic film by making this DIY Camp Crystal Lake sign for Halloween!

Step 21

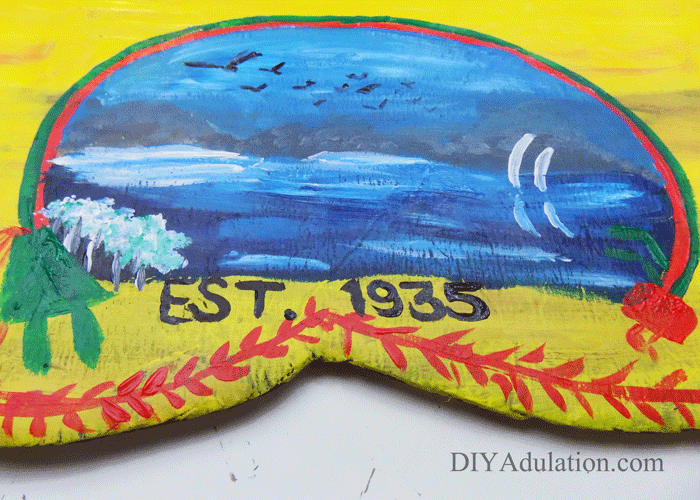
Paint “EST. 1935” in black under your painted scene.
Friday the 13th is an iconic, cult horror film! Pay homage to this classic film by making this DIY Camp Crystal Lake sign for Halloween!

Friday the 13th is an iconic, cult horror film! Pay homage to this classic film by making this DIY Camp Crystal Lake sign for Halloween!

Step 22

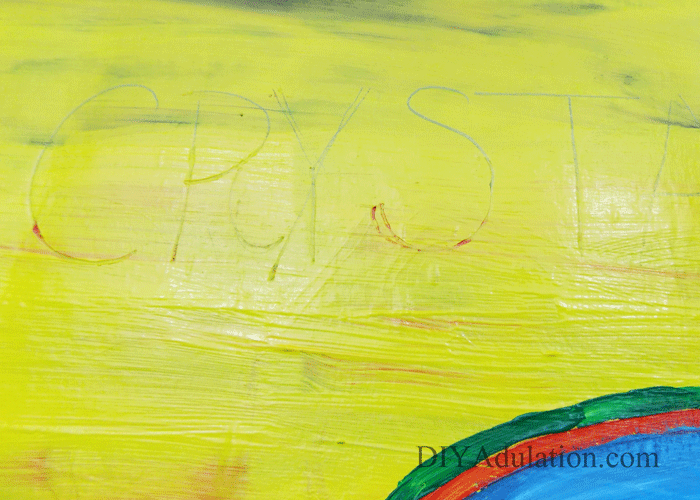
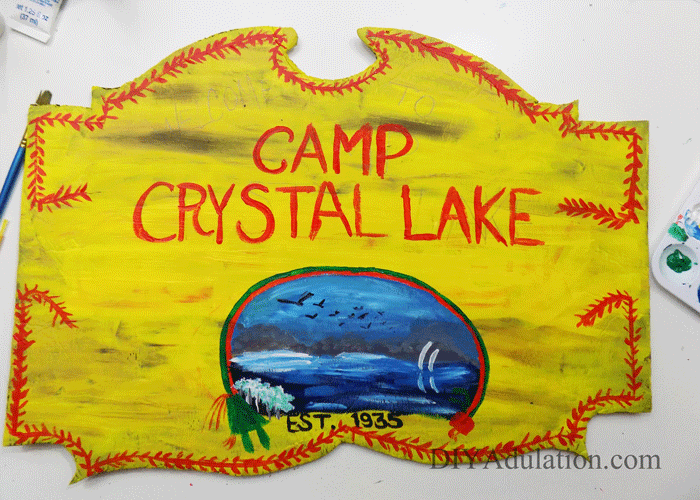
Next, write “CRYSTAL LAKE” centered above your painted scene with pencil.

Step 23

Write “CAMP” centered about that.
Friday the 13th is an iconic, cult horror film! Pay homage to this classic film by making this DIY Camp Crystal Lake sign for Halloween!

Step 24

Paint the words red with your detail brush.
Friday the 13th is an iconic, cult horror film! Pay homage to this classic film by making this DIY Camp Crystal Lake sign for Halloween!

Step 25

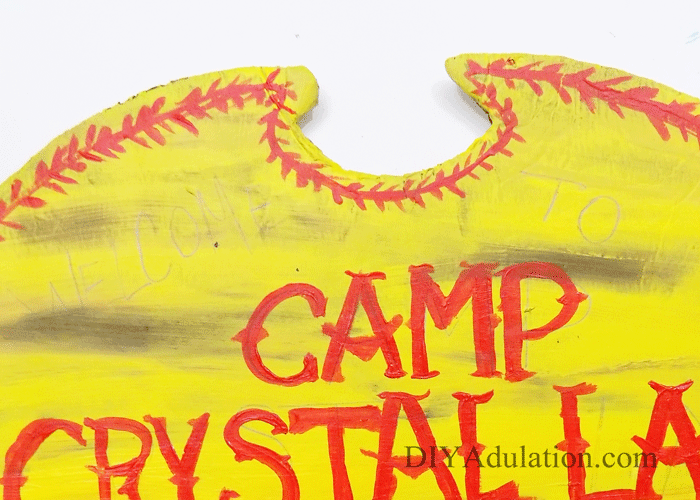
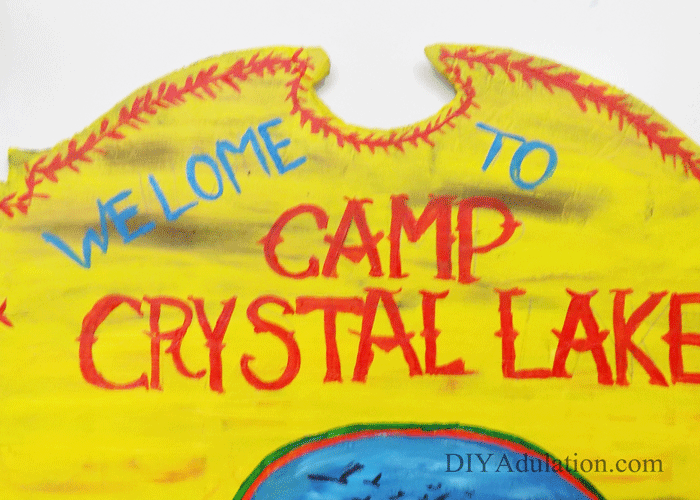
Add the words “WELCOME TO” in pencil at the top of your sign.
Friday the 13th is an iconic, cult horror film! Pay homage to this classic film by making this DIY Camp Crystal Lake sign for Halloween!

Step 26

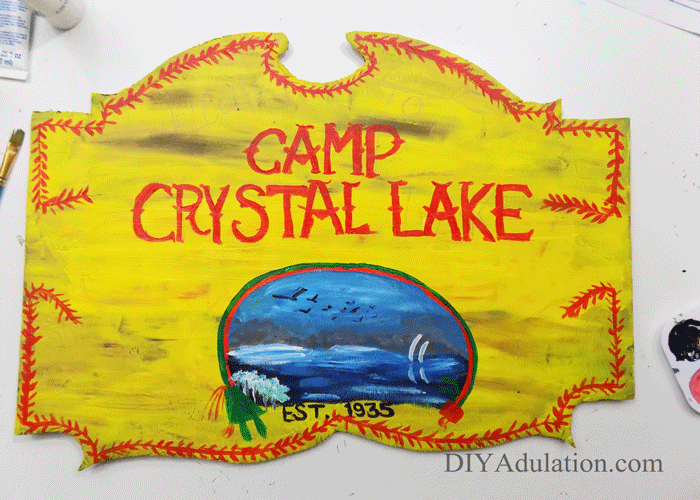
Add the details to the “CAMP CRYSTAL LAKE” letters as pictured above.
Friday the 13th is an iconic, cult horror film! Pay homage to this classic film by making this DIY Camp Crystal Lake sign for Halloween!

Step 27

Next, paint the words “WELCOME TO” in your sky blue.
Friday the 13th is an iconic, cult horror film! Pay homage to this classic film by making this DIY Camp Crystal Lake sign for Halloween!

Step 28

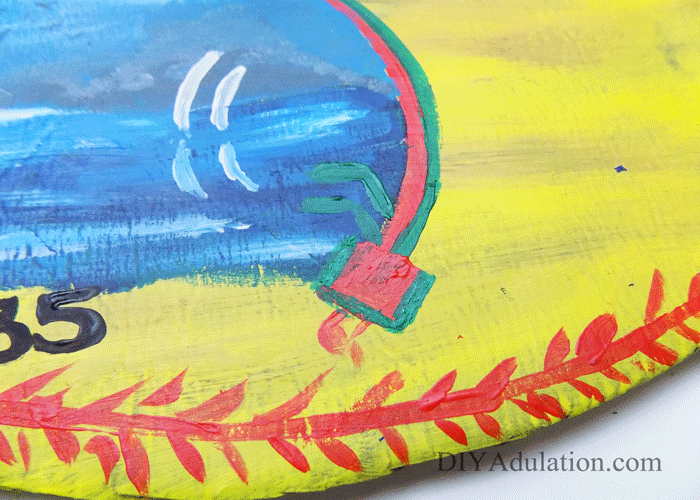
Add a red rectangle above your green body.
Friday the 13th is an iconic, cult horror film! Pay homage to this classic film by making this DIY Camp Crystal Lake sign for Halloween!

Step 29

Paint a green outline around the red head.
Friday the 13th is an iconic, cult horror film! Pay homage to this classic film by making this DIY Camp Crystal Lake sign for Halloween!

Step 30

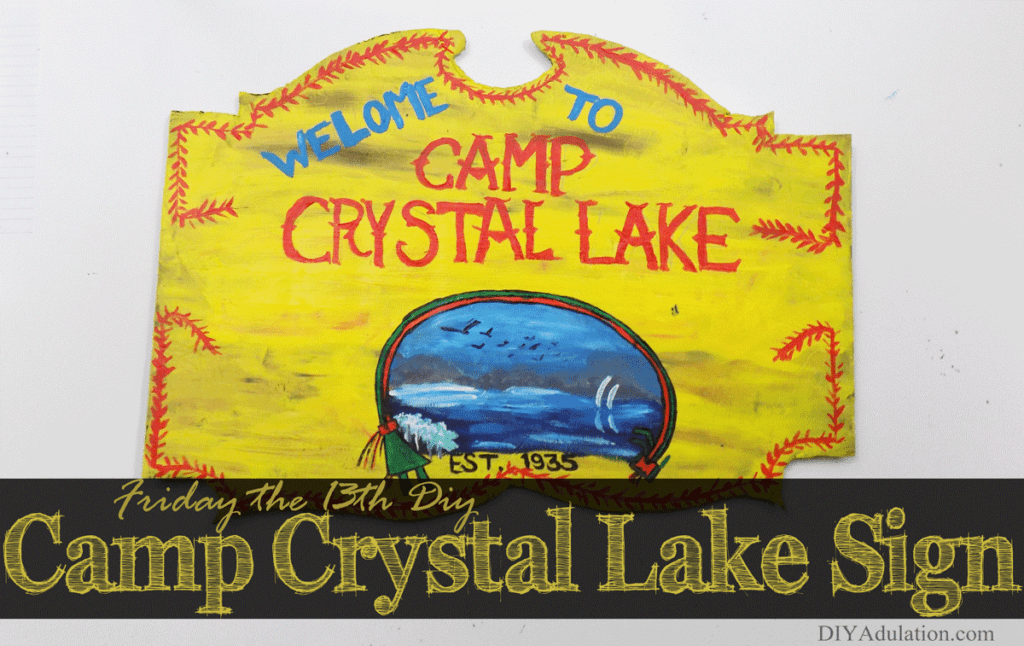
Lastly, outline everything in black as pictured and let your sign dry completely.
Friday the 13th is an iconic, cult horror film! Pay homage to this classic film by making this DIY Camp Crystal Lake sign for Halloween!

I know it is a lot of painting but this DIY Camp Crystal Lake sign turned out fabulous. Now we have another awesome piece of covert nerd décor in our home which is my favorite way to decorate. In fact, this piece could easily be left out year-round since there is nothing about it that screams, “Halloween”. If you decide to display this outside be sure to spray the entire piece with a protective sealant so that it doesn’t get ruined. I would also recommend bringing it inside during storms. Now it is time to see what my friends created for this month’s Movie Monday Challenge. Definitely stop by and give them some love! Speaking of great signs, a compay called LightSpeed have this great new technology that makes the coolest looking signs! My friend told me about it, they use an LED Exposure Unit to make mess free beautiful patterns that costs so much less to make then traditional painting.

See where I’m linking up!

On the last Monday of each month, a group of bloggers participate in a #MovieMondayChallenge, hosted by C’mon Get Crafty! We decide on a topic, genre, or specific movie to use for inspiration and everyone gets free reign to create something wonderful!

This month’s challenge was. . . . HALLOWEEN!!!! Everyone was allowed to choose their own favorite Halloween-themed film for this challenge.

Now let’s see what everyone else was inspired to create for this month’s #MovieMondayChallenge!! If you’d like to join our Facebook group, you can request an invite here.


Don’t Forget to Pin It!
Friday the 13th is an iconic, cult horror film! Pay homage to this classic film by making this DIY Camp Crystal Lake sign for Halloween!