Do you hate your front door? I seriously hate ours because it’s just so, “blah.” I want to paint it but it has been so humid out that I’m worried about the paint drying properly and frankly, don’t really want to have the front door off the hinges right now. However, just because the weather won’t cooperate doesn’t mean I have to continue to have an unattractive door. This rustic fall door wreath spruces it up without paint (although it is definitely still getting painted) and it can do the same for your front door.
Affiliate links may be used in this post. Ordering a product through these links may result in a commission. Read the full disclosure here.

[bctt tweet=”Check out this amazing before and after rustic fall wreath! #doordecor”]
Materials
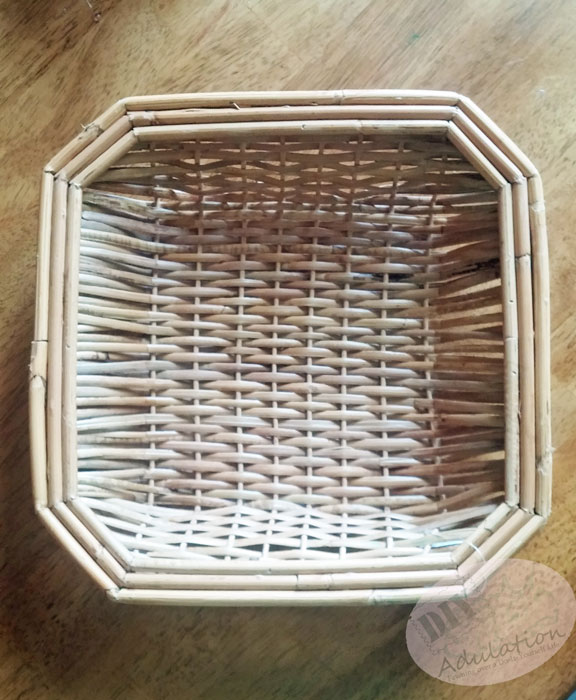
- Square Basket
- Spray Sealant
- Acrylic Paint in Black, White, and Burnt Umber
- Hot Glue Gun and Glue
- Length of Rope or Twine
- Faux Leaves (I got a 50 pack of these super cute foiled/glittered ones at the dollar store)
- Cardboard
- Scissors
- Mod Podge
- Mossy Shreds
Step 1
Prime your basket with a coat of sealer.
Step 2
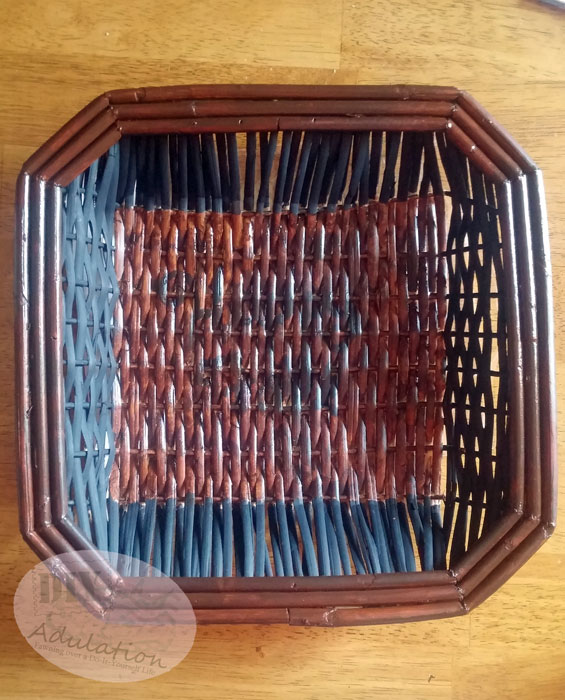
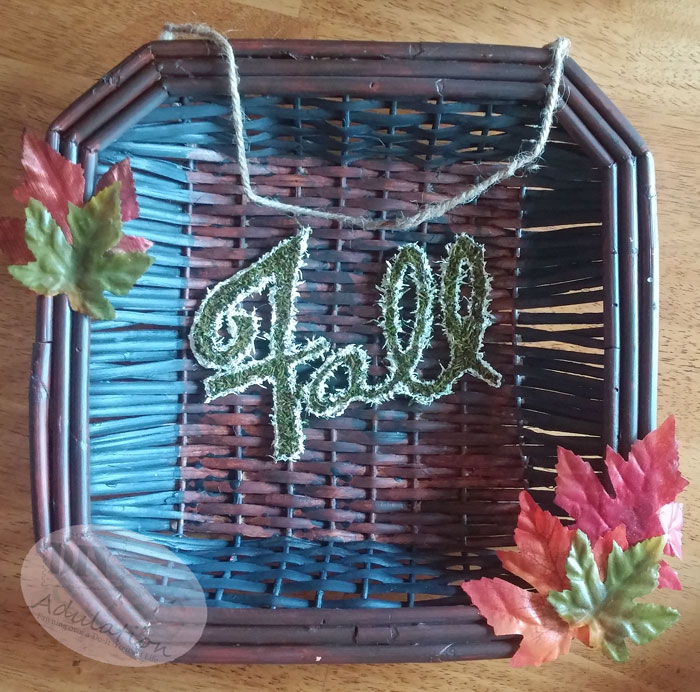
Paint the inside edges black as pictured above.
Step 3
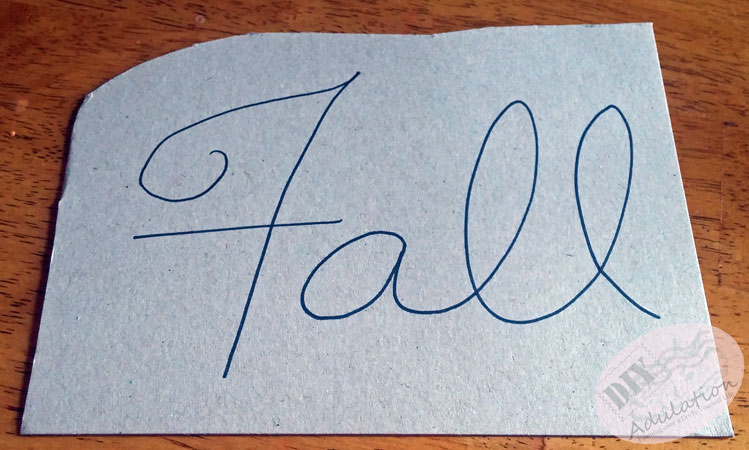
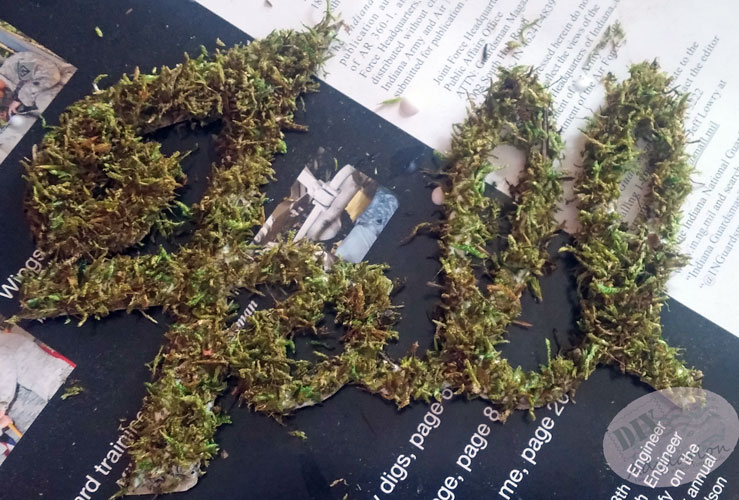
While paint is drying, create the word “fall” by writing it on a piece of cardboard.

Tips:
- I just used the cardboard insert from a pack of scrapbook paper.
- If you don’t like your handwriting, I’ve included a copy of my freehand for you to print out and trace.
Step 4
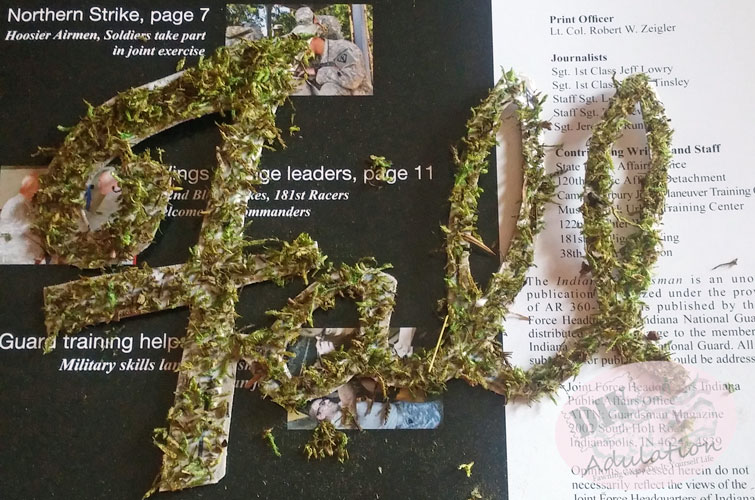
Cut around the letter being sure to leave extra space on either side if your lines.
Tip:
- These Tim Holtz scissors are perfect for tasks like this because they can cut evenly in the small nooks and crannies.
Step 5
Generously coat the front of your word with the Mod Podge and then cover with mossy shreds. Shake off the excess and return it to the container.
Step 6
While the Mod Podge is drying, paint the inside bottom and outside trim of your basket with the burnt umber paint.
Step 7
Once the first coat of Mod Podge has dried, apply a second generous coat over the moss and cover again as in step 5. As before, shake off the excess and return to your container.

Step 8
While the second coat of Mod Podge and moss is drying, flip over your basket and paint the entire back (except trim) black. Paint the trim burnt umber to match the front side.
Step 9
Allow everything to dry and then look for areas that need touch ups. You will likely need to touch up both the basket and the moss.

Step 10
To help your letters pop, apply a thin white outline of acrylic paint to your word. The easiest way to do this is to dip your brush in the white paint and then touch the long sides of the bristles to the outside edges.

Step 11
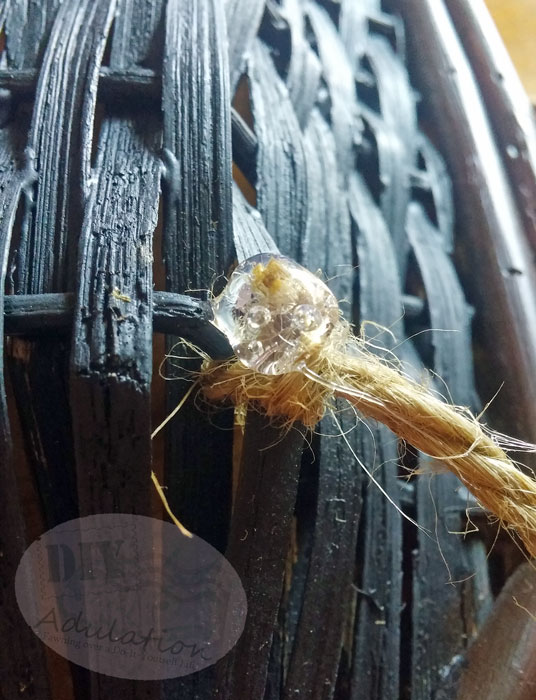
While the white paint is drying, attach your twine to the back of your basket by threading each end through the basket weave and knotting it.
Tip:
- To keep the edges of your rope from fraying and possibly coming loose in the future, add a dab of hot glue to the ends after you have knotted them.

Step 12
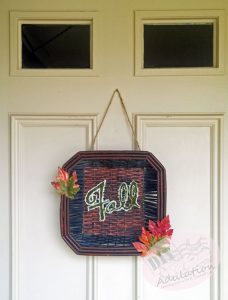
Apply your leaves to the front outside of edge of your basket. Arrange them however you wish and secure with hot glue. (I did 3 leaves of various sizes on the bottom right and 2 leaves on the top left.)

Step 13
Once the paint has dried on your mossy word, flip it over and apply hot glue to all of the exposed cardboard. (Think of it like writing the word again with glue to get the right coverage.)

Tip:
- To achieve the raised effect allow the glue to cool just slightly before pressing to the inside of the basket.
Step 14 (Optional)
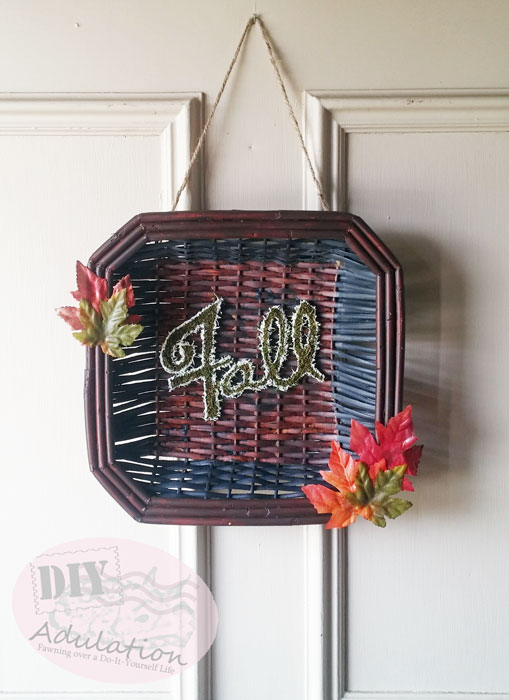
Help protect your “wreath” by spraying the entire thing with a final coat of your sealant. Then hang and enjoy!
Do you love how this turned out as much as me?! Plus it was extremely easy to work with the mossy shreds and there is still a ton left! There will definitely be more mossy tutorials coming your way in the future. Sign up for our newsletter so you don’t miss them!