Easy Painted Pumpkin Coasters + A Halloween Game Idea

Pumpkins are a staple of the fall season and you can’t celebrate this Halloween without at least one. Well, you could, but why would you? These easy painted pumpkin coasters are the perfect way to add festive fun to your table while protecting it at the same time.

Affiliate links may be used in this post. Ordering a product through these links may result in a commission. Read the full disclosure here.


[bctt tweet=”These easy painted pumpkin coasters are an inexpensive way to rock your Halloween decor.” username=”diyadulation”]

I don’t know what it is about pumpkins that is so dang appealing but they are beautiful. You can customize them in so many ways to fit any Autumn decor style.

These easy painted pumpkin coasters keep it traditional with an orange base and adorable black jack-o-lantern faces.

According to my kids they also make a great game, too. They promptly picked them up and started tossing them like Frisbees across the living room. There you go: fun Halloween décor and a boredom buster all in one!


Pumpkin Coasters Materials


Step 1

First, remove the coasters from their packaging. If you keep the cellophane in tact you can use it to protect your work surface from stray paint drops.

Note:


Step 2

Next, paint a nose on each coaster.


Step 3

Then, paint 2 eyes on the coaster. Be careful not to bump the painted nose with your hand. You don’t want to smear the paint.


Step 4

Next, paint a fun mouth on your coaster.


Step 5

Lastly, paint any eyebrows or lashes you want to include.


Step 6

Repeat steps 2 through 5 for your remaining 3 coasters. Set the coasters aside to finish drying.

Tip:


Step 7

Once the paint on your coasters is dry, use green paint to add leaves and vines to each of your pumpkins.

Step 8

Again, allow your paint to dry completely.

Step 9 (Optional)

If you want the coasters to stay put on the coffee table, add four dots of paint on the opposite side of each one. This will make the coasters grip the table during use and prevent spills.


Collage of pumpkin faces on coasters

Make It a Game

If you want to up the fun, you can turn this into a formal game of coaster throwing. These coasters are super light and work great for tossing. Make this awesome Jack-o-Lantern Treat Jar and set it up somewhere in the room or outside. Divide into teams and take turns trying to toss the coasters into the treat jar (sans the lid).

Variation Idea


Collage of pumpkin faces on coasters with text overlay: Easy Painted Pumpkin Coasters + a Halloween Game Idea

Who would have thought that such an inexpensive DIY could be your all-encompassing party go-to? These easy painted pumpkin coasters are the perfect way to dress up your table for the season. Next time, I’m going to make some adorable Frankies to go with them. Don’t worry. I’ll totally share the tutorial with you too.

See where I’m linking up!

Don’t Forget to Pin It!

Collage of pumpkin faces on coasters with text overlay: Easy Painted Pumpkin Coasters + a Halloween Game Idea


More Ideas You’ll Love:

Show Your Team Spirit with a DIY Football Noisemaker

Are you ready for some football?! If that doesn’t bring images of Hank Williams, Jr. to your mind you are missing out. Before you go any further, you should totally watch it… You back? Now that you’re pumped, find out how to show your team spirit with a DIY football noisemaker.

Affiliate links may be used in this post. Ordering a product through these links may result in a commission. Read the full disclosure here.

I love football! So much so that during the last Bengals game I was sick in bed and my husband was texting me game updates from the family room. (Yes, I was a little smug when my team beat his.)

I’ve even done a paint and sip where we made an awesome piece of Bengals artwork. It just gets me excited and pumped up. That’s why I want to find new ways to show my team spirit, like this DIY football noisemaker.

[bctt tweet=”Are you ready for some football?! It’s time to get pumped and show your team spirit for your favorite team (or kids) with a DIY football noisemaker.” username=”diyadulation”]

Collage of Football Noisemakers with text overlay: Show Your Team Spirit with a DIY Football Noisemaker

I saw the water bottle in the store and a light bulb went off. Thank you Dollar Tree for the constant influx of inspiration. Now, you can support your team too with this super easy project.


Football Noisemakers next to a Bengals Purse

Materials


Brown Football Water Bottle with Tag

Brown Football Water Bottle with Tag Removed

Step 1

First, remove the tags and any stickers from your water bottle.

Tip:


Brown Football Water Bottle with Strap Remove

Step 2

Then, unclip the strap from the water bottle and set it to the side.


Orange Spray Painted Football Water Bottle

Step 3

Next, cover your water bottle in spray paint on all sides and let it dry.

Tip:

Step 4

After your spray paint has dried, check your water bottle for any gaps in paint. Fill in those gaps with more spray paint. Again, allow your paint to dry.


Orange Spray Painted Football Water Bottle with Black Stripes

Orange Spray Painted Football Water Bottle with Black Stripes on Back

Step 5

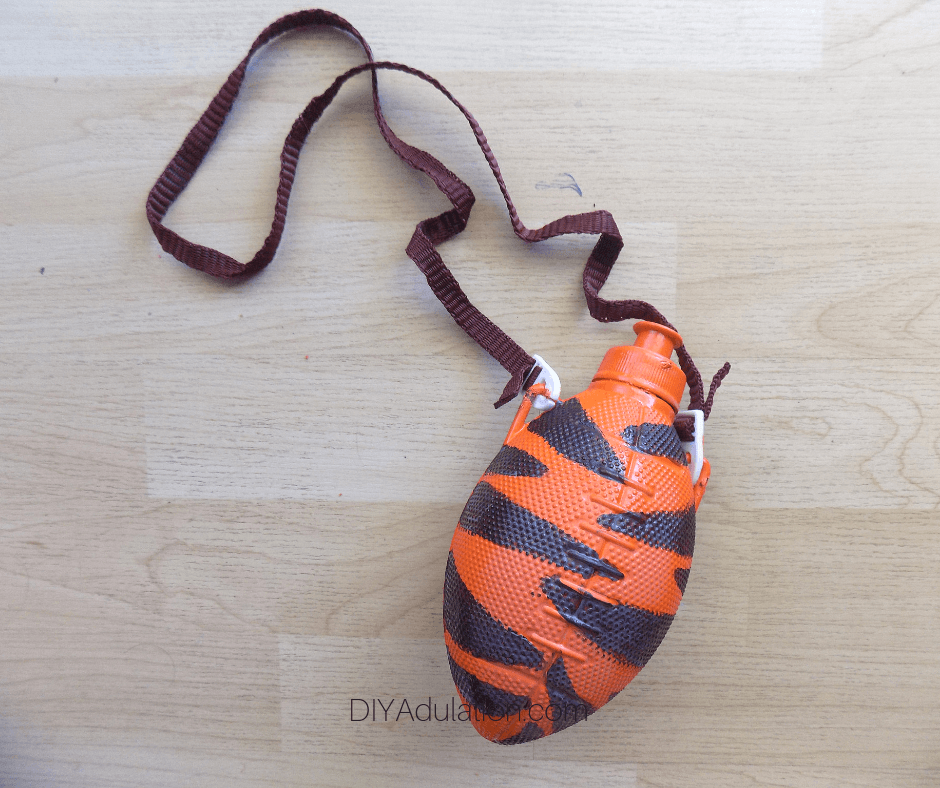
Next, use your acrylic paint in the secondary team color to paint the team initial or design. For example, I’m a Bengals fan so I painted tiger stripes on my water bottle. If I were making this for my husband (who is a Colts fan), I would paint the horseshoe or a block letter “C” on it. Do what works for your team.

Step 6

Then allow your acrylic paint to dry completely before moving on.


Close Up of Orange Spray Painted Football Water Bottle with Dark Black Stripes

Step 7

After you paint has dried, go back over your lines and darken them with a second coat of acrylic paint.


Football Water Bottle with Cap Off and Washers

Step 8

After your acrylic paint has dried, take your lid off of the water bottle and add your washers to the bottle.


Sealed Striped Football Water Bottle Front

Sealed Striped Football Water Bottle

Step 9

Then put the lid back on and seal your washer-filled water bottle with acrylic sealant.

Tip:


Striped Football Water Bottle with Strap

Step 10

Lastly, reattach the strap to your water bottle. This makes it easy to carry at the game (or tailgating).


Football Noisemakers next to a Bengals Purse with text overlay: Show Your Team Spirit with a DIY Football Noisemaker

Now you have the perfect DIY football noisemaker to support your favorite team! It’s also so inexpensive to make that you can make one to support your kid’s school team, your favorite college team, and your NFL giant. Then you’ll be ready for every game!

Before you go, the football lover in me has to know who your favorite team is. Let me know in the comments (unless you’re a Steelers fan lol).

See where I’m linking up!

Don’t Forget to Pin It!

Collage of Football Noisemakers with text overlay: Show Your Team Spirit with a DIY Football Noisemaker


More Ideas You’ll Love:

Upcycled Tissue Box to Spooky Halloween Candy Container

Awesome Halloween decor doesn’t have to cost a fortune. Create your own amazing decor on a budget by using what you already have. That’s exactly what this easy upcycled tissue box spooky Halloween candy container delivers!

Affiliate links may be used in this post. Ordering a product through these links may result in a commission at no extra cost to you. Read the full disclosure here.

Collage of Photos of Halloween Candy Container next to Pumpkin with text overlay: Upcycled Tissue Box to Spooky Halloween Candy Container


[bctt tweet=”Are you looking for awesome Halloween decor ideas on a budget? Turn an empty tissue box into this awesomely spooky Halloween candy container!” username=”diyadulation”]

I have been so excited to make this easy project that I’ve been holding onto this empty tissue box for weeks. I can’t count the number of times someone in my house asked me if it could be tossed out.

Of course, it was a little early at the time to start crafting for Halloween but September is the official green light in my mind. Now I can start pulling out the Halloween fun!

It’s time for you to start thinking about your own Halloween decorations, too. Start saving those tissue boxes so you can make your own spooky Halloween candy container.


Halloween Candy Container Next to Purple Owl

Materials


Plastic Next to Tissue Box

Step 1

First, remove the plastic from around the inside of the tissue box opening.


Gray Painted Tissue Box

Step 2

Next, paint your entire box with your rescue restore paint. Allow it to dry before moving on.


Hand Holding Painted Sides of Tissue Box

Note:


Something Wicked this Way Comes Sticker on Painted Tissue Box

Something Wicked this Way Comes and Spider Stickers on Painted Tissue Box

Cauldron Bubbles and Bat Stickers on Painted Tissue Box

Step 3

After you paint has dried, add your stickers to your box. Only work with one side at a time and focus on designing that one before moving to the next.


Close Up of Bat Sticker Wrapped Around Edge of Box

Tip:


Creepy Cloth Next to Halloween Stickers Sheet

Step 4

Now, remove the packaging from your black creepy cloth and unfold it.


Glue on Top of Tissue Box

Step 5

Then add E6000 to the top corners of your tissue box and around the opening.


Creepy Cloth Covering Top of Tissue Box

Step 6

Next, press a corner of your black creepy cloth into the glue. Don’t worry about covering your tissue box opening.


Creepy Cloth Covering Top of Tissue Box Next to Craft Supplies

Close Up of Creepy Cloth Covering Top of Tissue Box Next to Craft Supplies

Step 7

Carefully cut around the edges of the box to remove the glued section of your black creepy cloth from the rest of it.


Hole Cut Out of Creepy Cloth Covering Top of Tissue Box

Step 8

Again working carefully, cut out the black creepy cloth covering the hole in the top of your tissue box.


Close Up of Tape Wrapped Finger with Loose Strands Stuck to It

Tip:

Step 9

Next fix any areas of the black creepy cloth that pulled away from the glue.


Halloween Candy Container Next to Pumpkin

Step 10

Lastly, allow your glue to dry 24 hours then fill with your favorite Halloween candy!


Halloween Candy Container next to Pumpkin with text overlay: Upcycled Tissue Box to Spooky Halloween Candy Container

Would you ever guess that this gorgeous spooky Halloween candy container used to hold tissues?! It is seriously easy to make although you might want to have a backup stash of candy to refill it. I must deprive my family because they are already flying through it (minus a few Kit Kats I nabbed). Luckily, even empty it’s still an awesome piece of Halloween decor for the table!

See where I’m linking up!

Don’t Forget to Pin It!

Halloween


More Ideas You’ll Love: