DIY Adulation

Fawning Over a Do-It-Yourself Life

  • Crafts
    • Papercrafts
    • Fabric Crafts
    • Paint Crafts
    • Recycled Crafts
    • DIY Crafts
  • Home
    • Home Decor
    • Organization
    • Recipes
    • Finances
    • Cleaning
  • Holidays
    • Spring Holidays
    • Summer Holidays
    • Autumn Holidays
    • Winter Holidays
  • Relationships
    • Self
    • Marriage
    • Parenting
    • Friends and Family
    • Kids
      • Kids Crafts
      • Kids Learning
      • Kids Activities
      • Back to School
      • Kids Parties
      • Kids Korner
  • Policies & Disclosures
  • Newsletter
  • About Me
  • VIP Resource Library

DIY Lighted Photo Frame Home Accessory

07.12.2019 by Marie // Leave a Comment

Sometimes you simply want to keep pushing the limits. Like, how many veggies can I put in this sauce before the kiddos notice. How many items can I throw in the cart at the dollar store before I am blown away by my register total. Or.. How can I take my wall art to the next level for a totally unique decor look? That’s exactly what this DIY lighted photo frame does.

This is a sponsored post on behalf on Rust-Oleum. I received product for free in exchange for my honest opinion and creation. Affiliate links may be used in this post. Ordering a product through these links may result in a commission. Read the full disclosure here.

Collage of Lighted Mountains Photo in Yarn Frame with text overlay - DIY Lighted Photo Frame Wall Accessory


I love this DIY lighted photo frame home accessory! It’s colorful and fun during the day and a glowing masterpiece at night! Click To Tweet

I’m totally enthralled with those lighted canvases. The lights are the perfect accent to the not only the picture but the entire wall. While I’m not quite ready to tackle the canvases, a lighted photo frame seems totally possible. Then you’re not in charge of creating the entire work of art. You simply print out the photo and you’re good to go.

Of course, it helps that Rust-Oleum came out with this super simple photo transfer solution. It makes it totally easy to transfer your favorite photos to the glass from your frame. It works with a ton of other mediums too, if you’re curious. I just knew immediately that I wanted to use it for this project.

Empty Frame, Photo Transfer Solution, and Laser Printed Photo

Lighted Photo Frame Materials

  • Rust-Oleum Photo Transfer Solution
  • 8×10 Photo Frame
  • Laser Printed 8.5 x 11 inch Photograph
  • 1 inch Foam Brush
  • Scrap Cloth or Paper Towel
  • Colorful Yarn of Choice
  • Battery Operated Fairy Lights


Glass Removed From Picture Frame

Step 1

First, take your frame apart and pull out the glass insert. Set the rest of the frame aside for now and clean the glass if needed.


Edges Cut Off of Laser Printed Photo next to Scissors

Step 2

Next, pull out your laser printed photo and trim the white excess around the edges.


Photo Transfer Solution on Laser Printed Photo

Step 3

After your picture is printed, cover it with a coat of Rust-Oleum photo transfer solution. I used a very heavy coat.


Photo Pressed Face Down Onto Glass

Step 4

Then carefully place your coated picture face down onto the glass insert and smooth it starting from the middle to the edges.

Step 5

Leave your picture and glass sitting for 12 hours.


Half of Backing Rubbed Off of Transferred Photo

Step 6

After your photo and transfer solution has dried, wet a cloth or paper towel and gently rub away the paper on your glass. Use circular motions and wet the paper before rubbing to make it easier.


Backing Rubbed Off of Transferred Photo

Step 7

Continue removing the paper backing until all of it is removed.

Step 8

Once all of your paper is removed, set your glass photo aside and pull out your picture frame.


Close Up of Yarn Wrapped Around Picture Frame

Step 9

Begin wrapping your picture frame with your colorful yarn starting on one side close to the corner.


Yarn Wrapped Around Picture Frame

Step 10

Continue until your entire frame is wrapped in yarn then use knots to secure the end.


Mountain Photo in Yarn Picture Frame

Step 11

Then carefully press your glass photo into the yarn wrapped frame.


Lights Attached to Yarn Frame

Lighted Photo Frame

Step 12

Lastly, attach your fairy lights around the inside edge of your frame by threading it through the wrapped yarn.


Lighted Mountains Photo in Yarn Frame with text overlay - DIY Lighted Photo Frame Wall Accessory

I love this DIY lighted photo frame home accessory. It’s colorful and fun during the day and a glowing masterpiece at night. It’s the perfect decor idea for displaying your favorite vacation photos, like the one I used from one of our many Gatlinburg vacations. The lights make the skies in the photograph really pop and set against the mountains beautifully! Definitely the perfect addition to your gallery wall!

See where I’m linking up!

Don’t Forget to Pin It!

Lighted Mountains Photo in Yarn Frame with text overlay - DIY Lighted Photo Frame Wall Accessory


More Ideas You’ll Love:

  • How to Create Customized Wall Decor on a Budget
  • DIY Upcycled Pink Flamingo Wall Hanging
  • DIY Seashells Monogram Wall Art
  • Modern Triangle Geo Wall Art – Made in a Day

Categories // Crafts, DIY, Home, Home Decor, Recycled Crafts

Shimmery Upcycled DIY Patriotic Wreath

06.27.2019 by Marie // Leave a Comment

Are you ready for the easiest holiday wreath that you’ll ever make? This shimmery DIY patriotic wreath is so simple. All you do is wrap and repeat for a gorgeous red, white, and blue wreath to proudly display on your door this summer! Affiliate links may be used in this post. Ordering a product through these links may result in a commission. Read the full disclosure here.     Check out the written tutorial below!

The Rules:

  • Upcycle an item(s) from a thrift store, resale store, or garage sale into a new piece of decor.
  • There’s no monthly theme.
  • There’s no budget to stick to.

Meet the Hosts

Angela | Simply Beautiful By Angela – Angie | Grandma Creates – Meredith | Southbound Blog – Amanda | Domestically Creative – Molly | Just a Little Creativity – Jenny | Cookies Coffee and Crafts – Michelle | Michelle James Designs – Marie | DIY Adulation – Pili | My Sweet Things – Gail | Purple Hues and Me – Denise| My Thrifty House – Emy | Semigloss Design – Michelle | Our Crafty Mom – Lynne | My Family Thyme – Chas | Chas’ Crazy Creations – Kathleen | Our Hopeful Home

Make sure you follow our board on Pinterest for more upcycled decor inspiration!


Collage of patriotic garland wreaths with bow and stars on door with text overlay - Shimmery Upcycled DIY Patriotic Wreath   Are you ready for the easiest holiday wreath that you’ll ever make? This shimmery DIY patriotic wreath is so simple to and perfect to display on your door! Click To Tweet We are back this month with another awesome Thrift Store Upcycle Challenge! I knew I wanted to make some sort of patriotic craft but it wasn’t until I was at the thrift store that the idea solidified. If you’ve ever seen those garland wreaths at your local thrift store and thought, “Ugh, that’s hideous” and moved on: Don’t! The garland may be faded and ratty, but that plastic base underneath is pure gold for creating your own gorgeous wreath that actually fits your style. What’s even better is that the Dollar Tree always has fun and festive garland for a buck so you can grab the one you want cheaply. It’s like the perfect marriage of stylish and budget-friendly decor! I wanted to take this project a step further without adding a bunch of extra work for myself. That’s why I picked up a super fun glittery fireworks bow. It adds that extra bit of flair without adding a ton of time and work to the project, a dream for busy moms like us.   Patriotic Garland Wreath on Door

DIY Patriotic Wreath Materials

  • Thrift Store Garland Wreath with Plastic Base
  • 5 Lengths of Red, White, and Blue Garland (I got mine at the Dollar Tree)
  • Scissors
  • Glittery Fireworks Bow (This and the stars below also came from the Dollar Tree)
  • Glittery Foam Stars
  • Hot Glue Gun and Glue
Fall Garland Wreath Fall Garland Wreath with Half of the Garland Removed from Plastic Base Plastic Wreath Base

Step 1

First, remove the existing garland on your thrift store wreath so that you have an empty wreath base to work with.  

Step 2

Next, take your red, white, and blue garland out of the packaging and start attaching it to the wreath base. Wrap one end of garland around a hook on the edge of the wreath base as pictured.   Red White and Blue Garland Wrapped on Section of Plastic Wreath Base

Step 3

Then take your garland down the front of your wreath base and wrap it around the inside hook across from the top hook you wrapped around.

Step 4

Take the garland back up and wrap around the next hook on the edge of the wreath base and continue wrapping back and forth to cover your wreath.  

Step 5

After one garland runs out, attach another garland around the same hook where the previous one ran out. Again, continue wrapping on your wreath hooks back and forth.     Garland Wrapped Plastic Wreath Base with Small Section Empty Patriotic Garland Wreath

Step 6

Continue wrapping the garland, adding more as needed, until your entire wreath is covered with garland.     Glittery Fireworks Bow with Tag

Step 7

Once your wreath is wrapped, remove the packaging from your bow but save the twist tie from the packaging.    

Step 8

Use the twist tie to attach your bow to the wreath by poking the twist tie ends through the wreath and secure them in the back.     Glittery Foam Stars on Wreath

Step 9

Lastly, glue on the glittery foam stars in sets of 3 at random on your wreath. I used one large star and 2 smaller stars in each group.     patriotic garland wreath with bow and stars on door with text overlay - Shimmery Upcycled DIY Patriotic Wreath Can you believe how freaking easy this shimmery DIY patriotic wreath is to make? It looks so pretty and festive on our door, especially when the sunlight catches it. The next time you’re at the thrift store, don’t pass up those ugly garland wreaths! Instead stock up for your holidays and create awesome, eye-catching door decor that you’ll love.

See where I’m linking up!

Don’t Forget to Pin It!

patriotic garland wreath with bow and stars on door with text overlay - Shimmery Upcycled DIY Patriotic Wreath

And now for more thrifty goodness!

Check out what my fellow upcyclers created below!

You are invited to the Inlinkz link party!

Click here to enter

Categories // 4th of July, Crafts, DIY, Holidays, Home, Home Decor, Recycled Crafts, Summer Holidays

DIY Summer Boredom Box for Kids | Easy Recycled Craft

06.05.2019 by Marie // Leave a Comment

If you let your kiddos spend every hour of every day playing video games you won’t hear “I’m bored” from them much. Of course, you also don’t want them wasting away in front of the TV so you set limits on how much they can play each day. That’s when the inevitable moaning about “There’s nothing to do” starts and this DIY summer boredom box for kids comes in.

Affiliate links are used on this site. Ordering a product through these links may result in a commission. Read the full disclosure here.

Collage of Colorful Discs and Tissue Box with Flower with text overlay - DIY Summer Boredom Box for Kids


Make life easier this summer break! Anytime your child complains about being bored, or some variant thereof, send them to this DIY summer boredom box for kids. Click To Tweet

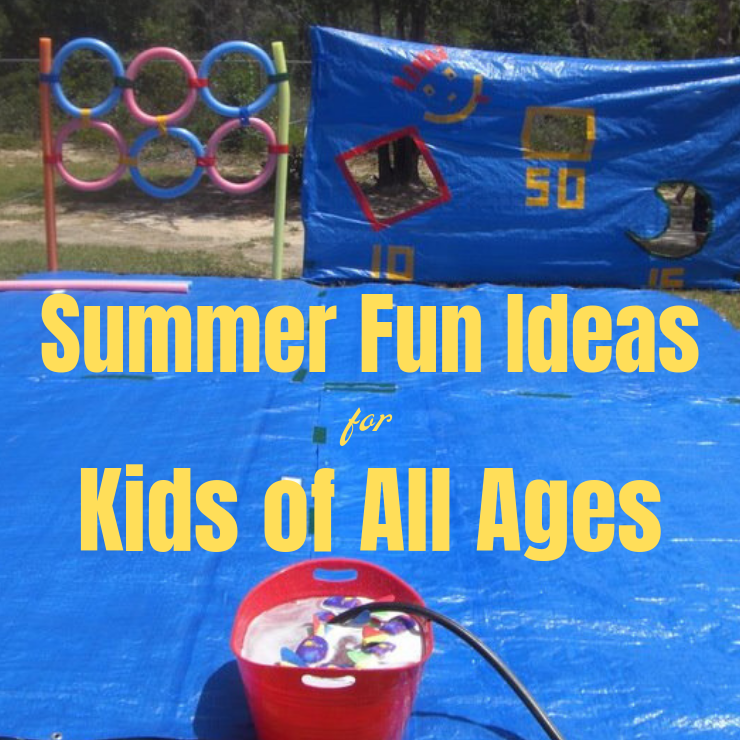
Wondering how to keep the kids occupied all summer long? See our list of Summer Activities for Kids of All Ages!

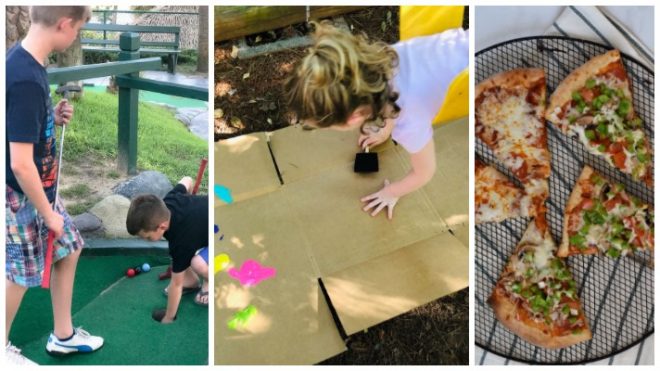
We have partnered with some savvy blogging Mom’s and Grandma’s to bring you a collection of summer fun ideas to do with kids of all ages from Pre-K up to those precious teens. Be sure to scroll all the way down for even more ideas!


Colorful Boredom Box with Flower next to Discs

Stop Summer Boredom in Its Tracks

We’re only a week into summer break and my kiddos are already complaining about being bored. There is a lot of excitement about summer, but losing the structure of the school day can really throw kids out of whack (even if they won’t admit it).

As much as I love hanging out with my kiddos, I still have work I have to get done each day. From making meals to cleaning extra messes, my workload definitely isn’t any lighter during the summer.


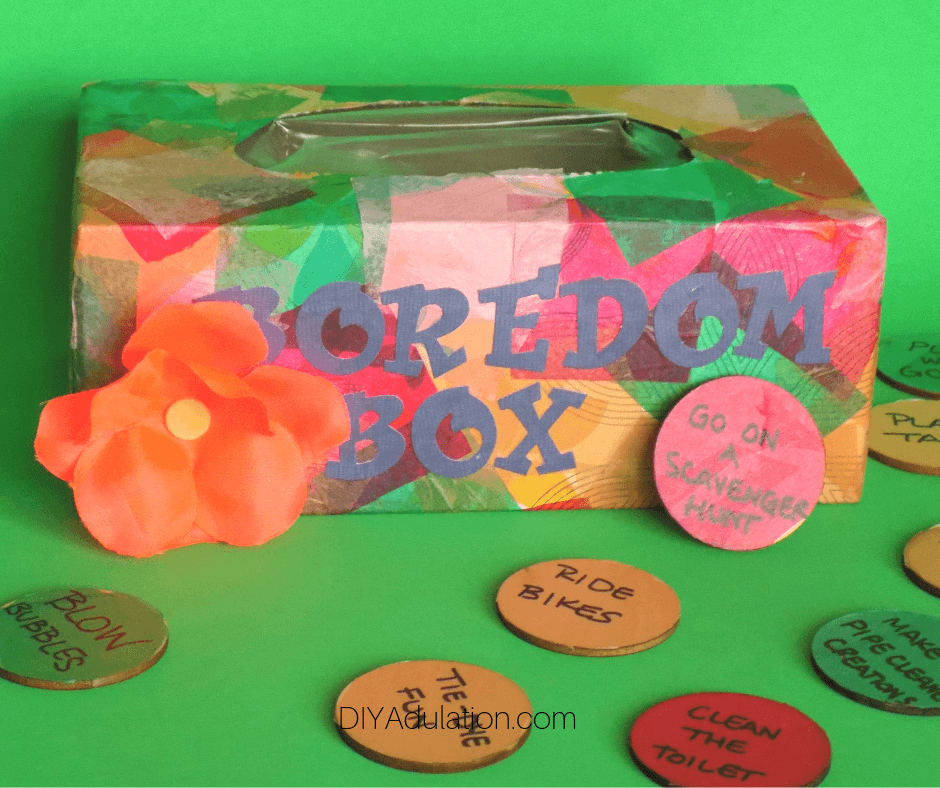
That’s why I wanted to be ready for those moments when the kids can’t think of anything to do on their own. This summer boredom box is an easy way to give the kids something easy to do without having to hover or mediate constantly.

Make sure to keep some supplies on hand that correspond with your boredom box activities. For example, I have “Blow Bubbles” on one of the discs so I have a secret stash of extra bubbles the kids don’t know about for when this comes up. Some other easy supplies to keep on hand are notebooks, glow sticks, and water balloons.


Tissue Paper and Mod Podge next to Empty Tissue Box

DIY Summer Boredom Box Materials

  • Empty Tissue Box
  • Multiple Colors of Tissue Paper
  • Mod Podge
  • Flat Paint Brush
  • 50-100 2-inch Unfinished Wood Discs
  • Black Permanent Marker
  • Letter Stickers or Paper Letters that Compliment Your Tissue Paper Colors


Cut Up Pieces of Tissue Paper next to Scissors

Step 1

First, tear or cut your tissue paper into smaller pieces. They should be at least 2 inches by 2 inches.

Note:

  • I chose the colors peach, green, hot pink, and light pink because I wanted a tropical summery vibe for our box.

Step 2

Next, cover a small area of your tissue box in Mod Podge.
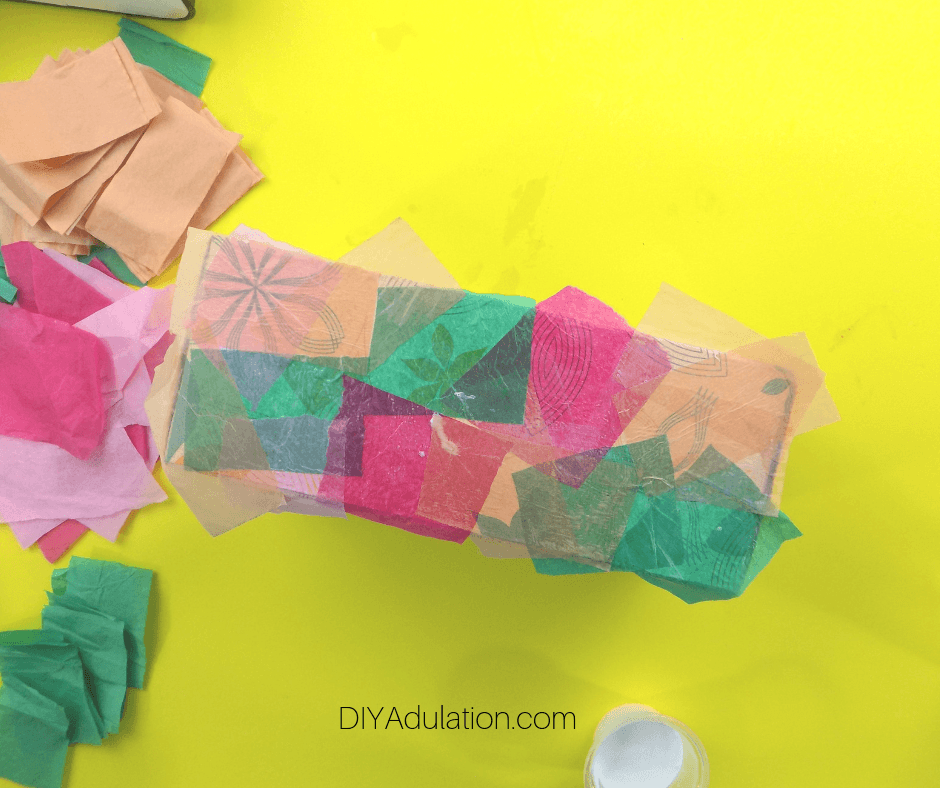
 

Tissue Paper Glued to Side of Box

Step 3

Then press pieces of tissue paper onto that same area of your tissue box.

Note:

  • The design on my tissue box actually complimented my theme so I went with it. If you don’t like the design on your box and don’t want to add 50 layers of paper and Mod Podge, paint your box in a base coat of white before starting step 2.

Step 4

After the pieces are pressed onto the box, go over them with more Mod Podge.


Tissue Paper Glued to Bottom of Box

Step 5

Continue adding layers of Mod Podge and tissue paper until your tissue box is completely covered. Don’t cover the opening of the tissue box.

Step 6

Once the box is completely covered set it aside to dry.

Tip:

  • Keep the box from sticking to your drying surface by placing it upside down on a full water bottle during drying.

Step 7

While your tissue box dries, pull out your wood discs.


Tissue Paper Glued to Wood Circles

Step 8

Use the same tissue paper pieces as you did on the box to cover 1 side of 50 or more discs.

Note:

  • I chose to use one color per disc but you can totally mix up the colors on each disc.

Step 9

Set your tissue covered discs to the side to dry.
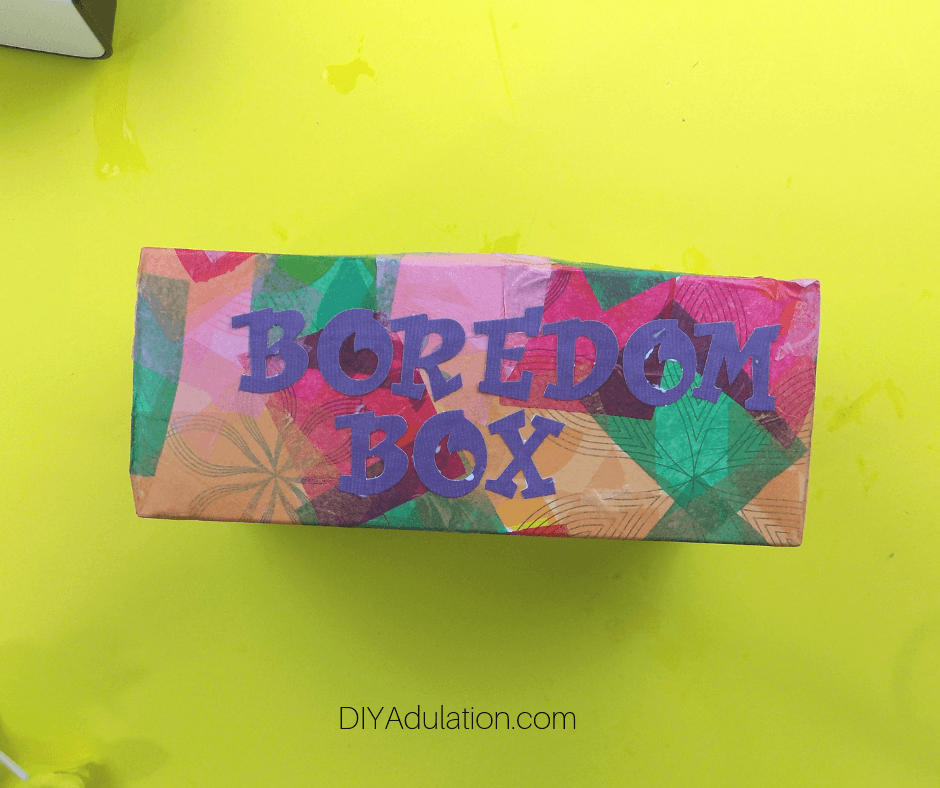
 

Letters Glued on Colorful Box

Step 10

While the discs dry, add letters to your box to spell out “Boredom Box” on one side.


Flower Glued on Colorful Box

Step 11 (Optional)

You can also add decorative stickers suck as flowers or palm trees for more embellishment on the box.
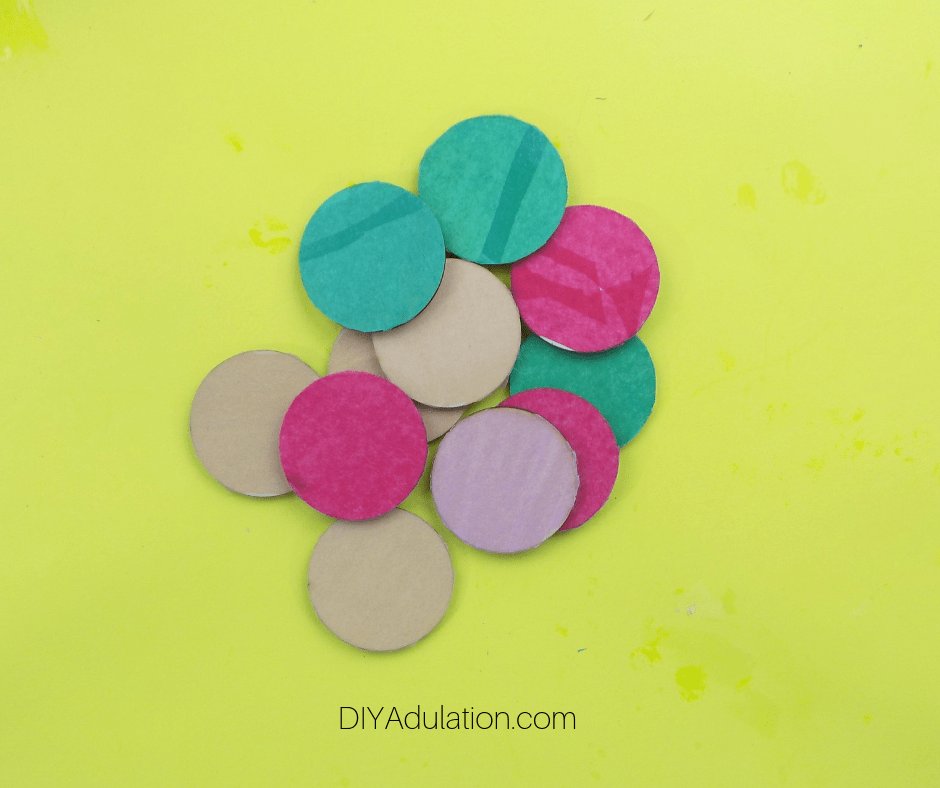
 

Trimmed Pile of Tissue Paper Wood Circles

Step 12

After your discs are dry, carefully trim the excess tissue paper from around the edges.


Activities Written on Colorful Discs

Step 13

Next, write boredom-busting activities on the discs with a black permanent marker.

Note:

  • See below for examples on what to put on your discs.


Wood Discs Inside of Colorful Box

Step 14

Lastly, add all of your discs to your DIY summer boredom box and place in an area that is easily accessible to the kiddos.


Colorful Boredom Box with Flower

What to Write on Your Discs

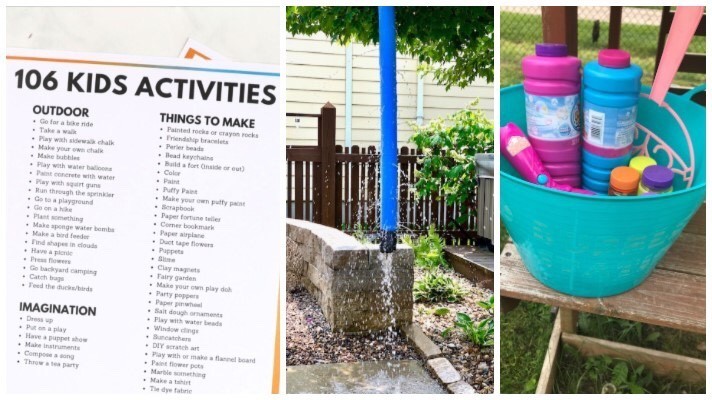
I used this list of 75 Screen Free Summer Activities for Kids to put on the boredom box discs. The activities are things that don’t involve a screen like putting on a puppet show, playing with sidewalk chalk, or writing a letter to someone.

Although I have strict time limits on video games, I did include one single disc that gives the kiddos an extra 30 minutes of game time. It’s kind of my golden goose surprise for the kiddos.

In addition to the fun activity ideas, I also included some chores. I feel that this encourages kids to entertain themselves but, also, it’s important that they help out around the house a little extra during the summer.


Colorful Tissue Box with Flower next to Colorful Discs with text overlay - DIY Summer Boredom Box for Kids

Anytime your child complains about being bored, or some variant thereof, send them to this DIY summer boredom box for kids. Once they choose a disc, have them do the activity and return the disc to the box for reuse. This way the box will last all summer long, no problem!

See where I’m linking up!

Don’t Forget to Pin It!

Colorful Tissue Box with Flower next to Colorful Discs with text overlay - DIY Summer Boredom Box for Kids


Summer Fun Activities

Now, let’s see what else we can add to our Summer Activities list!  New ideas are added every day this week so Pin this post and check back every day.


Collage of Summer Activities Photos

Monday

An Alli Event

Glitter On A Dime

That Fit Fam


Collage of Summer Activities Photos

Tuesday

Intelligent Domestications

Cookies, Coffee and Crafts

DIY Adulation


Collage of Summer Activities Photos

Wednesday

DIY Adulation

Polka Dot Poplars


Collage of Summer Activities Photos

Thursday

Creative Ramblings

Cookies, Coffee and Crafts

Our Good Life


Collage of Summer Activities Photos

Friday

Glitter On A Dime

My Family Thyme

Categories // Activities, Crafts, DIY, Holidays, Kids, Papercrafts, Parenting, Recycled Crafts, Relationships, Summer Holidays

  • « Previous Page
  • 1
  • 2
  • 3
  • 4
  • …
  • 20
  • Next Page »

  • Facebook
  • Instagram
  • Pinterest
  • Twitter
  • YouTube
Shop The Best Machine Prices of the Year

Copyright © 2021 · Modern Studio Pro on Genesis Framework · WordPress · Log in