Chocolate Eiffel Tower Cupcakes with Hidden Messages

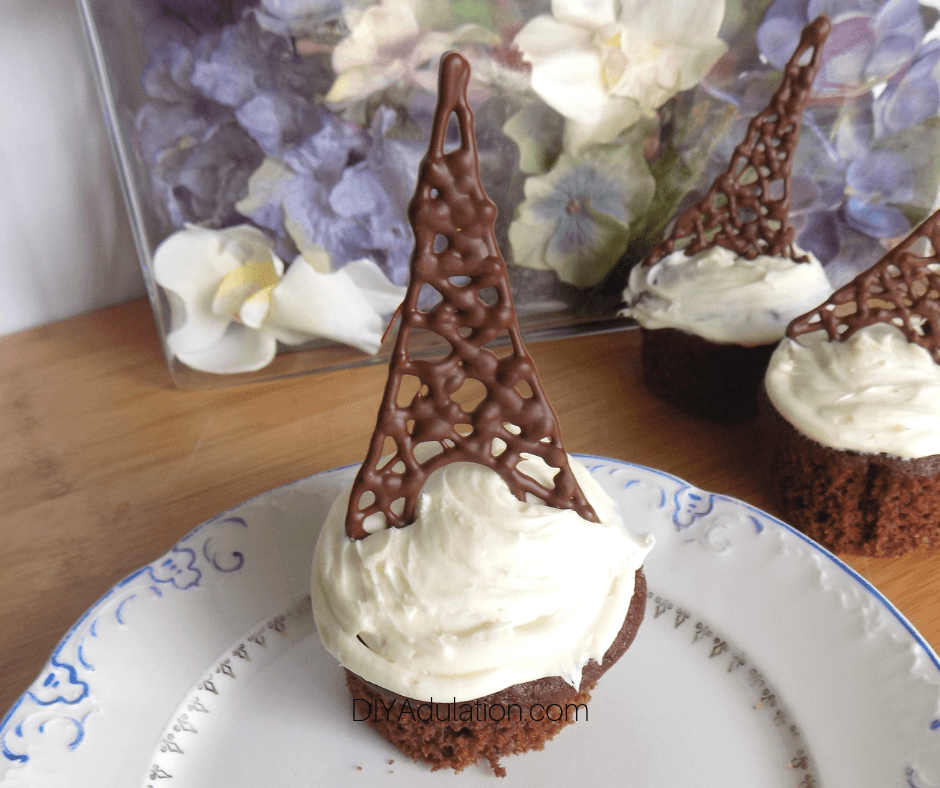
Want to take your next party to the next level or know someone looking for a creative way to ask their girlfriends to be their bridesmaids? If so you have to check out these easy, not to mention super tasty, Eiffel Tower cupcakes with hidden messages.

Affiliate links may be used in this post. Ordering a product through these links may result in a commission. Read the full disclosure here.

Collage of Chocolate Eiffel Tower Cupcake on Plate with text overlay - Eiffel Tower Cupcakes with Hidden Messages


[bctt tweet=”Looking for a creative way to ask the girls to be bridesmaids or a unique new party idea? Don’t miss these Eiffel Tower cupcakes with hidden messages!” username=”diyadulation”]

This fun idea was inspired by the movie Bridesmaids. If you haven’t seen the movie, the bride loves all things Paris and I knew I wanted to do something fun with that theme.

As I watched the movie, my second inspirational strike came when the main character gets the bridal shower invitation. It was crazy and way over-the-top but it’s also crazy unique. How do you capture that awesome uniqueness in way that doesn’t cost a fortune and is easy to duplicate? These awesome Eiffel Tower cupcakes with hidden messages.

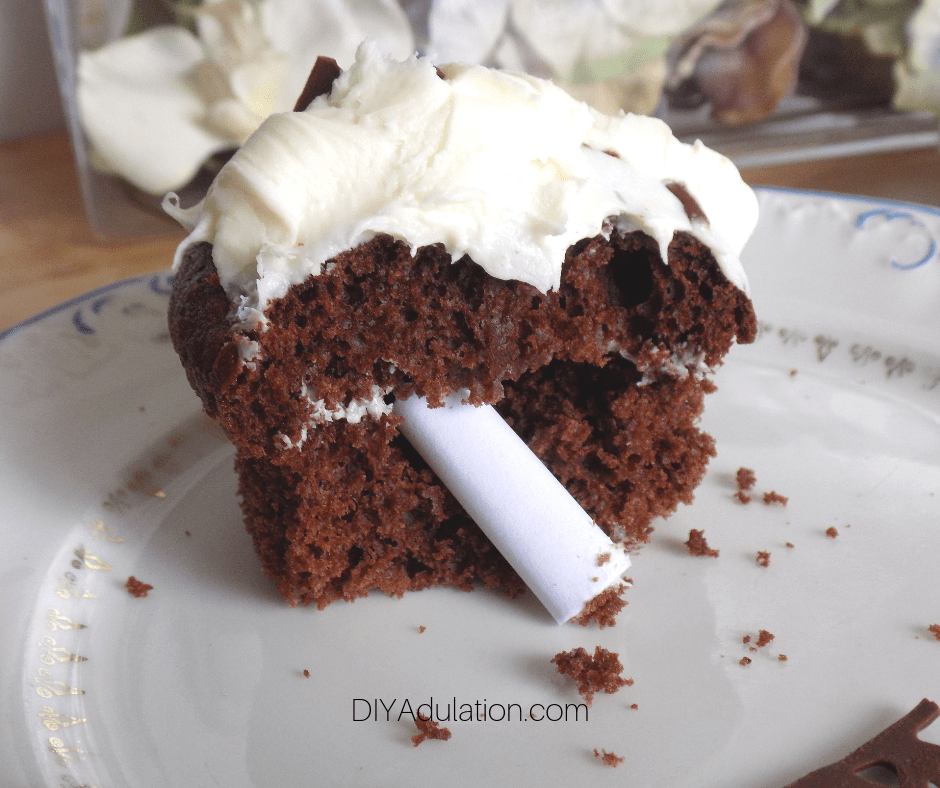
Of course, you don’t have to use them for bridesmaids (that ship sailed 3 kids ago for me). Add a sweet “Thank you for coming” message or “I’m lucky to have friends like you”. No matter how you use them, your guests will love biting into these sweet sentiments. Just be sure to let your guests know there’s a surprise inside. You don’t want them eating your message.


Chocolate Eiffel Tower Cupcake on Plate

Eiffel Tower Cupcakes Materials


Pan of Chocolate Cupcakes

Cupcake with wrapper removed next to Pan of Chocolate Cupcakes

Step 1

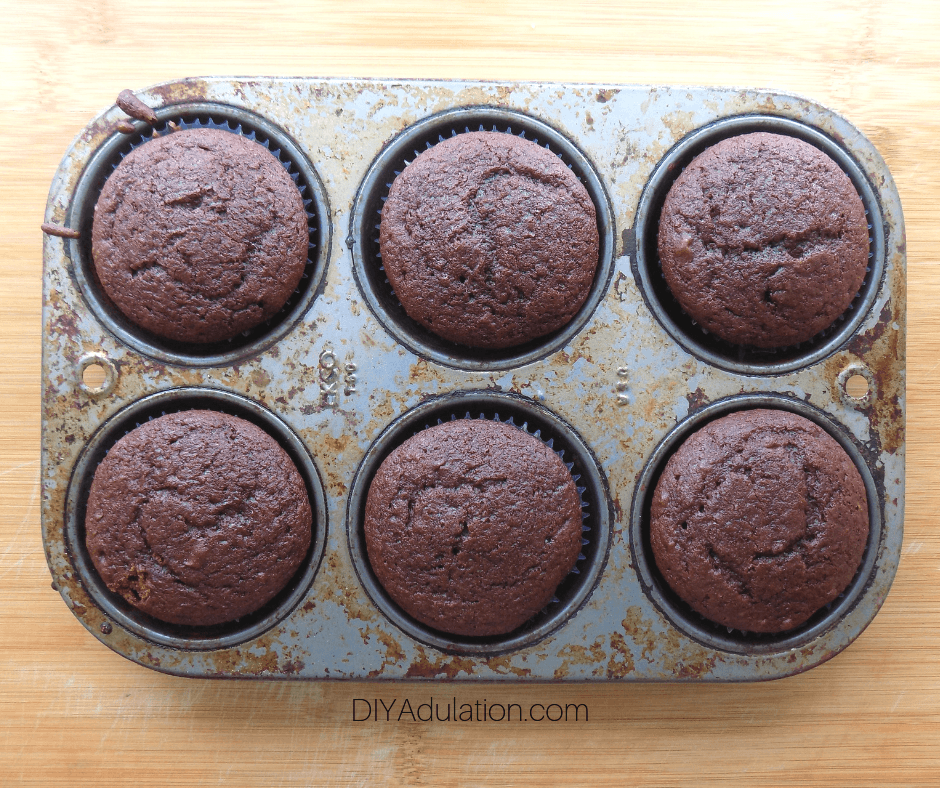
Remove the cupcake liners from your prepared chocolate cupcakes.


Step 2

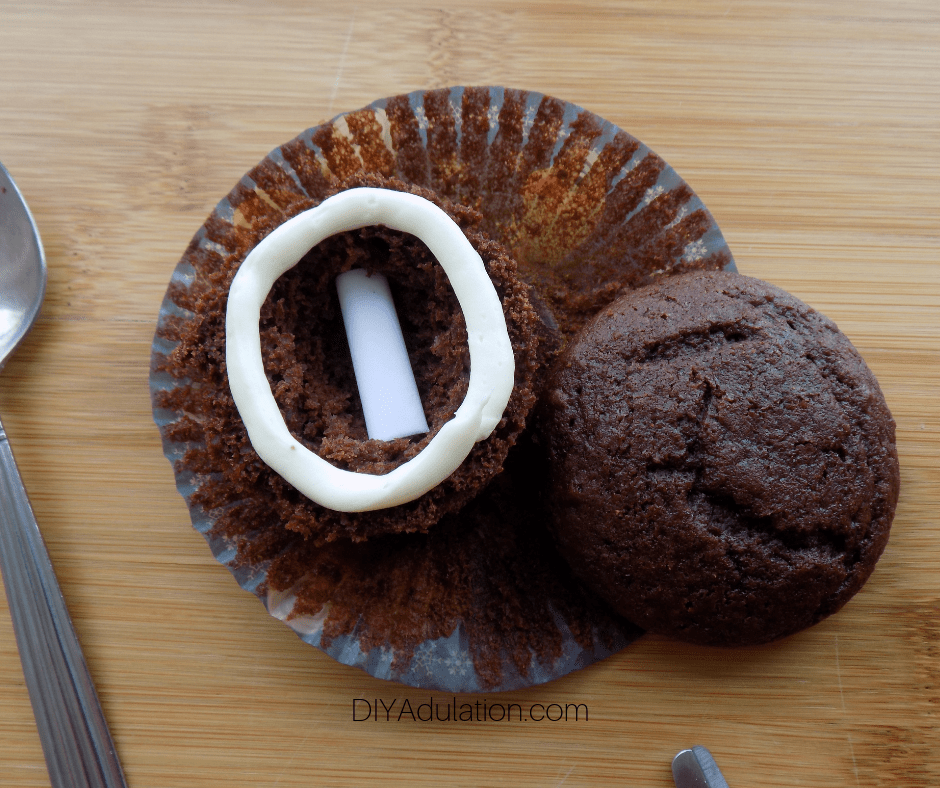
Next, cut off the top of a cupcake just below the top.

Tip:


Step 3

Then scoop out a small amount from the bottom center with a spoon or knife.


Fingers holding rolled up Piece of Paper

Step 4

Write your message on a small piece of paper (or print out the free ones above) and roll it up as pictured.


Rolled up Piece of Paper inside of Cupcake

Step 5

Add your rolled message into the small cavity. Be sure the seam is placed down.


Icing in a Resealable Plastic Bag

Close up of Icing in a Resealable Plastic Bag with Corner Cut Off

Step 6

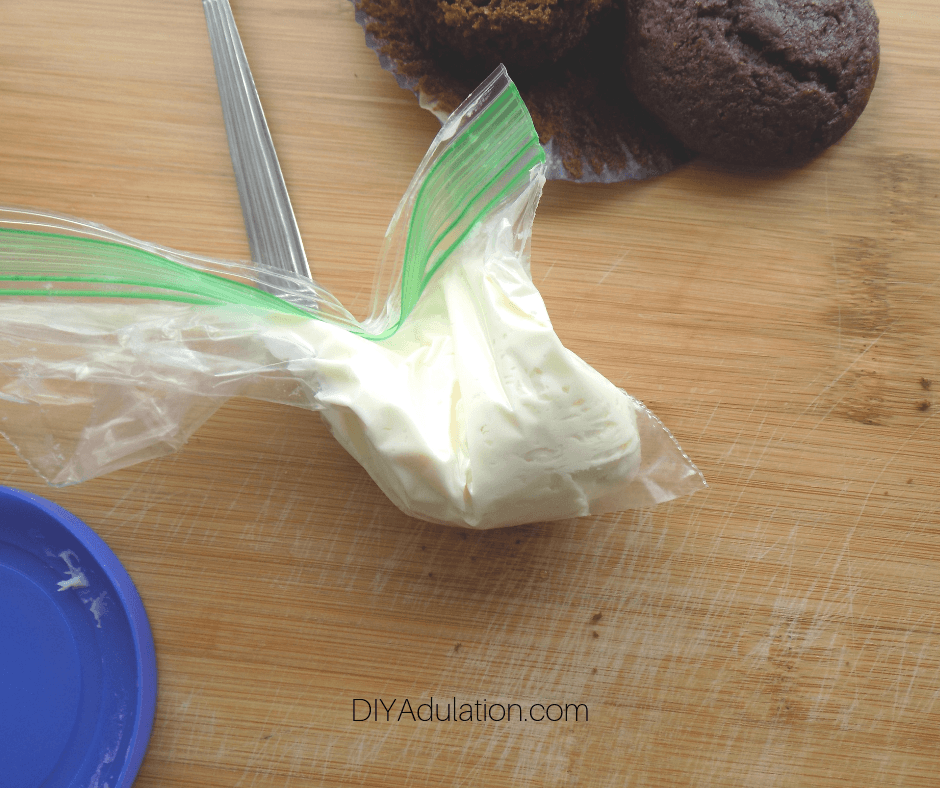
Next, add icing to a small plastic resealable bag and snip off the corner.


Icing Piped Along Edge of Cupcake Cavity

Step 7

Use the bag to pipe a line of icing on the outer edge of the cupcake around the cavity with the message.


Chocolate Cupcake Next to Spoon

Step 8

Place the cupcake top back on the cupcake.
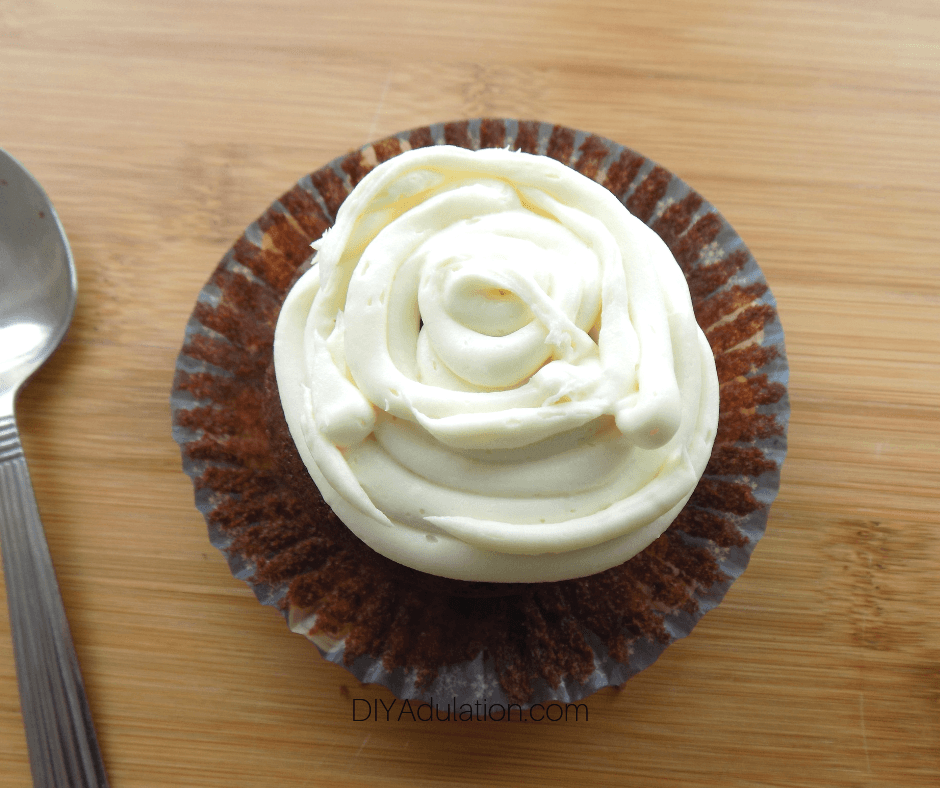
 

Icing Piped on Chocolate Cupcake

Step 9

Then ice the top of the cupcake like normal. Make sure you add quite a bit of icing. You need enough to act as a stabilizer for your Eiffel Towers.
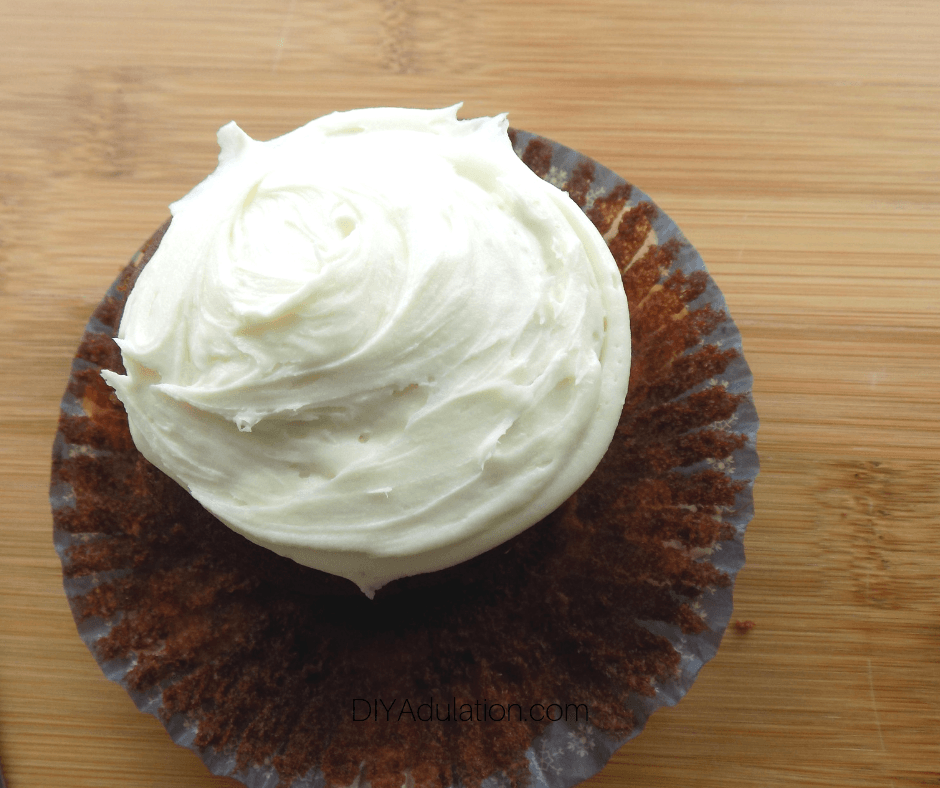
 

Smoothed Icing on Chocolate Cupcake

Optional:

Step 10

Repeat steps 2 through 9 with the rest of your cupcakes and then set them aside.


Eiffel Tower Template

Step 11

Print out the Eiffel Tower template.


Parchment Paper over Eiffel Tower Template

Step 12

Next, lay a piece of parchment paper over the template.


Melted Chocolate in Plastic Resealable Bag

Step 13

Melt your chocolate and place the melted chocolate in your second resealable plastic bag.

Note:

Step 14

Again cut the corner off of the bag. It needs to be very small.


2 Chocolate Eiffel Towers Next to Each Other

Step 15

Pipe the chocolate onto the parchment paper over the template.

Step 16

After you finish one chocolate Eiffel Tower, move your parchment paper so that a blank spot is over your template and again pipe on chocolate.


Chocolate Eiffel Towers on Parchment Paper

Step 17

Repeat until you have the number of chocolate Eiffel Towers that you need for all of your cupcakes.

Step 18

Place your chocolate Eiffel Towers in the freezer to set them.


Chocolate Eiffel Tower Cupcake on Plate with Flowers in Background

Step 19

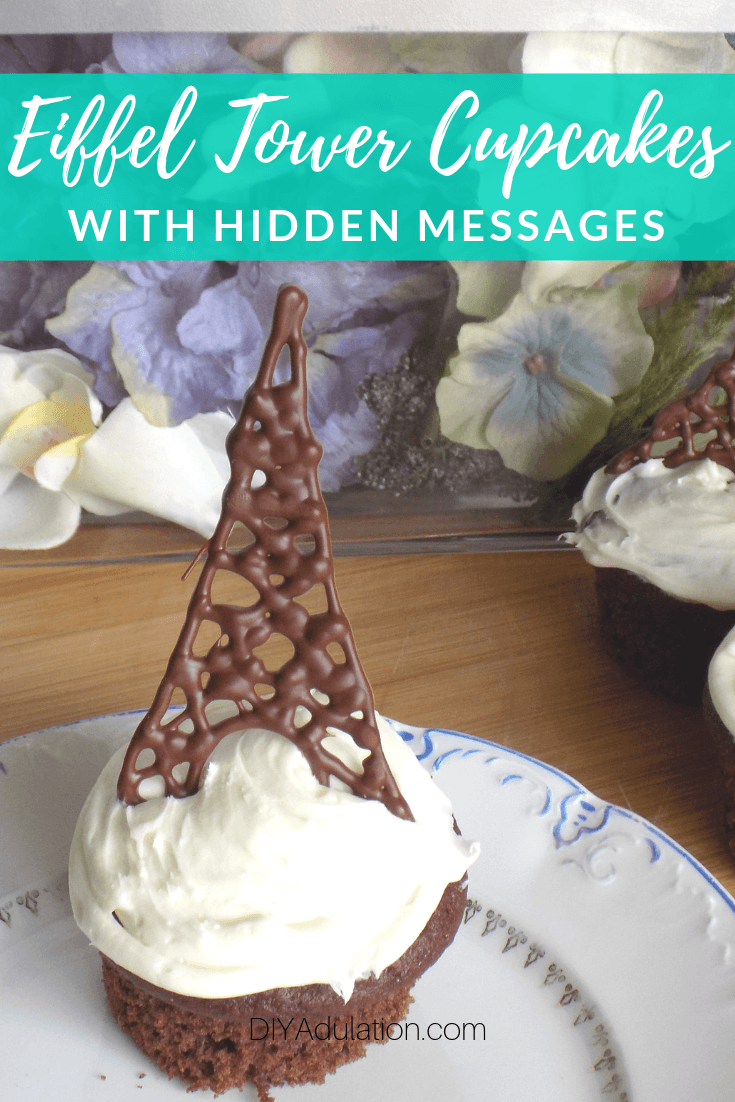
After the chocolates have set, place them in the frosting on top of the cupcakes.


Chocolate Cupcake with Secret Message Cavity Inside

Chocolate Cupcake with Secret Message Sticking Out of Inside

Chocolate Eiffel Tower Cupcake on Plate with text overlay - Eiffel Tower Cupcakes with Hidden Messages

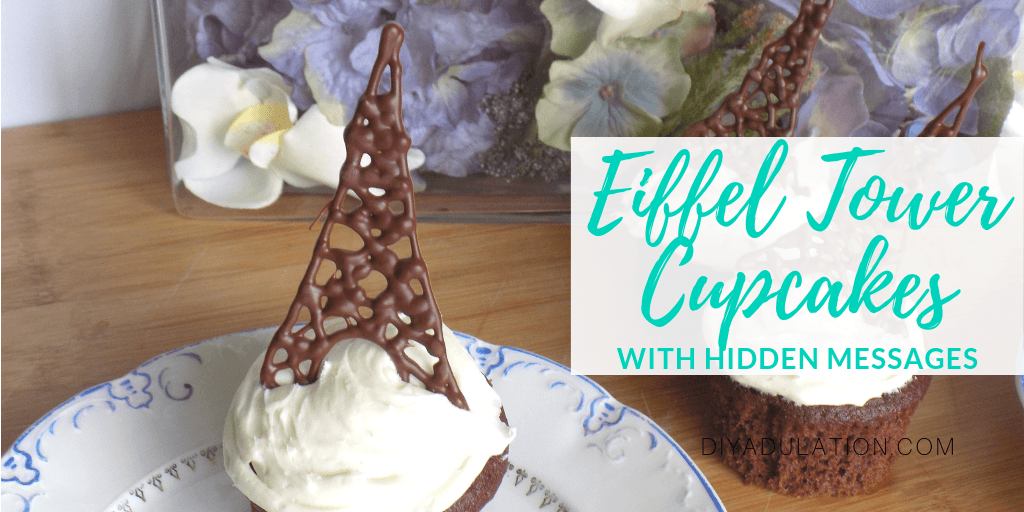
How super sweet are these Eiffel Tower cupcakes with hidden messages? The best part is that they add that next level uniqueness without breaking the bank or taking days of your time to create. In fact, you can whip them up in a couple of hours. If you want to make them in advance, freeze your cupcakes after they are iced and leave your chocolate Eiffel Towers frozen separate. Then simply defrost the cupcakes and top with your chocolates an hour before serving.

See where I’m linking up!

Don’t Forget to Pin It!

Chocolate Eiffel Tower Cupcake on Plate with Flowers in Background with text overlay - Eiffel Tower Cupcakes with Hidden Messages


More Ideas You’ll Love:

Adorable and Easy Pipe Cleaner Butterfly Craft

It’s officially Spring and that means bright and cheerful craftiness! Let’s start with something for kiddos like an adorable and easy pipe cleaner butterfly craft. This kids craft is super easy and only needs some of those pipe cleaners I know you have lying around and scissors.

Affiliate links may be used in this post. Ordering a product through these links may result in a commission. Read the full disclosure here.

Collage of Pipe Cleaner Butterflies with text overlay - Adorable and Easy Pipe Cleaner Butterfly


[bctt tweet=”Looking for a fun and easy spring craft to make with the kiddos? This adorable pipe cleaner butterfly craft is the perfect quick and easy creation!” username=”diyadulation”]

My tiny humans are always playing with pipe cleaners. Sometimes, I swear, I don’t even know where they came from (like didn’t we use all of those at Christmastime?). I think part of the draw is that you can turn them into anything. Your imagination is the limit.

They have made bracelets, glasses, animal tails, clothes for dolls, springs… the list goes on and on. While I love letting them create freely, sometimes it’s fun to pass on my own knowledge and watch their eyes light up. That’s exactly what happened with this pipe cleaner butterfly craft. It went from, “That’s so cool, how did you make it” to, “Mom look! That was so easy!”

Of course, the youngest played with his for about 5 minutes before pulling it apart and turning it into something else but that’s also part of the fun. Much like play dough you can create, destroy, and recreate again and again. So grab the pipe cleaners and gather the little ones around the table for some fun and colorful spring creating.


Pipe Cleaner Butterfly next to Flowers

Pipe Cleaner Butterfly Materials


2 Purple Pipe Cleaners with Ends twisted together

Step 1

First, grab 2 pipe cleaners of the same color and twist 1 set of ends together.


Close Up of Secured Ends of Purple Pipe Cleaners

Step 2

Next, straighten the 2 pipe cleaners into one line and flatten the twisted joint so that it is flush with the pipe cleaner line.


Twisted Loop in Purple Pipe Cleaner

Step 3

Then form a loop at one end of the joined pipe cleaners and twist once to secure.


2 Loops in Purple Pipe Cleaner

Step 4

Add a second loop next to the first loop and, again, twist it one to secure. This creates your first wing.


Purple Pipe Cleaner Butterfly Wings

Step 5

Repeat steps 3 and 4 with the rest of your joined pipe cleaners to create the second wing. Wrap any excess pipe cleaner ends around the center to secure in place.


Yellow Pipe Cleaner Wrapped Around Center of Purple Pipe Cleaner Butterfly Wings

Step 6

Next, grab one pipe cleaner in a different color and secure it to the middle of your butterfly wings by wrapping it 2-3 times around the center of them.


Yellow Pipe Cleaner with Small Loop on Top on Purple Pipe Cleaner Butterfly Wings

Step 7

Then fold your pipe cleaner in on itself to form the butterfly body and twist it together. Leave a small loop at the top as pictured.


Pipe Cleaner Butterfly next to Small Piece of Yellow Pipe Cleaner and Scissors

Step 8

Now cut a smaller piece of pipe cleaner in the same color as your butterfly body.

Mom Note:


Pipe Cleaner Butterfly with Antennae Attached

Step 9

Thread the small piece of pipe cleaner through the loop at the top of your butterfly body and twist the open loop you left in step 7 to secure it.


Pipe Cleaner Butterfly with Curled Antennae

Step 10

Lastly, curl the ends of the small piece of pipe cleaner to look like antennae for your butterfly.


Pipe Cleaner Butterfly next to Pipe Cleaner Flowers

Close up of Pipe Cleaner Butterfly with text overlay - Adorable and Easy Pipe Cleaner Butterfly

The great thing about this adorable and easy pipe cleaner butterfly craft is that once you can shape and bend the wings once it is made. Pull the wings slightly together to create a creature that looks as though it is ready to take flight. You can also make multiple pipe cleaner butterflies and thread them together to create a mobile. Or simply let the kiddos take flight on a playful adventure and run around the house with their creations. No matter what you choose, these adorable little critters are sure to be a fun craft to make with the kiddos.

See where I’m linking up!

Don’t Forget to Pin It!

Close up of Pipe Cleaner Butterfly with text overlay - Adorable and Easy Pipe Cleaner Butterfly


More Ideas You’ll Love:

Candy Flavored Homemade Lip Gloss Recipe

Tired of the kiddos stealing all of your lip balm? Surprise them with their own special lip gloss with this candy flavored homemade lip gloss recipe! It’s inexpensive to make, easy to personalize to your child’s tastes, and makes a great gift.

Affiliate links may be used in this post. Ordering a product through these links may result in a commission. Read the full disclosure here.

Collage of Containers of Lip Gloss with text overlay - Candy Flavored Homemade Lip Gloss Recipe


[bctt tweet=”This candy flavored homemade lip gloss recipe has it all. It moisturizes dry lips, is shimmery, smells delicious, and is stored in a kid-friendly container.” username=”diyadulation”]

Of everything that could drive you crazy about being a mom, it’s always the little things that seem to be the worst, right? For me, it’s the kiddos messing up my lip balm. I don’t mind them using it if they ask and then hand it back to me to close when they’re done. Of course, that’s not how it goes most of the time.

My kids are constantly getting into my lip balm in my purse. I get super annoyed grabbing my Burt’s Bees and finding it messy and destroyed because little hands got to it. Part of the problem is they don’t twist the balm back down after they use it. Instead, they smash the lid back on and slip it into my bag.

These candy flavored homemade lip glosses are stored in small lidded pots instead of twist tubes. That makes them more kid friendly plus the containers are reusable. No more destroyed lip balm in your purse. Let your kiddos have their own lip gloss and leave yours alone.


Open Watermelon Lip Gloss Next to Rainbow

Container of Cocoa Butter Petroleum Jelly next to Empty Cups

Candy Flavored Lip Gloss Materials


Petroleum Jelly in Plastic Cups next to Mica Powder

Step 1

First, add a small amount of cocoa butter petroleum jelly into 1 container per flavor you are making.


Close Up of Rose Mica Powder On Top of Petroleum Jelly

Step 2

Next, add some cosmetic grade mica powder on top of the petroleum jelly.

Note:


Close Up of Brown Mica Powder Mixed in Petroleum Jelly

Step 3

Stir your mica powder into the petroleum jelly with a wooden popsicle stick until it is well combined.


Flavored Candy Oils

Root Beer Lip Gloss in Small Container next to Wooden Stick

Watermelon Flavor Mixed into Rose Colored Jelly

Step 4

Add in 5-10 drops of your candy flavoring oil after your mica powder is mixed into your petroleum jelly. Then mix the oil into your lip gloss thoroughly.


Package of Small Storage Containers

Watermelon Lip Gloss in Small Container

Step 5

Lastly, after you’ve mixed your lip gloss, scoop them into the small lidded containers.


Watermelon Lip Gloss Next to Decorative Lid

Step 6 (Optional)

Top your container lids with stickers or cabochons to label the flavors.


Close up of Open Root Beer Lip Gloss

Containers of Lip Gloss with text overlay - Candy Flavored Homemade Lip Gloss Recipe

Is it really kid-friendly if it’s not delicious? Um, no. This candy flavored homemade lip gloss recipe has it all. It moisturizes dry lips and has a hint of shimmer. It smells and tastes delicious plus it’s stored in a totally kid-friendly container too! These make great party favors, stocking stuffers, or basket stuffers for kids because you can whip up a large batch in no time at all.

See where I’m linking up!

Don’t Forget to Pin It!

Close Up of Finger Holding Lip Gloss with text overlay - Candy Flavored Homemade Lip Gloss Recipe


More Ideas You’ll Love: