Sprinkle-Covered Rainbow Shamrock Cakes

Let’s start this week off with a splash of color and sugar. As promised at the Merry Monday party yesterday, we are back today with another fun rainbow treat. These easy rainbow shamrock cakes are a fun addition to your holiday party or simply a nice surprise for the family. Get in the kitchen, crank some Flogging Molly, and bake up this deliciousness.

Affiliate links may be used in this post. Ordering a product through these links may result in a commission at no extra cost to you. Read the full disclosure here.

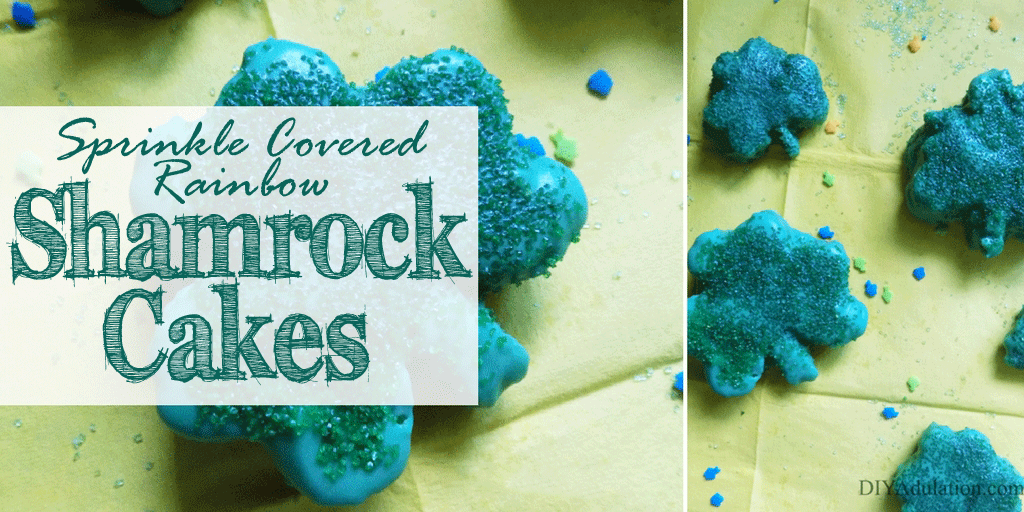
Sprinkled Shamrock Cakes Collage with Text Overlay: Sprinkle Covered Rainbow Shamrock Cakes


[bctt tweet=”Get in the kitchen, crank some Flogging Molly, and bake up these delicious rainbow shamrock cakes! #stpats #recipe” username=”diyadulation”]

I have loved celebrating St. Patrick’s Day since I first moved out on my own. I always went all out with green everything, fun decorations, and games. Since those days, the celebrations have tamed quite a bit but we still enjoy celebrating. We always do some sort of festive food spread and, of course, blast the music. The kiddos get all hyped up on sugar and dance around. This year, I’m surprising them with this new sweet treat!


Close up of Sprinkled Rainbow Shamrock Cake

Ingredients

Step 1

First, preheat your oven to 350° F.
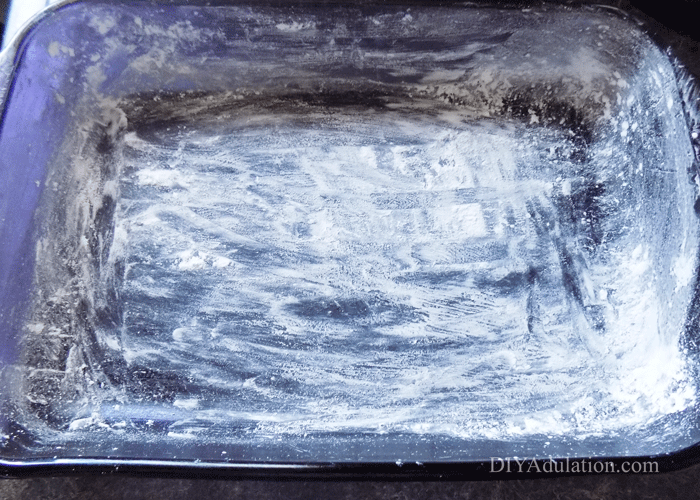
 

Flour Prepped Baking Dish

Step 2

Prepare a 9 x 13 glass baking dish by lining with shortening and then covering in flour. This makes it easier to get the cake out later. Set it to the side.


Mixed Cake Batter and Whisk in Mixing Bowl

Step 3

Prepare your cake mix according to the instructions on the box.


4 Bowls of Cake Batter

Step 4

Next, separate your mix into 4 or 5 different small bowls.
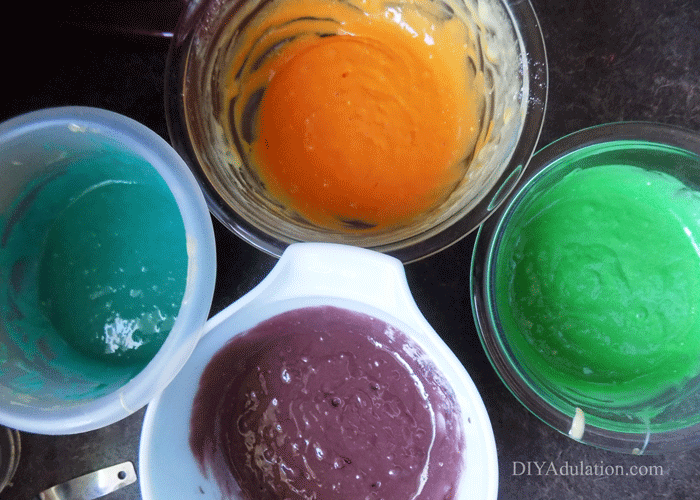
 

Dyed Cake Mix in 4 Separate Bowls

Step 5

Add in food coloring to each bowl and mix it in. I went with blue, green, orange, and purple but any colors from the rainbow (or all of them) will work.


Step 6

Now, drop dollops of each color of cake batter into the baking dish at random.

Step 7

Next, take a toothpick and swirl it through the cake batter in your baking dish.

Step 8

Bake for 30 minutes at 350° F.

Step 9

After your cake is finished baking, place the baking dish on a trivet to cool for 10-15 minutes.

Step 10

When the baking dish is cool enough to touch without oven mitts, flip it over onto a cooling rack to remove the cake.

Step 11

Place your cake and the cooling rack in the freezer for at least 2 hours. This will make the next steps much easier.


Cooled Cake on parchment Paper

Cut in Half Slab of Cake

Step 12

After your cake is fully cooled (even partially frozen), pull it out and cut it in half along the center like a hamburger bun. Put one half off to the side for now.

Step 13

Lay your remaining half slab of cake on a piece of parchment paper and begin cutting out your shamrocks with a cookie cutter.

Notes:

  • I used 2 different sizes to reduce the amount of cake waste.
  • Put the excess cake that cannot be cut with your cookie cutters in a plastic freezer bag. You can turn it into cake pops later so none of the cake goes to waste.

Step 14

Continue cutting out shamrocks until both halves of your cake have been cut.


Cut Out Shamrock Cakes on Cooling Rack

Step 15

Now, place your shamrocks on the cooling rack and place it over the parchment paper.

Step 16

Melt your candy melts in the microwave in a microwave safe bowl in 1 minute increments until smooth.

Tip:

  • After the candy is melted, add a tbsp. of shortening to make it smoother and easier to pour.

Step 17

Next, pour your melted candy over the tops of the shamrocks. Be sure that the sides are covered also.

Step 18

Sprinkle your green sugar sprinkles over the candy coating immediately.


Sprinkled Rainbow Shamrock Cakes

Step 19

Allow your candy coating to cool completely, the remove the rainbow shamrock cakes and enjoy!

Bonus Tips


Sprinkled Shamrock Cakes Collage with Text Overlay: Sprinkle Covered Rainbow Shamrock Cakes

The work on these rainbow shamrock cakes is totally worth it. The candy coating seals in the moisture for a soft, spongy cake and the sprinkles give it a surprise crunch that you will love. In case you missed it, you can find more awesome Rainbow Crafts and Treats at this week’s Merry Monday link party. Don’t forget to complete the fun with these Dollar Store St Pats Party Hats, too.

See where I’m linking up!

Don’t Forget to Pin It!

Sprinkled Shamrock Cakes Collage with Text Overlay: Sprinkle Covered Rainbow Shamrock Cakes


More Ideas You’ll Love:

Easy Homemade Sausage Gravy Recipe

Enjoy biscuits and gravy any day of the week with this easy homemade sausage gravy. It’s super easy to make, freezes well, and once you give it a try, this delicious recipe will be a staple in your home too!

Affiliate links may be used in this post. Ordering a product through these links may result in a commission at no extra cost to you. Read the full disclosure here.

Forkful of biscuits and sausage gravy with plate of food in the background


[bctt tweet=”Breakfast is done with this deliciously easy #homemade sausage gravy #recipe! Serve it up on biscuits or fried potatoes for the ultimate country feast on cold mornings.” username=”diyadulation”]

Biscuits and gravy is one of my all-time favorite breakfast meals. It is like a warm and comforting hug in a bowl (or on a plate).

I was lucky enough (or spoiled enough, depending on how your look at it) to be able to call my mom when I first moved out on my own and have her make up a batch for me. Eventually, though, you have to grow up and figure out how to make it on your own.

I’m proud to say that after nearly 10 years of learning how to make it, I can make this easy homemade sausage gravy in my sleep. Once you give it a try, this delicious recipe will soon be a staple in your home too!

A Cooking Mishap

The first time I tried to make this I had just graduated high school. I was fending for myself during the summer while my mom was at work and wanted biscuits and gravy.

Unfortunately, I had absolutely no idea how my mom made this favorite dish of mine. So I took water and brought it to a boil on the stove. Then I added brown gravy mix from a container in the spice cabinet.

When it didn’t get thick like it was supposed to, I added more gravy mix. Imagine how much powdered gravy mix you need to add to get that creamy thickness of sausage gravy.

In case you’re wondering, it was inedible. It was so salty that one bight made your mouth pucker. Bleck! Thank goodness for canned biscuits or I probably would have messed that up too. Epic fail.


Plate of biscuits covered in sausage gravy

Homemade Sausage Gravy Ingredients


Forkful of biscuits and sausage gravy with plate of food in the background

Step 1

First, brown your sausage in a large pot over medium-high heat.

Step 2

Once your sausage is browned, add the butter to it. Stir until the butter has melted.

Step 3

Next, stir in flour until well combined. The mixture should look more like dough than soup.

Step 4

Then pour in your milk and mix together thoroughly.

Step 5

Once your mixture starts to bubble, lower the heat to low and add some salt and pepper. I recommend starting with half a teaspoon of each. You can always add more if needed when the gravy is done cooking.

Step 6

Continue to simmer for 10 minutes or until your gravy has thickened up.

Tip:


Forkful of biscuits and sausage gravy with plate of food in the background

Step 7

Lastly, serve gravy over biscuits or fried potatoes.

How to Freeze Homemade Sausage Gravy

You can make this delicious dish even faster by doubling the batch and freezing half of it. Place it in a gallon, resealable freezer bag and toss in the freezer. Be sure to label and date it so you know what it is later.

How to Reheat Frozen Homemade Sausage Gravy

When you’re ready to have it for breakfast, pull it out the night before and let it defrost in the fridge overnight. The next morning, warm it up on low on the stove, stirring frequently. Then serve as normal.

Plate of biscuits covered in sausage gravy

You should definitely give this easy homemade sausage gravy on fried potatoes sometime, too. The crunch of the potatoes adds a delicious texture to your breakfast you won’t regret.

I’ve come a long way since that first fateful attempt at making this. Now I can whip it up easily on a cold morning for my family. We usually make a huge batch and freeze it for easy hot breakfasts throughout the month.

Now that I’ve shared my cooking disaster, I want to hear yours. What meal did you totally mess up when you first started cooking? Let me know in the comments and we can commiserate on how far we have come!

Easy Homemade Sausage Gravy Recipe

Easy Homemade Sausage Gravy Recipe
Cook Time 30 minutes
Total Time 30 minutes

Ingredients

  • 1 lb Breakfast Sausage
  • 1/4 Cup Butter or Margarine
  • 1 Cup Flour
  • 3 Cups Milk
  • Salt and Pepper to Taste

Instructions

  1. First, brown your sausage in a large pot over medium-high heat.
  2. Once your sausage is browned, add the butter to it. Stir until the butter has melted.
  3. Next, stir in flour until well combined. The mixture should look more like dough than soup.
  4. Then pour in your milk and mix together thoroughly.
  5. Once your mixture starts to bubble, lower the heat to low and add some salt and pepper. I recommend starting with half a teaspoon of each. You can always add more if needed when the gravy is done cooking.
  6. Continue to simmer for 10 minutes or until your gravy has thickened up.
  7. Lastly, serve gravy over biscuits or fried potatoes.

Notes

If the gravy is too thick, add more milk. If it is too thin, add a teaspoon of cornstarch

See where I’m linking up!

Don’t Forget to Pin It!

Forkful of biscuits and sausage gravy with plate of food in the background. Text Overlay: Easy Homemade Sausage Gravy


More Ideas You’ll Love:


Easy Cheesy Mini Black Bean Quesadillas

Raise your hand if you’re a taco fiend! I could seriously eat tacos every single day and never get sick of them. Unfortunately, my family doesn’t always share my fervor. That means we have to mix it up so I can still get my taco fix while serving up something a little different for the family. That’s where these easy cheesy mini black bean quesadillas come into play. They are quick and easy to make and packed with that taco flavor. It’s a win-win.

Affiliate links may be used in this post. Ordering a product through these links may result in a commission at no extra cost to you. Read the full disclosure here.

Stacked Black Bean and Cheese Quesadillas on a plate with Sour Cream on top.


[bctt tweet=”Get your taco fix with these easy cheesy mini black bean quesadillas! #easyrecipe” username=”diyadulation”]

Ingredients

Step 1

First, strain and rinse off your beans.

Step 2

Add rinsed beans, cheese, and taco seasoning to a medium mixing bowl.

Step 3

Next, toss ingredients to combine.


Stacked Black Bean and Cheese Quesadillas on a plate with Sour Cream on top.

Step 4 (Stovetop Cooking)

To cook these on the stovetop, place a tortilla in a lightly greased frying pan over medium heat.

Step 5

Add ½ cup of seasoned beans and cheese mix to half of the tortilla and fold in half.

Step 6

Cook the quesadilla over medium heat 1-2 minutes per side or until each side is lightly browned.


Stacked Black Bean and Cheese Quesadillas on a plate with Sour Cream on top.

Step 7 (Oven Cooking)

To cook your quesadillas in the over, pre-heat it to 350º F and line a large baking sheet with parchment paper.

Step 8

Next, add your filled and folded quesadilla to the pan and bake 10 minutes until the sides are browned.

Step 9

Lastly, cut quesadillas into fourths and serve warm with sour cream or salsa for dipping.


Stacked Black Bean and Cheese Quesadillas on a plate with Sour Cream on top.

Stacked Black Bean and Cheese Quesadillas on a plate with Sour Cream on top.

I love the crunch followed immediately by the creamy inside with every bite of these easy cheesy mini black bean quesadillas. We usually have them for lunch but they also make a great party or game day appetizer. Now you can still get your taco fix without boring your family. These delicious babies are freezer-friendly too! Store them in a gallon freezer bag for up to 2 weeks. Then pull out and microwave for 2 minutes per whole quesadilla as needed. One warning for you: freezing and microwaving these makes the quesadillas lose their crispiness on the outside. They are still totally delicious, of course.

[amd-zlrecipe-recipe:19]

See where I’m linking up!

Don’t Forget to Pin It!

Stacked Black Bean and Cheese Quesadillas on a plate with Sour Cream on top.


More Ideas You’ll Love: