DIY Adulation

Fawning Over a Do-It-Yourself Life

  • Crafts
    • Papercrafts
    • Fabric Crafts
    • Paint Crafts
    • Recycled Crafts
    • DIY Crafts
  • Home
    • Home Decor
    • Organization
    • Recipes
    • Finances
    • Cleaning
  • Holidays
    • Spring Holidays
    • Summer Holidays
    • Autumn Holidays
    • Winter Holidays
  • Relationships
    • Self
    • Marriage
    • Parenting
    • Friends and Family
    • Kids
      • Kids Crafts
      • Kids Learning
      • Kids Activities
      • Back to School
      • Kids Parties
      • Kids Korner
  • Policies & Disclosures
  • Newsletter
  • About Me
  • VIP Resource Library

DIY Father’s Day Tie Designed by Kids

06.07.2019 by Marie // Leave a Comment

Want an awesome, one-of-a-kind gift for Dad this Father’s Day? Wrap up this easy and budget-friendly DIY Father’s Day tie designed by your kiddos for a truly amazing gift any father or grandpa will love!

Affiliate links are used on this site. Ordering a product through these links may result in a commission. Read the full disclosure here.

Kids Drawings Tie with text overlay - DIY Father's Day Tie Designed by Kids


Want an awesome, one-of-a-kind gift for Dad this Father’s Day? Wrap up this easy and budget-friendly DIY Father’s Day tie designed by your kiddos! Click To Tweet

After years of surprising the wonderful men in our life with heartfelt gifts, you hit a point where you struggle with ideas for what to gift. Luckily, it seems universal that adorable creations by kiddos is always welcome so you can’t go wrong with something the little ones help make.

This project is a fun and creative take on the traditional necktie gift for Father’s Day. Instead of buying a boring tie that anyone can pick up at the store, create a totally unique one that dads and granddads will proudly wear every chance they get!


Gray and White Drawing Tie on Teal Button Up Shirt

DIY Father’s Day Tie Materials

  • White Cotton or Polyester Tie (Don’t use silk or satin for this project)
  • Fabric Markers
  • 2 Rubber Bands
  • Iron


White Mens Tie in Plastic Packaging

White Tie on Wood Background

Step 1

First, remove your tie from the packaging.


Close up of Rubber Band on White Tie

Spacing between rubber bands on tie

Step 2

Next, divide your tie into thirds and mark the sections using rubber bands.


Purple Rubber Bands on White Tie

Tip:

  • Don’t wrap the rubber bands too tight. Only wrap them 2-3 times to make the areas without overly cinching the tie.


Drawing on Bottom of White Tie

Drawing on Middle Section of White Tie

Step 3

After the tie is divided, let each kiddo decorate one section. We went with a gray fabric marker for all of the kids designs because of concern over the type of tie their grandpa can wear to work. You can go more colorful depending on Dad or Grandpa’s style.


Drawing on Small End Section of White Tie

Tip:

  • If one of your kids is a scribbler, you might want to give him or her the skinnier section of the tie. My youngest literally tried to see how much he could get in one small section of the tie. It definitely made for an interesting design, but it also bled a lot distorting the end result.


Set Design on White Tie

Step 4

After each kid has colored in his or her sections, remove the rubber bands and press with an iron to set the design in the fabric. I didn’t want to risk throwing this in the dryer but you need to set fabric marker designs with heat.

Tip:

  • Make sure that your iron has multiple settings so that you can choose one specific to your fabric. You don’t want one that is too cool so that it doesn’t set the design but not so hot that it ruins your tie.


DIY Kids Drawings Tie on Teal Button Up Shirt

Step 5 (Optional)

If you want to take your gift to the next level, gift it tied around the neck of a button up shirt. Then wrap and surprise Dad with it!


Kids Drawings Tie on Teal Shirt with text overlay - DIY Father's Day Tie Designed by Kids

Not only is this DIY Father’s Day tie designed by kids a thoughtful gift that Dad will treasure but at $10.00, it’s also super budget-friendly. Don’t forget that you can make it appropriate for the stodgiest office dress code by sticking with a neutral color like gray, as we did. You can also get totally crazy with it and let the kiddos go nuts with colors and designs. Even if the overuse of ink makes the designs bleed together, you still end up with an awesome and unique creation for Dad to show off!

See where I’m linking up!

Don’t Forget to Pin It!

Kids Drawings Tie with text overlay - DIY Father's Day Tie Designed by Kids


Bring on the Crafts 700 x 550

Bring on the Crafts — A Craft & DIY Blog Hop

On the first Friday through Sunday of each month, a group of DIY and crafty bloggers join forces to create a fun craft or DIY project to share that follows a monthly materials theme. Together, with hosts Marie from The Inspiration Vault and Habiba from Craftify My Love, they share the #BringontheCrafts blog hop with you. June’s theme is Fabric! Each blogger chooses their own craft to make as long as they love it and it uses Fabric for the project.

Our May Co-hosts

Jenny at Cookies, Coffee and Crafts
Erlene at My Pinterventures • Marie at DIY Adulation • Michele at Coastal Bohemian • Beverly at Across the Blvd • Gail at Purple Hues & Me

Join in on the fun! If you’d like to participate next month, you can request to join our Bring on the Crafts Facebook Group. Next month’s theme is Beads & Buttons!

Not a blogger, but a creative mind none the less!? Don’t worry, Share your awesome creations in our Craft Cult Facebook Group. This is also a great place to ask craft & DIY related questions and find inspiration for your next project.

Now let’s see all of those amazing Craft and DIY Projects!

You are invited to the Inlinkz link party!

Click here to enter

Categories // Bring on the Crafts Blog Hop, Crafts, Crafts, DIY, Fabric Crafts, Father's Day, Holidays, Kids, Summer Holidays

Awesome Summer Fiesta Birthday Party Ideas

06.06.2019 by Marie // Leave a Comment

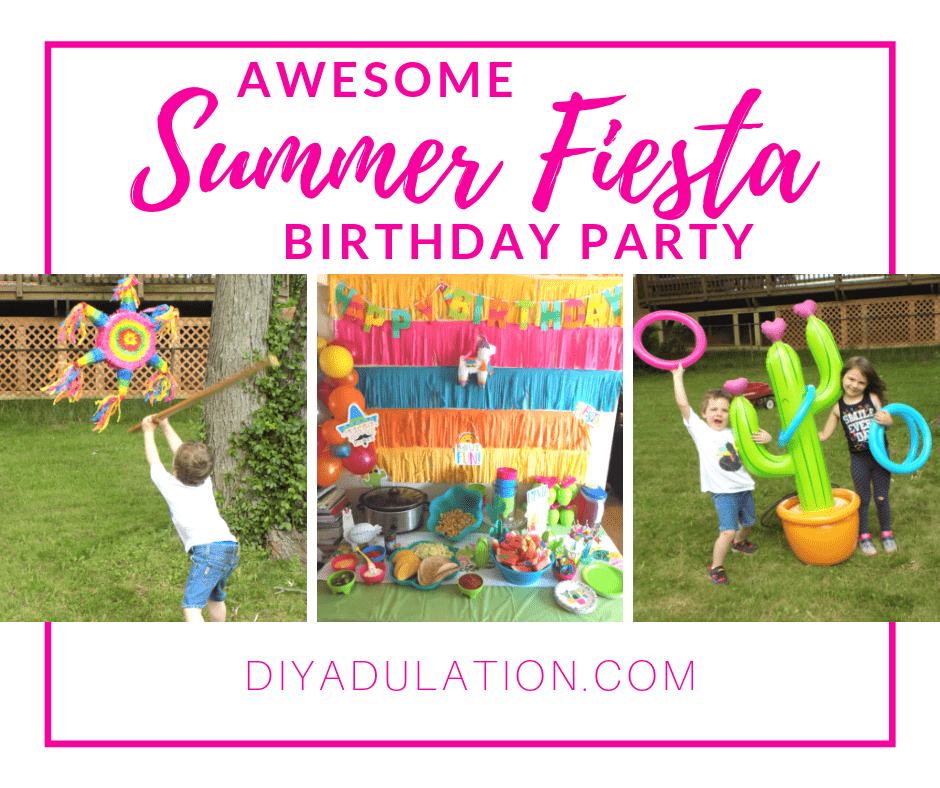
Are you looking for super sweet, and budget-friendly, ideas to throw an awesome summer fiesta birthday party then you are in the right place. Below you’ll find all of the ideas and tips you need to throw and epic birthday party complete with gorgeous decorations, delicious food, and entertaining games.

This is a sponsored post written on behalf on Oriental Trading. In addition, affiliate links are used on this site. Ordering a product through these links may result in a commission. Read the full disclosure here.

Collage of Games and Colorful Fiesta Party Table with text overlay - Awesome Summer Fiesta Birthday Party


Looking for super sweet, and budget-friendly, ideas to throw an awesome summer fiesta birthday party? Find everything you need from food to games right here! #ad #OTC❤️Summer #orientaltrading Click To Tweet

My youngest definitely has his momma’s affinity for tacos. That’s why I knew that a summer fiesta birthday party was the perfect theme for this year’s party. I mean, come on. It has tacos, bright colors, a pinata and cake. Is there anything more you could ask for?

According to my incredibly grateful 5-year-old, “None of this awesome food, treats, or games would be possible without you.” Clearly it was a good decision on my part.

If you have a little fiesta lover like me, then a summer fiesta birthday party is exactly what you need!


Close Up of Fiesta Party Table (1)

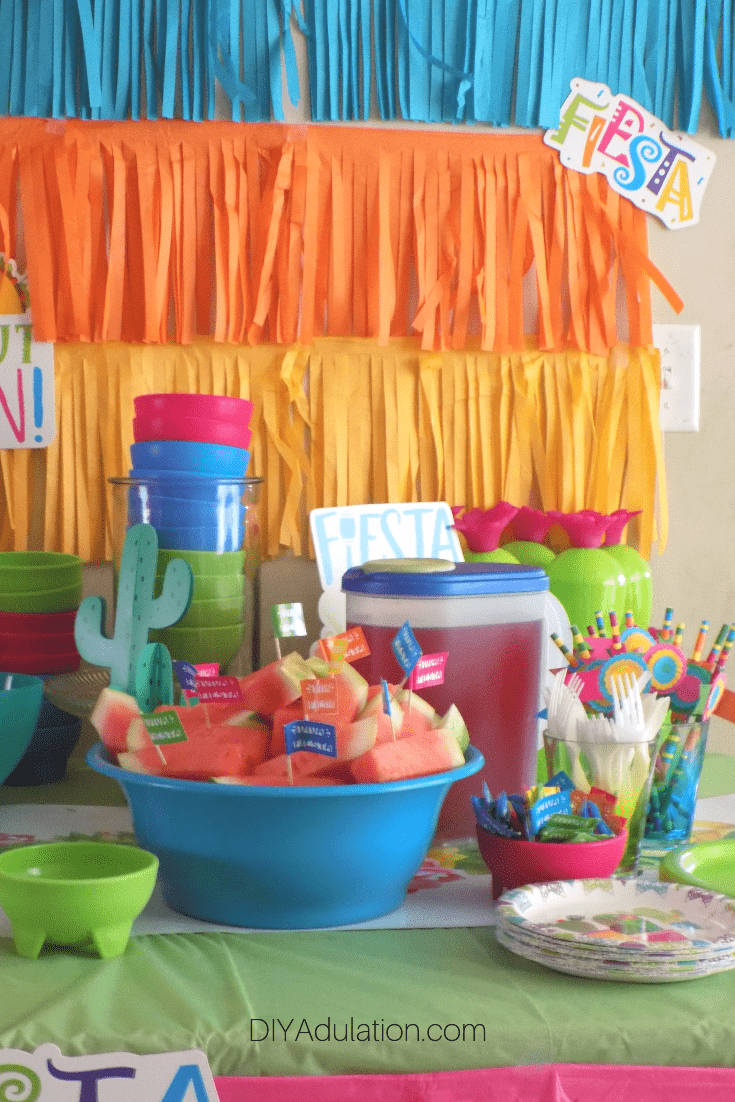
Summer Fiesta Birthday Party Table

No party is complete without awesome food and, of course, you want a gorgeous way to display. These easy steps walk you through how to create the exact table I did which is perfect for any fiesta!

Note:

  • I set up our food table inside because I needed my Crock Pot to keep the taco meat warm. It also keeps the food safe from bugs and other things outside.

Step 1

First, you have to set up the party wall behind your food table. I used these awesome fringe decorations layered on the wall. Tape them to your wall and cut any excess from the end. I used the extra to add 2 more rows to my fringe wall. Then later, I added the remaining pieces to the edge of my table.

Step 2

After you have your fringe on the wall, hang a fiesta Happy Birthday banner like this awesome one I got from Oriental Trading. It fits perfectly with the design I was going for.


Birthday Banner and Mini Pinata on Fringe Background

Step 3

Lastly, hang a mini boho llama pinata under your birthday banner for additional visual interest.

Step 4

Next, cover your table with a green plastic tablecloth. Do this before attaching your extra fringe to it.

Step 5

After you have your tablecloth in place, add a cactus table runner for visual interest. It also serves a more practical purpose. It helps divide your table to create zones for food and drinks.

Step 6

Then I blew up balloons and sewed them together to create the wall feature you see on the left of the photo above step 3. This isn’t complicated. Simply blow up your balloons (I love this set because the balloons are various sizes) and then use a needle and thread to attach them. Thread the needle through the balloon tail under the knot you make after blowing them up.


Fiesta Sign next to Cacti Cups

Fiesta Straws on Party Table

Watermelon and Dishes on Fiesta Table

Step 7

Next, organize your food and tableware on the table. I like to start with cups and drinks, then place plates and utensils, and lastly move on to food and snacks.

Shop These Items:

  1. Cactus Cups
  2. Fiesta Straws
  3. Green Paper Plates
  4. Fiesta Party Picks
  5. Cactus Paper Plates
  6. Guacamole Bowls


Close up of Fiesta Party Table

Step 8

Once you have all of your food laid out on the table, lastly add the extra smaller touches. I got this pack of fun fiesta sayings and added them to the fringe wall, the balloons, and the front of the food table.


Paper Llama on Party Table

Step 9

Finish off your table setting by adding these llama and cacti centerpieces. I chose not to group them together for visual interest. I like the cacti dressing up the guac bowls.


Fiesta Flags in Watermelon

Close Up of Taco Bar on Fiesta Table

Summer Fiesta Birthday Party Food

The no-brainer fiesta food is tacos. They’re cheap, delicious, and make feeding a crowd easy. Of course, you want to serve a bit more than tacos and cake. I also added chips and fruit because, yum!

Most importantly for a taco bar, you want multiple topping and shell options. We has soft tortillas, hard shells, and corn chips as our taco bases. For toppings, I included lettuce, tomatoes, salsa, fresh sliced jalapenos, cheese, sour cream, and taco sauce. These are all in addition to our taco meat in the Crock Pot.


Kids Next to Cactus Ring Toss

Summer Fiesta Birthday Party Games and Party Favors

When throwing a kids birthday party you want some fun activities to enjoy. We had 4 main activities in addition to the myriad of awesome outdoor games we love.


Boy Swinging at Pinata

Girl Swinging at Pinata

Pinata

I feel like you really can’t have a fiesta without a pinata. I love this traditional designed one from Oriental Trading. It’s large and colorful, plus super easy to fill and even easier to hang. While I’m not sure I recommend it, Hubs tied a rope to the pinata then the opposite end to a brick and tossed it over the tree. On the other hand, it was super amusing to watch him try to repeatedly toss it into just the right spot and once it was, the brick helped stabilize both the pinata and the height.


Note:

  • I hate having too much candy in a pinata so I opted for this toy and candy mix from Oriental Trading. The toys give the kiddos even more to play with and they keep them from binging on too many sweets during the party. Win-win.


Boy Behind Cactus Ring Toss Game

Cactus Ring Toss Game

Okay, seriously, how freaking adorable is this cactus ring toss game? Don’t let the website fool you. It’s crazy larger than it appears, which is totally a good thing. The kids had a blast playing this and my daughter announced she wants the same game for her birthday… in December. Looks like we’ll have to breakable-proof the living room for that.


Pumping Up Cactus Ring Toss Game

Note:

  • Do yourself a favor and use a pump to blow this thing up. I started using just my lungs and after only working on the base I felt ready to pass out. It’s not impossible to do without a pump but it definitely takes a lot more energy and even more time.

Bubbles

The bubbles served a dual purpose: one, they’re fun (duh) and two, they stabilize the cactus gift boxes until they can be filled with the pinata loot. Trust me, you want the gift boxes pre-assembled before the party. They’re super cute but not exactly intuitive to put together.

Face Painting

I don’t know why, but I always love to include face painting at a kiddos birthday party. This one was especially fun because I totally painted mustaches on the adults (that didn’t have them, that is… looking at you, Hubs). Other face painting ideas for a fiesta party are cacti on cheeks, sombreros on the forehead, and tacos on the cheek. You can go with this kit for more traditional face painting or try out these crayons for a super simple face painting tool.


Fiesta Sign next to Cacti Cups with text overlay - Awesome Summer Fiesta Birthday Party

This summer fiesta birthday party was an absolute blast. Even better, even with all of the food, everything cost less than $250! Score! You can find all of the decorations and tools that you need on Oriental Trading. Then all that’s left is to kick back and have fun. Even if you don’t have a summer birthday on the horizon, throw a summer fiesta party for no reason other than to get together with friends and family. You definitely won’t regret it!

See where I’m linking up!

Don’t Forget to Pin It!

Colorful Fiesta Party Table with text overlay - Awesome Summer Fiesta Birthday Party


More Ideas You’ll Love:

  • Easy Outdoor Flying Disc Game
  • Delicious Warm Taco Dip Recipe
  • DIY Giant Backyard Glow Pong
  • Fiesta Recipes – Inside the Fox Den

Categories // Holidays, Kids, Parties, Summer Holidays

DIY Summer Boredom Box for Kids | Easy Recycled Craft

06.05.2019 by Marie // Leave a Comment

If you let your kiddos spend every hour of every day playing video games you won’t hear “I’m bored” from them much. Of course, you also don’t want them wasting away in front of the TV so you set limits on how much they can play each day. That’s when the inevitable moaning about “There’s nothing to do” starts and this DIY summer boredom box for kids comes in.

Affiliate links are used on this site. Ordering a product through these links may result in a commission. Read the full disclosure here.

Collage of Colorful Discs and Tissue Box with Flower with text overlay - DIY Summer Boredom Box for Kids


Make life easier this summer break! Anytime your child complains about being bored, or some variant thereof, send them to this DIY summer boredom box for kids. Click To Tweet

Wondering how to keep the kids occupied all summer long? See our list of Summer Activities for Kids of All Ages!

We have partnered with some savvy blogging Mom’s and Grandma’s to bring you a collection of summer fun ideas to do with kids of all ages from Pre-K up to those precious teens. Be sure to scroll all the way down for even more ideas!


Colorful Boredom Box with Flower next to Discs

Stop Summer Boredom in Its Tracks

We’re only a week into summer break and my kiddos are already complaining about being bored. There is a lot of excitement about summer, but losing the structure of the school day can really throw kids out of whack (even if they won’t admit it).

As much as I love hanging out with my kiddos, I still have work I have to get done each day. From making meals to cleaning extra messes, my workload definitely isn’t any lighter during the summer.


That’s why I wanted to be ready for those moments when the kids can’t think of anything to do on their own. This summer boredom box is an easy way to give the kids something easy to do without having to hover or mediate constantly.

Make sure to keep some supplies on hand that correspond with your boredom box activities. For example, I have “Blow Bubbles” on one of the discs so I have a secret stash of extra bubbles the kids don’t know about for when this comes up. Some other easy supplies to keep on hand are notebooks, glow sticks, and water balloons.


Tissue Paper and Mod Podge next to Empty Tissue Box

DIY Summer Boredom Box Materials

  • Empty Tissue Box
  • Multiple Colors of Tissue Paper
  • Mod Podge
  • Flat Paint Brush
  • 50-100 2-inch Unfinished Wood Discs
  • Black Permanent Marker
  • Letter Stickers or Paper Letters that Compliment Your Tissue Paper Colors


Cut Up Pieces of Tissue Paper next to Scissors

Step 1

First, tear or cut your tissue paper into smaller pieces. They should be at least 2 inches by 2 inches.

Note:

  • I chose the colors peach, green, hot pink, and light pink because I wanted a tropical summery vibe for our box.

Step 2

Next, cover a small area of your tissue box in Mod Podge.


Tissue Paper Glued to Side of Box

Step 3

Then press pieces of tissue paper onto that same area of your tissue box.

Note:

  • The design on my tissue box actually complimented my theme so I went with it. If you don’t like the design on your box and don’t want to add 50 layers of paper and Mod Podge, paint your box in a base coat of white before starting step 2.

Step 4

After the pieces are pressed onto the box, go over them with more Mod Podge.


Tissue Paper Glued to Bottom of Box

Step 5

Continue adding layers of Mod Podge and tissue paper until your tissue box is completely covered. Don’t cover the opening of the tissue box.

Step 6

Once the box is completely covered set it aside to dry.

Tip:

  • Keep the box from sticking to your drying surface by placing it upside down on a full water bottle during drying.

Step 7

While your tissue box dries, pull out your wood discs.


Tissue Paper Glued to Wood Circles

Step 8

Use the same tissue paper pieces as you did on the box to cover 1 side of 50 or more discs.

Note:

  • I chose to use one color per disc but you can totally mix up the colors on each disc.

Step 9

Set your tissue covered discs to the side to dry.


Letters Glued on Colorful Box

Step 10

While the discs dry, add letters to your box to spell out “Boredom Box” on one side.


Flower Glued on Colorful Box

Step 11 (Optional)

You can also add decorative stickers suck as flowers or palm trees for more embellishment on the box.


Trimmed Pile of Tissue Paper Wood Circles

Step 12

After your discs are dry, carefully trim the excess tissue paper from around the edges.


Activities Written on Colorful Discs

Step 13

Next, write boredom-busting activities on the discs with a black permanent marker.

Note:

  • See below for examples on what to put on your discs.


Wood Discs Inside of Colorful Box

Step 14

Lastly, add all of your discs to your DIY summer boredom box and place in an area that is easily accessible to the kiddos.


Colorful Boredom Box with Flower

What to Write on Your Discs

I used this list of 75 Screen Free Summer Activities for Kids to put on the boredom box discs. The activities are things that don’t involve a screen like putting on a puppet show, playing with sidewalk chalk, or writing a letter to someone.

Although I have strict time limits on video games, I did include one single disc that gives the kiddos an extra 30 minutes of game time. It’s kind of my golden goose surprise for the kiddos.

In addition to the fun activity ideas, I also included some chores. I feel that this encourages kids to entertain themselves but, also, it’s important that they help out around the house a little extra during the summer.


Colorful Tissue Box with Flower next to Colorful Discs with text overlay - DIY Summer Boredom Box for Kids

Anytime your child complains about being bored, or some variant thereof, send them to this DIY summer boredom box for kids. Once they choose a disc, have them do the activity and return the disc to the box for reuse. This way the box will last all summer long, no problem!

See where I’m linking up!

Don’t Forget to Pin It!

Colorful Tissue Box with Flower next to Colorful Discs with text overlay - DIY Summer Boredom Box for Kids


Summer Fun Activities

Now, let’s see what else we can add to our Summer Activities list!  New ideas are added every day this week so Pin this post and check back every day.


Collage of Summer Activities Photos

Monday

An Alli Event

Glitter On A Dime

That Fit Fam


Collage of Summer Activities Photos

Tuesday

Intelligent Domestications

Cookies, Coffee and Crafts

DIY Adulation


Collage of Summer Activities Photos

Wednesday

DIY Adulation

Polka Dot Poplars


Collage of Summer Activities Photos

Thursday

Creative Ramblings

Cookies, Coffee and Crafts

Our Good Life


Collage of Summer Activities Photos

Friday

Glitter On A Dime

My Family Thyme

Categories // Activities, Crafts, DIY, Holidays, Kids, Papercrafts, Parenting, Recycled Crafts, Relationships, Summer Holidays

  • « Previous Page
  • 1
  • 2
  • 3
  • 4
  • 5
  • 6
  • …
  • 29
  • Next Page »

  • Facebook
  • Instagram
  • Pinterest
  • Twitter
  • YouTube
Shop The Best Machine Prices of the Year

Copyright © 2021 · Modern Studio Pro on Genesis Framework · WordPress · Log in