How to Turn Birthday Cards into Picture Frames

It happens every year. You invite friends and family to celebrate your kiddo’s birthday and after everything is said and done, you have a pile of thoughtful birthday cards that your child has already forgotten. You don’t want to toss them but you also don’t feel like storing them in a box for years to come. Find out how to turn birthday cards into picture frames that capture your child’s birthday and become a fun piece of decor for your home.

I was compensated by Dollar Tree for this post. This post also contains affiliate links and I will be compensated if you make a purchase after clicking on my links. Read the full disclosure here.
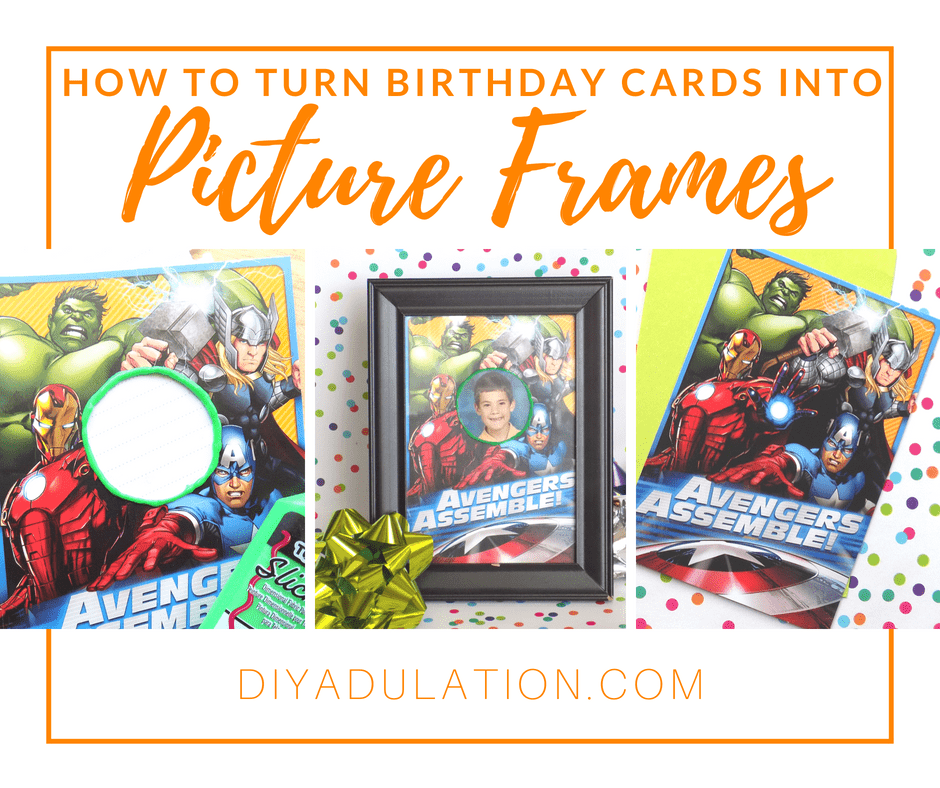
Collage of Photos of Avengers Birthday Card Photo Frame inside of Frame Next to Gift Bows with text overlay: How to Turn Birthday Cards into Picture Frames


[bctt tweet=”Do you have a stack of birthday cards you feel too guilty to throw out? Find out how to turn birthday cards into picture frames that you’ll want to keep! #ad” username=”diyadulation”]

Let’s face it, when you spend your hard earned money on something, you don’t really want to think about it being carelessly tossed away. Too often this happens with birthday cards.

That’s why I’m so excited about Dollar Tree carrying Expressions from Hallmark for $1 each and Heartline from Hallmark for 2 for $1! Seriously, I am a bit of a Dollar Tree addict. If I can get it at my local store, I probably am.


Kindness is Rare Card on Polka Dot Background

Layered Robot Birthday Card on Polka Dot Background

Birthday Cards and Envelopes on Polka Dot Background

Expressions and Heartline Cards by Hallmark

These new cards, available starting today, are absolutely gorgeous and available for a multitude of occasions all without breaking the bank. Even better, they are high quality and sturdy. Some even come with my personal favorite embellishment: glitter!!


Ariel and Avengers Birthday Cards on Polka Dot Background

You can also find them with your kid’s favorite characters on them. It makes them the perfect budget-friendly option for all of those birthday parties you get invited to during the school year.


Elephant Card on Polka Dot Background

When you aren’t blowing your budget on cards, it makes it so much easier when you think about them getting tossed or shoved in a drawer somewhere. Of course, you can prevent that in your own house now. Keep reading to find out how how to turn birthday cards into picture frames with this easy tutorial.

Materials

Step 1

First, determine where you want your photo to show on your card front.


Close Up of Circle Drawn on Avengers Card

Step 2

Then trace a circle in that spot in pencil on the front of the card.


Close Up of Circle Drawn on Avengers Card with Hole in the Middle

Step 3

Next, punch a hole in the center of the circle with your awl.


Circle Cut Out of Avengers Card

Step 4

After you punch your circle, carefully wedge your scissors in the hole and cut out your traced circle.

Note:


School Pictures of Little Boy

Step 5

Then, test your photo behind your cutout to ensure that the opening is sufficient. If not, trim it as needed.


Avengers Card with Circle Cut Out on Scrap Paper

Step 6

Remove your photo and place your card open, with the inside facing down, on a scrap piece of paper.

Tip:


Avengers Card with Green Puff Paint Next to It

Step 7

Now, add a line of puff paint around the edge of your cut out area to create a “frame”.


Painted Avengers Card on Red Serving Tray

Step 8

Carefully lift your painted card from the scrap paper and set the opening over a can or bowl to dry.

Note:


Scrap Paper with Green Painted Ring on It

Note:


Photo Taped Inside of Birthday Card

Step 9

After your paint is dry, center your photo in the cutout opening and tape into place.


Avengers Card Photo Frame next to Glue Runner

Step 10

Then use your glue runner to attach the inside of the card together.


Avengers Birthday Card Photo Frame inside of Frame

Step 11 (Optional)

Lastly, place your card in a picture frame and hang it on the wall.


Avengers Birthday Card Photo Frame inside of Frame Next to Gift Bows with text overlay: How to Turn Birthday Cards into Picture Frames

Now that you know how to turn birthday cards into picture frames, you can feel better about that stack of cards after every birthday party. Now that you can get amazing, high quality Expressions and Heartline Hallmark cards from Dollar Tree, you can feel good about your budget. It’s a win-win!

Check out the amazing designs now on the Dollar Tree Website and let me know which is your favorite in the comments! (If you can pick just one, that is. I certainly can’t.)

See where I’m linking up!

Don’t Forget to Pin It!

Collage of Photos of Avengers Birthday Card Photo Frame inside of Frame Next to Gift Bows with text overlay: How to Turn Birthday Cards into Picture Frames


More Dollar Tree Ideas You’ll Love:

DIY Seashells Monogram Wall Art | July Pinterest Challenge

Clearly I cannot get the beach off of my mind this summer. From this DIY beach sunset painted rock magnet to these beachy decor ideas, I am fully ready for coastal living. This month’s Pinterest Challenge is no exception. Add to your own seaside decor with this DIY seashells monogram wall art.

Affiliate links may be used in this post. Ordering a product through these links may result in a commission. Read the full disclosure here.

Collage of Seashell Monogram Wall Art with text overlay: DIY Seashells Monogram Wall Art


[bctt tweet=”Love the beach look but with a little more glam? Add some gorgeous and colorful coastal decor to your walls with this DIY seashells monogram wall art!” username=”diyadulation”]

The Inspiration Pin

https://www.pinterest.com/pin/390405861443817678/

When choosing a pin for this challenge, I was instantly captivated by this tutorial to dye your own sea shells. Admittedly, it’s a kid’s craft, but I’m basically 8 years old at heart, so that works.

Besides, once your kiddos makes these awesome dyed shells, what do you do with them? Now the answer is turn them into a gorgeous piece of decor for your home.


Seashell Monogram Wall Art

Materials


Seashells in Dye Solution

Step 1

First, dye half of your seashells blue and green according to this tutorial from Rainy Day Mum.

Tips:


Blank Canvas next to Dyed Seashells

Step 2

While your shells are soaking, begin working on your canvas.


Painted Canvas next to Dyed Seashells

Step 3

Start by covering the entire canvas with the Rescue Restore Paint. This paint dries very quickly and (bonus) it smells absolutely amazing! 


Gilding Size on Painted Canvas

Step 4

After your paint is dry, add gilding size around the border of your canvas.

Tip:

Step 5

Next, allow the gilding size to dry until lightly tacky.


Dyed Shells Drying on Paper Towels

Step 6

If you haven’t done so already, this is a good time to pull your shells out to dry on some paper towels.


Gold Leaf and Gilding Size on Painted Canvas

Gold Leaf on Painted Canvas

Step 7

Once your gilding size is lightly tacky, begin covering it with your gold leaf. Continue until your entire canvas is bordered in gold leaf.


Close up of Gold Leaf Edged Canvas

Step 8

Then, using a dry brush, gently brush away the excess gold leaf. Be careful not to brush too hard.


Monogram Shell Art

Step 9

When your shells have dried, lay them out in the center of your canvas to design your monogram.


Glue on the back of a seashell

Step 10

After you are happy with your design, begin gluing your shells down with E6000.

Tip:


Seashells on a gold leafed canvas

Step 11

Finish off your design by gluing a few of the un-dyed shells to the top of your monogram.

Step 12

Lastly, allow your glue to dry 24 hours.


Seashell Monogram Wall Art

Collage of Seashell Monogram Wall Art with text overlay: DIY Seashells Monogram Wall Art

Confession. This DIY seashells monogram wall art isn’t for me, although I totally love it. It’s a gift for my mom who wants to decorate her new upstairs bathroom in a coastal theme. Hence the “B” for the monogram instead of an “L”. Of course, if you still really like the look of the beach, it could totally stand for beach as well. Either way, it will look beautiful on a gallery wall or hanging in the bathroom.

Now it’s time to check out what my friends are creating for this month’s Pinterest Challenge! Find out what worked, what didn’t, and how they tweaked these pins. If we can do it, you totally can too. What pin has been sitting on your boards forever? Hopefully you will be inspired to tackle it this week!

See where I’m linking up!

Don’t Forget to Pin It!

Collage of Seashell Monogram Wall Art with text overlay: DIY Seashells Monogram Wall Art


To join next month’s #pinterestchallenge, click here to sign-up ⇒ August Pinterest Challenge.


Now let’s see what other things Pinterest inspired! Head over and visit the other hosts to see what they crafted, cooked, built, or tried!

Pinterest Challenge Blog Hop

Erlene – My Pinterventures • Jenny – Cookies Coffee and Crafts
Debbee – Debbee’s Buzz • Laurie – My Husband Has Too Many Hobbies
Bri – Halfpint Design • Julie – Sum of their Stories
 T’onna – Sew Crafty CrochetBeverly – Across the Boulevard • Debra – Shoppe No. 5
Roseann – This Autoimmune Life • Terri – Our Good Life
Chelc – Inside The Fox Den • Cherryl – Farm Girl Reformed
Leslie – Once Upon a Time & Happily Ever After • Katrin – Kreativ K
Kelley – Simply Inspired Meals • Joanne – Our Unschooling Journey
Toni – Small Home Soul • Gail – Purple Hues and Me
Rebecca – Hello Central Avenue • Gwen – Geez, Gwen!
Marie – DIY Adulation • Kristie – Teadoddles • Marie – The Inspiration Vault
Lydia – Lydia’s Flexitarian Kitchen • Maria – Simple Nature Decor
Michelle – Our Crafty Mom • Emily – Domestic Deadline
Sam – Raggedy Bits • Alexandra – Eye Love Knots 


Beachy Decor Ideas You Can Make at Home

Already missing the beach now that vacation is over? Bring some of those carefree vacation vibes home with these beachy decor ideas! They’re the perfect DIY way to add that tropical touch to your everyday.

Collage of beach decor with text overlay: Beachy Decor Ideas You Can Make at Home

[bctt tweet=”Missing the beach now that vacation is over? Bring some of those carefree vacation vibes home with these beachy decor ideas!” username=”diyadulation”]

These DIY projects are an easy way to create your own little private oasis. Create a beachy dining room where you can drink your morning coffee and prep for your day. Turn the master bathroom into a tropical retreat for ultimate relaxation. Whatever you choose, you’ll love having your own private beachy retreat. These designs are perfect next to my lovely Matthew Duke Photography landscape canvas prints so I hope you can find the perfect place to put them in your home.

Shell stamped napkins

DIY Shell Print Napkins (Kreativ K)

These easy napkins are the perfect accessory for a beachy dining room table. Easily customize them to fit your decor color scheme, too!

Blue pineapple serving tray next to plant

Blue Pineapple Painted Serving Tray (Sparkle Living)

Raise your hand if your are absolutely in love with this serving tray!! The colors are gorgeous and it is surprisingly easy to make. So pretty, you’ll want to display it all year long.

Watercolor Canvas art on small wall

Painting Watercolor On Canvas (The Red Painted Cottage)

This tutorial isn’t specifically beachy. She gives you tips for how to paint watercolor designs on canvas in general but the artwork is so beautiful I had to include it. If you’re handy with a paint brush you can make your own gorgeous variations.

Reclaimed seaside art hanging on wall

Seaside Art from a Hidden Treasure (The Boondocks Blog)

This upcycled treasure wonderfully marries beachy design with industrial chic! Make it from found items in your home for your own unique decor.

Crab artwork made out of rocks

How To Make A Beach Crab Sign Using Rocks (Kreativ K)

Can you believe this is made with shells?! This is the perfect piece to create a beachy gallery wall in your home.

Palm leaf pencil bag next to gold handled scissors

4 Easy Palm Leaf DIY’s (Crafty Lumberjacks)

These palm leaf DIY’s help you add that tropical touch to your decor with trays, lamps, and more!

sea glass rope lantern on a counter

DIY Sea Glass Rope Lantern (A Wonderful Thought)

This gorgeous piece of decor is made from recycling those old jars! Grab your glue gun and get ready for beautiful beachy decor.

Shell covered welcome sign

DIY Seashell Decor (Suzy’s Sitcom)

This welcome sign would make a perfect beachy centerpiece for your dining room. It is another project that is easy to customize to your color scheme.

Driftwood mirror on wall

DIY Drift Wood Mirrors (Happy Deal, Happy Day)

Who doesn’t love driftwood projects? This mirror is easy and gorgeous. You will want to make one for every room in your home!

Come Sail Away pillow in a chair

Nautical Come Sail Away Pillow Tutorial (H20 Bungalow)

Don’t forget the softer touches in your beachy decor. This DIY pillow is just what you need to throw in your favorite comfy reading chair.

Beach Scene Painted on a Rock

DIY Beach Sunset Painted Rock Magnet (DIY Adulation)

Lastly, of course, I had to include this painted rock magnet. It is the truest way to bring a small piece of your actual beach vacation home with you.

Collage of beach decor with text overlay: Beachy Decor Ideas You Can Make at Home

Which of these DIY beachy decor ideas are going in your home this summer? I see a coastal bathroom makeover in our future, for sure. Until then, it’s time to check out this week’s Merry Monday link party. Share your awesome ideas and see what everyone else is sharing. You may even find some more beachy decor ideas down there!

Don’t Forget to Pin It!

Collage of beach decor with text overlay: Beachy Decor Ideas You Can Make at Home