We are back at it with Day 5 of the 12 Days of Christmas Blog Hop. Today we are showing you how to create frugal and festive holiday décor with the Dollar Tree. If you haven’t checked out my other tips for saving on your Christmas décor be sure to read Frugal Tips for Gorgeous Christmas Décor on a Budget. For now, let’s make this easy DIY gold foiled luminary. It is versatile décor that will work on your holiday mantle or as a beautiful centerpiece on your table.
Affiliate links may be used in this post. Ordering a product through these links may result in a commission at no extra cost to you. Read the full disclosure here.
Welcome to the third annual 12 Days of Christmas Blog Hop!
Stop by every day from December first through the twelfth for new ideas you can use to make your season brighter!
Meet Your Hosts
They have all been busy as Elves creating, decorating, cooking and crafting tons of new ideas for you to try this holiday season!
Shirley~Intelligent Domestications I Alli~An Alli Event I Michelle~Our Crafty Mom I Marie~DIY Adulation
Erlene~My Pinterventures I Beverly~Across The Blvd. I Debra~Shoppe No. 5 I Victoria~Dazzle While Frazzled
Megan~C’mon Get Crafty I Michelle~Michelle James Designs I Amanda~Domestically Creative
Deborah~Salvage Sister & Mister I Jeanie~Create & Babble I Sherry~Olives & Okra
Jenny~Cookies Coffee & Crafts I Emily~Domestic Deadline I Bonbon~Farmhouse 40
Leanna~Of Faeries & Fauna I Pam Larmore~P.S. I Love You Crafts I Kelly~North Country Nest I
Marie~The Inspiration Vault I Gail~Purple Hues and Me I Lynne~My Family Thyme I
Karen~Dragonfly and Lily Pads I Trisha~Blowing Away Out West Lorrin~Embrace The Perfect Mess I
Terri~Christmas Tree Lane I Sam~Raggedy Bits I Cyn~Creative Cynchronicity Valeria~Val Event Gal
Yami~The Latina Next Door I Tania~Little Vintage Cottage I Lauren~Wonderfully Made
Vanessa~DIY 180 I Kimberly~A Wonderful Thought I Kim~Everyday Parties I Dru~Polka Dot Poplars

[bctt tweet=”This easy #DIY gold foiled #luminary is versatile décor for your holiday mantle or table.” username=”diyadulation”]
Materials

Step 1
First, remove all of your packaging from your frames.
Step 2
Next, take your frames apart. Keep like elements together for convenience later.
Step 3
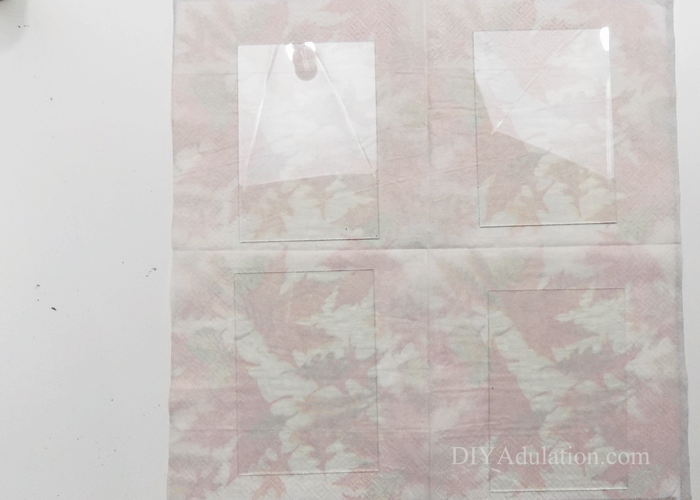
Now, lay your glass inserts on a protected surface such as a non-stick mat or napkin.


Step 4
Next carefully brush foiling adhesive on your glass inserts at random.
Tip:
- You don’t want to cover the entire panes in adhesive.
Step 5
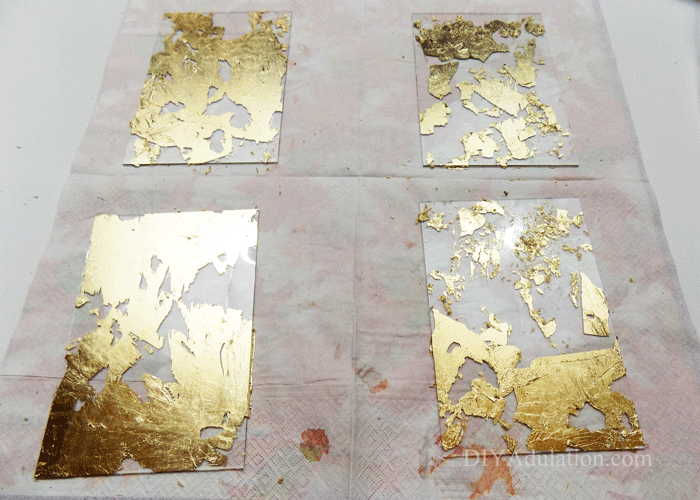
Let your adhesive dry until tacky.
Step 6
After your adhesive is tacky, cover each pane with foil.
Step 7
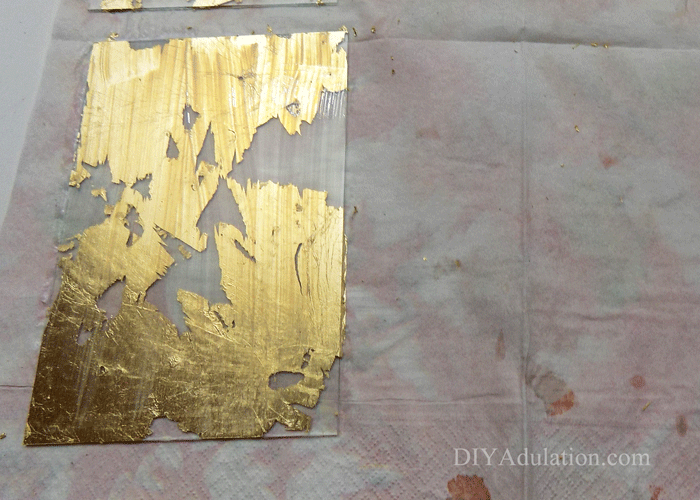
Carefully and gently brush the excess foil off of the glass panes.
Step 8
Set your glass panes aside.

Step 9
On your frames, paint the silver inlay with gold enamel paint.
Tip:
- If you don’t trust yourself to stay on the inlay with your paint, tape the black areas of your frame with masking tape.
Step 10
Now set your frames aside to dry.

Step 11
Next, seal the foil on your frames with the sealant included in your kit. Let the sealer fry completely.
Step 12
After the sealer has dried, re-assemble your frames with only the glass inserts.


Step 13
Glue your frames together starting with attaching one frame to either side of the first.
Step 14
Finish attaching your frames by gluing your final frame on.

Step 15
Lastly, add your pillar candle to the center of your luminary.


This gorgeous DIY gold foiled luminary is so easy to make. It will add elegant touch to any holiday table. By the way, you will totally see it when I share my holiday table for Day 10 of the 12 Days of Christmas Blog Hop. You’ll also get tips for how to create your own gorgeous holiday table easily. Until then, it is time to check out the frugal projects my friends are sharing below!
See where I’m linking up!
Be sure to visit our fellow 12 Days of Christmas Bloggers below for even more creative ideas this holiday season!

Don’t Forget to Pin It!
