Add Whimsy to Your Life with These Adorable Unicorn Crafts

Life gets mundane. You fall into routines that out you on autopilot instead of enjoying the moment. Routines are great when they’re intentional but too often it’s an unconscious pattern of existence. Change it up and add some whimsy and magic back into your life with these adorable unicorn crafts!

Collage of Unicorn Crafts with text overlay: Add Whimsy to Your Life with These Adorable Unicorn Crafts

Remember as a kid when an ordinary tree became a fairy village? What about when riding your bike was actually a warrior on horseback? That is the supreme magic of childhood.


[bctt tweet=”Remember when an ordinary tree became a fairy world in the magic of childhood? Add some of that magic back to your life with these adorable unicorn crafts!” username=”diyadulation”]

Somewhere along the way, we lose that. We stop seeing magic in the everyday and instead allow stress and chores dominate our minds. I’m guilty of this more often than I care to admit. That’s why I think it is so important to consciously choose to add some magic to your day.

What better way to do that than craft something truly whimsical like these adorable unicorn crafts?

Paper Quilled Unicorn

How to Make a Quilled Unicorn (She Saved)

This is a great craft for scrapbookers and card makers. Find out how easy it is to start paper quilling with this adorable unicorn.


Unicorn Cactus Plants

A Unicorn Cactus (Busy Being Jennifer)

How to do you make a cactus more magical? Turn it into an adorable unicorn of course! These little plants are a wonderful gift idea for friends and family!


Unicorn Wreath on a Door

Easy Unicorn Wreath DIY (Ann’s Entitled Life)

Let a magnificent unicorn guard your door (or add to unicorn party decor) with this easy DIY wreath idea. This would also make a fantastic decoration for your daughter’s door.


Unicorn Popsicle Holder with a Sprinkle Covered Chocolate Popsicle Inside

Magic Unicorn Popsicle Holder (Spaceships and Laser Beams)

This unicorn craft is fun to make and useful for mom too. Keep hands (and your floors) cleaner with this adorable popsicle holder.


Felt Unicorn Pouch

No Sew Felt Project: Unicorn Pouch Craft (She Saved)

How freaking adorable is this felt pouch? Even better, it’s no sew so no worries if you aren’t a strong seamstress. Find out how easy it is to make now!


Crocheted Unicorn Pillow

Crochet Unicorn Pillows (Mrs. Tschi-Tschi)

It’s beautiful creations like this that make me wish I were a stronger crocheter. If you are, you will definitely love this super cute unicorn pillow! (Also, feel free to make one for me too… my birthday’s in October. *hint hint*)


Glittery Unicorn Ornament Hanging on Tree

DIY Unicorn Ornament (C’mon Get Crafty)

You can even add whimsical magic to your Christmas decor with this easy and fun tutorial. How much does this make you want to create an entire unicorn themed tree? No, just me?


Surprise Unicorn Card on Purple Background

Glittery and Colorful Unicorn Birthday Card (DIY Adulation)

Know someone with a birthday coming up who absolutely loves unicorns? If so, surprise her with this adorable handmade stamped unicorn birthday card! It’s super easy to make and totally beautiful.


Collage of Unicorn Crafts with text overlay: Add Whimsy to Your Life with These Adorable Unicorn Crafts

The next time your find yourself caught in the “rut-tine”, to quote Barney Stinson from How I Met Your Mother, pause. Change it up with these adorable unicorn crafts and remind yourself of that childhood magic. They are the perfect reminder to find magic and joy in the everyday.

Now, let’s get this week’s Merry Monday link party started! be sure to check out the other hosts’ roundups to see if you were featured this week. Then link up your awesome ideas below and check out what everyone else is sharing this week!

Don’t Forget to Pin It!

Collage of Unicorn Crafts with text overlay: Add Whimsy to Your Life with These Adorable Unicorn Crafts

Gorgeous Budget Friendly Fall Wreath

Raise your hand if you love the Dollar Tree! There are so many awesome things throughout their stores that you actually want to go through every single aisle. Their seasonal items are always amazing too! That’s exactly where you’ll find everything you need to make this gorgeous budget friendly fall wreath.

Affiliate links may be used in this post. Ordering a product through these links may result in a commission. Read the full disclosure here.
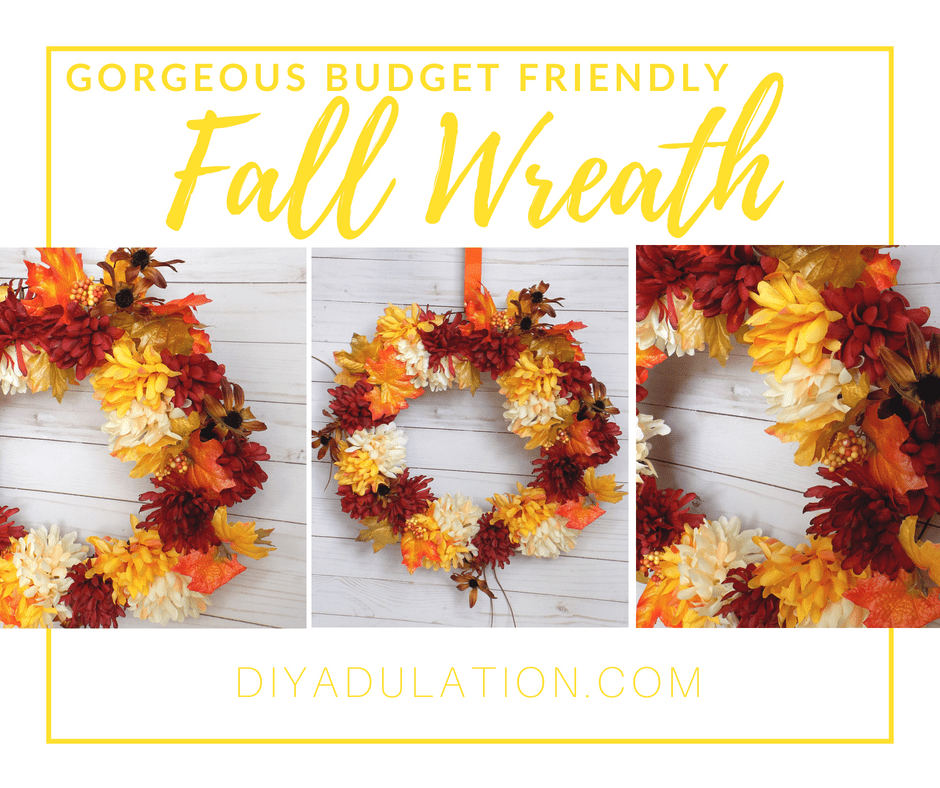
Collage of Photos Orange, Red, and Cream Floral Fall Wreath with text overlay: Gorgeous Budget Friendly Fall Wreath


[bctt tweet=”Get your home ready for fall on a budget! This gorgeous budget friendly fall wreath is the perfect decor to take your door all the way through Thanksgiving.” username=”diyadulation”]

While I’ll miss the sunshine and water activities of summer, I am absolutely ready for fall. In fact, I may be rushing it to our home, hoping to craft it into existence with projects like this wreath. I mean, if I put the the decorations up, it has to show up at my door, right?

Of course, after the back to school shopping, vacations, and summer fun who has the money to fill their home with fall decor? Everyone does with the Dollar Tree. I’m on a mission to get our homes ready for autumn dollar by dollar starting with this gorgeous budget friendly fall wreath!


Orange, Red, and Cream Floral Fall Wreath

Fall Wreath Materials


Wire Wreath Form next to Pink Scissors

Step 1

First, remove any tags from your wire wreath form.


Cut Fake Flower Stems on Top of Wire Wreath Form

Step 2

Next, cut the mum stems apart, leaving at least 3 inches of stem on the flowers.

Step 3

After you have cut apart your mum stems, remove the leaves from them.


Back of Red Flower Wrapped Around Wire Wreath Form

Back of Red Flower Wrapped Around Wire Wreath Form

Back of Red Flower Wrapped Around Wire Wreath Form

Step 4

Now, begin attaching your red mums by weaving the stems through the wires on your wreath form. See the pictures above for reference.


Back of Red Flowers Wrapped Around Wire Wreath Form

Red Flowers on a Wire Wreath Form

Step 5

Continue adding red mums throughout the wreath form until you have added half of them.


Red and Cream Mums on Wire Wreath Form

Step 6

After your red mums are attached, add your cream mums.


Red, Cream, and Yellow Mums on Wire Wreath Form

Step 7

Next, attach your yellow mums to the wire wreath form.


Additional Red Mums on Wire Wreath Form

Step 8

Fill in your wreath more with the remaining half of your red mums.

Step 9

After all of your mums are attached to the wreath form, cut your maple leaf bushes stems apart.


Maple Leaves and Mums on Wire Wreath Form

Step 10

Then use the maple leaf stems to fill in the remaining gaps in your wreath.

Step 11

Next, cut the stems of your black eyed susans flowers apart, again leaving at least 3 inches of stem.


Orange, Red, and Cream Floral Fall Wreath

Step 12

Lastly, add 3-4 of your black eyed susans stems to your wreath.

Step 13 (Optional)

Hang your wreath using an orange metal wreath hanger.


Orange, Red, and Cream Floral Fall Wreath with text overlay: Gorgeous Budget Friendly Fall Wreath

This gorgeous budget friendly fall wreath turned out spectacularly! You can’t beat the price at $7 to make it ($8 if you buy the wreath hanger). It is the perfect decor to take your door all the way through Thanksgiving. Score!

So what are your thoughts on wish fulfillment? Can we craft our favorite seasons into existence? If not, we can definitely pass the time getting ready for it. That’s totally enough for now.

See where I’m linking up!

Don’t Forget to Pin It!

Collage of Photos Orange, Red, and Cream Floral Fall Wreath with text overlay: Gorgeous Budget Friendly Fall Wreath


More Ideas You’ll Love:

Easy Handmade DIY Turquoise Bird Earrings

After shelling out a good chunk of your budget for back to school, who has the money left to update their fall wardrobe? I certainly don’t but that doesn’t mean my wardrobe can’t change up a little. Pieces like these DIY turquoise bird earrings are the perfect budget-friendly way to do so.

Affiliate links may be used in this post. Ordering a product through these links may result in a commission. Read the full disclosure here.

Collage of fishhook earrings with text overlay: Easy Handmade DIY Turquoise Bird Earrings


[bctt tweet=”Dress up your wardrobe with these easy handmade DIY turquoise bird earrings!” username=”diyadulation”]

Who doesn’t love a great piece of jewelry? Don’t get intimidated by the process either. You can create your own amazing pieces easily. These earrings are super simple to make and a gorgeous accessory!

They are also a great way to bring some teal accents to your outfits. Try pairing them with a light scarf and this matching bracelet to change up your favorite outfit.


Beads, Jewelry Findings, and Cords

DIY turquoise bird earrings Materials


Knotted Brown Cord

Step 1

First, cut a length of cording about 4 inches long. Tie a knot in the end as pictured above.

Tip:


Turquoise Bird Bead Threaded on Brown Cord

Step 2

Thread on your turquoise bird bead first. Pull the bead down all the way to your knot.


Turquoise Bird Bead and Clear Spacer Next to Knot on Brown Cord

Step 3

Next thread on your clear spacer bead down until it is taut next to the turquoise bird bead.


Beads on Brown Cord

Step 4

Follow the spacer bead with your brown glass bead on the cording. Again, pull the beads all the way down so that all of the beads are taut together.


Cord Threaded Through Eye of Fishhook Earring

Step 5

Attach your fishhook by first threading your string through the eye at the end. (See the picture above.)


Knot Above Bead Through Eye of Fishhook Earring

Step 6

Pull the fishhook loop down to the beads. Next, loop the thread through the eye 2 more times. Then pull the loose end through the loops created and pull tight.

Tip:


Turquoise Bird Fishhook Earring

Step 7

Trim the excess string from the bottom of the earring and your knot at the top.


Turquoise Bird Earrings next to Bracelet

Step 8

Lastly, repeat steps 1-7 to create your second earring and complete the set.


Turquoise Bird Earrings next to Bracelet with text overlay: Easy Handmade DIY Turquoise Bird Earrings

These are so pretty and easy to make. The brown string adds a little rustic touch to them than the clear string traditionally used for projects like this would not. You can also make these a little more quirky and colorful by switching out the brown glass beads for bigger, bright yellow or orange ones!

Once you master this basic technique you can create your own designs for updating your wardrobe or as gifts for family and friends. Don’t forget to check out the tutorial for this matching bracelet before you go to complete your budget-friendly new jewelry set!

See where I’m linking up!

Don’t Forget to Pin It!

Collage of fishhook earrings with text overlay: Easy Handmade DIY Turquoise Bird Earrings


More Ideas You’ll Love: