50 Fall Bucket List Ideas + Tips for Success

Do you love creating bucket lists? With so many ideas out there is can be overwhelming. Confession time: I have never made a bucket list of any kind. This year I’m changing that! Why? Every year there are things I want to experience with my family in a given season. Before I realize it, the season is gone and we’ve only done 1 or 2 of those things. Sound familiar? Find out why I’m taking the plunge and making a fall bucket list this year. Then, fill in your own fall bucket list with help from the 50 ideas listed below!

Affiliate links may be used in this post. Ordering a product through these links may result in a commission. Read the full disclosure here.
Find out why I’m taking the plunge and making a fall bucket list this year. Then, fill in your own fall bucket list with help from the 50 ideas listed!


[bctt tweet=”Fill in your fall bucket list with help from the 50 ideas listed here! #fall #bucketlist” username=”diyadulation”]


Why a Bucket List

Bucket lists are portrayed as these fun little exercises to do things you like. They are, but they are also so much more. When you make a bucket list you are setting goals. These are goals for experiences you want to share with your kids. These are goals to help push you outside of your comfort zone and grow as a person.

I love goal setting and when you look at it that way you see the point. The best part about a bucket list is that you can make any kind you want. Make an individual one, a list for couples, or a list for your family. You can also make it as finite or expansive as you like. Create a seasonal one, like the fall bucket list, or a life-long bucket list.


Find out why I’m taking the plunge and making a fall bucket list this year. Then, fill in your own fall bucket list with help from the 50 ideas listed!

Tips for Your Bucket List

There are a few tips to make a successful bucket list that you will actually complete. They are:

Determine WhoWho is your bucket list for? Are you setting an individual one for yourself or making one for the whole family to complete together? The “who” will define the activities and goals you put on your list.

Create a ThemeIs it a list of places you want to visit? Are you making a seasonal list? Do you want to try new things? Decide this before creating your bucket list.

Set a Time-frame – A fall bucket list is easy because it has a specific season set to complete it. Other bucket lists are not as straight forward. If creating a travel bucket list, you will need to define a time-frame, such as 5 years. This helps keep you accountable for completing it instead of continually putting it off.

Pick a NumberDon’t overload your list with more tasks/goals than you can reasonably complete in the chosen time-frame. For example, don’t make a list of 20 destinations you want to visit in 5 years if you can only realistically manage 1 trip a year.


Find out why I’m taking the plunge and making a fall bucket list this year. Then, fill in your own fall bucket list with help from the 50 ideas listed!

Find out why I’m taking the plunge and making a fall bucket list this year. Then, fill in your own fall bucket list with help from the 50 ideas listed!

50 Fall Bucket List Ideas

Note:

The first 12 of these ideas came from the new Create365 Seasonal Planner Stickers. They include beautiful bucket list stickers for every season. Use them to set little reminders in your planner of bucket list events!

  1. Go for a Hay Ride
  2. Visit a Pumpkin Patch
  3. Eat Pumpkin Pie
  4. Read a Book
  5. Roast S’mores
  6. Carve Pumpkins
  7. Go Apple Picking
  8. Enjoy a Comfort Food
  9. Visit a Haunted House
  10. Donate to a Family in Need
  11. Watch a Scary Movie
  12. Make a Fall Craft
  13. Make a Costume
  14. Decorate Your Porch
  15. Make a Scarecrow
  16. Make Pinecone Bird Feeders
  17. Take a Walk through Your Neighborhood
  18. Drink Apple Cider
  19. Tell Ghost Stories
  20. Have a Bonfire
  21. Make a Dried Fruit Garland
  22. “Boo” Your Neighbors
  23. Have a Campout
  24. Visit a Farmer’s Market
  25. Go to a Football Game
  26. Visit a Fair
  27. Go Trick-or-Treating
  28. Visit the Library
  29. Enjoy some Candy Corn
  30. Collect Acorns
  31. Throw a Halloween Party
  32. Make Your Own Applesauce
  33. Make and Send Halloween Cards
  34. Create Leaf Rubbings
  35. Jump in a Pile of Leave
  36. Make Halloween Masks
  37. Watch Hocus Pocus
  38. Go on a Scavenger Hunt
  39. Visit a Corn Maze
  40. Start a Family Gratitude Journal
  41. Look at the Current Constellations in the Sky
  42. Plant Some Bulbs
  43. Attend an Outdoor Concert
  44. Rake a Neighbor’s Yard
  45. Research Halloween History
  46. Make DIY Potpourri
  47. Go Ziplining
  48. Explore Fall Foliage
  49. Research Local Ghost Stories

When creating your fall bucket list, make sure you keep the tips above in mind. On the free printable you will find room for 15 items and that is the maximum I recommend. Our family is only choosing 10 because I know we cannot reasonably complete 15 along with obligations already on our family calendar. What are your favorite ideas from the list? Let me know!!

See where I’m linking up!

Pretty Spooky DIY Jack-O-Lantern Bracelet

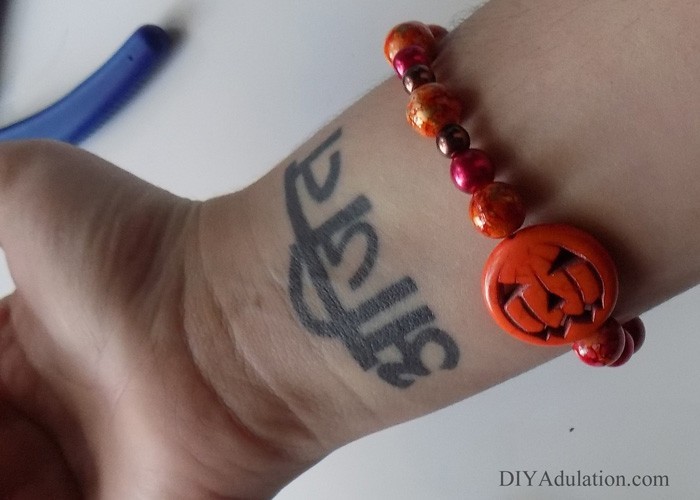
Watching a new season of The Walking Dead on Netflix is seriously perfect to get you in the Halloween spirit.(If you’re a fan, don’t miss these awesome free trivia printables for Season 1, Season 2, and Season 3 from Erlene @ MyPinterventures) Soon the weather will be turning and then it is time to start pulling out the spooky décor, screening Hocus Pocus, and making costumes. Start planning your October style now by making this pretty spooky DIY jack-o-lantern bracelet. It is an easy seasonal piece to rock with an everyday fall outfit or an entire Halloween ensemble.

Affiliate links may be used in this post. Ordering a product through these links may result in a commission. Read the full disclosure here.


[bctt tweet=”Start planning your October style now by making this pretty spooky DIY jack-o-lantern bracelet!” username=”diyadulation”]


Materials

Step 1

Cut a piece of thread 24” long.

Step 2

Slide your jump ring onto the thread and center.

Step 3

Match the ends of your thread together and thread through one of your jack-o-lantern beads.

Step 4

Next, thread on one of your ceramic orange swirl beads followed by a chocolate bead.

Step 5

Thread on a cranberry bead next.


Start planning your October style now by making this pretty spooky DIY jack-o-lantern bracelet; an easy seasonal piece to rock with an everyday fall outfit!

Step 6

Thread on another ceramic orange swirl bead.
 

Start planning your October style now by making this pretty spooky DIY jack-o-lantern bracelet; an easy seasonal piece to rock with an everyday fall outfit!

Step 7

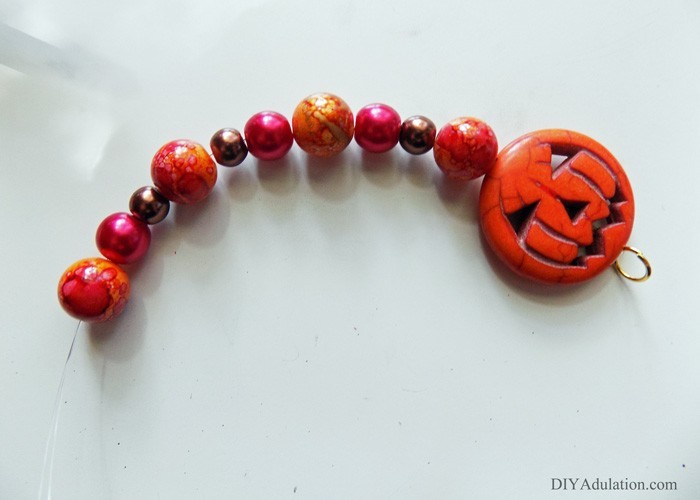
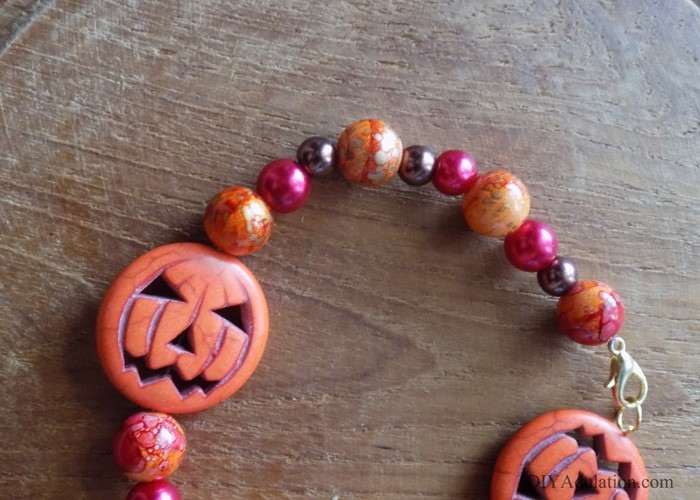
Thread your next beads on in the following order:

  1. Cranberry
  2. Chocolate
  3. Orange Swirl
  4. Chocolate
  5. Cranberry
  6. Orange Swirl

See the photo above for reference.


Start planning your October style now by making this pretty spooky DIY jack-o-lantern bracelet; an easy seasonal piece to rock with an everyday fall outfit!

Step 8

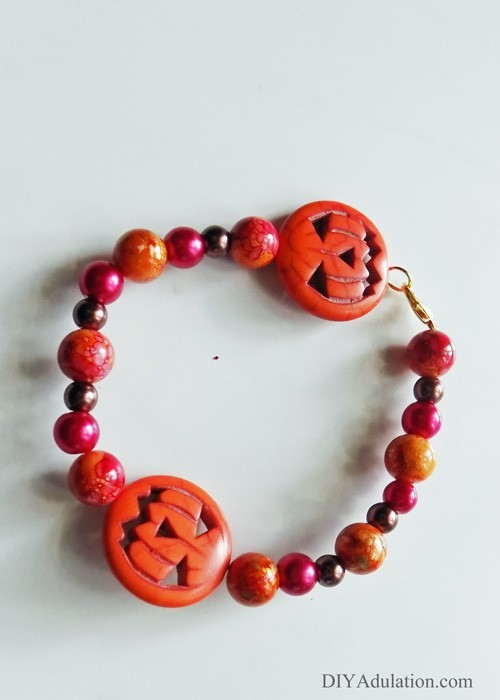
Add your second jack-o-lantern bead followed by an orange swirl bead, a cranberry bead, and a chocolate bead.


Start planning your October style now by making this pretty spooky DIY jack-o-lantern bracelet; an easy seasonal piece to rock with an everyday fall outfit!

Step 9

Thread the last beads on in the following order:

  1. Orange Swirl
  2. Chocolate
  3. Cranberry
  4. Orange Swirl
  5. Cranberry
  6. Chocolate
  7. Orange Swirl

Again, see the photo for reference.

Step 10

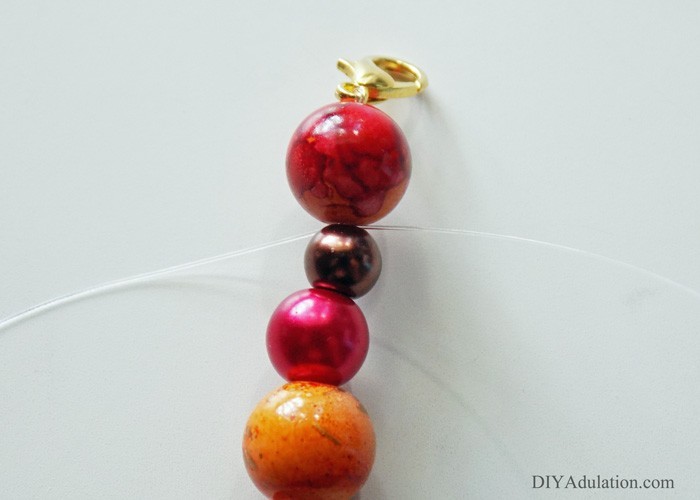
Pull your beads taut and attach your lobster clasp. Do this by running your thread through the eye of the clasp and then through the orange swirl bead next to it. Again, pull the thread taut.
 

Start planning your October style now by making this pretty spooky DIY jack-o-lantern bracelet; an easy seasonal piece to rock with an everyday fall outfit!

Step 11

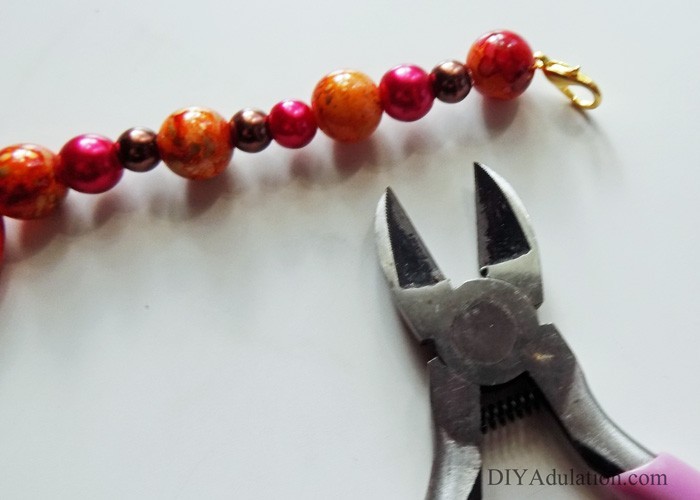
Next, pull the loose ends of the thread off to the sides as pictured and tie them in a double knot between the orange swirl bead and the chocolate bead.
 

Start planning your October style now by making this pretty spooky DIY jack-o-lantern bracelet; an easy seasonal piece to rock with an everyday fall outfit!

Step 12

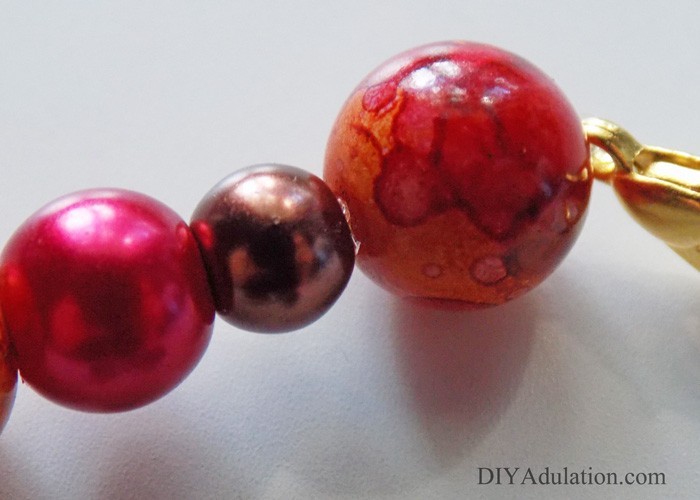
Carefully trim the excess thread.
Start planning your October style now by making this pretty spooky DIY jack-o-lantern bracelet; an easy seasonal piece to rock with an everyday fall outfit!

Tip:

  • Wire cutters from your jewelry tool set work best for this. Scissors will do the job but it can be difficult to get between the beads.
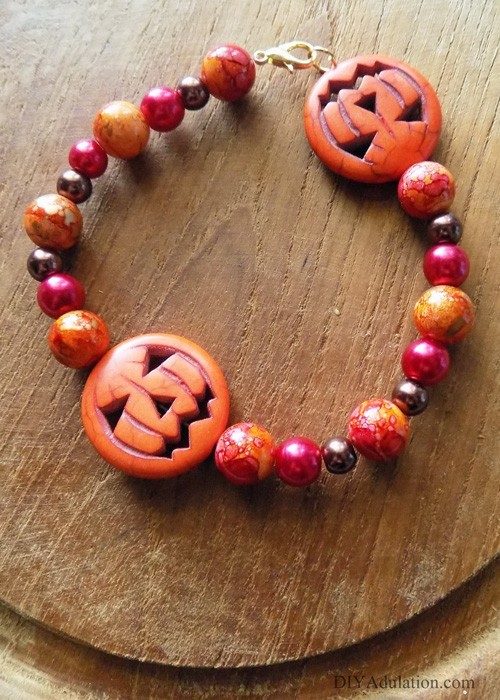
 

Start planning your October style now by making this pretty spooky DIY jack-o-lantern bracelet; an easy seasonal piece to rock with an everyday fall outfit!

Start planning your October style now by making this pretty spooky DIY jack-o-lantern bracelet; an easy seasonal piece to rock with an everyday fall outfit!

Start planning your October style now by making this pretty spooky DIY jack-o-lantern bracelet; an easy seasonal piece to rock with an everyday fall outfit!

Start planning your October style now by making this pretty spooky DIY jack-o-lantern bracelet; an easy seasonal piece to rock with an everyday fall outfit!

Start planning your October style now by making this pretty spooky DIY jack-o-lantern bracelet; an easy seasonal piece to rock with an everyday fall outfit!

Now you have a beautiful and fun piece of wrist candy! This is so easy to make and a perfect way to celebrate the Halloween season. Bonus points if you pair it with a kitschy Halloween sweater. Don’t forget that if the jack-o-lantern beads are a little too spooky for your tastes change them out for large witch hats or cute spiders. Keep in mind that the size of the beads adjusts the length of the bracelet. If the new beads you choose are significantly smaller than the jack-o-lanterns simply add additional round beads to keep the length.

Want the Halloween crafts to keep going? Check out how to make this recycled jack-o-lantern treat jar or this gorgeous skull treat stand!

See where I’m linking up!

Plaid Thanksgiving Pallet Wall Art

Fall is absolutely the best time of year.  There is football, multicolored leaves, pumpkin everything, boots, and plaid everywhere!  It is like my Heaven on Earth. Of course the creative juices start flowing like crazy this time of year and there are always at least 10 projects going on at a time in my office.  One of those projects was this awesome plaid Thanksgiving pallet wall art.

Affiliate links may be used in this post. Ordering a product through these links may result in a commission. Read the full disclosure here.


Create this plaid Thanksgiving pallet wall art in time to hang for your festivities without taking away from meal prep!


[bctt tweet=”Create this plaid #Thanksgiving #pallet wall art in time to hang for your festivities without taking away from meal prep! #wallart #diy”]

Materials


Create this plaid Thanksgiving pallet wall art in time to hang for your festivities without taking away from meal prep!

Step 1

Take all packaging and tags off of your pallets.

Step 2

Put some paint into a container (or on a paint pallet) and add a small amount of water to it.  Mix well.

Tips:

  • It should be thinner but still retain a paint-like consistency.
  • It is best to add the water in small increments until you get the desired consistency.


Create this plaid Thanksgiving pallet wall art in time to hang for your festivities without taking away from meal prep!

Step 3

Begin covering your wall hanging with paint and water mixture.  Once you have covered about half, take a dry paper towel and wipe it over the paint.  This will allow the wood grain to show through giving you the look of stained wood instead of painted wood.


Create this plaid Thanksgiving pallet wall art in time to hang for your festivities without taking away from meal prep!

Step 4

Repeat step 3 until your entire pallet is “stained” and then allow it to dry completely.

Step 5

Once dry, cut a piece of plaid fabric to the size of the wall hanging and attach it to the back using hot glue.

Step 6

Lastly, attach a small picture hook to the back to hang.

Tip:

  • Because these are not very heavy, I opted to use hot glue to attach the hook.  If you are concerned about it holding, attach your hook using E6000 instead and allow to dry 24 hours before hanging.


Create this plaid Thanksgiving pallet wall art in time to hang for your festivities without taking away from meal prep!


Create this plaid Thanksgiving pallet wall art in time to hang for your festivities without taking away from meal prep!


Create this plaid Thanksgiving pallet wall art in time to hang for your festivities without taking away from meal prep!

This is such an easy and fun way to add a touch of plaid to your Thanksgiving décor without your home looking like it was attacked by the Brawny paper towel guy.  They come together so quickly that you can easily have them finished and hanging by your Thanksgiving meal without taking away from food prep time.  Don’t forget to check out all of our other Autumn projects before you go!

See where I’m linking up!