DIY Birthday Card Frame

Let’s face it; the card is a kid’s least favorite part of their birthday presents.  Furthermore, unless their parents save them for them they just end up recycled or thrown away at some point.  This past weekend, my son had a birthday party to attend for one of his classmates.  I always make the cards we give out for any occasion and this one was to be no different. A DIY birthday card frame is a fun new twist on the tradition.

Affiliate links may be used in this post. Ordering a product through these links may result in a commission. Read the full disclosure here.
I had been shopping for picture frames for another project earlier in the day and totally forgot to measure which size I needed before venturing out (of course!).  So instead of going all the way back home and measuring it, then traveling back to the store, I just bought 2 different size frames.  The one that wasn’t the right size was just sitting on my desk begging me to use it.  It also happened that during grocery shopping that week, I came across clearance Teenage Mutant Ninja Turtle duct tape on clearance for $1.50!  The fates were working in my favor because the birthday girl loves Ninja Turtles.  I decided to make a birthday card frame instead of a regular card.  That’s way more fun than some boring piece of cardboard that doesn’t even have any money in it.

It turned out awesome and I’m super stoked to share it with you!

DIY Birthday card Frame Materials


Step 1

Prepare your frame by taking out the glass and all the padding/inserts.  You don’t want to risk breaking it while you’re working on your frame.


Step 2

Start on the left side of your frame and cut a strip of tape long enough that it overlaps the outside edges.  Then press down the tape to the frame being sure that the inside tape edge lines up with the inside edge of the frame.


Step 3

Cut off the excess tape. If your frame has a lip like mine did, simple run your fingernail along the edge of the lip making an indentation.  Then open your scissors and run one blade down the groove you made.  Once you’ve done that it should left away cleanly and leave you with a nice straight edge.


Step 4

Repeat step three until your frame is completely covered.  I lined up the photos on most of mine but it will still be awesome if you don’t want to be that OCD about.


Step 5

Replace the glass and cardboard/padding to your frame.

Ta-Da! You’re done with the frame and you can add whatever you want to it: a note, a photo, a simple Happy Birthday message… it is up to you.

Want to see how to make the awesome card insert pictured?

See where I’m linking up

Don’t Forget to Pin It!

Recycled Cardboard Disney Fund Bank

When my family decided to start planning a Disney trip for when my youngest is five, I knew we should start saving now.  I also wanted to get the kids involved to encourage working together as a family toward a common goal. I also wanted a way to keep them excited while we’re waiting for the years to pass until trip time. I love reusing cardboard in my projects and knew I wanted to use it for this recycled cardboard Disney fund bank. When we buy things that come in cardboard packaging and I can’t stand not seeing it put to use. 

Affiliate links may be used in this post. Ordering a product through these links may result in a commission. Read the full disclosure here.

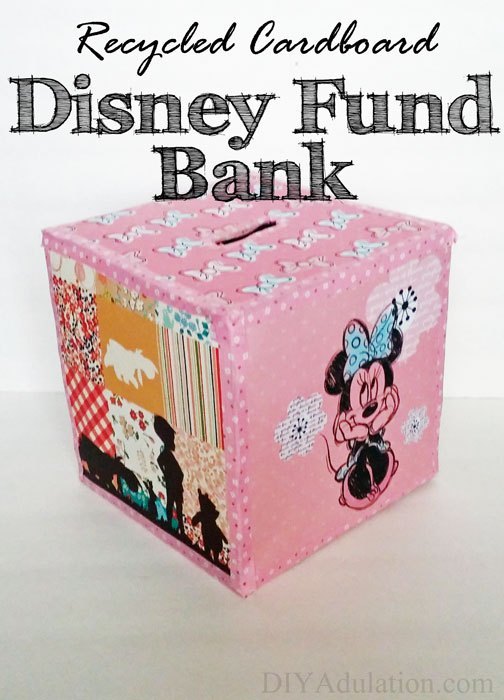
Pink Square bank with text overlay - Recycled Cardboard Disney Fund Bank

Flipping through a magazine, I saw a photo of kids playing with this adorable giant toy block and the light bulb went off. I could make a large recycled cardboard bank that we could all pitch money into! It could be pretty, functional, and recycled. Yay! Make your own Disney fund bank with these easy-to-follow instructions and start planning your Disney vacation today!

Recycle Cardboard Disney Fund Bank Materials


Step 1

Cut out 6 squares of cardboard roughly the same size. Don’t worry if they aren’t exact.  When you put them together later, it will hide imperfections.


Paper Covered Cardboard Squares

Step 2

Glue your paper to the cardboard squares.  I put my glue tape on the cardboard square and stuck it to the paper.  Then I cut out the cardboard square from the larger piece of paper.
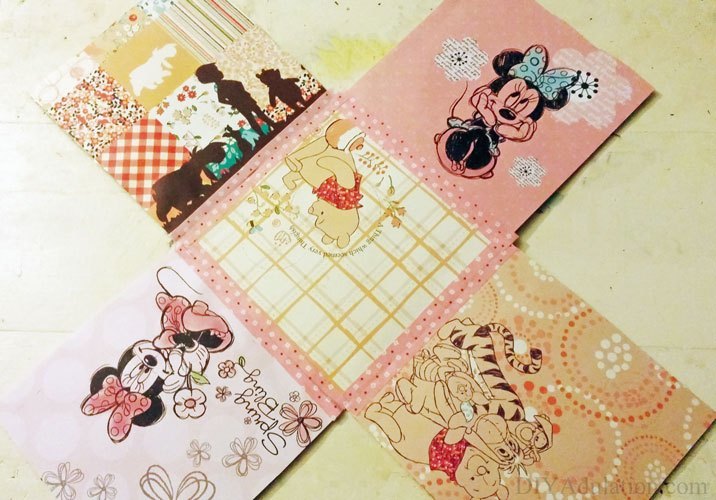
 

Attached colorful squares splayed on wood background

Step 3

Starting with your bottom square, tape one of your cardboard squares (decorative side out) to each side of the bottom square. (See the picture above.)


Taped edges of square cardboard bank

Step 4

Fold up the sides of the box and begin taping each side together as well, forming a block.


Top of Bank with hole in the center

Step 5

Take your sixth cardboard square and cut a rectangular slit out of the top.  I just went from the back side with my scissors and then taped up the hole to clean it up some.


Quarter next to hole on top of bank

Step 6

Tape the last cardboard square to the top of your box.

Step 7

Write your savings goal on the outside of the box in pretty lettering.  If you don’t like your handwriting, you can always use stickers to do this.


Pink Square Bank with Minnie Mouse on it

It is that easy to make your own Disney fund bank.  It’s so pretty and you can personalize it with your family’s favorite Disney characters.  Is your family planning on taking a vacation to Disney?  Have you been recently and have recommendations on must-see attractions?  Let me know in the comments!

See where I’m linking up!

Don’t Forget to Pin It!

Pink Square bank with text overlay - Recycled Cardboard Disney Fund Bank