This DIY golden bunny bank is super simple to make and so pretty. Add it to your Easter decor this year with the easy tutorial below!
Affiliate links may be used in this post. Ordering a product through these links may result in a commission at no extra cost to you. Read the full disclosure here.
[bctt tweet=”This easy DIY golden bunny bank is a gorgeous addition to your Easter décor! #diy #Easter” username=”diyadulation”]
As I’ve said before, our family has a weird obsession with banks. They are more than vessels to collect money in. Banks can make gorgeous home décor as well.
When designing new Easter décor I knew I wanted to do something with this adorable papier mache bunny I have. Once it occurred to me that it is hollow, turning it into a bank was the obvious choice.
This easy DIY golden bunny bank is a gorgeous addition to your Easter décor. It will also help feed your bank obsession!

DIY Golden Bunny Bank Materials


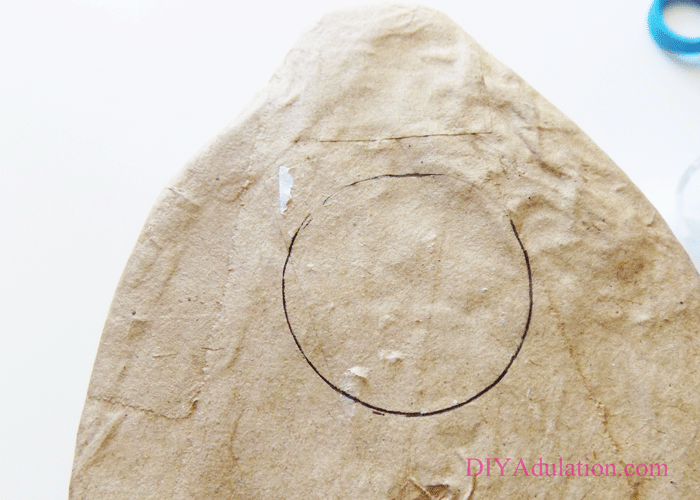
Step 1
To start, prepare your K-Cup by removing the foil from the top from it as best as possible. Don’t worry about making it perfect, just enough to clean the inside. It will get trimmed off later.
Step 2
Next, wash your K-Cup to remove any residue left over.
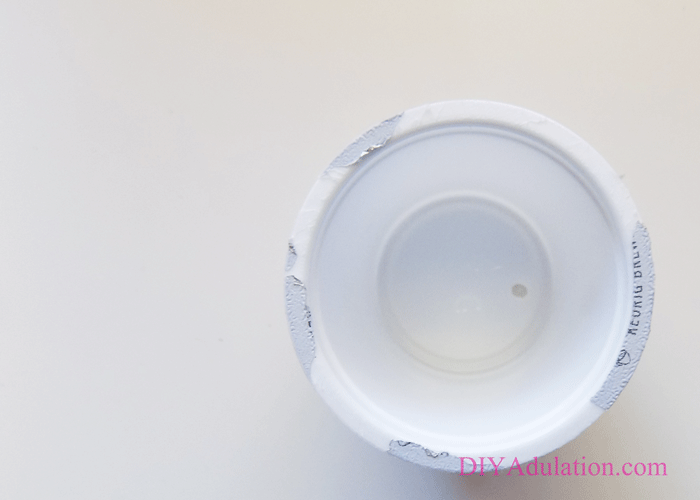
Step 3
After you have cleaned your K-Cup, use the solid end to trace a circle on the bottom of your bunny. Make sure it is far enough in from the edges so that you don’t cut them later.

Step 4
Next, cut out your circle using your box cutter.

Step 5
File the edges of the cut circle with a fine file. If it is too course, it will only shred your bunny worse.
Tip:
- I used a small nail file and it worked fabulously.
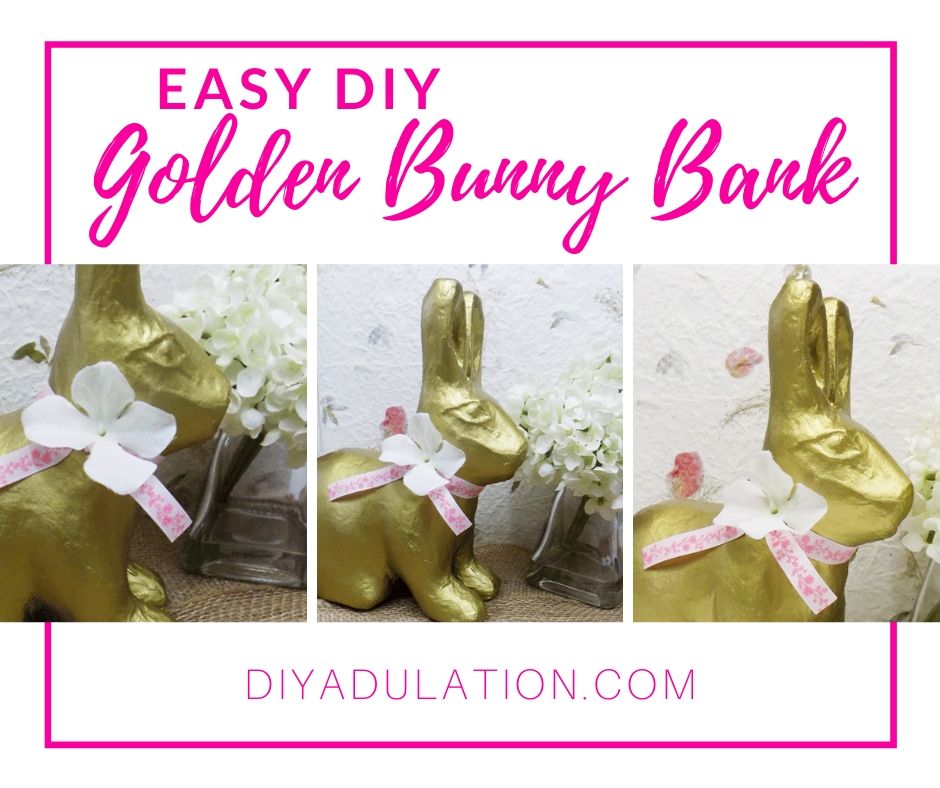
Step 6
Next, push your K-Cup into the hole so that it is secure but don’t force it to hard. Mark the spot that the bunny comes to on the cup.
Step 7
Then pull the K-Cup out and cut along the mark you made.

Step 8
Carefully melt the cut edge of your K-Cup with a lighter to create a small lip along the cut edge.

Step 9
Next, check that the plug now sits flush in the opening. If it does, pull back out and place off to the side.
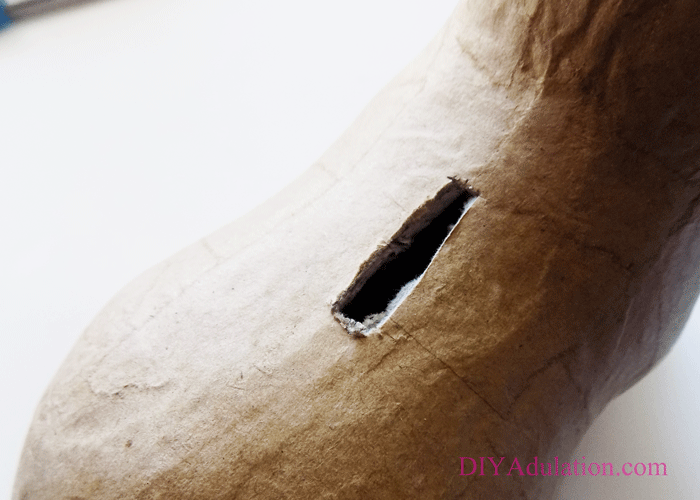
Step 10
Then, turn your bunny over and cut a rectangular coin slot in the top.

Step 11
Next, measure the slot to ensure that it is large enough for a large coin to fit through.
Tip:
- Check the measurement with the largest coin to ensure that all coins will fit.
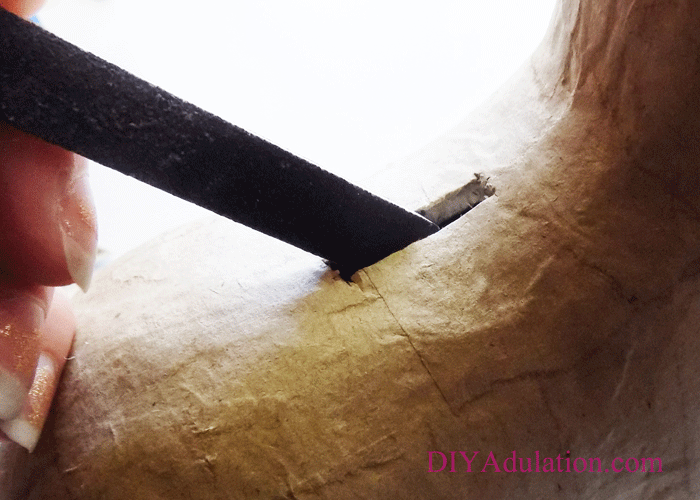
Step 12
Once you know the coin slot is big enough, file the edges of the coin slot with your file.

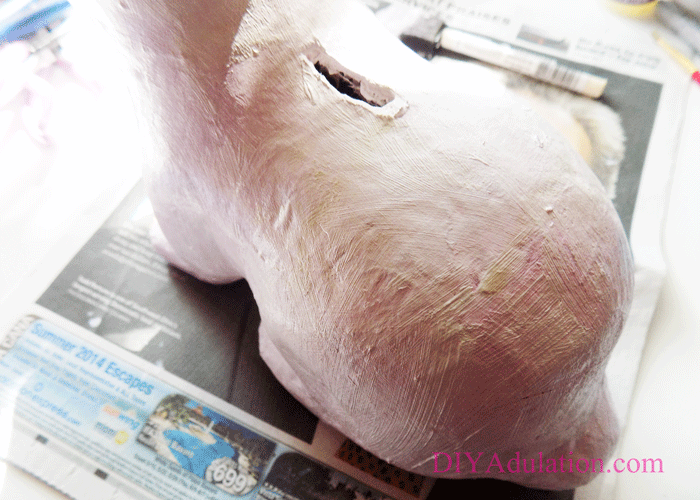
Step 13
Now, cover your bunny with a coat of white acrylic paint. Allow the paint to dry.

Step 14
After your white paint has dried, spray paint your bunny gold.
Tip:
- You may need 2 coats of gold spray paint. If you do, allow the first coat to dry completely before applying the second.

Step 15
Next, cut a length of ribbon long enough to tie around the neck of your bunny.
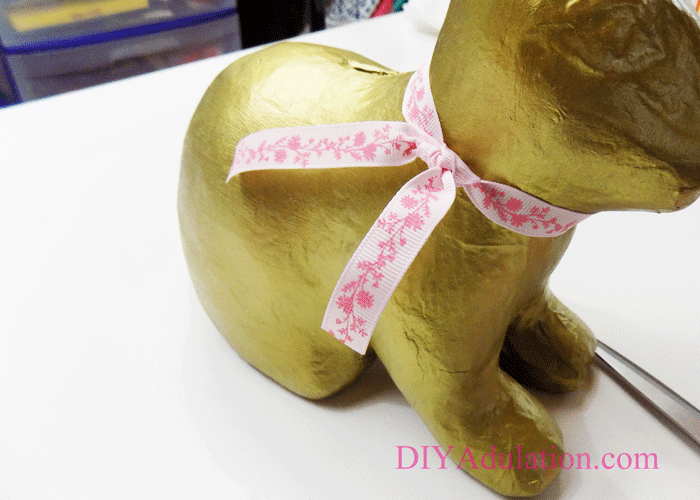
Step 16
Now, tie the ribbon around your bunny’s neck.
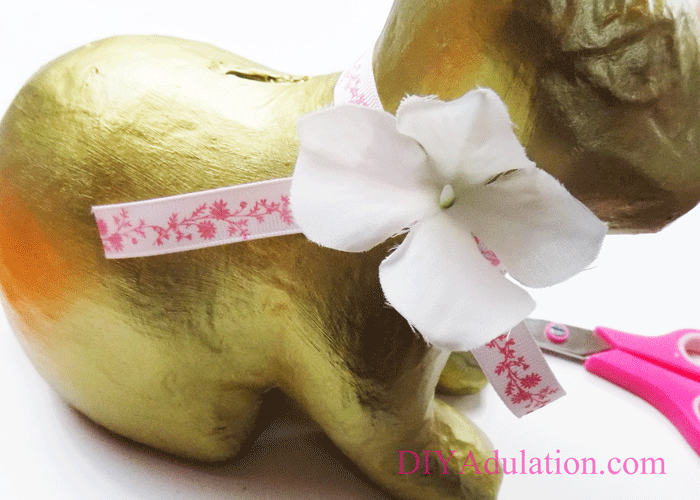
Step 17
Next, tuck a small flower in the ribbon.
Step 18
Lastly, add the K-Cup plug back into the bottom of the bunny.


This easy DIY golden bunny bank is such a fantastic project to get your home Easter-ready. You can change it up to fit your décor style by changing up the paint color and ribbon.
A fun addition is to drop your spare change into the bank all month long. When Easter comes, you’ll have cash to put into the eggs for the Easter egg hunt! If you want even more fun bunny crafts, check out these 8 easy ones to satisfy your craft craving.
See where I’m linking up!
Don’t Forget to Pin It!

More Easter Tips and Tricks: