How to Declutter Clothes with Kids the KonMari Way

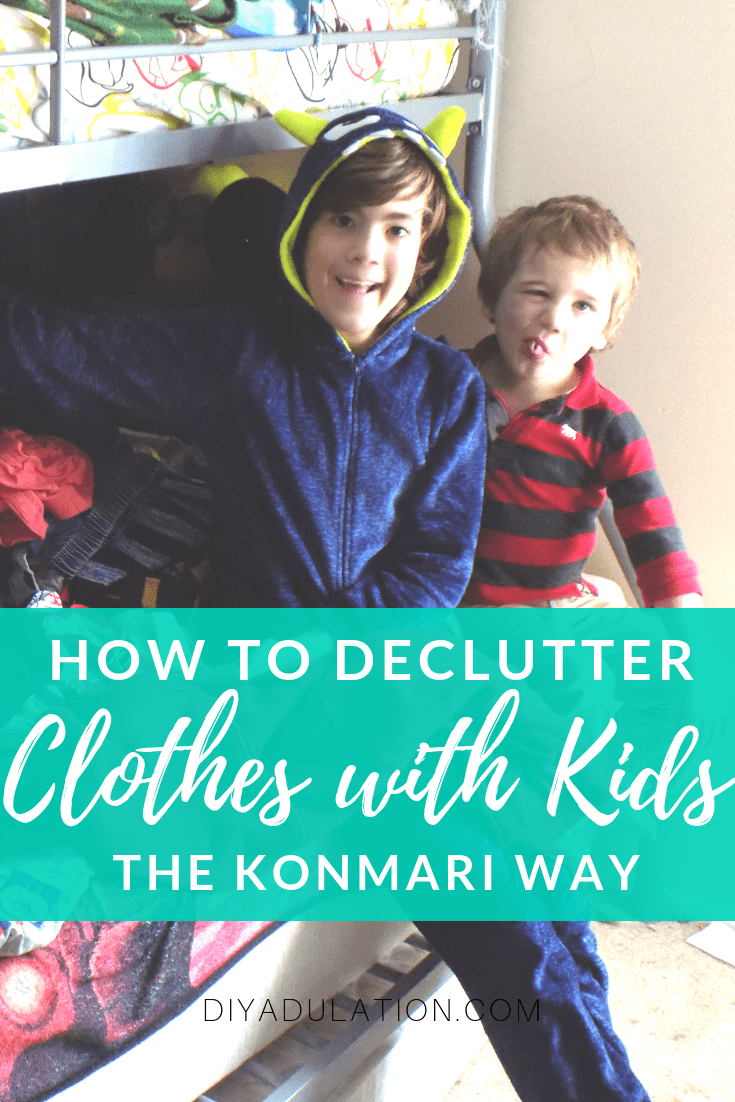
Once you declutter your own clothes, it’s time to tackle the kiddos outfits. You may be tempted to simply do the job yourself but this is such a huge undertaking and lifestyle change that it’s better to include your kids as much as possible. Find out how to declutter clothes with kids the KonMari way to include them in this new lifestyle.

Affiliate links may be used in this post. Ordering a product through these links may result in a commission. Read the full disclosure here.

Collage of Kids Sitting on Bed and Decluttering with text overlay - How to Declutter Clothes with Kids the KonMari Way

[bctt tweet=”Learn how to declutter clothes with kids the KonMari way so you don’t fall into the trap of doing it on your own and burn yourself out during decluttering.” username=”diyadulation”]

The kids had mixed feelings in the beginning of this. The oldest knew how big of a job it would be and that was overwhelming. Our daughter just took it in stride and the youngest saw the piles of clothes and thought of them as giant leaf piles.

However, once we got started the oldest really found his stride. After we finished, he remarked surprise at how much fun it was. That’s right, he totally thought it was fun to do. Pretty awesome, right?

The youngest one loved being included in something that his older siblings were doing which I think helped his focus. He lasted a lot longer during the process than I thought he would and I credit that greatly to everyone working on the same task.


Clothes Piled on Bunk Beds

Now that we’ve successfully completed the task, I have some tips for how to declutter clothes with kids the KonMari way that made the process go more smoothly and easier.


Kids Next to Clothes Piled on Bunk Beds

KonMari Clothes with Toddlers

When decluttering clothes with toddlers, be prepared to do a lot of the work. This is especially true if your child has a ton of clothes. Their attention span and patience will wane as the process drags on.


Little Boy Hiding In Night Stand

If they start getting restless, let them expel some energy. You can either take a break during this time or mom/dad can keep decluttering while the kiddos get active.

It also helps to have older kids going through the process at the same time. My youngest was much more excited and involved because his big brother was doing the same thing. Toddlers don’t get to do what the big kids do a lot so it adds an element of excitement for them.

Lastly, while toddlers can totally fold and put away their clothes, being faced with so much at once can be overwhelming. My little one loved the novelty of the task at first, but lost focus about halfway through.


Daughter Sorting Through Clothes on Bed

KonMarie Clothes with Young Kids

Young kids are better able to determine what sparks joy for them. However, clothing is not going to be the easiest item for them to determine that feeling with.

For our 6 year old daughter, we had her pick out a toy that brought her joy, a small stuffed doggy. Anytime throughout the process when she started to struggle, we had her pick up the stuffed animal and remember that feeling. She went back to the stuffed animal frequently but it really helped her discern what to keep and what to toss.

Before you get started decluttering clothes with young kids, have them pick out a toy that truly brings them joy. Have them describe what the feel when they hold it and teach them how to search for that same spark during decluttering.


Child Sorting Through Clothes in Bedroom

KonMarie Clothes with Older Kids

Older kids can do this pretty much autonomously. My 9 (almost 10) year old sorted through all of his clothes on his own. We did run into a few issues where guidance was needed, listed below.


Boy Next to Pile of Clothes

Let your child know it’s okay to get rid of items that they just got. For example, he got a few items for Christmas that didn’t spark joy for him but he felt guilty getting rid of them since they were brand new. In this instance he simply needed validation that it is perfectly okay to let go of the item.

Example:

He also struggled letting go of clothing that held some important memory for him. For example, he had a teeshirt that a penguin painted from a vacation years ago. He didn’t really want the shirt but he treasured the memory of the vacation. In this instance, we talked about whether he needed the shirt to remember the joy of that vacation. In the end, he was able to let it go with love and without regret.


Boys Socks and Underwear Organized in Drawer

Boys Shorts and Pants Organized in Drawer

Boys Shirts Organized in Closet

Additional Tips

First, remember to go through the process with your clothes first. This helps for 2 reasons. One, it helps prepare the kids as they see you doing the same job you expect them to do. Secondly, it helps you prepare for helping them with the process. It’s much harder to teach something you’ve never experienced.


Dad and Daughter Sorting Through Clothes on Bed

If possible, try to divide and conquer with your spouse. My husband helped our daughter while I worked with the boys. This made the process much faster.

Also, although older kids can totally do this on their own, it helps to have mom or dad there for support. Even though I didn’t have to do much for my oldest, the fact that I was there supporting and helping him meant a lot.

Lastly, I recommend allowing kids to make an unsure pile as well. This pile gets smaller as the process continues because they identify the feeling of joy more easily. Before that, though, it can be overwhelming to be forced into a decision before fully understanding.


Kids Sitting on Bed with text overlay - How to Declutter Clothes with Kids the KonMari Way

Learning how to declutter clothes with kids the KonMari way doesn’t have to be difficult. Remember to have younger kids choose an item that they know brings them joy for reference during the process. Also, include the entire family. It brings you closer and also provides support so that kiddos don’t get overwhelmed during the process.

Don’t fall into the trap of doing it on your own. Not only will you burn yourself out on the decluttering process, you will miss an opportunity to see how amazing your kiddos really are. I guarantee they’ll surprise you.

See where I’m linking up!

Don’t Forget to Pin It!

Kids Sitting on Bed with text overlay - How to Declutter Clothes with Kids the KonMari Way


More Ideas You’ll Love:

Delicious Homemade Super Bowl Appetizers

Let’s be honest, 2 of the best things about Super Bowl are the food and the commercials. While the football is awesome too, it starts to feel played out. We can’t control the commercials but you can dominate the food with these delicious homemade Super Bowl appetizers!

Plates and Bowls of Appetizers with text overlay - Delicious Homemade Super Bowl Appetizers


[bctt tweet=”These delicious homemade Super Bowl appetizers are the perfect people-pleasing recipes for your celebration! (Even if it’s only you guys and the kids)” username=”diyadulation”]

While I love football, the kiddos don’t get as hyped about the whole thing as I do. That doesn’t mean they don’t get excited about Super Bowl. They love it when we load up the coffee table with dozens of delicious treats to munch on during the game.

Of course, we always include our favorite, these amazing Coffee Wings, but the Super Bowl appetizers change out. This year we’re definitely giving these amazing recipes a try!


Close up of basket of fried pickles

Air Fryer Fried Pickles (Mommy Hates Cooking)

Fried pickles are seriously delicious and this air fryer version is easy to make! Everyone will love munching on these during the big game!


Close up of bowl of bean dip and chips

Hot Bean Dip (Sparkles to Sprinkles)

Of course, you also need something hot and delicious to dip your chips in. That’s the staple of any good party! This delicious bean dip won’t disappoint your family or guests.


Plate of nachos

Nachos Deluxe (Ann’s Entitled Life)

Nachos are my second favorite thing in the world, coming only behind tacos. These nachos are piled high with everything you love snacking on.


Plate of buffalo chicken tortilla pinwheels

Buffalo Chicken Tortilla Pinwheels Recipes (Home Cooking Memories)

Finger foods are another staple for any party. These buffalo chicken pinwheels are easy to make and a little more substantial than the chips and dips.


Overhead photo of queso bar

How to Make Queso (The Kittchen)

Cheese! Always yes to cheese! She makes queso look easy with this delicious recipe. You can even amp up the party with her tips to create a queso bar for your guests during the big game.


plate of bacon wrapped chicken bites

BBQ Bacon Wrapped Chicken Bites (Wondermom Wannabe)

Keep protein levels high with these amazing bite sized treats! Everything you could ever want in a delicious, poppable appetizer.


Close up of plate of fried calamari

Oven Baked Calamari Recipe (Dizzy, Busy, and Hungry)

Calamari may seem fancy for Super Bowl but you definitely won’t regret making this easy baked version!


Cheese ball on a plate

The Best Cheese Ball You’ll Ever Snack On (Oh, Mrs. Tucker)

If you’re not the one hosting the party this year, you can bring this delicious cheese ball recipe. Cheese balls travel easily and are always a favorite.


Plate of Cheesy Bacon Wraps with Barbecue Sauce

Cheesy Bacon Ranch Smokies (DIY Adulation)

Serve up these bite-size treats with some barbecue sauce and you’re ready to enjoy the game in minutes. You totally have my permission to sneak one before serving.


Plates and Bowls of Appetizers with text overlay - Delicious Homemade Super Bowl Appetizers

These delicious homemade Super Bowl appetizers are the perfect people-pleasing recipes for your celebration. Even if it’s only you and the kids, you can’t go wrong with yummy food and football.

Now let’s move on to another party, this week’s Merry Monday link party. Share your awesomeness below and check out what your friends are sharing. Don’t forget to check out the other hosts to see if you were featured!

Don’t Forget to Pin It!

Plates and Bowls of Appetizers with text overlay - Delicious Homemade Super Bowl Appetizers


Upcycled DIY Bank for Guys Night Fund

Are you looking for an easy Valentine gift for your husband this year? This upcycled DIY bank for guys night fund is the perfect gift for hubs that doesn’t break the bank (haha, get it?). Even better, you can make it without even leaving the house. Score!

Affiliate links may be used in this post. Ordering a product through these links may result in a commission. Read the full disclosure here.

Wood Bank next to Candle with text overlay - Upcycled DIY Bank for Guys Night Fund


[bctt tweet=”Looking for an easy Valentine gift for your husband this year? This upcycled DIY bank for guys night fund is the perfect gift for hubs on a budget.” username=”diyadulation”]

Between decluttering and fighting over our military pay, the last thing I want to do is run out and buy more stuff for hubs this Valentine’s Day. Of course, I still want to surprise him with a little gift and this upcycled DIY bank for guys night fund is exactly what I need. It uses up leftover packaging. It’s creative and thoughtful and it’s an easy way to say, “I love you”.

If you got a bunch of those kits or sets for Christmas last month then you already have what you need to make this super simple craft. Rescue one from the recycling bin and grab your craft supplies to make this awesome gift today!


Guys Night DIY Bank next to Map Candle

Materials for Guys Night Fund


Empty Coffee Syrups Box

Step 1

First, make sure your box is clean and empty.


Glob of Black Paint on Back of Box

Step 2

Next, begin painting the box with black acrylic paint.


Back of Black Painted Box

Front of Black Painted Box

Step 3

Cover your entire box with paint and then allow the paint to dry.


Decorative Wood Tape Around Box

Step 4

After your paint is dry, wrap your decorative tape around the box to measure the length you need.

Note:


Trimmed Decorative Wood Tape Around Box

Step 5

While your decorative tape is still wrapped around your box, trim the amount needed from your tape roll.


Decorative Wood Tape Attached to Edge of Box

Step 6

Once your tape is trimmed, begin attaching it to the front of your box starting at the open edge.

Step 7

Continue attaching your tape until you reach the edge of the view panel.


Blue Painters Tape Attached to Edge Window in Box

Step 8

Next, place rolled pieces of blue painters tape around the edges of the view panel.

Step 9

Then place your decorative tape with the paper backing still on over the painters tape.


Blue Painters Tape Attached to Backing on Tape

Step 10

Carefully peel back your decorative tape, keeping the painters tape in place on the paper backing and lifting it from the box.


Rectangle Cut Out Inside Blue Painters Tape Attached to Backing on Tape

Step 11

Next, cut out the rectangle between the painters tape.


Tape Attached to Box With Window Cutout

Step 12

After you have cut out the rectangle, resume attaching your decorative tape to your box. Ensure that your rectangle lines up with the view panel in the box.


Tape Attached to Back of Box

Step 13

Continue attaching your decorative tape all the way around your box.


Folded Tape Edge on Box

Step 14

Once you reach the edge of your box opening, fold the tape inside the box.


Pencil Measurement on Tape Backing

Close Up of Pencil Measurement on Tape Backing

Step 15

Now, measure the uncovered edge of your box on the tape and mark with a pencil.


Cut Out Piece of Decorative Tape

Step 16

Next, cut out the tape inside of the pencil lines.


Decorative Tape on Edge of Box

Step 17

Attach the cut piece of decorative tape to the edge of your box.

Step 18

Repeat steps 15 through 17 for the remaining uncovered side of your box.


Colorful Travel Sheet of Cardstock

Step 19

After your box is covered, pull out your piece of decorative cardstock.


Measuring Decorated Box On Cardstock

Close Up of Pencil Line on Cardstock

Step 20

Flip it over and use your box to measure the size you need and mark it with a pencil.


Back of Cut Out Piece of Cardstock

Step 21

Next, use your paper cutter to cut 1/4 inch inside all of your pencil marks.

Step 22

Try sliding your cut out cardstock into your box. If it doesn’t fit, trim the edges more.


Tape on the Back of Cardstock

Step 23

Once your cardstock fits inside of your box, add adhesive to the back of it with your glue runner.


Decorative Cardstock Inside of Box

Step 24

Then attach the cardstock to the inside of your box.


Money Slot Cut Into Top of Box

Step 25

Next, cut an opening for the money in the top of your box.

Tip:


Striped Chipboard Letters

Step 26

Now pull out your chipboard letters and lay out the ones you need.


Striped Chipboard Letters Laid Out on Box

Step 27

Lay out your letters on the box until you have your desired placement.


Guys Night Letter Attached to Box

Step 28

Then attach the letters 1 at a time by lifting them from their place, applying adhesive with your glue runner, and replacing in the spot.


Close Up of Guys Night Letter Attached to Box

Angled View of Guys Night DIY Bank next to Map Candle

Wood Bank next to Candle with text overlay - Upcycled DIY Bank for Guys Night Fund

Take your gift to the next level by adding some money to the fund before gifting. This upcycled DIY bank for guys night fund is the perfect easy gift to surprise your guy with this year. Even better, you can create the perfect thoughtful gift for him without even leaving the house. Seriously, does it get any better than that?

See where I’m linking up!

Don’t Forget to Pin It!

Wood Bank next to Candle with text overlay - Upcycled DIY Bank for Guys Night Fund


More Ideas You’ll Love: