DIY Etched Mugs without Vinyl Stencils (2 Different Methods)

Custom etched mugs are an easy and inexpensive gift idea. That is why you see them as Father’s Day, Christmas, Birthday, and even groomsmen’s gifts. Unfortunately, most of the tutorials that you see for them require cutting a stencil out of vinyl to adhere to your mug. What do you do if you don’t have any vinyl or you are still waiting for that cutting machine? That is what I wanted to find out so I made DIY etched mugs without vinyl stencils. I tried 2 different methods to see which worked best: a plastic stencil and sticker outlines. Find out the outcome and my tips below.

Affiliate links may be used in this post. Ordering a product through these links may result in a commission at no extra cost to you. Read the full disclosure here.

Make DIY etched mugs without vinyl stencils. I tried 2 different methods to see which worked best. See the tutorials and find out the outcome (+ tips).


[bctt tweet=”Make DIY etched mugs without vinyl stencils. 2 different methods (+ tips) #diy #crafts #etchedmugs” username=”diyadulation”]


Method 1: Plastic Stencil

Materials


Make DIY etched mugs without vinyl stencils. I tried 2 different methods to see which worked best. See the tutorials and find out the outcome (+ tips).

Step 1

First, make sure that your mug is clean. Giving it a quick wipe down with a damp cloth is sufficient.


Make DIY etched mugs without vinyl stencils. I tried 2 different methods to see which worked best. See the tutorials and find out the outcome (+ tips).

Make DIY etched mugs without vinyl stencils. I tried 2 different methods to see which worked best. See the tutorials and find out the outcome (+ tips).

Step 2

Place your stencil on your mug where you would like the design and tape into place with your packaging tape.


Make DIY etched mugs without vinyl stencils. I tried 2 different methods to see which worked best. See the tutorials and find out the outcome (+ tips).

Step 3

Before doing anything else, put on protective gloves. You don’t want to get the etching solution on your skin.


Make DIY etched mugs without vinyl stencils. I tried 2 different methods to see which worked best. See the tutorials and find out the outcome (+ tips).

Step 4

Open your etching solution and apply over your stencil using a paintbrush.

Tip:

  • Brush towards the center of your stencil openings. This will help keep the solution from getting under the stencil and give you cleaner lines.

Step 5

Allow to sit according to the time on your etching solution directions.

Step 6

Put your gloves back on and rinse off your solution. Once the bulk of it is off, remove your stencil and rinse off any remaining solution.


Make DIY etched mugs without vinyl stencils. I tried 2 different methods to see which worked best. See the tutorials and find out the outcome (+ tips).

Step 7

Dry your mug and you are finished.

Method 2: Sticker Outline

Materials


Make DIY etched mugs without vinyl stencils. I tried 2 different methods to see which worked best. See the tutorials and find out the outcome (+ tips).

Step 1

Again, make sure your mug is clean.


Make DIY etched mugs without vinyl stencils. I tried 2 different methods to see which worked best. See the tutorials and find out the outcome (+ tips).

Step 2

Cut out the stickers that you want to use. Be sure to leave excess around the edges.


Make DIY etched mugs without vinyl stencils. I tried 2 different methods to see which worked best. See the tutorials and find out the outcome (+ tips).

Step 3

Pull off only the inverse of the letters and stick them to your mug where you want your design.

Tip:

  • Remember to add the centers of letters that have openings.

Step 4

Before doing anything else, put on protective gloves. You don’t want to get the etching solution on your skin.

Step 5

Open your etching solution and apply over the inside of the sticker outlines using a paintbrush.

Step 6

Allow to sit according to the time on your etching solution directions.

Step 7

Put your gloves back on and rinse off your solution. The sticker outlines will soften and wash off along with the solution.


Make DIY etched mugs without vinyl stencils. I tried 2 different methods to see which worked best. See the tutorials and find out the outcome (+ tips).

Step 8

Again, dry your mug and you are finished.


Make DIY etched mugs without vinyl stencils. I tried 2 different methods to see which worked best. See the tutorials and find out the outcome (+ tips).

Make DIY etched mugs without vinyl stencils. I tried 2 different methods to see which worked best. See the tutorials and find out the outcome (+ tips).

Make DIY etched mugs without vinyl stencils. I tried 2 different methods to see which worked best. See the tutorials and find out the outcome (+ tips).

Both of these methods for DIY etched mugs without vinyl were successful. However, the sticker outlines method resulted in cleaner lines. The removal of the sticker outlines and etching solution is also much easier. Also, both of these methods work if you only have stencils or stickers available to you. My overall opinion is to go with stickers if you have them. They seal everywhere which results in a beautiful, clean design. Have any DIY alternatives you want tackled? Let me know in the comments and I’ll see what I can come up with!

See where I’m linking up!

DIY Leather Charging Cord Organizer

How many times has your husband asked you where his charger is? If you don’t know, then one of you is digging through a drawer of cords hoping to find an extra one that fits his phone. It’s frustrating and eats up valuable time that you don’t have. Save time and energy by storing your chargers in a DIY leather charging cord organizer. The adjustable leather cord holds your charging cords and wall adapters to keep everything organized in one place. It makes traveling easier because you can grab it and go, confident that you have what you need. Additionally, it is so easy to make that it is a perfect DIY gift!

Affiliate links may be used in this post. Ordering a product through these links may result in a commission at no extra cost to you. Read the full disclosure here.

This DIY leather charging cord organizer holds your cords and wall adapters to keep everything in one place. Perfect for yourself or as an easy DIY gift!

[bctt tweet=”DIY leather charging cord organizer keeps your cords and wall adapters in one place! #diy #organizer” username=”diyadulation”]

Materials


This DIY leather charging cord organizer holds your cords and wall adapters to keep everything in one place. Perfect for yourself or as an easy DIY gift!

This DIY leather charging cord organizer holds your cords and wall adapters to keep everything in one place. Perfect for yourself or as an easy DIY gift!

This DIY leather charging cord organizer holds your cords and wall adapters to keep everything in one place. Perfect for yourself or as an easy DIY gift!

This DIY leather charging cord organizer holds your cords and wall adapters to keep everything in one place. Perfect for yourself or as an easy DIY gift!

Step 1

Trim a piece of scrap leather into a rectangle. It can be any size you like but I recommend no smaller than 12 inches by 5 inches.

Tip:

  • You can be a precise as you would like but don’t feel like you have to be. Having some irregularities adds a more rustic touch to your organizer.


This DIY leather charging cord organizer holds your cords and wall adapters to keep everything in one place. Perfect for yourself or as an easy DIY gift!

Step 2

Punch a hole in the center edge of the right side of your rectangle.

Note:


This DIY leather charging cord organizer holds your cords and wall adapters to keep everything in one place. Perfect for yourself or as an easy DIY gift!

This DIY leather charging cord organizer holds your cords and wall adapters to keep everything in one place. Perfect for yourself or as an easy DIY gift!

Step 3

Fold your leather in half lengthwise and cut notches every two inches with your scissors. Make sure that you have an odd number of notches that are large enough to thread your leather cording through.


This DIY leather charging cord organizer holds your cords and wall adapters to keep everything in one place. Perfect for yourself or as an easy DIY gift!

This DIY leather charging cord organizer holds your cords and wall adapters to keep everything in one place. Perfect for yourself or as an easy DIY gift!

Step 4

Unfold your leather and thread your cording through. Start by threading the cord through your punched hole and next continue weaving back and forth through the notches.

Tip:

  • Only leave enough of the leather cording through the punched hole to secure it to your organizer. The excess cording should be at the opposite end.


This DIY leather charging cord organizer holds your cords and wall adapters to keep everything in one place. Perfect for yourself or as an easy DIY gift!

This DIY leather charging cord organizer holds your cords and wall adapters to keep everything in one place. Perfect for yourself or as an easy DIY gift!

This DIY leather charging cord organizer holds your cords and wall adapters to keep everything in one place. Perfect for yourself or as an easy DIY gift!

Step 5

Push your brad through the punched hole with the prongs coming through the inside of your organizer. Fold out the prongs over the cording to secure them.


This DIY leather charging cord organizer holds your cords and wall adapters to keep everything in one place. Perfect for yourself or as an easy DIY gift!

Step 6

Place a few stitches through your organizer and cording end at the brad to secure the cording thoroughly. You don’t want it pulling out when you tighten the cord around your chargers.


This DIY leather charging cord organizer holds your cords and wall adapters to keep everything in one place. Perfect for yourself or as an easy DIY gift!

Step 7

Cut a small square of leather out of a piece that you trimmed off in step 1.


Step 8

Center the leather square over the cording and brad on the inside of your organizer.


This DIY leather charging cord organizer holds your cords and wall adapters to keep everything in one place. Perfect for yourself or as an easy DIY gift!

Step 9

Secure the leather square into place by sewing a whipstitch around the edges.

Tip:

  • For a cleaner look, do not stitch all of the way through your organizer. Instead thread about halfway into your organizer leather and pull back up through your leather square. This is so that your stitches are not visible on the outside of your organizer.


This DIY leather charging cord organizer holds your cords and wall adapters to keep everything in one place. Perfect for yourself or as an easy DIY gift!

This DIY leather charging cord organizer holds your cords and wall adapters to keep everything in one place. Perfect for yourself or as an easy DIY gift!

Step 10

Lastly, add your charging cords and adapters and tighten your cording.


This DIY leather charging cord organizer holds your cords and wall adapters to keep everything in one place. Perfect for yourself or as an easy DIY gift!

Step 11

Roll up your DIY leather charging cord organizer and wrap the excess cording around the outside to secure.


This DIY leather charging cord organizer holds your cords and wall adapters to keep everything in one place. Perfect for yourself or as an easy DIY gift!

[bctt tweet=”Need a gift for your guy? This DIY Leather Charging Cord Organizer is perfect! #diy #giftidea” username=”diyadulation”]

This DIY leather charging cord organizer holds your cords and wall adapters to keep everything in one place. Perfect for yourself or as an easy DIY gift!

This DIY leather charging cord organizer holds your cords and wall adapters to keep everything in one place. Perfect for yourself or as an easy DIY gift!

This is such an easy and inexpensive way to organize all of your chargers in one place. You can change the look to fit your style by using a different color of leather for your organizer or cording. A DIY leather charging cord organizer is also a perfect DIY gift for the guys in your life. It is handsome and practical to delight even the most difficult men to shop for. If you want to make one for everyone on your gift list, opt for buying a yard of leather instead of using a scrap piece. Then you can cut all of your organizers at once and have enough to make them in bulk! I’d love to hear who you would make yours for. Let me know in the comments!

This DIY leather charging cord organizer holds your cords and wall adapters to keep everything in one place. Perfect for yourself or as an easy DIY gift!

See where I’m linking up!

A Mom for Christmas DIY Rose Quartz Necklace and Movie Night

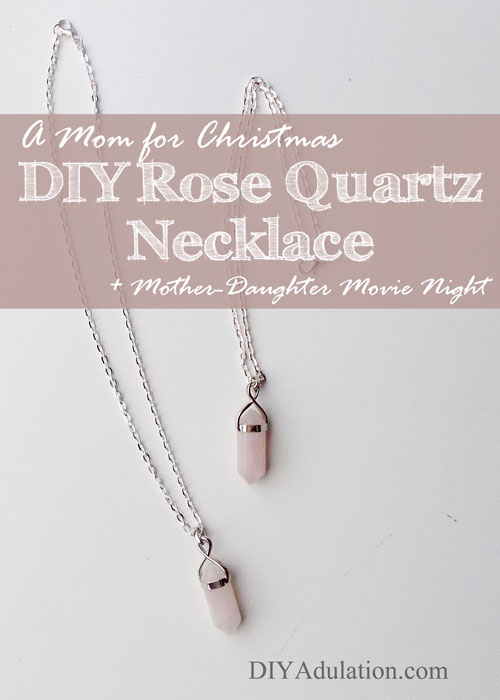
One of the joys of being a mom is sharing the things you loved as a child with your own children. The holidays are an especially fun time to share traditions. Make sure to get some quality time with your daughter during the busy season. A Mom for Christmas DIY rose quartz necklace and movie night is the perfect way to do this! This was one of my favorite Christmas movies growing up. I still love this movie today although I hadn’t taken the time to watch it in many years. Now I can promise you that this will be a new mother-daughter Christmas tradition for us and I hope it is for you and your daughter too.

Affiliate links may be used in this post. Ordering a product through these links may result in a commission at no extra cost to you. Read the full disclosure here.

Start a new mother-daughter Christmas tradition this year with A Mom for Christmas DIY rose quartz necklace and movie night fun!


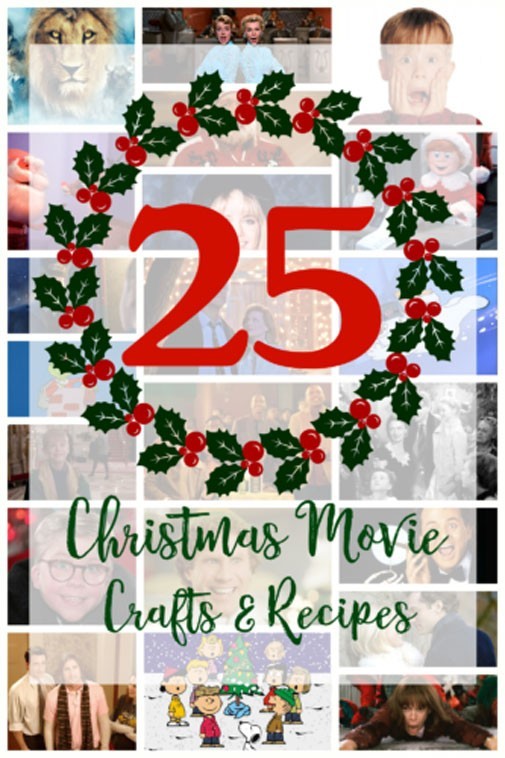
We have 25 talented bloggers gathered together to share with you all the wonderful crafts and recipes you can make this Christmas season, based off of some of the most beloved holiday classic films. Each blogger will lead you to the next, so be sure to finish the hop all the way through to the end for all the Christmas movie goodies!


[bctt tweet=”25 talented bloggers have put together a host of food and craft ideas based on your favorite movies!” username=”diyadulation”]


Let’s Meet The Hosts!

Start a new mother-daughter Christmas tradition this year with A Mom for Christmas DIY rose quartz necklace and movie night fun!


Megan ~ C’mon Get Crafty | Alli ~ An Alli Event | Shirley ~ Intelligent Domestications

Marie ~ DIY Adulation | RaNesha ~ Queen Thrifty | Emily ~ The Crafty Carlson

Stephanie ~ The Tip Toe Fairy | Molly ~ Just a Little Creativity | Michelle ~ Our Crafty Mom

Pam ~ P.S. I Love You Crafts | Sue ~ A Purdy Little House | Katie ~ A Mommy Scene

Vanessa ~ DIY 180 | Nicole ~ For the Love of Food | Victoria ~ Dazzle While Frazzled

Stephanie ~ A Little Moore | Sam ~ Raggedy Bits | Paula ~ Paula Tisch

Courtney ~ Running with Love and Coffee | Dana ~ Emerald and Oak

Kim ~ Made in a Day | Kallee ~ Creative Southern Home | Rachel ~ Smart Mom Smart Ideas

Emily ~ Small Stuff Counts | Evelin ~ Sweet Song Bird Evey’s Creations


Now are you ready to get to this A Mom for Christmas DIY Rose Quartz Necklace and Movie Night? Let’s start with a little movie background then get on to the rest of the fun:

Start a new mother-daughter Christmas tradition this year with A Mom for Christmas DIY rose quartz necklace and movie night fun!

[bctt tweet=”Start a new tradition this year with A Mom for Christmas DIY rose quartz necklace and movie night!” username=”diyadulation”]

About the Movie

If you haven’t seen the movie, it is about a little girl whose mom died when she was very young. Her father has never truly healed from the loss and the girl desperately craves the love and attention of a mother figure. While at the store she draws a free gift to find that it is for one free wish. She wishes for a mom for Christmas. To her surprise, she a pendant necklace as well as a literal wish come true when a mannequin comes to life and shows up at her house. This is such a beautiful and heartfelt movie about a family healing and finding its way back together. It is also sprinkled with comedy as the mannequins in the store are absolutely hysterical! You and your daughter will love watching this flick together.


Start a new mother-daughter Christmas tradition this year with A Mom for Christmas DIY rose quartz necklace and movie night fun!

DIY Rose Quartz Necklace


Start a new mother-daughter Christmas tradition this year with A Mom for Christmas DIY rose quartz necklace and movie night fun!

Materials


Start a new mother-daughter Christmas tradition this year with A Mom for Christmas DIY rose quartz necklace and movie night fun!

Step 1

Remove rose quartz pendants from packaging.
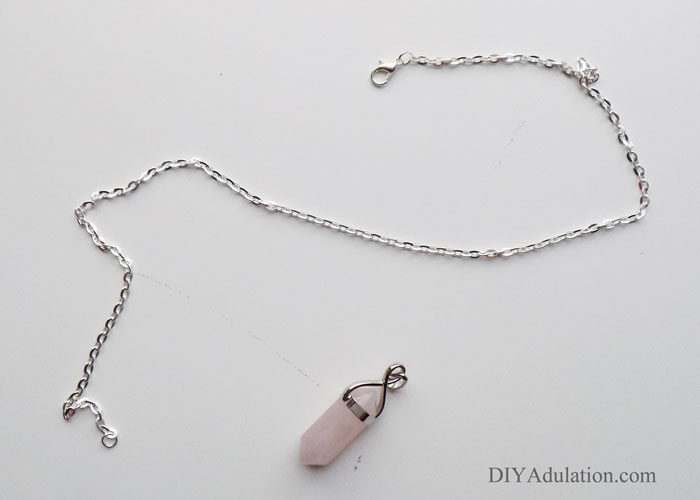
 

Start a new mother-daughter Christmas tradition this year with A Mom for Christmas DIY rose quartz necklace and movie night fun!

Step 2

Remove silver chains from packaging.


Start a new mother-daughter Christmas tradition this year with A Mom for Christmas DIY rose quartz necklace and movie night fun!

Step 3

Slide your pendants onto the chains and you’re done!

That is seriously the easiest DIY ever. This is a quick and fun surprise for your mother-daughter movie Christmas movie night. It will mean so much to the both of you. Now that you have your necklaces done, it’s time to cover the rest of the essentials for your night.


Start a new mother-daughter Christmas tradition this year with A Mom for Christmas DIY rose quartz necklace and movie night fun!

Snacks

At the beginning of the movie, Olivia Newton John (the mannequin come to life) makes the family soup for breakfast because she doesn’t know any better. It is absolutely adorable. Bring that fun vibe to your movie night by serving traditional snacks in a fresh way.

Popcorn Garland

Instead of snacking on a regular old bowl of popcorn, make a popcorn garland. Thread popcorn and dried fruit into a giant snack necklace that’s fun to munch on.

Hot Chocolate

Warm up with a delicious mug of hot chocolate. Dress up the flavors by adding your favorite flavored coffee creamer.


Start a new mother-daughter Christmas tradition this year with A Mom for Christmas DIY rose quartz necklace and movie night fun!
Photo Credit: Amazon.com

Dress for the Occasion

In the movie the girls wear matching braids and, of course, they rock early 90’s style. Go retro with your daughter and dress in your comfiest pair of leggings and some warm cable knit socks. If you’re feeling ambitious, braid each other’s hair. Here are a few tutorials if you need help:

Classic Braid

French Braid

Fishtail Braid

Now all that’s left to do is turn the lights down, snuggle under a blanket on the couch, and watch A Mom for Christmas. Your new necklaces will be a beautiful reminder of the memories made and your daughter will love letting friends and family know the story behind. Don’t forget to snap a picture each year to chronical your awesome mother-daughter tradition. Now it’s time to check out the next fun post in the 25 Christmas movies blog hop! Check out this awesome “This Christmas” recipe from RaNesha at Queen Thrifty! 

Start a new mother-daughter Christmas tradition this year with A Mom for Christmas DIY rose quartz necklace and movie night fun!

See where I’m linking up!