This month for the Thrift Store Decor Upcycle Challenge I am changing things up a little. This tutorial is a birthday gift for someone so I tried to capture the farmhouse look. The mix of textures in this upcycled farmhouse vignette cloche is so comforting and pretty. I hope you (and the birthday girl) love it as much as I do. Full disclaimer: there are a lot of steps to this tutorial but the end result is absolutely worth it.
Affiliate links may be used in this post. Ordering a product through these links may result in a commission at no extra cost to you. Read the full disclosure here.

The Rules:
- Upcycle an item(s) from a thrift store, resale store, or garage sale into a new piece of decor.
- There’s no monthly theme.
- There’s no budget to stick to.
Meet the Hr5Sosts
Amanda | The Kolb Corner Erlene | My Pinterventures Kim | Made in a Day
Dru | Polka Dot Poplars Maureen | Red Cottage Chronicles Pili | Sweet Things
Shirley | Intelligent Domestications Debra | Shoppe No. 5 Marie | DIY Adulation
Chelsea | The Johnsons Plus Dog Jes | My DIY Envy Ann | Duct Tape and Denim
Molly | Just a Little Creativity Ashley | 3 Little Greenwoods Kimm | Reinvented
Kim | Farmhouse Made Victoria | Dazzle While Frazzled Sara | Twelve on Main
Chelc | Inside the Fox Den Sue | A Purdy Little House Michelle | Our Crafty Mom
Sherry | Savvy Apron Jennifer and Vicki | 2 Bees in a Pod Lora | Craftivity Designs
Ali | Home Crafts By Ali Denise | My Thrifty House Colleen | Life on Kaydeross Creek
Toni | Small Home Soul Jeanie | Create & Babble Michelle | Michelle James Designs
Medina | Grillo Designs Karen | Dragonfly & Lily Pads
Make sure you follow our board on Pinterest for more upcycled decor inspiration!

[bctt tweet=”The mix of textures in this upcycled farmhouse vignette cloche are gorgeous! #diy” username=”diyadulation”]
Upcycled Farmhouse Vignette Cloche Materials
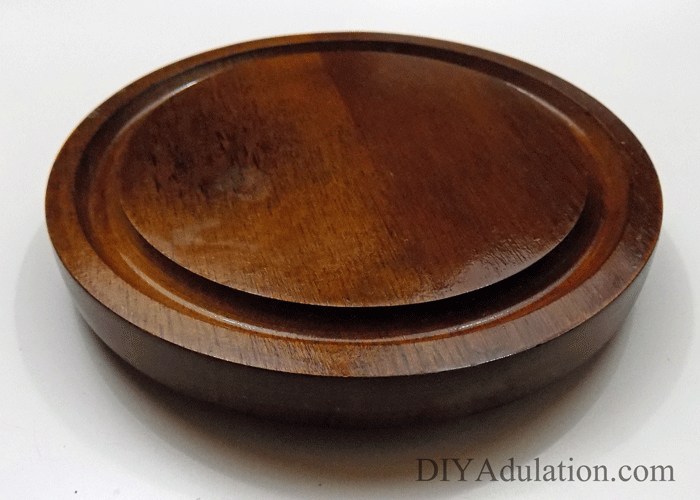
- Thrift Store Footed Cloche
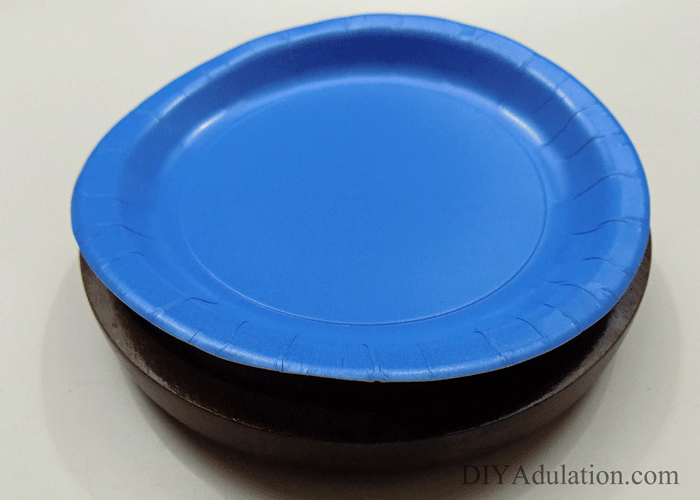
- Small Paper Plate
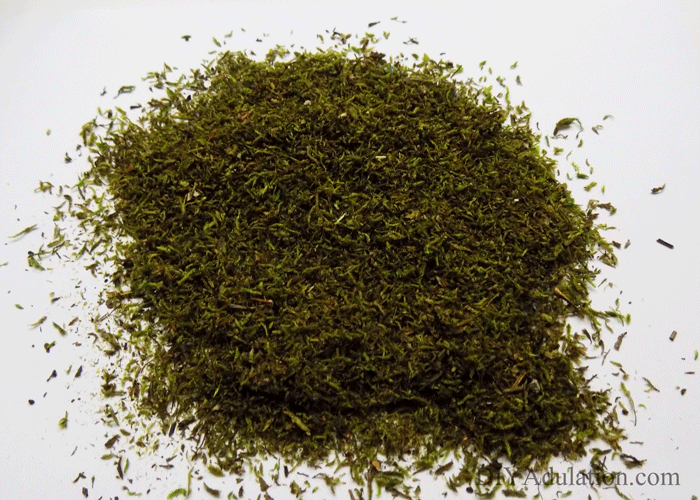
- Loose Moss
- Mod Podge
- White Acrylic Paint
- 2 Foam Brushes (One for Mod Podge and One for White Paint)

- HB Graphite Pencil
- Hot Glue Gun and Glue Sticks
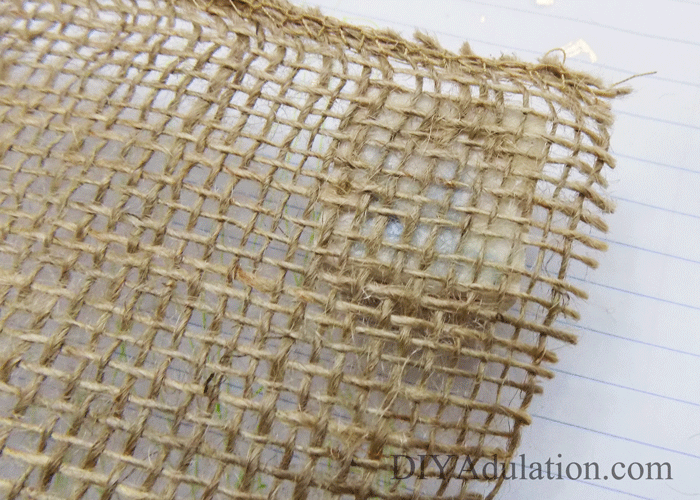
- Burlap Roll
- Scissors
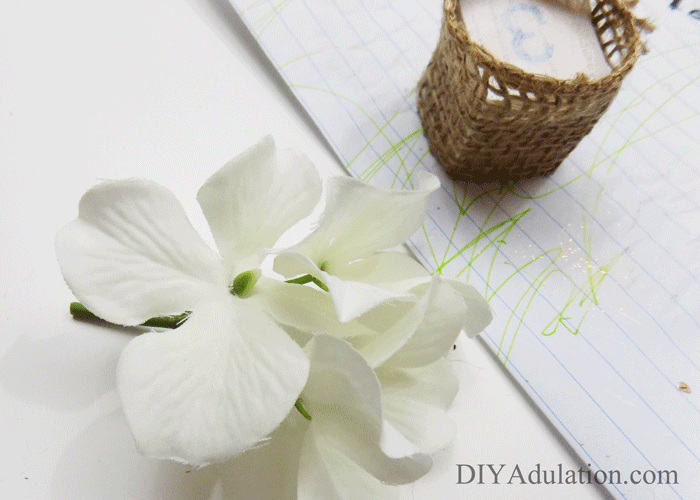
- Faux Off White Hydrangea
- Cream Colored Yarn
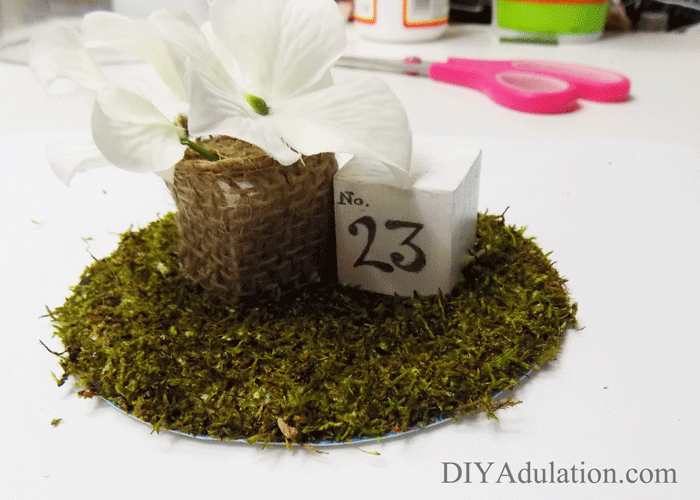
- 3 Wooden Blocks

Step 1
First, clean your cloche inside and out.
Tip:
- If the price written on the glass isn’t coming off, add a small amount of Dawn dish soap to it. Let sit for a minute then wipe off with a damp paper towel.

Step 2
Next, cut the lip off of your small paper dessert plate.
Step 3
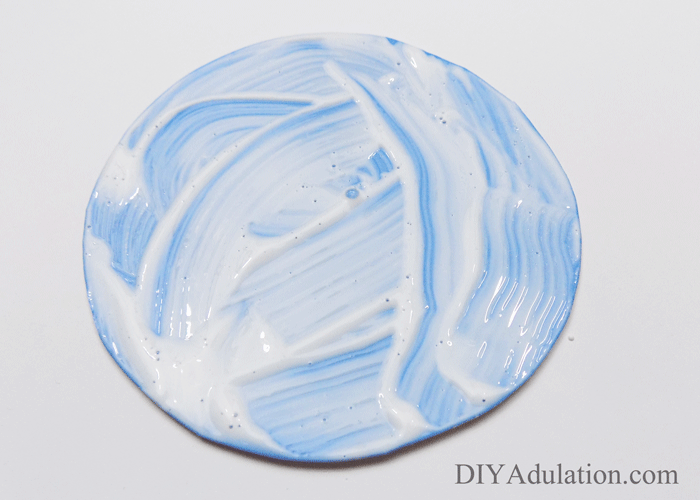
Add a coat of Mod Podge to your plate.

Step 4
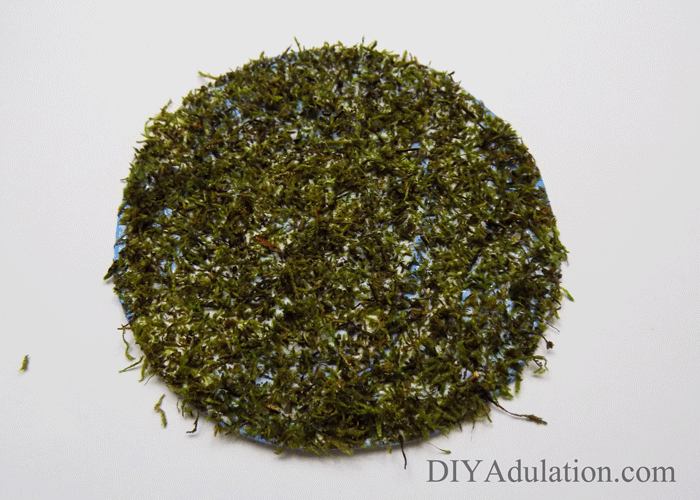
Now cover your plate with your loose moss.
Step 5
Shake off the excess and return it to the container. Next, set your moss plate off to the side to dry.

Step 6
Paint a coat of white acrylic paint on your blocks.
Tip:
- Don’t worry about coating the bottom of the blocks. The bottoms won’t be seen.
Step 7
Allow the paint to dry completely before moving on.

Step 8
If needed, add a second coat of paint to the blocks.
Tip:
- A second coat of white paint is only needed on one block because the others will be covered with other media.
Step 9
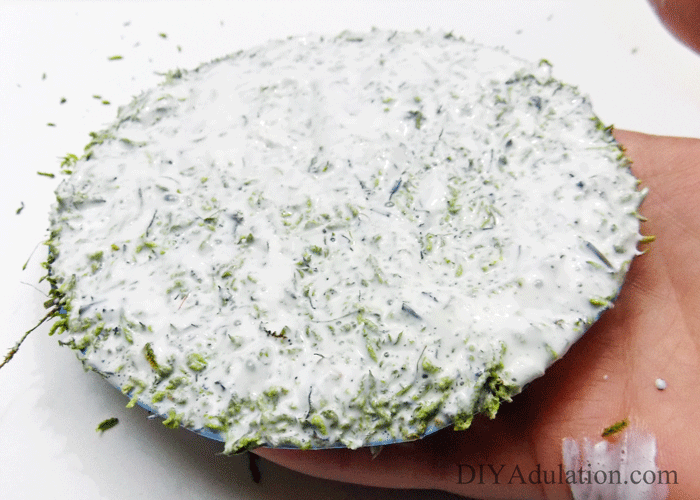
After your moss plate has begun to dry, add a second coat of Mod Podge over the moss.
Tip:
- Do this gently to prevent the moss already attached from coming off.

Step 10
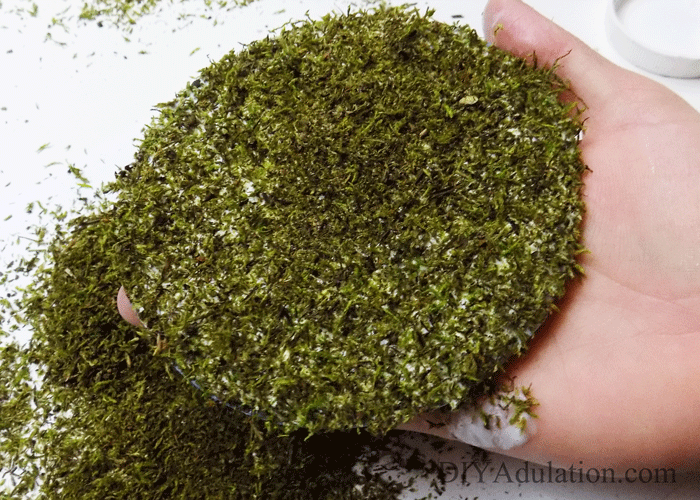
Next, cover the 2nd coat with moss.
Step 11
Shake off the excess again and return to the container. Set aside to allow the glue to dry completely.
Tip:
- This can take up to 24 hours.

Step 12
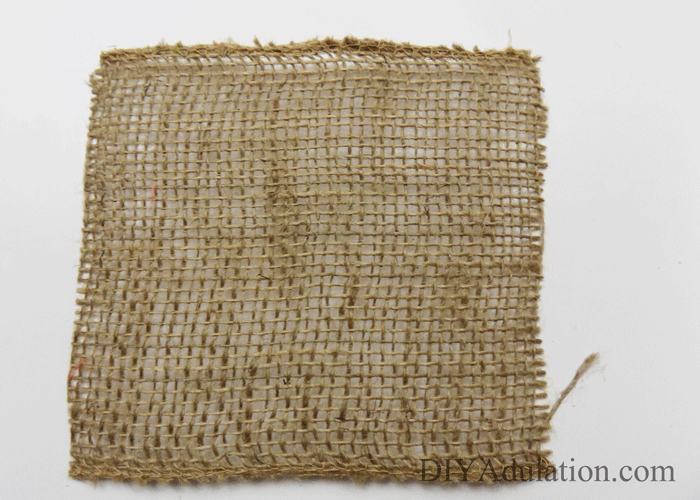
Measure enough burlap to wrap around the outside of one of your single-coated blocks.
Step 13
Cut the burlap.

Step 14
Next, glue your burlap strip to the block.
Note:
- Leave a lip of extra burlap above the block.


Step 15
Trim the excess wrap and the excess at the bottom. Do not trim the lip from step 14.
Step 16
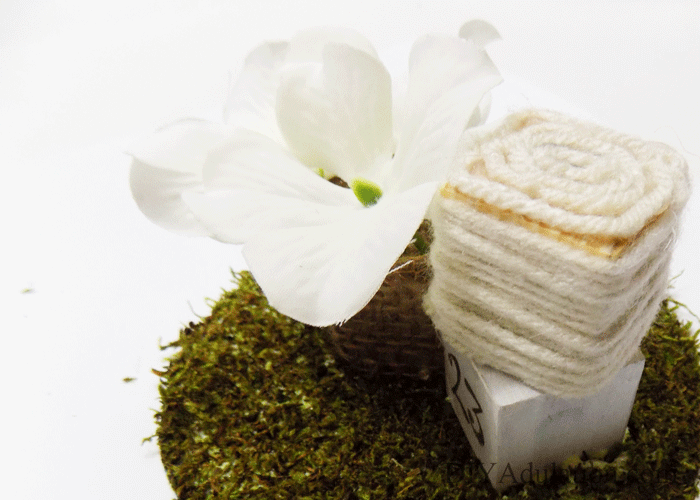
Next, cut 2-3 single flowers from your hydrangea.

Step 17
Then glue the single flowers to the top of your burlap block.

Step 18
Now, cover the flower stems with a small piece of the excess burlap you trimmed in step 15.

Step 19
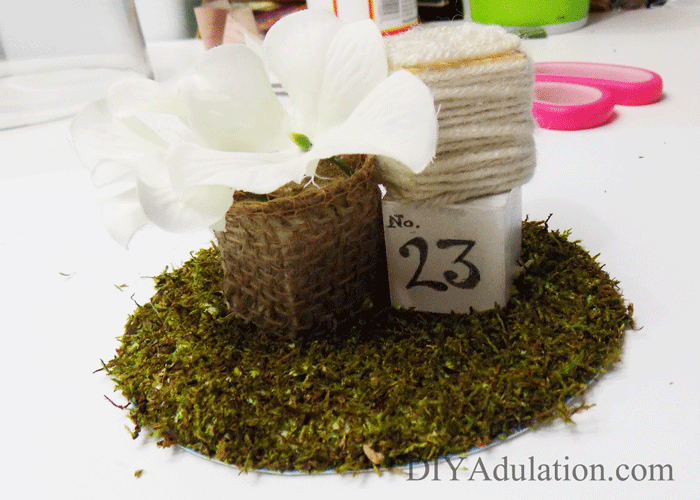
Next, cover your 2nd single-coated block with cream yarn. Attach the yarn with hot glue.

Tip:
- Wrap around the outside and secure with glue first. Then cover the top of the block.

Step 20
Draw “No. 23” on the remaining block with your pencil.

Step 21
Carefully cover your pencil drawing with Mod Podge.
Tip:
- I used my finger to apply the Mod Podge in this step.
Step 22
Allow all of your elements to dry completely before moving on.
Step 23
Lastly, attach your blocks to the center of your moss plate as pictured.
Note:
- The yarn block is glued only to the top of the white block.


Once your farmhouse vignette is completed, place it in the center of your cloche and replace the lid. This allows you to change your vignette out seasonally if desired. If you want to make the vignette semi-permanent (or less-susceptible to bumps) place a Zot between the cloche base and vignette plate. Don’t forget to check out what my friends create this month after you’ve made your own upcycled farmhouse vignette cloche!
See where I’m linking up!
And now for more thrifty goodness!
Check out what my fellow upcyclers created below!