Easy and Gorgeous DIY Spring Wreath

Spring is such an exciting time of year. It brings more sunshine, new life, and promises hope. It also signals that summer is on its way which personally fills me with endless excitement. While it hasn’t quite peeked its head out yet, spring is right around the corner. You are probably, like me, catching the spring bug that motivates you to start cleaning out your home and planning your garden. To welcome the season and all of the wonderful promises that come along with it I’m showing you how to make this gorgeous DIY spring wreath today.

Affiliate links may be used in this post. Ordering a product through these links may result in a commission. Read the full disclosure here.


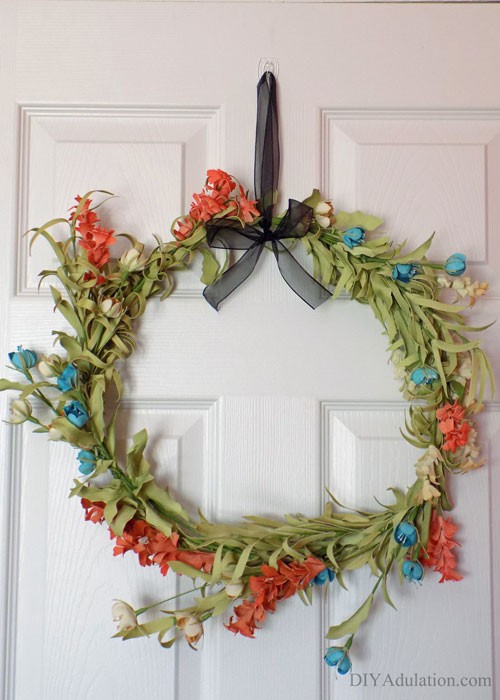
Celebrate the season with this gorgeous DIY spring wreath. You’ll love having this bright and cheery wreath welcome you every day during this spring.

[bctt tweet=”Celebrate the season with this gorgeous DIY spring wreath! #diy #springwreath”]

Spring is such an exciting time of year. It brings more sunshine, new life, and promises hope. It also signals that summer is on its way which personally fills me with endless excitement.

While it hasn’t quite peeked its head out yet, spring is right around the corner. You are probably, like me, catching the spring bug that motivates you to start cleaning out your home and planning your garden.

To welcome the season and all of the wonderful promises that come along with it I’m showing you how to make this gorgeous DIY spring wreath today.

DIY Spring Wreath Materials

Step 1

Choose 3 of your floral stems to being forming your wreath.

Note:


Celebrate the season with this gorgeous DIY spring wreath. You’ll love having this bright and cheery wreath welcome you every day during this spring.

Step 2

Find the thickest stem in one set of florals and attach the bottom stem of a second set to it using your floral wire. Next, attach more floral wire about every 3” or so to ensure it stays together as you form them into a circle.

Tip:


Celebrate the season with this gorgeous DIY spring wreath. You’ll love having this bright and cheery wreath welcome you every day during this spring.

Step 3

Repeat step 2 with the third set of florals only attaching it to the second set of florals instead of the first.


Celebrate the season with this gorgeous DIY spring wreath. You’ll love having this bright and cheery wreath welcome you every day during this spring.

Step 4

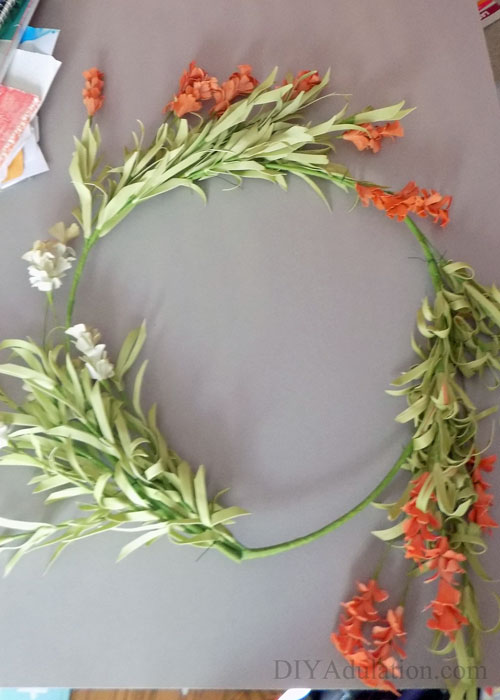
Complete forming your circles by repeating step 2 again, this time attaching the bottom stem of the first set of florals to the thickest stem on the third.
 

Celebrate the season with this gorgeous DIY spring wreath. You’ll love having this bright and cheery wreath welcome you every day during this spring.

Celebrate the season with this gorgeous DIY spring wreath. You’ll love having this bright and cheery wreath welcome you every day during this spring.

Step 5

When you’ve finished forming your circle it will look like the above photo with random flowers hanging off. Clean it up a little by “pinning” those flowers to the circle using your floral wire.

Step 6

Next, begin adding in your remaining floral stems to fill out the rest of your wreath. Use the existing attached floral wire to secure and only add more wire where needed.

Tip:


Celebrate the season with this gorgeous DIY spring wreath. You’ll love having this bright and cheery wreath welcome you every day during this spring.

Step 7

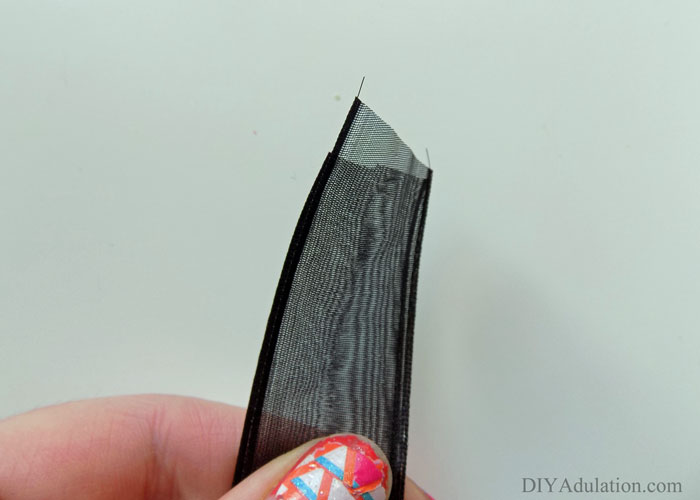
Cut a length of ribbon and place it around your wreath with the needs together at the top.

Tip:


Celebrate the season with this gorgeous DIY spring wreath. You’ll love having this bright and cheery wreath welcome you every day during this spring.

Step 8

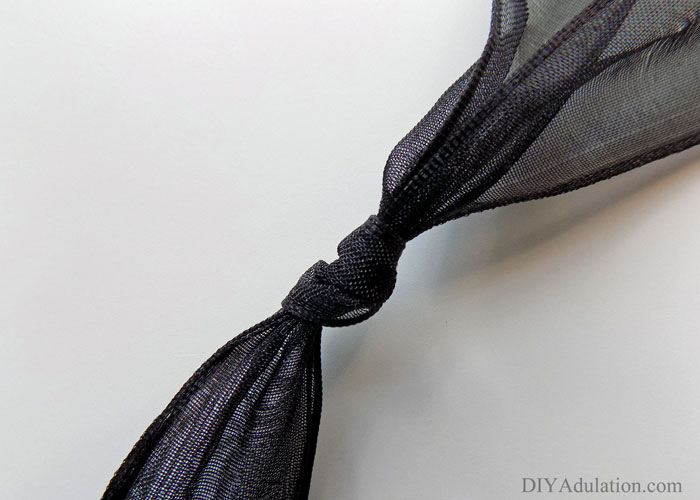
Knot the ends together but leave long pieces free, out of the knot.


Celebrate the season with this gorgeous DIY spring wreath. You’ll love having this bright and cheery wreath welcome you every day during this spring.

Step 9

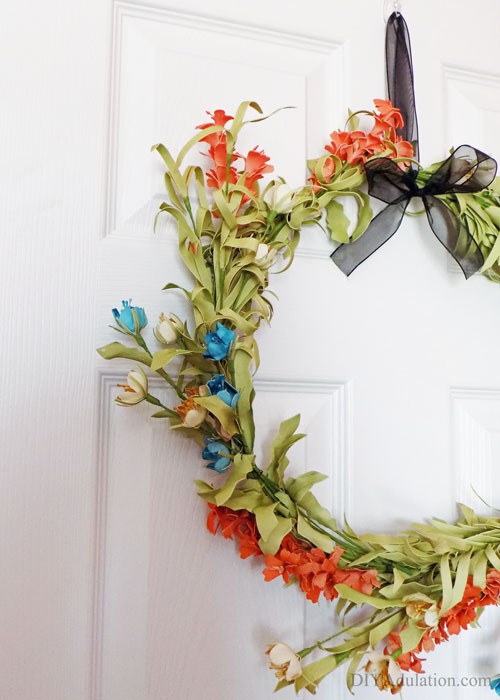
Rotate the ribbon so that the knot is at the wreath and tie your loose ends into a bow. Next hang up your wreath and enjoy.


Celebrate the season with this gorgeous DIY spring wreath. You’ll love having this bright and cheery wreath welcome you every day during this spring.

Celebrate the season with this gorgeous DIY spring wreath. You’ll love having this bright and cheery wreath welcome you every day during this spring.

Celebrate the season with this gorgeous DIY spring wreath. You’ll love having this bright and cheery wreath welcome you every day during this spring.

Celebrate the season with this gorgeous DIY spring wreath. You’ll love having this bright and cheery wreath welcome you every day during this spring.

Celebrate the season with this gorgeous DIY spring wreath. You’ll love having this bright and cheery wreath welcome you every day during this spring.

If you aren’t yet feeling motivated to tackle your spring potential hopefully making this gorgeous DIY spring wreath will help. Wave good-bye to winter with me (perhaps with Barbara Streisand singing “So Long Dearie” joyously in your head) and get psyched for the upcoming season. You’ll love having this bright and cheery wreath welcome you every day during this spring.

See where I’m linking up!

Don’t Forget to Pin It!

Freezer-Friendly Chicken Nuggets

These freezer-friendly chicken nuggets are extra crispy and way healthier than what you’ll get in a drive-thru. Find out how easy they are to make below!

Affiliate links may be used in this post. Ordering a product through these links may result in a commission. Read the full disclosure here.

 These freezer-friendly chicken nuggets are extra crispy and way healthier than what you’ll get in a drive-thru.

[bctt tweet=”Freezer-friendly chicken nuggets are way healthier than what you get in a drive-thru. #freezercooking”]

Chicken nuggets are like the ultimate kids food. It’s as though they are born with this innate love for them. Can you blame them? Chicken nuggets are delicious! Unfortunately, most of the ones you get at a restaurant or buy in the frozen section of the grocery store aren’t very healthy for you.

Instead of cutting them out of your meals altogether, keep the delicious convenience food in your arsenal of quick meals by making your own.


Freezer-Friendly Chicken Nuggets Ingredients

Step 1

Preheat your oven to 350 degrees.  Line baking pans with foil and spray with a non-stick cooking spray.

Step 2

Cut up chicken breasts into roughly 1 inch pieces.  (Don’t worry if they aren’t exact.)

Step 3

In a separate bowl from your beaten eggs, combine panko bread crumbs and seasonings.

Step 4

Dip each piece of chicken in your eggs (allowing excess to run off) and then roll in bread crumb mixture.  Repeat a second time and place on prepared baking sheet.

**The extra coat is what makes them extra crispy!


 These freezer-friendly chicken nuggets are extra crispy and way healthier than what you’ll get in a drive-thru.

Step 5

Once one pan is full of nuggets, bake for 20 minutes.

Step 6

Continue steps 4 and 5 until all of your nuggets are cooked.

This recipe makes roughly 75 nuggets depending on how evenly your pieces are cut.


How to Freeze Chicken Nuggets

To freeze, place in a large Ziploc freezer bag and store in your freezer. You can pull out only the amount you need later and continue storing the rest in the freezer until needed. Don’t forget to label them!

How to Reheat Freezer-Friendly Chicken Nuggets

They can be reheated in the microwave or (to retain their crispness) reheat in the oven at 300 degrees for 10 minutes or until warmed throughout.


 These freezer-friendly chicken nuggets are extra crispy and way healthier than what you’ll get in a drive-thru.

 These freezer-friendly chicken nuggets are extra crispy and way healthier than what you’ll get in a drive-thru.


Yield: About 75 Nuggets

Freezer-Friendly Chicken Nuggets

Freezer-Friendly Chicken Nuggets
Prep Time 10 minutes
Cook Time 20 minutes
Total Time 30 minutes

Ingredients

  • Bag of Frozen Chicken Breasts (defrosted)
  • 6 Beaten Eggs
  • 4 Cups Panko Bread Crumbs
  • 2 Tbsp. Garlic Pepper
  • Dash of Salt

Instructions

  1. Preheat your oven to 350 degrees.  Line baking pans with foil and spray with a non-stick cooking spray.
  2. Cut up chicken breasts into roughly 1 inch pieces.  (Don’t worry if they aren’t exact.)
  3. In a separate bowl from your beaten eggs, combine panko bread crumbs and seasonings.
  4. Dip each piece of chicken in your eggs (allowing excess to run off) and then roll in bread crumb mixture.  Repeat a second time and place on prepared baking sheet.
  5. Once one pan is full of nuggets, bake for 20 minutes.
  6. Continue steps 4 and 5 until all of your nuggets are cooked.
 These freezer-friendly chicken nuggets are extra crispy and way healthier than what you’ll get in a drive-thru.

When you make these freezer-friendly chicken nuggets you don’t have to sacrifice convenience for healthy food. You can have both! They will last at least a month properly stored in the freezer and get lunch on the table in minutes. Once you are comfortable making these you can start playing around with the flavors. Add a dry barbeque rub to the breading mix or create some heat by adding Cajun spices. Get creative and find your family’s favorite flavors!

See where I’m linking up!

Don’t Forget to Pin It!

Merry Monday Link Party #93

Merry-Monday-Link-Party-300x300

Welcome to the Merry Monday Link Party #93

It is that time of week again! I love seeing all of your awesome ideas and projects shared! Apparently last Monday was National Margarita day and I’m sad to admit that I did not get to have a margarita so I hope you guys were able to imbibe for me! Luckily, I was able to gather up a ton of new recipes for the drink, so looking forward to trying those out (not all in one night… probably). One small announcement for you guys: the organization of DIY Adulation has changed some (but no categories were abolished). If you have any trouble finding something, feel free to utilize the search box on the right or shoot me a message. I’m always happy to help you out. Okey dokey, now onto the party!

Meet the hosts of the 2016 Merry Monday

The Hosts (3)


MOST POPULAR

12 Things I Do Not Buy

12 Things I Do Not Spend Money On @Condo Blues (PIN IT)

HOST PICKS

Spring

MM-Host-90-1-1

MM-Host-90-2

MM-Host-90-3

MM-Host-90-4

All features & host favorites are pinned to the Merry Monday Link Party Board!

Follow My Pinterventures’s board Merry Monday Linky Party on Pinterest.


Help grow this party by displaying this button on your sidebar or party page!

My Pinterventures

If you were featured, grab a STAR button and place it on your blog!

My Pinterventures


[bctt tweet=”Share your blog post on the #MerryMonday Link Party #93″]

Party Rules – Please read!

Merry Monday Rules

Let’s get the Merry Monday Link Party #93 started! Help support your fellow bloggers and share their posts on your social media using hashtag #MerryMonday and we’ll help share it too! Or visit our Merry Monday Pinterest board and help repin!

***Please do not add subscribe to download posts to the party***