Autumn Scarecrow Note Holder

It is fun to dress up your home for autumn but that doesn’t mean dressing it up can’t also be functional.  You still have grocery lists, to-do lists, letters to mail… the list goes on and on.  Wouldn’t it be great to have a way to keep all of your notes and lists in one place that is actually festive and pretty to look at?  (If you said no, I’m worried about you, unless you haven’t had your coffee yet, in which case I understand completely.)  This adorable autumn scarecrow note holder does just that and you can make it in about 10 minutes!

Decorating your house for fall doesn't mean you have to sacrifice function for festive. This adorable autumn scarecrow note holder has both!

[bctt tweet=”Decorating your house for fall doesn’t mean you have to sacrifice function for festive. This adorable #autumn #scarecrow note holder has both!”]

Materials

Decorating your house for fall doesn't mean you have to sacrifice function for festive. This adorable autumn scarecrow note holder has both!

Step 1

Place one craft stick on your work surface at an angle and then glue 6 craft sticks perpendicular to it. (See picture above.)


Decorating your house for fall doesn't mean you have to sacrifice function for festive. This adorable autumn scarecrow note holder has both!

Step 2

Glue some straw to another craft stick to create the “hair”.  The pieces on the outside edges should be longer and the pieces in the middle should be kept short. (Think fringy bangs.)  Once your straw is in place, glue craft sticks (straw side down) to your scarecrow parallel with the existing perpendicular stick.


Decorating your house for fall doesn't mean you have to sacrifice function for festive. This adorable autumn scarecrow note holder has both!

Step 3

Glue down you 2 black buttons for eyes.  Next, glue your orange heart button upside down for the nose.


Decorating your house for fall doesn't mean you have to sacrifice function for festive. This adorable autumn scarecrow note holder has both!

Step 4

Paint on the mouth as pictures using your black paint.


Decorating your house for fall doesn't mean you have to sacrifice function for festive. This adorable autumn scarecrow note holder has both!

Step 5

Paint the top of your craft sticks green for the hat as pictured.


Decorating your house for fall doesn't mean you have to sacrifice function for festive. This adorable autumn scarecrow note holder has both!

Step 6

Paint the perpendicular stick brown and allow paint to dry completely.

Tip:

  • If you do not have sealed craft sticks (mine were not) it may require a second coat of both green and brown paint.


Decorating your house for fall doesn't mean you have to sacrifice function for festive. This adorable autumn scarecrow note holder has both!

Step 7

Flip your scarecrow over.  Break the last craft stick in half and glue it to the back as pictured.  This helps to stabilize your scarecrow.


Decorating your house for fall doesn't mean you have to sacrifice function for festive. This adorable autumn scarecrow note holder has both!

Step 8

Glue on your clothespin being sure that it can be pressed open from the front of your scarecrow.


Decorating your house for fall doesn't mean you have to sacrifice function for festive. This adorable autumn scarecrow note holder has both!

Step 9

Next, glue your embellishments to the lower right side of the brim.  I layered 2 leaves and a dimensional acorn, but you can do it in any variety you like.


Decorating your house for fall doesn't mean you have to sacrifice function for festive. This adorable autumn scarecrow note holder has both!

Step 10

Glue on your length of burlap ribbon to hang it by and enjoy.

Note:

  • If you are concerned about the back of the scarecrow being “ugly” simply cut a piece of matching felt to size and glue it over top of the entire back.  Since it will be against the wall, I wasn’t concerned about it.

Decorating your house for fall doesn't mean you have to sacrifice function for festive. This adorable autumn scarecrow note holder has both!

This little guy is just too stinking cute!  You will love having him greet you on your wall every day.  Maybe he’ll even get you a little excited about your to-do list! (Or not, but either way you’ll have something adorable to look at.)

Don’t want the autumn craft fun to end?  Get more ideas here!

Affiliate links may be used in this post. Ordering a product through these links may result in a commission. Read the full disclosure here.

See where I’m linking up!


Save on Holiday Gifts and Prevent Overspending

Are you thinking about Christmas yet? I know it’s early.  Some of you may even be complaining about the Christmas items showing up in store already.  However, if you want to save on your holiday gifts and prevent overspending, you need to start planning now. Don’t get stuck with a mound of bills and buyer’s remorse during the new year. These easy tips will help get you on the right track to rock your holiday budget this year.

Last year the average family of four planned to spend over $600 on gifts for immediate family! Join the #DIYHolidayChallenge to save on holiday gifts and prevent overspending this season!

The Numbers

According to an article published last December on Mintlife.com “mothers expect[ed] to spend $224 on average for gifts for each child” and a similar amount on their spouses (How Much to Spend on Christmas Gifts for Kids by Mary Hiers).  For a family of four, that adds up to over $600!  That number doesn’t even include extended family, friends, and coworkers.  Also, that is just what the women surveyed planned to spend.  How many people do you know (or perhaps have had it happen to you) that have been remorseful of overspending after the holidays?  Planning early can help you avoid this because remorse has no place in a season that is supposed to be filled with joy and love.


[bctt tweet=”Save on your holiday gifts and prevent overspending by planning now with these tips! ” username=”diyadulation”]


Determine Your Total Budget

The first step in planning is determining your total holiday budget.  This step is crucial to preventing over-spending.  Before you buy any gifts or even brainstorm gift ideas, sit down and think about what you realistically have to spend on gifts.  If your budget looks too small to fulfill all of your gifting needs/obligations, don’t worry.  I can help you achieve an amazing holiday on a small budget.


Join the #DIYHolidayChallenge to save on holiday gifts and prevent overspending this season!

Allocate Funds

Once you determine what you truly have to spend, it is time to divide that total amount among all of the people on your list.  Obviously your immediate family is going to get more of the budget than friends or coworkers and that’s okay.  Don’t worry if you are staring at only five to spend on a friend.  Again, I can help you with that.


Plan for DIY Projects

The caveat is that a small budget requires early planning and often a lot of do-it-yourself ideas.  Lucky for you that you have a secret weapon: DIY Adulation.

Starting now, subscribers will have access to a VIP only holiday page that will have a new frugal DIY gift idea every Saturday!  This exclusive page will help you create beautiful, handmade gifts for every person on your list that they will actually want.  How do I know it can be done?  I know because I have been doing this for our family for years now.

The Challenge

Every year we have saved more and more on gifts.  This year’s goal is a $500 budget.  Yep, $500 for all of the 30 people on our shopping list.  Sign up for our newsletter and be a part of this holiday journey now with a free printable Holiday Gift Budget available only to subscribers.  You will also get to see our family’s budget at the end of the season to see if I achieve the $500 holiday goal!  Join the challenge and save on holiday gifts this year!

Make this your most joyous holiday season ever by avoiding the overspending remorse later.  You can do it and I’ll be here to help you along the way.

See where I’m linking up!


DIY Rustic Fall Door Wreath

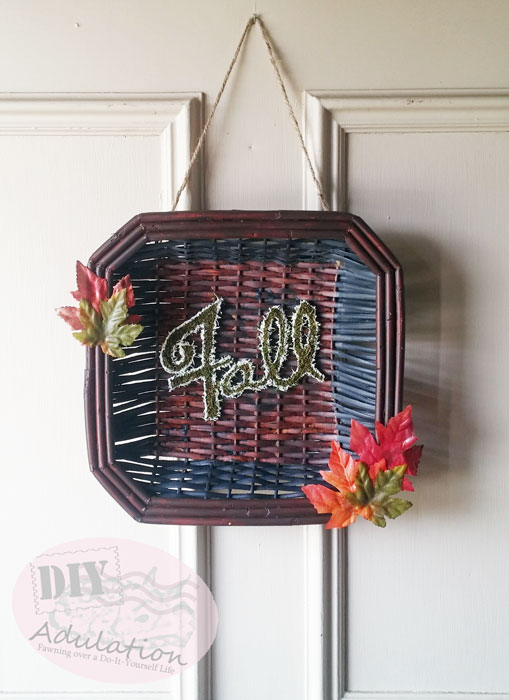
Do you hate your front door?  I seriously hate ours because it’s just so, “blah.”  I want to paint it but it has been so humid out that I’m worried about the paint drying properly and frankly, don’t really want to have the front door off the hinges right now.  However, just because the weather won’t cooperate doesn’t mean I have to continue to have an unattractive door.  This rustic fall door wreath spruces it up without paint (although it is definitely still getting painted) and it can do the same for your front door.

Affiliate links may be used in this post. Ordering a product through these links may result in a commission. Read the full disclosure here.

You won't believe how easy this DIY rustic fall wreath is to make! Check out the before and after!


[bctt tweet=”Check out this amazing before and after rustic fall wreath! #doordecor”]

Materials

You won't believe how easy this DIY rustic fall wreath is to make! Check out the before and after!

Step 1

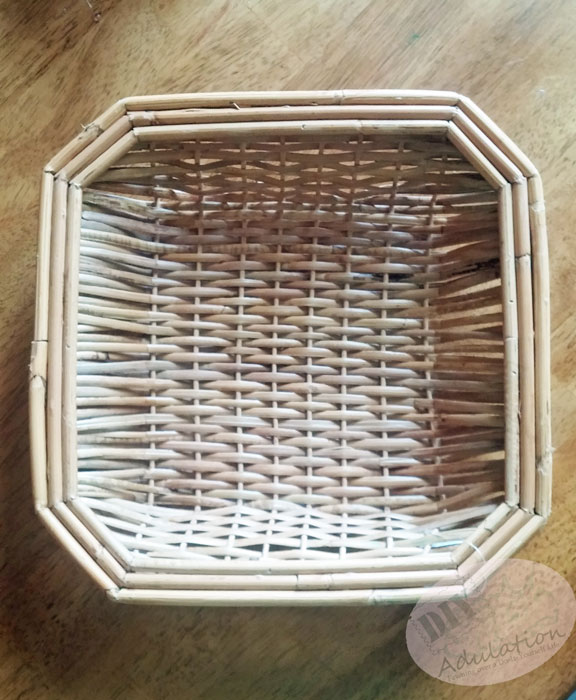
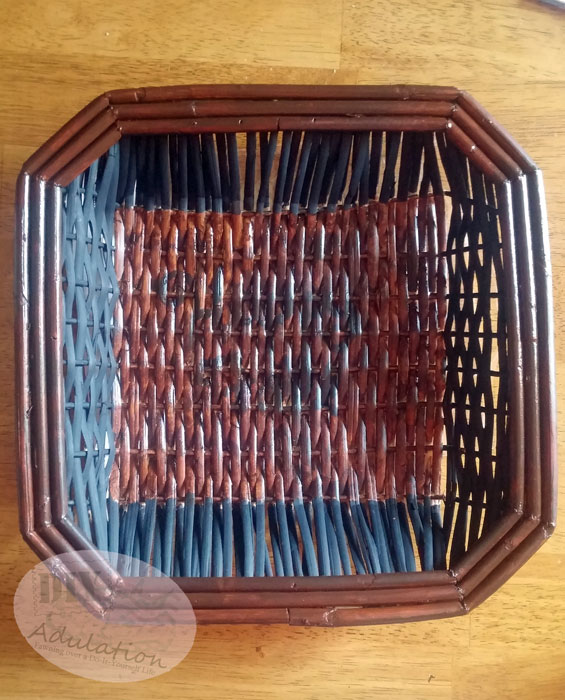
Prime your basket with a coat of sealer.


Step 2

Paint the inside edges black as pictured above.
 

You won't believe how easy this DIY rustic fall wreath is to make! Check out the before and after!

Step 3

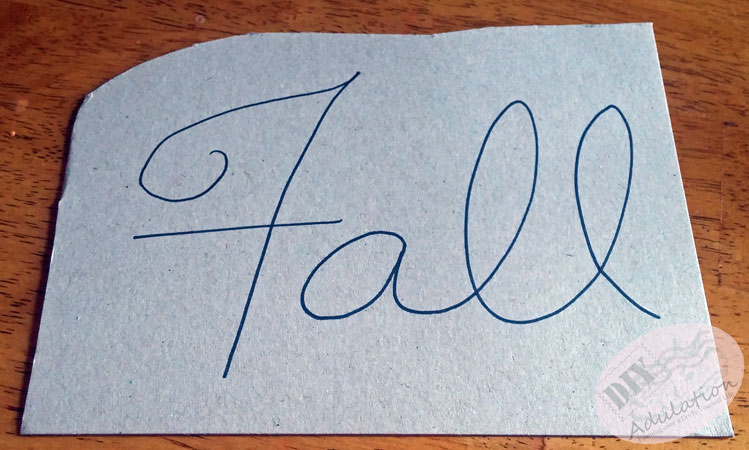
While paint is drying, create the word “fall” by writing it on a piece of cardboard.

You won't believe how easy this DIY rustic fall wreath is to make! Check out the before and after!

Tips:

  • I just used the cardboard insert from a pack of scrapbook paper.
  • If you don’t like your handwriting, I’ve included a copy of my freehand for you to print out and trace.

Step 4

Cut around the letter being sure to leave extra space on either side if your lines.

Tip:

  • These Tim Holtz scissors are perfect for tasks like this because they can cut evenly in the small nooks and crannies.
 

You won't believe how easy this DIY rustic fall wreath is to make! Check out the before and after!

Step 5

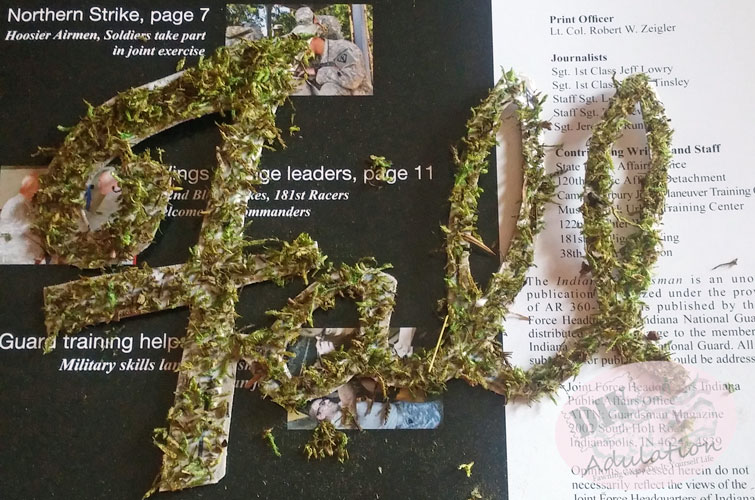
Generously coat the front of your word with the Mod Podge and then cover with mossy shreds.  Shake off the excess and return it to the container.
 

You won't believe how easy this DIY rustic fall wreath is to make! Check out the before and after!

Step 6

While the Mod Podge is drying, paint the inside bottom and outside trim of your basket with the burnt umber paint.


You won't believe how easy this DIY rustic fall wreath is to make! Check out the before and after!

Step 7

Once the first coat of Mod Podge has dried, apply a second generous coat over the moss and cover again as in step 5.  As before, shake off the excess and return to your container.


You won't believe how easy this DIY rustic fall wreath is to make! Check out the before and after!

Step 8

While the second coat of Mod Podge and moss is drying, flip over your basket and paint the entire back (except trim) black.  Paint the trim burnt umber to match the front side.

Step 9

Allow everything to dry and then look for areas that need touch ups.  You will likely need to touch up both the basket and the moss.


Step 10

To help your letters pop, apply a thin white outline of acrylic paint to your word.  The easiest way to do this is to dip your brush in the white paint and then touch the long sides of the bristles to the outside edges.


You won't believe how easy this DIY rustic fall wreath is to make! Check out the before and after!

Step 11

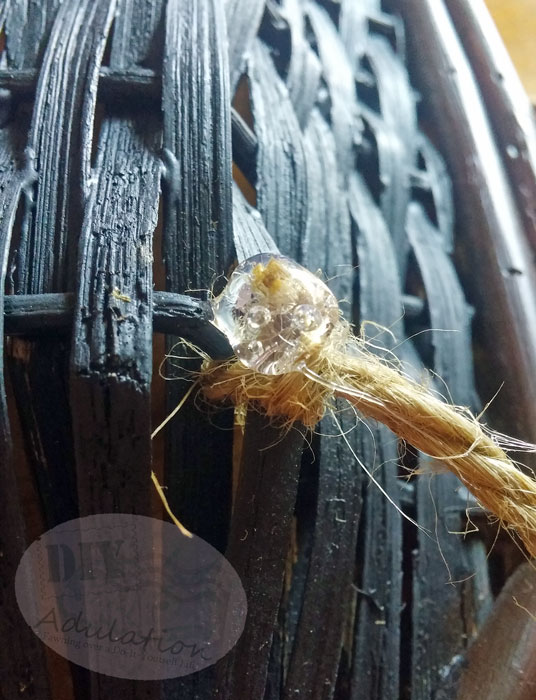
While the white paint is drying, attach your twine to the back of your basket by threading each end through the basket weave and knotting it.
You won't believe how easy this DIY rustic fall wreath is to make! Check out the before and after!

Tip:

  • To keep the edges of your rope from fraying and possibly coming loose in the future, add a dab of hot glue to the ends after you have knotted them.


You won't believe how easy this DIY rustic fall wreath is to make! Check out the before and after!

Step 12

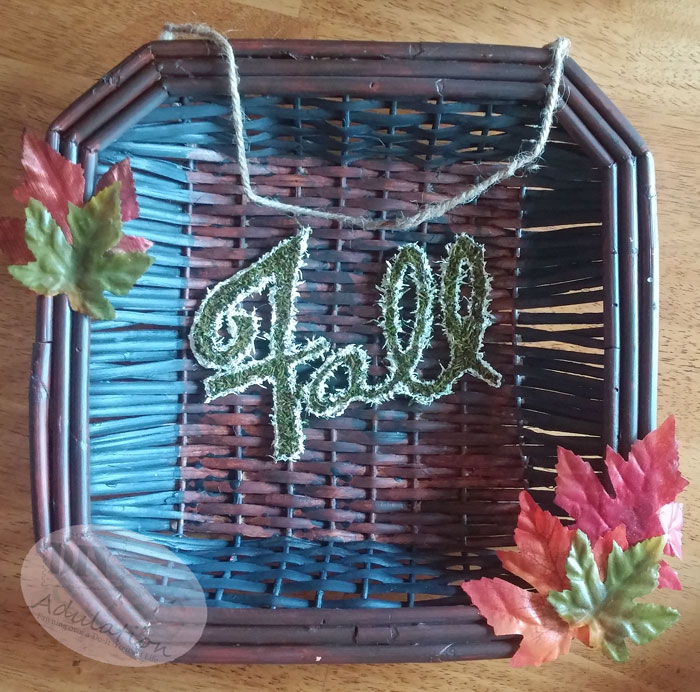
Apply your leaves to the front outside of edge of your basket.  Arrange them however you wish and secure with hot glue.  (I did 3 leaves of various sizes on the bottom right and 2 leaves on the top left.)


You won't believe how easy this DIY rustic fall wreath is to make! Check out the before and after!

Step 13

Once the paint has dried on your mossy word, flip it over and apply hot glue to all of the exposed cardboard.  (Think of it like writing the word again with glue to get the right coverage.)

You won't believe how easy this DIY rustic fall wreath is to make! Check out the before and after!

Tip:

  • To achieve the raised effect allow the glue to cool just slightly before pressing to the inside of the basket.

Step 14 (Optional)

Help protect your “wreath” by spraying the entire thing with a final coat of your sealant.  Then hang and enjoy!
 

You won't believe how easy this DIY rustic fall wreath is to make! Check out the before and after!


You won't believe how easy this DIY rustic fall wreath is to make! Check out the before and after!


You won't believe how easy this DIY rustic fall wreath is to make! Check out the before and after!

Do you love how this turned out as much as me?!  Plus it was extremely easy to work with the mossy shreds and there is still a ton left!  There will definitely be more mossy tutorials coming your way in the future.  Sign up for our newsletter so you don’t miss them!

See where I’m linking up!