14 DIY Succulent Planters + Merry Monday Link Party 150

Succulents are a great addition to your home for spring. Unfortunately, if you have a black thumb like me, the faux ones are the preferable way to add them. These 14 DIY succulent planters are the perfect way to dress up your home when you’re not great at taking care of houseplants. No matter what your décor style is you will find succulent ideas to suit your home. After you are done getting your DIY on, stick around and check out the Merry Monday link party!

These 14 DIY succulent planters are the perfect way to dress up your home when you’re not great at taking care of houseplants.


[bctt tweet=”These 14 DIY succulent planters are the perfect way to dress up your home! #diy #succulents” username=”diyadulation”]


These 14 DIY succulent planters are the perfect way to dress up your home when you’re not great at taking care of houseplants.

MCM Atomic Dish Planters (Vanessa at Gardening in the Shade)

These are the perfect planters if you love that 50’s sputnik style. Find out how to make your own atomic planters for succulents easily.


These 14 DIY succulent planters are the perfect way to dress up your home when you’re not great at taking care of houseplants.

Faux Succulent Mug Planter (Erlene at MyPinterventures)

You know I love all things coffee and that includes finding unique ways to add it to my décor. This mug planter is the perfect DIY décor to rock your coffee addiction!


These 14 DIY succulent planters are the perfect way to dress up your home when you’re not great at taking care of houseplants.

DIY Faux Succulent Wreath (Amanda at The Kolb Corner)

You won’t believe have crazy easy this wreath is to make. Add succulents to your door with this awesome DIY.


These 14 DIY succulent planters are the perfect way to dress up your home when you’re not great at taking care of houseplants.

DIY Gold Succulent Figurines (Chelc at Inside the Fox Den)

If you are looking for a glamorous way to add succulents to your décor then this is the DIY for you. It’s easy and perfect for year-round gorgeousness!


These 14 DIY succulent planters are the perfect way to dress up your home when you’re not great at taking care of houseplants.

DIY Americana Clay Pot Wreath (Shirley at Intelligent Domestications)

Rock your door décor with this gorgeous wreath. It is great for carrying your home all the way through July!


These 14 DIY succulent planters are the perfect way to dress up your home when you’re not great at taking care of houseplants.

Galvanized Bucket Hanging Succulent Planter (Michelle at Our Crafty Mom)

Word seriously cannot express how much I am in love with this succulent planter. This will definitely be making an appearance on our walls soon. It is so easy to make and a gorgeous piece of wall art!


These 14 DIY succulent planters are the perfect way to dress up your home when you’re not great at taking care of houseplants.

Mini Succulent Arrangements (Amy at My Life From Home)

How do you make something even more awesome? You make it mini! These mini succulent arrangements are a fantastic DIY to add a touch of green to your home.


These 14 DIY succulent planters are the perfect way to dress up your home when you’re not great at taking care of houseplants.

Dollar Store Faux Succulent Planters (Laurie at My Husband Has Too Many Hobbies)

Dollar store crafts are seriously the best! These beauties are easy to make and inexpensive.


These 14 DIY succulent planters are the perfect way to dress up your home when you’re not great at taking care of houseplants.

Succulent Stacker (Megan at Left in Knots)

Don’t have a lot of shelf space? These crocheted stacked pots are the perfect solution for you. Find out how to make the holder for your home today.


These 14 DIY succulent planters are the perfect way to dress up your home when you’re not great at taking care of houseplants.

DIY Faux Succulent Centerpiece (Emily at Two Purple Couches)

The dining room deserves some décor love during the year too. This easy DIY centerpiece is an easy way to dress up your spring table.


These 14 DIY succulent planters are the perfect way to dress up your home when you’re not great at taking care of houseplants.

DIY Faux Succulent Planter (Amanda at The Kolb Corner)

This succulent planter is so versatile there is no doubt that you will find the perfect place in your home to display it.


These 14 DIY succulent planters are the perfect way to dress up your home when you’re not great at taking care of houseplants.

Spring Floral Design Using Birch Bark (Penny at Penny’s Vintage Home)

How do you make succulents even better? You add some awesome birch bark to the planter. That is why I am so in love this gorgeous piece of DIY décor.


These 14 DIY succulent planters are the perfect way to dress up your home when you’re not great at taking care of houseplants.

DIY Faux Succulent Chalk Paint Planter (Angela at Organized and Simplified)

This succulent planter is perfect for making use of old jars you have lying around. It is also a fantastic way to add some farmhouse charm to your décor.


These 14 DIY succulent planters are the perfect way to dress up your home when you’re not great at taking care of houseplants.

Succulent Garden (Michelle at Our Crafty Mom)

Last but certainly not least is this gorgeous craft-stash buster. It looks perfect hanging on your wall or as a gorgeous centerpiece on your table.


These 14 DIY succulent planters are the perfect way to dress up your home when you’re not great at taking care of houseplants.

All of these 14 DIY succulent planters are super easy additions to your spring décor. After you’ve figured out which ones you are going to make come back and check out the Merry Monday link party. We love seeing what you share each week. Your creativity and useful tips are always inspiring. See you down there!

Don’t Forget to Pin It

These 14 DIY succulent planters are the perfect way to dress up your home when you’re not great at taking care of houseplants.

Easy DIY Golden Bunny Bank + An Easter Day Hack

This DIY golden bunny bank is super simple to make and so pretty. Add it to your Easter decor this year with the easy tutorial below!

Affiliate links may be used in this post. Ordering a product through these links may result in a commission at no extra cost to you. Read the full disclosure here.
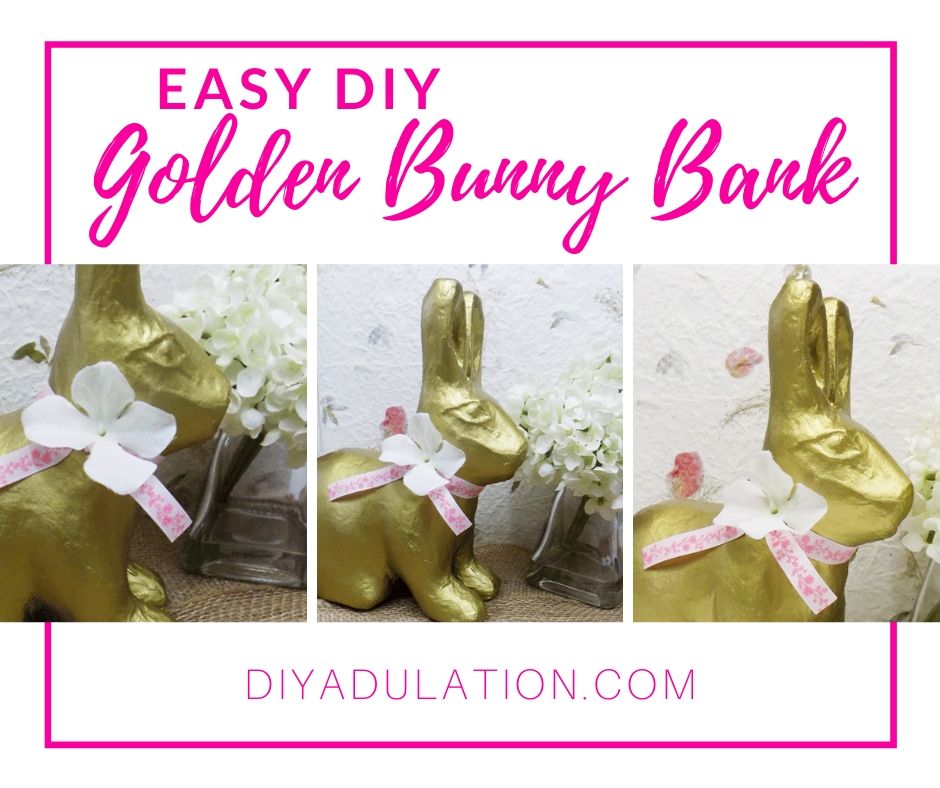
This easy DIY golden bunny bank is a gorgeous addition to your Easter décor. Find out how it can also make your Easter day easier!

[bctt tweet=”This easy DIY golden bunny bank is a gorgeous addition to your Easter décor! #diy #Easter” username=”diyadulation”]

As I’ve said before, our family has a weird obsession with banks. They are more than vessels to collect money in. Banks can make gorgeous home décor as well.

When designing new Easter décor I knew I wanted to do something with this adorable papier mache bunny I have. Once it occurred to me that it is hollow, turning it into a bank was the obvious choice.

This easy DIY golden bunny bank is a gorgeous addition to your Easter décor. It will also help feed your bank obsession!

 
This easy DIY golden bunny bank is a gorgeous addition to your Easter décor. Find out how it can also make your Easter day easier!

DIY Golden Bunny Bank Materials


This easy DIY golden bunny bank is a gorgeous addition to your Easter décor. Find out how it can also make your Easter day easier!

This easy DIY golden bunny bank is a gorgeous addition to your Easter décor. Find out how it can also make your Easter day easier!

Step 1

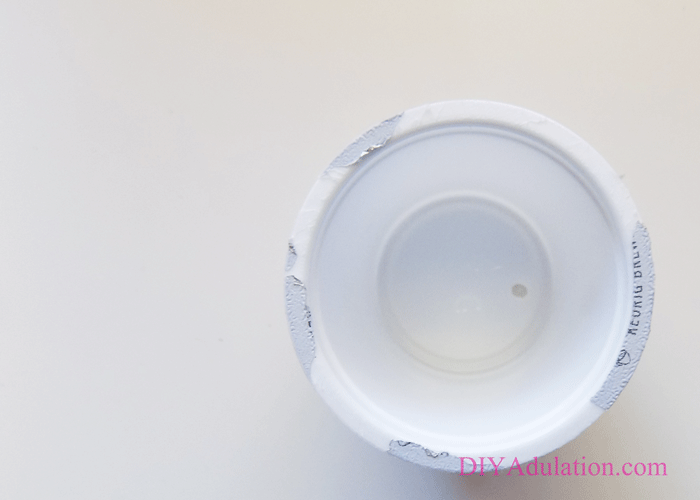
To start, prepare your K-Cup by removing the foil from the top from it as best as possible. Don’t worry about making it perfect, just enough to clean the inside. It will get trimmed off later.
 

This easy DIY golden bunny bank is a gorgeous addition to your Easter décor. Find out how it can also make your Easter day easier!

Step 2

Next, wash your K-Cup to remove any residue left over.
 

This easy DIY golden bunny bank is a gorgeous addition to your Easter décor. Find out how it can also make your Easter day easier!

Step 3

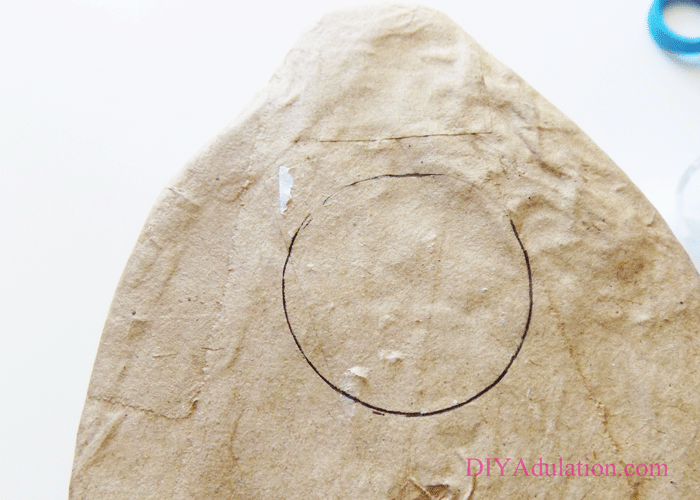
After you have cleaned your K-Cup, use the solid end to trace a circle on the bottom of your bunny. Make sure it is far enough in from the edges so that you don’t cut them later.


This easy DIY golden bunny bank is a gorgeous addition to your Easter décor. Find out how it can also make your Easter day easier!

Step 4

Next, cut out your circle using your box cutter.


This easy DIY golden bunny bank is a gorgeous addition to your Easter décor. Find out how it can also make your Easter day easier!

Step 5

File the edges of the cut circle with a fine file. If it is too course, it will only shred your bunny worse.

Tip:


This easy DIY golden bunny bank is a gorgeous addition to your Easter décor. Find out how it can also make your Easter day easier!

Step 6

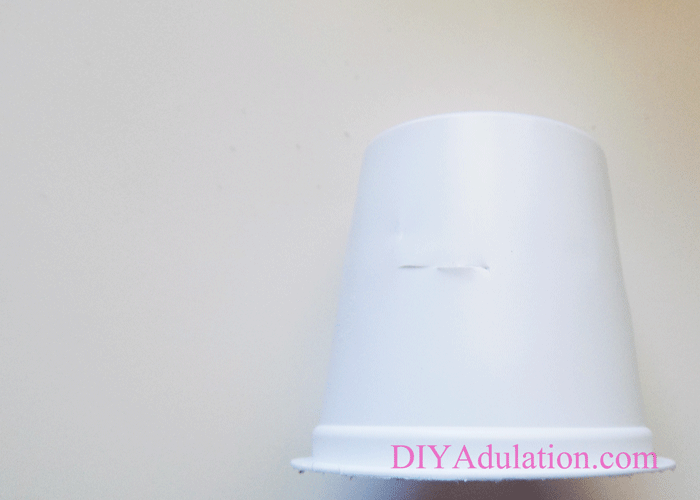
Next, push your K-Cup into the hole so that it is secure but don’t force it to hard. Mark the spot that the bunny comes to on the cup.

Step 7

Then pull the K-Cup out and cut along the mark you made.


This easy DIY golden bunny bank is a gorgeous addition to your Easter décor. Find out how it can also make your Easter day easier!

Step 8

Carefully melt the cut edge of your K-Cup with a lighter to create a small lip along the cut edge.


This easy DIY golden bunny bank is a gorgeous addition to your Easter décor. Find out how it can also make your Easter day easier!

Step 9

Next, check that the plug now sits flush in the opening. If it does, pull back out and place off to the side.
 

This easy DIY golden bunny bank is a gorgeous addition to your Easter décor. Find out how it can also make your Easter day easier!

Step 10

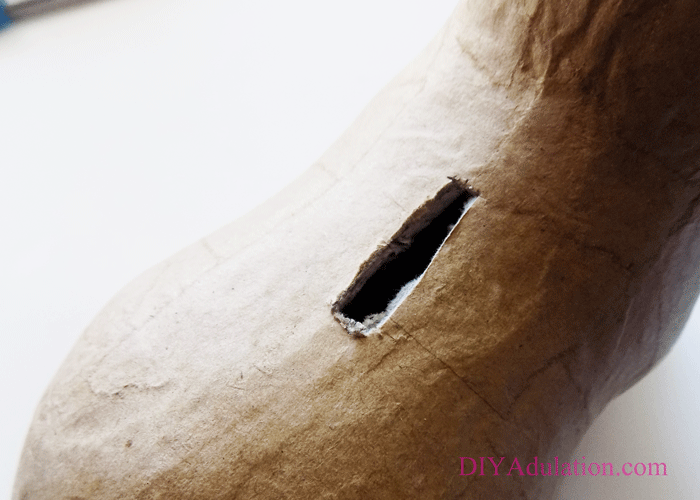
Then, turn your bunny over and cut a rectangular coin slot in the top.


This easy DIY golden bunny bank is a gorgeous addition to your Easter décor. Find out how it can also make your Easter day easier!

Step 11

Next, measure the slot to ensure that it is large enough for a large coin to fit through.

Tip:


This easy DIY golden bunny bank is a gorgeous addition to your Easter décor. Find out how it can also make your Easter day easier!

Step 12

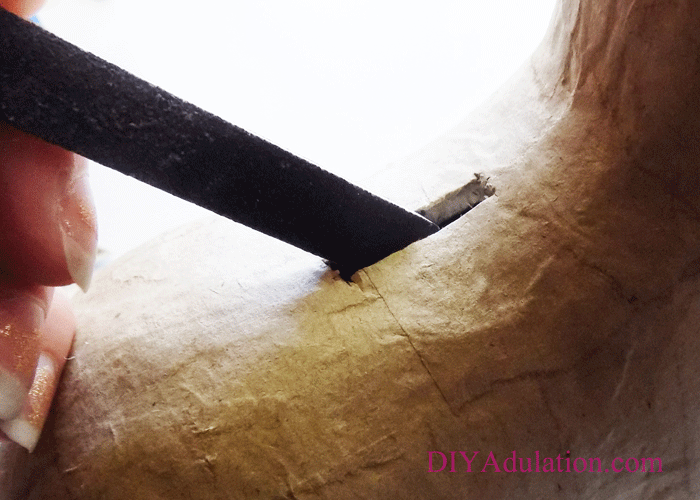
Once you know the coin slot is big enough, file the edges of the coin slot with your file.


This easy DIY golden bunny bank is a gorgeous addition to your Easter décor. Find out how it can also make your Easter day easier!

This easy DIY golden bunny bank is a gorgeous addition to your Easter décor. Find out how it can also make your Easter day easier!

Step 13

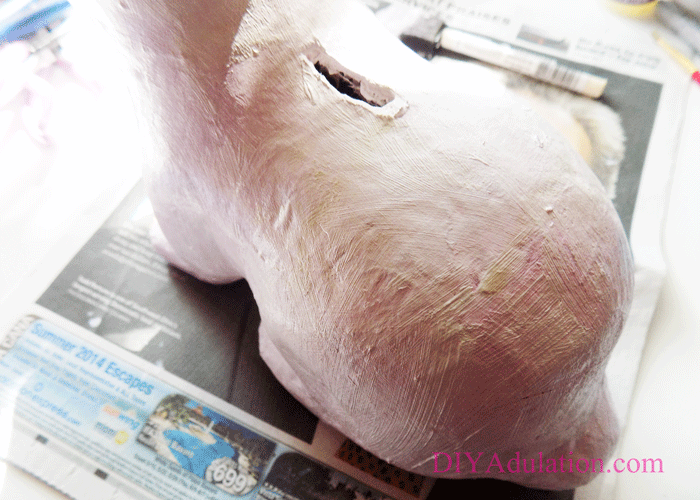
Now, cover your bunny with a coat of white acrylic paint. Allow the paint to dry.


This easy DIY golden bunny bank is a gorgeous addition to your Easter décor. Find out how it can also make your Easter day easier!

Step 14

After your white paint has dried, spray paint your bunny gold.

Tip:


This easy DIY golden bunny bank is a gorgeous addition to your Easter décor. Find out how it can also make your Easter day easier!

Step 15

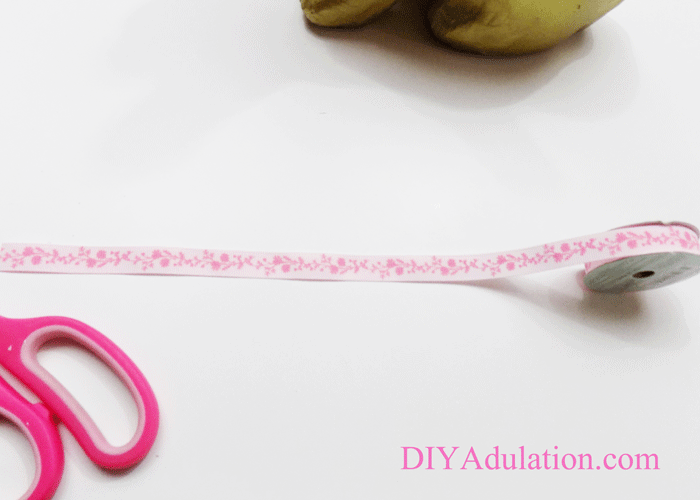
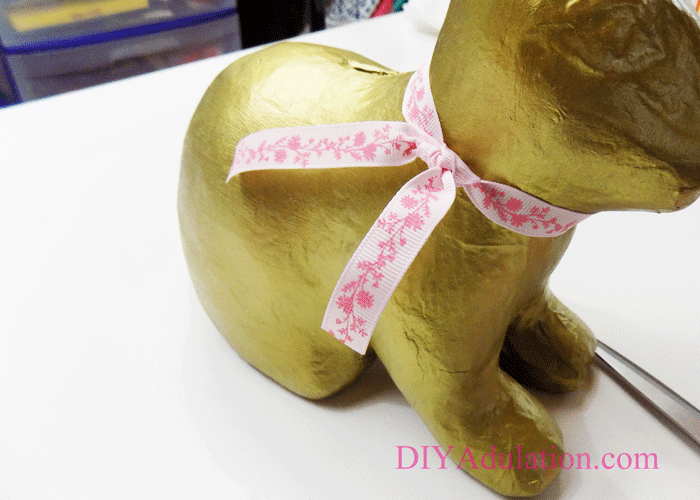
Next, cut a length of ribbon long enough to tie around the neck of your bunny.
 

This easy DIY golden bunny bank is a gorgeous addition to your Easter décor. Find out how it can also make your Easter day easier!

Step 16

Now, tie the ribbon around your bunny’s neck.
 

This easy DIY golden bunny bank is a gorgeous addition to your Easter décor. Find out how it can also make your Easter day easier!

Step 17

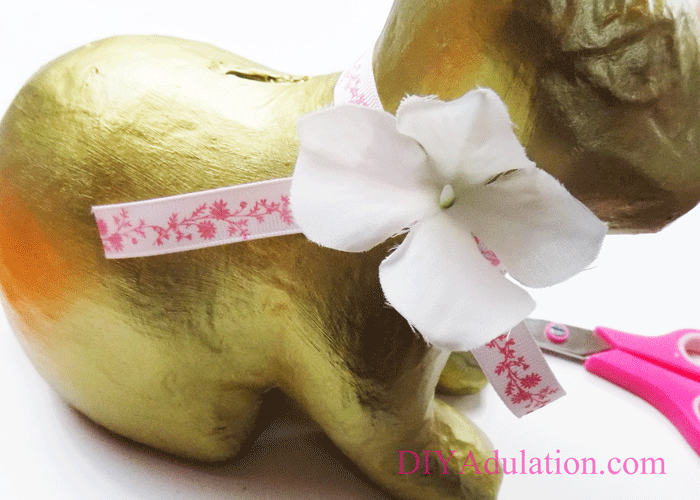
Next, tuck a small flower in the ribbon.

Step 18

Lastly, add the K-Cup plug back into the bottom of the bunny.


This easy DIY golden bunny bank is a gorgeous addition to your Easter décor. Find out how it can also make your Easter day easier!

Close Up of Gold Bunny next to Flowers with text overlay - Easy DIY Golden Bunny Bank - DIY Adulation

This easy DIY golden bunny bank is such a fantastic project to get your home Easter-ready. You can change it up to fit your décor style by changing up the paint color and ribbon.

A fun addition is to drop your spare change into the bank all month long. When Easter comes, you’ll have cash to put into the eggs for the Easter egg hunt! If you want even more fun bunny crafts, check out these 8 easy ones to satisfy your craft craving.

See where I’m linking up!

Don’t Forget to Pin It!

Gold Bunny next to Flowers with text overlay - Easy DIY Golden Bunny Bank - DIY Adulation


More Easter Tips and Tricks:

Upcycled Farmhouse Vignette Cloche

This month for the Thrift Store Decor Upcycle Challenge I am changing things up a little. This tutorial is a birthday gift for someone so I tried to capture the farmhouse look. The mix of textures in this upcycled farmhouse vignette cloche is so comforting and pretty. I hope you (and the birthday girl) love it as much as I do. Full disclaimer: there are a lot of steps to this tutorial but the end result is absolutely worth it.

Affiliate links may be used in this post. Ordering a product through these links may result in a commission at no extra cost to you. Read the full disclosure here.

Thrift Store Decor Upcycle Challenge

The Rules:

Meet the Hr5Sosts

Amanda | The Kolb Corner    Erlene | My Pinterventures    Kim | Made in a Day
Dru | Polka Dot Poplars    Maureen | Red Cottage Chronicles    Pili | Sweet Things
Shirley | Intelligent Domestications    Debra | Shoppe No. 5    Marie | DIY Adulation
Chelsea | The Johnsons Plus Dog    Jes | My DIY Envy    Ann | Duct Tape and Denim
Molly | Just a Little Creativity    Ashley | 3 Little Greenwoods    Kimm | Reinvented
Kim | Farmhouse Made    Victoria | Dazzle While Frazzled    Sara | Twelve on Main
Chelc | Inside the Fox Den    Sue | A Purdy Little House    Michelle | Our Crafty Mom
Sherry | Savvy Apron    Jennifer and Vicki | 2 Bees in a Pod    Lora | Craftivity Designs
Ali | Home Crafts By Ali    Denise | My Thrifty House    Colleen | Life on Kaydeross Creek
Toni | Small Home Soul    Jeanie | Create & Babble    Michelle | Michelle James Designs

Medina | Grillo Designs    Karen | Dragonfly & Lily Pads

Make sure you follow our board on Pinterest for more upcycled decor inspiration!


For this Thrift Store Decor Upcycle Challenge I am changing things up a little. The mix of textures in this upcycled farmhouse vignette cloche are gorgeous!


[bctt tweet=”The mix of textures in this upcycled farmhouse vignette cloche are gorgeous! #diy” username=”diyadulation”]


Upcycled Farmhouse Vignette Cloche Materials

For this Thrift Store Decor Upcycle Challenge I am changing things up a little. The mix of textures in this upcycled farmhouse vignette cloche are gorgeous!


For this Thrift Store Decor Upcycle Challenge I am changing things up a little. The mix of textures in this upcycled farmhouse vignette cloche are gorgeous!

For this Thrift Store Decor Upcycle Challenge I am changing things up a little. The mix of textures in this upcycled farmhouse vignette cloche are gorgeous!

Step 1

First, clean your cloche inside and out.

Tip:


For this Thrift Store Decor Upcycle Challenge I am changing things up a little. The mix of textures in this upcycled farmhouse vignette cloche are gorgeous!

For this Thrift Store Decor Upcycle Challenge I am changing things up a little. The mix of textures in this upcycled farmhouse vignette cloche are gorgeous!

Step 2

Next, cut the lip off of your small paper dessert plate.


For this Thrift Store Decor Upcycle Challenge I am changing things up a little. The mix of textures in this upcycled farmhouse vignette cloche are gorgeous!

Step 3

Add a coat of Mod Podge to your plate.


For this Thrift Store Decor Upcycle Challenge I am changing things up a little. The mix of textures in this upcycled farmhouse vignette cloche are gorgeous!

For this Thrift Store Decor Upcycle Challenge I am changing things up a little. The mix of textures in this upcycled farmhouse vignette cloche are gorgeous!

Step 4

Now cover your plate with your loose moss.


For this Thrift Store Decor Upcycle Challenge I am changing things up a little. The mix of textures in this upcycled farmhouse vignette cloche are gorgeous!

Step 5

Shake off the excess and return it to the container. Next, set your moss plate off to the side to dry.


For this Thrift Store Decor Upcycle Challenge I am changing things up a little. The mix of textures in this upcycled farmhouse vignette cloche are gorgeous!

Step 6

Paint a coat of white acrylic paint on your blocks.     

Tip:

Step 7

Allow the paint to dry completely before moving on.


For this Thrift Store Decor Upcycle Challenge I am changing things up a little. The mix of textures in this upcycled farmhouse vignette cloche are gorgeous!

Step 8

If needed, add a second coat of paint to the blocks.

Tip:


For this Thrift Store Decor Upcycle Challenge I am changing things up a little. The mix of textures in this upcycled farmhouse vignette cloche are gorgeous!

Step 9

After your moss plate has begun to dry, add a second coat of Mod Podge over the moss.

Tip:


For this Thrift Store Decor Upcycle Challenge I am changing things up a little. The mix of textures in this upcycled farmhouse vignette cloche are gorgeous!

Step 10

Next, cover the 2nd coat with moss.


For this Thrift Store Decor Upcycle Challenge I am changing things up a little. The mix of textures in this upcycled farmhouse vignette cloche are gorgeous!

Step 11

Shake off the excess again and return to the container. Set aside to allow the glue to dry completely.

Tip:


For this Thrift Store Decor Upcycle Challenge I am changing things up a little. The mix of textures in this upcycled farmhouse vignette cloche are gorgeous!

Step 12

Measure enough burlap to wrap around the outside of one of your single-coated blocks.


For this Thrift Store Decor Upcycle Challenge I am changing things up a little. The mix of textures in this upcycled farmhouse vignette cloche are gorgeous!

Step 13

Cut the burlap.


For this Thrift Store Decor Upcycle Challenge I am changing things up a little. The mix of textures in this upcycled farmhouse vignette cloche are gorgeous!

For this Thrift Store Decor Upcycle Challenge I am changing things up a little. The mix of textures in this upcycled farmhouse vignette cloche are gorgeous!

Step 14

Next, glue your burlap strip to the block.

Note:


For this Thrift Store Decor Upcycle Challenge I am changing things up a little. The mix of textures in this upcycled farmhouse vignette cloche are gorgeous!

For this Thrift Store Decor Upcycle Challenge I am changing things up a little. The mix of textures in this upcycled farmhouse vignette cloche are gorgeous!

Step 15

Trim the excess wrap and the excess at the bottom. Do not trim the lip from step 14.


For this Thrift Store Decor Upcycle Challenge I am changing things up a little. The mix of textures in this upcycled farmhouse vignette cloche are gorgeous!

Step 16

Next, cut 2-3 single flowers from your hydrangea.


For this Thrift Store Decor Upcycle Challenge I am changing things up a little. The mix of textures in this upcycled farmhouse vignette cloche are gorgeous!

Step 17

Then glue the single flowers to the top of your burlap block.


For this Thrift Store Decor Upcycle Challenge I am changing things up a little. The mix of textures in this upcycled farmhouse vignette cloche are gorgeous!

Step 18

Now, cover the flower stems with a small piece of the excess burlap you trimmed in step 15.


For this Thrift Store Decor Upcycle Challenge I am changing things up a little. The mix of textures in this upcycled farmhouse vignette cloche are gorgeous!

Step 19

Next, cover your 2nd single-coated block with cream yarn. Attach the yarn with hot glue.

For this Thrift Store Decor Upcycle Challenge I am changing things up a little. The mix of textures in this upcycled farmhouse vignette cloche are gorgeous!

Tip:


For this Thrift Store Decor Upcycle Challenge I am changing things up a little. The mix of textures in this upcycled farmhouse vignette cloche are gorgeous!

Step 20

Draw “No. 23” on the remaining block with your pencil.


For this Thrift Store Decor Upcycle Challenge I am changing things up a little. The mix of textures in this upcycled farmhouse vignette cloche are gorgeous!

Step 21

Carefully cover your pencil drawing with Mod Podge.

Tip:

Step 22

Allow all of your elements to dry completely before moving on.


For this Thrift Store Decor Upcycle Challenge I am changing things up a little. The mix of textures in this upcycled farmhouse vignette cloche are gorgeous!

For this Thrift Store Decor Upcycle Challenge I am changing things up a little. The mix of textures in this upcycled farmhouse vignette cloche are gorgeous!

Step 23

Lastly, attach your blocks to the center of your moss plate as pictured.

For this Thrift Store Decor Upcycle Challenge I am changing things up a little. The mix of textures in this upcycled farmhouse vignette cloche are gorgeous!

Note:


For this Thrift Store Decor Upcycle Challenge I am changing things up a little. The mix of textures in this upcycled farmhouse vignette cloche are gorgeous!

For this Thrift Store Decor Upcycle Challenge I am changing things up a little. The mix of textures in this upcycled farmhouse vignette cloche are gorgeous!

For this Thrift Store Decor Upcycle Challenge I am changing things up a little. The mix of textures in this upcycled farmhouse vignette cloche are gorgeous!

For this Thrift Store Decor Upcycle Challenge I am changing things up a little. The mix of textures in this upcycled farmhouse vignette cloche are gorgeous!

For this Thrift Store Decor Upcycle Challenge I am changing things up a little. The mix of textures in this upcycled farmhouse vignette cloche are gorgeous!

Once your farmhouse vignette is completed, place it in the center of your cloche and replace the lid. This allows you to change your vignette out seasonally if desired. If you want to make the vignette semi-permanent (or less-susceptible to bumps) place a Zot between the cloche base and vignette plate. Don’t forget to check out what my friends create this month after you’ve made your own upcycled farmhouse vignette cloche!

See where I’m linking up!


And now for more thrifty goodness!

Check out what my fellow upcyclers created below!