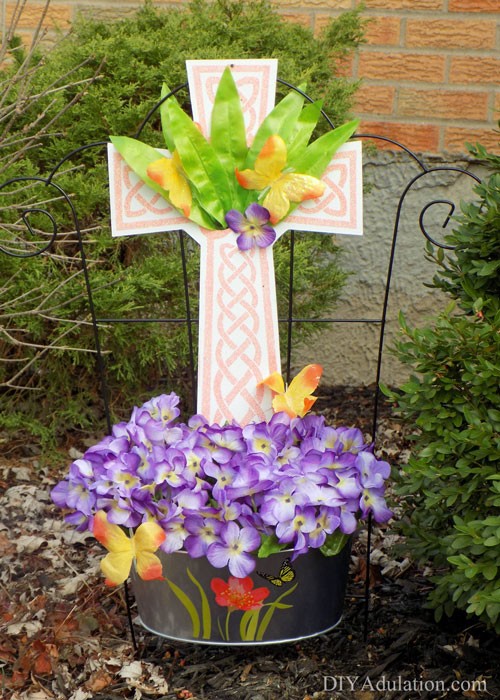
Thank you so much for joining me in this blog hop today! I’ve teamed up with 11 other extremely talented bloggers to share our Easter crafts on a budget, like my DIY Easter trellis. Each of us was given a budget of no more than $10 and challenged to create an Easter inspired craft using items from the dollar store or dollar section of our local stores. If you have any budget friendly Easter crafts to share, please add it to the link-up at the bottom of this post so it can be seen on all of our blogs!
Meet the Hosts!

[bctt tweet=”I’ve teamed up with 11 extremely talented bloggers to share budget Easter crafts, like this DIY trellis. #Easter”]
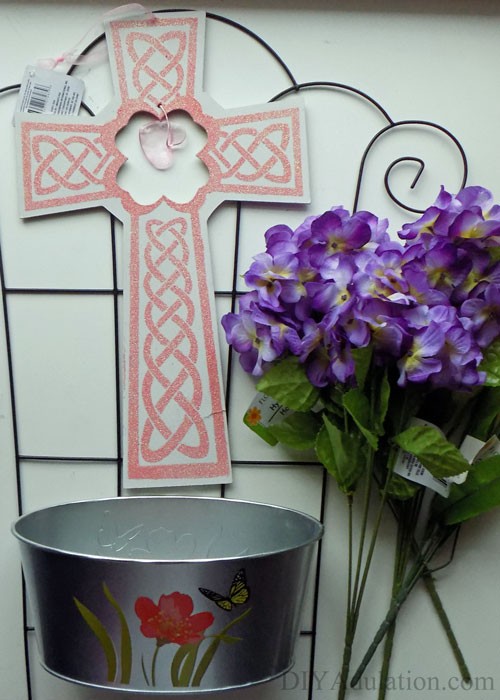
Dollar Store DIY Easter Trellis Materials
*All of these materials came from the dollar store with the exception of the glue gun and grocery bags.
- Trellis
- Metal Decorative Planter
- 3 Bunches of Flowers
- 1 Bunch of Butterflies
- Decorative Cross
- Hot Glue Gun and Glue Sticks
- Plastic Grocery Bags

Step 1
Remove the tags from all of your materials. (Don’t forget the sticker on the bottom of your planter.)

Step 2
Cut the stems of your flowers as pictured above.
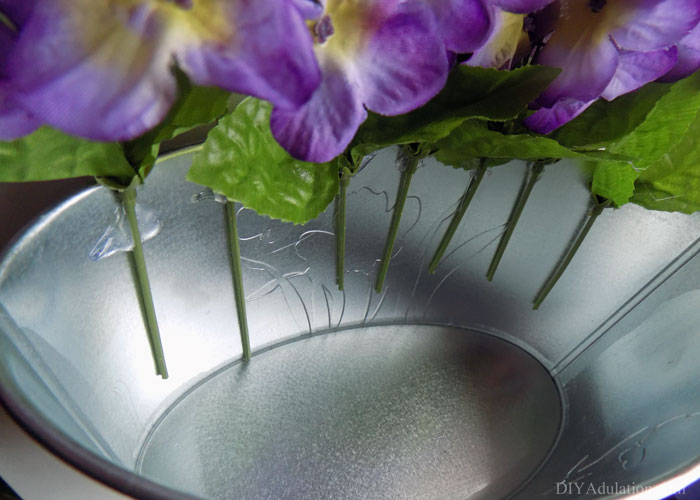
Step 3
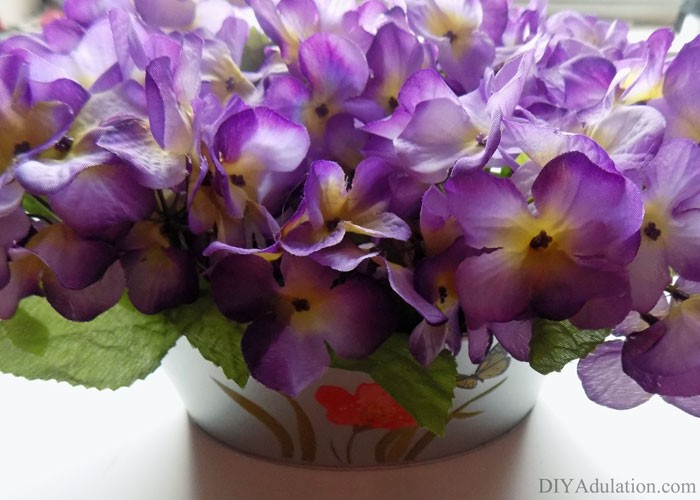
Begin gluing your flowers to the inside edge of your planter. Continue until the entire circumference of your planter is lined with flowers.


Step 4
Stuff your plastic bags into the center of your planter and flowers.

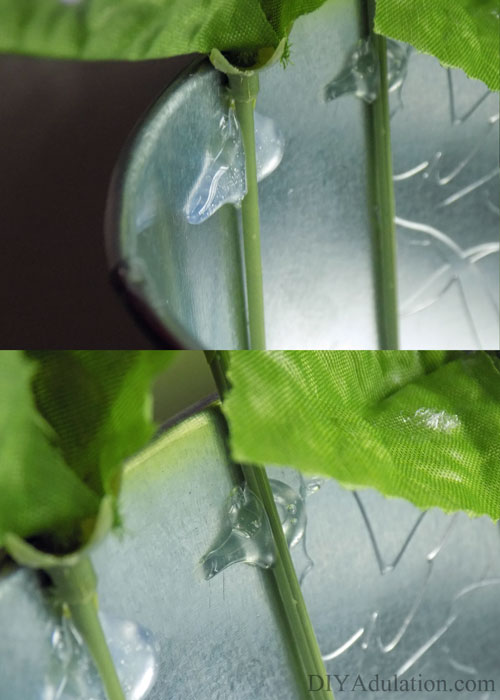
Step 5
Fill out the center of your planter by placing hot glue on the stems of your remaining flowers (one at a time) and angling them into your planter to fill gaps. Continue until you have filled the planter.

Step 6
Once your glue has dried, fluff your flowers to create a full planter. Set your flower-filled planter to the side.

Step 7
Remove the ribbon and heart from your cross.

Step 8
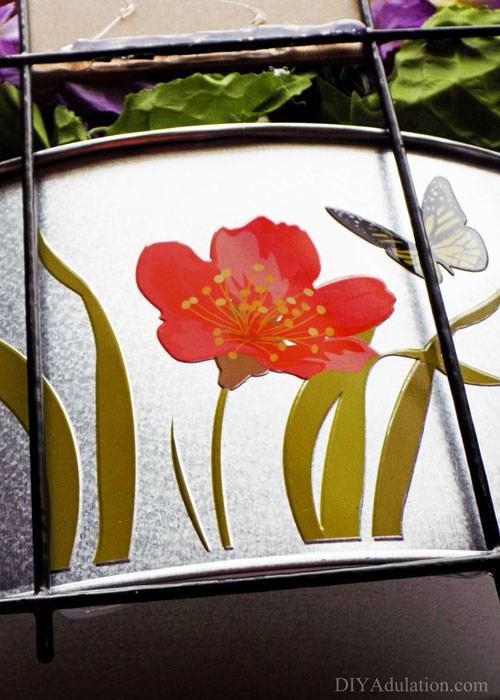
Glue your cross to your trellis, aligning the top of the cross with the top of your trellis.

Step 9
Remove the butterflies and leaves from their bunch.

Step 10
Place the stems of your leaves through the center of your cross as pictured and secure with glue.
Tip:
- Be sure to fan out the leaves to give them the appearance of fronds.
Step 11
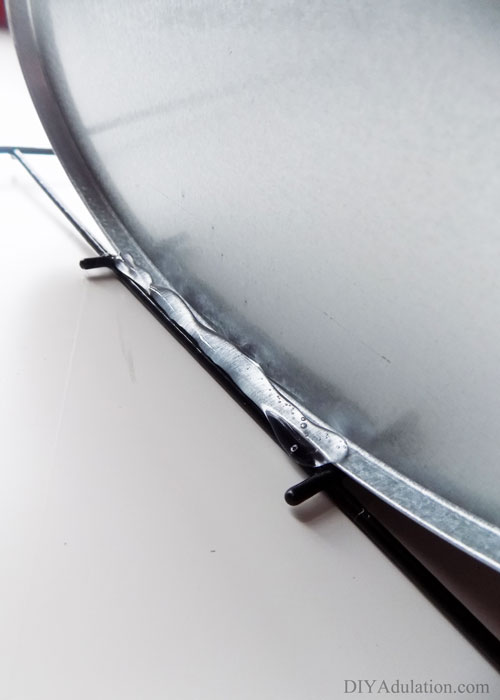
Glue your planter to the bottom of your trellis, with the lip of the planter resting on the bottom wire of the trellis.
Tip:
- This will take a lot of glue. You want to be sure it will stay.

Step 12
Glue some butterflies to the leaves in the center of your cross.
Tip:
- If you want, you can remove one flower from your planter and glue it to the leaves as I did in the pictures.

Step 13
Lastly, add a couple of butterflies to the planter. Once all of your glue is dry, place your trellis in your garden and enjoy.