Easy Homemade Caramel Candies for Christmas

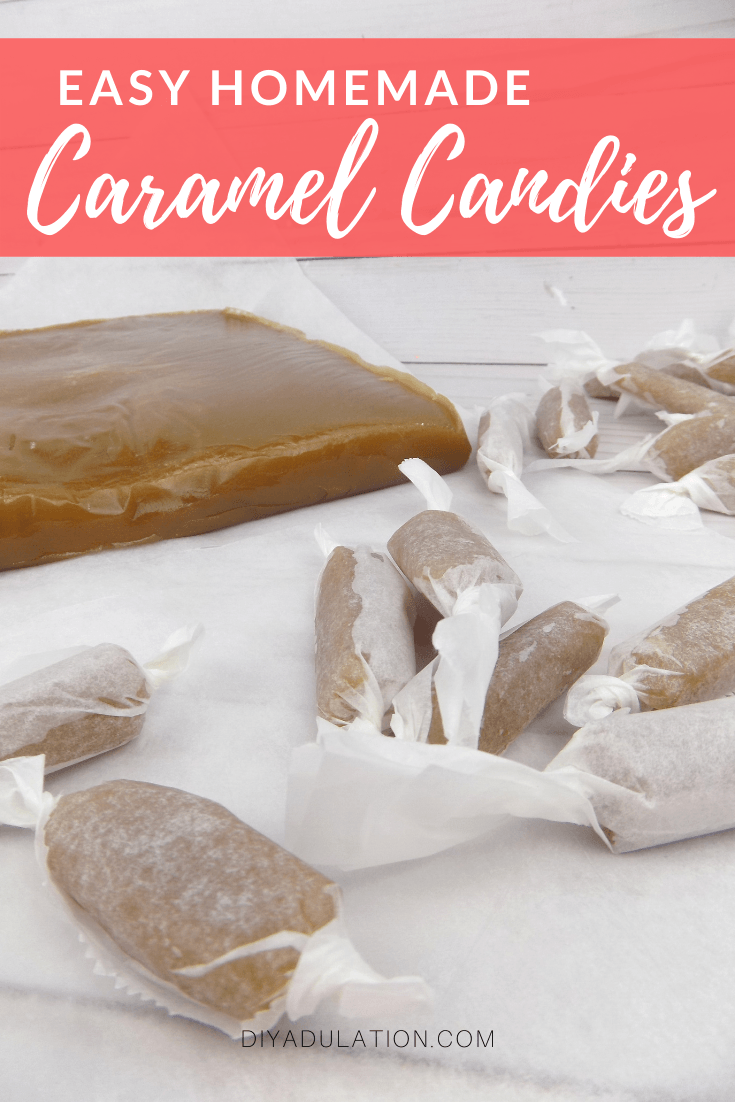
Indulgent desserts are a quintessential part of holiday entertaining. Do you need a delicious treat to serve for this year’s Christmas celebration? If so, you definitely need to check out these easy homemade caramel candies! They are totally yummy and way less expensive than store bought caramels.

This post is sponsored by Dixie Crystals Sugar. All ideas and opinions are my own. In addition, affiliate links may be used in this post. Ordering a product through these links may result in a commission at no extra cost to you. Read the full disclosure here.

Wrapped Caramel Candies with text overlay - Easy Homemade Caramel Candies

Don’t forget to check out the kickoff post, 50+ Ideas to Jump Start Your Holidays, to see the schedule for all of the 12 Days of Holiday Ideas Blog Hop. Plus get inspired for your holiday season with DIY projects, recipes, and games while you’re there!

[bctt tweet=”It’s time to get your Christmas cooking on! Your friends and family are seriously going to love these easy homemade caramel candies for Christmas!” username=”diyadulation”]

Close up of Hand Holding Caramel with Bite Out of It

I seriously can’t get enough caramel deliciousness during the holidays. My mom occasionally surprises us with awesome homemade chocolate caramel candy bars and they’re amazing. Luckily, even when she isn’t in the mood to slave away in the kitchen (and I totally don’t blame her) I can still get my caramel fix with these delicacies.

In addition to being the perfect treat to serve at any holiday party, they’re also a great way to save on stocking stuffers for your family. One batch makes a ton of caramels and they’re the perfect individually wrapped treat to top off those accessories hanging by the fireplace.

Lastly, of course, they also are an easy and budget-friendly gift idea for hostesses and teachers during the holiday season. Now it’s time to find out just how easy they are to make with the step-by-step recipe below.


Close up of Wrapped Caramels with Caramel Slab in Background

Homemade Caramel Candies Ingredients

Step 1

First, prepare a 9×13 inch glass baking dish by lining it with a sheet of parchment paper. Then set your dish aside.

Step 2

Next, cube your sticks of butter and toss them in a large sauce pot.

Step 3

Add your heavy whipping cream, light corn syrup, brown sugar, and granulated sugar to your sauce pan and put it on the stove over medium-high heat.

Step 4

Stir all of the ingredients in your pot together over the heat.

Step 5

Continue stirring your mixture constantly while heating until the mixture reaches 240° Fahrenheit. If you don’t have a candy thermometer, stir continually for 35 to 40 minutes until large bubbles regularly appear in the mixture.

Step 6

Then remove your mixture from the heat and immediately stir in your vanilla extract.

Step 7

Immediately transfer your mixture to your parchment lined baking dish and then set aside to cool completely.

Step 8

Once your caramel is cooled, refrigerate for 1 hour.

Step 9

Then pull out your caramel and cut into small pieces with a butter knife.


Wrapped Caramels next to Caramel Slab

Step 10

Finally wrap your caramels in pieces of parchment paper and twist the ends to seal.


Close up of Hand Holding Caramel with Caramel Slab in Background with text overlay - Easy Homemade Caramel Candies


Yield: 150-300 Caramels

Easy Homemade Caramel Candies

Wrapped Caramels next to Caramel Slab
Cook Time 35 minutes
Additional Time 2 hours
Total Time 2 hours 35 minutes

Ingredients

  • 1 Cup Unsalted Butter
  • 4 Cups Light Brown Sugar
  • 2 Cups White Granulated Sugar
  • 2 Cups Light Corn Syrup
  • 1.5 Cups Heavy Whipping Cream
  • 3 Tsp. Vanilla Extract

Instructions

  1. First, prepare a 9x13 inch glass baking dish by lining it with a sheet of parchment paper. Then set your dish aside.
  2. Next, cube your sticks of butter and toss them in a large sauce pot.
  3. Add your heavy whipping cream, light corn syrup, brown sugar, and granulated sugar to your sauce pan and put it on the stove over medium-high heat.
  4. Stir all of the ingredients in your pot together over the heat.
  5. Continue stirring your mixture constantly while heating until the mixture reaches 240° Fahrenheit. If you don’t have a candy thermometer, stir continually for 35 to 40 minutes until large bubbles regularly appear in the mixture.
  6. Then remove your mixture from the heat and immediately stir in your vanilla extract.
  7. Immediately transfer your mixture to your parchment lined baking dish and then set aside to cool completely.
  8. Once your caramel is cooled, refrigerate for 1 hour.
  9. Then pull out your caramel and cut into small pieces with a butter knife.
  10. Finally wrap your caramels in pieces of parchment paper and twist the ends to seal.
Your friends and family are seriously going to love these easy homemade caramel candies for Christmas! Whip up a batch this week and be ready for every celebration this season… actually, you may want to make 2 batches so you have one to enjoy at home and one to give away. Now it’s time to check out the other amazing desserts from my awesome blogging friends at the link up below. Don’t forget that there’s still time to enter our holiday giveaway too. Find all the details you need under the link up!

Check out Dixie Crystals Sugar on Facebook, Twitter, and Instagram!

See where I’m linking up!

Don’t Forget to Pin It!

Wrapped Caramel Candies with Caramel Slab in Background with text overlay - Easy Homemade Caramel Candies

You are invited to the Inlinkz link party!

Click here to enter


We have a BIG GIVEAWAY from our Sponsors this year!

Giveaway begins Nov. 8, 2019 and ends Dec. 6, 2019. Winners will be notified by December 13, 2019. Sponsors will ship each prize to the winner. There will be a total of seven winners, one for each prize. Drawing is by random selection using the Rafflecopter widget. 

Must be 18 to win. Open to U.S. residents only.

a Rafflecopter giveaway

Cheddar Bacon and Broccoli Pinwheels

It happened again… with all of the chaos of the holidays you completely forgot about making the dish for the party tonight! Instead of dropping by the store for that container of cookies again, whip up these cheddar bacon and broccoli pinwheels. They’re quick, easy, and a sure-fire crowd pleaser!

Affiliate links may be used in this post. Ordering a product through these links may result in a commission at no extra cost to you. Read the full disclosure here.

Collage of Photos of Pinwheels with text overlay - Cheddar Bacon and Broccoli Pinwheels

Don’t forget to check out the kickoff post, 50+ Ideas to Jump Start Your Holidays, to see the schedule for all of the 12 Days of Holiday Ideas Blog Hop. Plus get inspired for your holiday season with DIY projects, recipes, and games while you’re there!


Close Up of Stack of Cheddar Bacon and Broccoli Pinwheels

[bctt tweet=”Looking for a super easy and totally tasty appetizer for your next pot luck? Check out these delicious cheddar bacon and broccoli pinwheels!” username=”diyadulation”]

I’ve totally been there more times than I care to admit. I’m crazy organized with my lists and planners but somehow, the big family Christmas pot luck falls through the cracks. It’s not that I forget about the event, only the cooking of the dish.

Then I run out of time and pick up something pre-made at the grocery store on the way there. I don’t know what it is about this particular task but I never seem to stick it in my brain. This year, I’m totally ready with these delicious cheddar bacon and broccoli pinwheels.

Luckily, they’re so easy to make, even if you’re not prepared (like I usually am not) you can easily whip up a batch to take with you. Even better? Everyone will absolutely love them!

Cheddar Bacon and Broccoli Pinwheels Ingredients

Step 1

First, preheat your oven to 350° Fahrenheit and line a baking sheet with parchment paper. Set your baking sheet aside.


Close Up of Chopped Broccoli Florets

Step 2

Next, coarsely chop your broccoli florets and toss into a medium-sized mixing bowl.

Step 3

Add your sour cream, bacon bits, and shredded cheese to the mixing bowl and fold with a spatula until well-combined.


Close Up of Ingredients Mixed in Bowl

Step 4

Then add in a pinch of salt and pepper and fold into the mixture. Set mixture aside.

Step 5

On a separate piece of parchment paper (or other non-stick surface) roll out one can of crescent rolls dough.

Step 6

Next, pinch the seams of the crescent dough together so that there are no seams.


Close Up of Mixture Spread on Flat Dough

Step 7

Spread half of your sour cream mixture in an even layer on your crescent dough.


Rolled Dough on Parchment Paper

Step 8

Then roll your dough up starting with the long edge closest to you.


Sliced Dough on Parchment Paper

Step 9

Next, cut your rolled dough into 1/4 to 1/2 inch wide sections.

Step 10

Repeat steps 5 through 9 with your second can of crescent dough.

Step 11

Place your dough rolls on the parchment-lined baking sheet 2 inches apart.

Step 12

Bake for 13 minutes.


Close Up of Cheddar Bacon and Broccoli Pinwheels on Wire Rack

Step 13

Allow your pinwheels to cool on the baking sheet for 2 minutes and then transfer them to a cooling rack. This keeps them from falling apart when you transfer them to the rack.


Hand Holding Cheddar Bacon and Broccoli Pinwheel

Close up of Stack of Pinwheels with text overlay - Cheddar Bacon and Broccoli Pinwheels


Yield: 40 Pinwheels

Cheddar Bacon and Broccoli Pinwheels

Close Up of Stack of Cheddar Bacon and Broccoli Pinwheels
Prep Time 10 minutes
Cook Time 13 minutes
Total Time 23 minutes

Ingredients

  • 1.5 Cups Fresh Broccoli Florets
  • 8 oz. Light Sour Cream
  • 2.5 oz. Real Bacon Bits
  • 1 Cup Shredded Mild Cheddar Cheese
  • Pinch of Salt and Black Pepper
  • 2 Cans Crescent Rolls

Instructions

  1. First, preheat your oven to 350° Fahrenheit and line a baking sheet with parchment paper. Set your baking sheet aside.
  2. Next, coarsely chop your broccoli florets and toss into a medium-sized mixing bowl.
  3. Add your sour cream, bacon bits, and shredded cheese to the mixing bowl and fold with a spatula until well-combined.
  4. Then add in a pinch of salt and pepper and fold into the mixture. Set mixture aside.
  5. On a separate piece of parchment paper (or other non-stick surface) roll out one can of crescent rolls dough.
  6. Next, pinch the seams of the crescent dough together so that there are no seams.
  7. Spread half of your sour cream mixture in an even layer on your crescent dough.
  8. Then roll your dough up starting with the long edge closest to you.
  9. Next, cut your rolled dough into 1/4 to 1/2 inch wide sections.
  10. Repeat steps 5 through 9 with your second can of crescent dough.
  11. Place your dough rolls on the parchment-lined baking sheet 2 inches apart.
  12. Bake for 13 minutes.
  13. Allow your pinwheels to cool on the baking sheet for 2 minutes and then transfer them to a cooling rack.

Nutrition Information:

Yield:

40

Serving Size:

1 Pinwheel

Amount Per Serving: Calories: 66
Serve these delicious cheddar bacon and broccoli pinwheels on their own or mix up some ranch sour cream for dipping. No matter what, they’re crazy tasty and so easy to make that you can whip them up in time for your next pot luck! Now it’s time to check out some more awesome pot luck recipes from my friends at the link up below!

See where I’m linking up!

Don’t Forget to Pin It!

Close up of Stack of Pinwheels with text overlay - Cheddar Bacon and Broccoli Pinwheels

You are invited to the Inlinkz link party!

Click here to enter


We have a BIG GIVEAWAY from our Sponsors this year!

Giveaway begins Nov. 8, 2019 and ends Dec. 6, 2019. Winners will be notified by December 13, 2019. Sponsors will ship each prize to the winner. There will be a total of seven winners, one for each prize. Drawing is by random selection using the Rafflecopter widget. 

Must be 18 to win. Open to U.S. residents only.

a Rafflecopter giveaway

Printable Family Christmas Bucket List

You have likely made summer bucket lists with your kiddos during the long break, but have you ever enjoyed a Christmas one? If not, this is the year to try it because I’m making it easier than ever with this printable Family Christmas Bucket List!

Affiliate links may be used in this post. Ordering a product through these links may result in a commission at no extra cost to you. Read the full disclosure here.

Collage of Bucket List Printables and Snowman with Stick Arms with text overlay - Printable Family Christmas Bucket List

Don’t forget to check out the kickoff post, 50+ Ideas to Jump Start Your Holidays, to see the schedule for all of the 12 Days of Holiday Ideas Blog Hop. Plus get inspired for your holiday season with DIY projects, recipes, and games while you’re there!

[bctt tweet=”Start a new tradition or refresh some old ones as a family with this free printable Family Christmas Bucket List! A few quality activities go a long way.” username=”diyadulation”]

Normally, our Advent Calendar is full of fun family activities which has always negated the need for a family bucket list. As you know, though, this year we’re doing it a little differently. That’s why I wanted to create this awesome printable bucket list. It’s the perfect way to make sure that we still spend time together as a family enjoying some of our favorite holiday activities.

If you do gifts for your Advent or simply want more reasons to slow down and spend time together as a family this season, grab the free printable Family Christmas Bucket List below and get ready for tons a family holiday fun!


Printable Family Christmas Bucket List

Printable Family Christmas Bucket List

Click on the image or heading above to download your free printable. Make sure you save a copy to your computer before printing. It won’t always let you print it out directly from the drive.

Fill It Out Together

Don’t feel the need to fill out every blank line. Over-stuffing your schedule will only lead to disappointment. One of the best and most important parts of a Family Christmas Bucket List is to fill it out together. Not only is it more quality time together, it also ensures that there will be something on the list that everyone will enjoy.

If this is your first year doing a Christmas Bucket List, let each family member pick 1 or 2 activities and leave it at that. If you need some ideas, here are 40 to get you started. They are included in the printable, too, so that you can discuss them with your family later.

Bucket List Activity Ideas


Snowman with Stick Arms with text overlay - Printable Family Christmas Bucket List

Start a new tradition or refresh some old ones as a family this holiday season with this free printable Family Christmas Bucket List! Don’t forget to fill it out together as a family and don’t try to over-commit. A few quality activities go a long way. Get the rest of your holiday in order with the other awesome printables from my friends below!

See where I’m linking up!

Don’t Forget to Pin It!

Snowman with Stick Arms with text overlay - Printable Family Christmas Bucket List

You are invited to the Inlinkz link party!

Click here to enter


We have a BIG GIVEAWAY from our Sponsors this year!

Giveaway begins Nov. 8, 2019 and ends Dec. 6, 2019. Winners will be notified by December 13, 2019. Sponsors will ship each prize to the winner. There will be a total of seven winners, one for each prize. Drawing is by random selection using the Rafflecopter widget. 

Must be 18 to win. Open to U.S. residents only.

a Rafflecopter giveaway