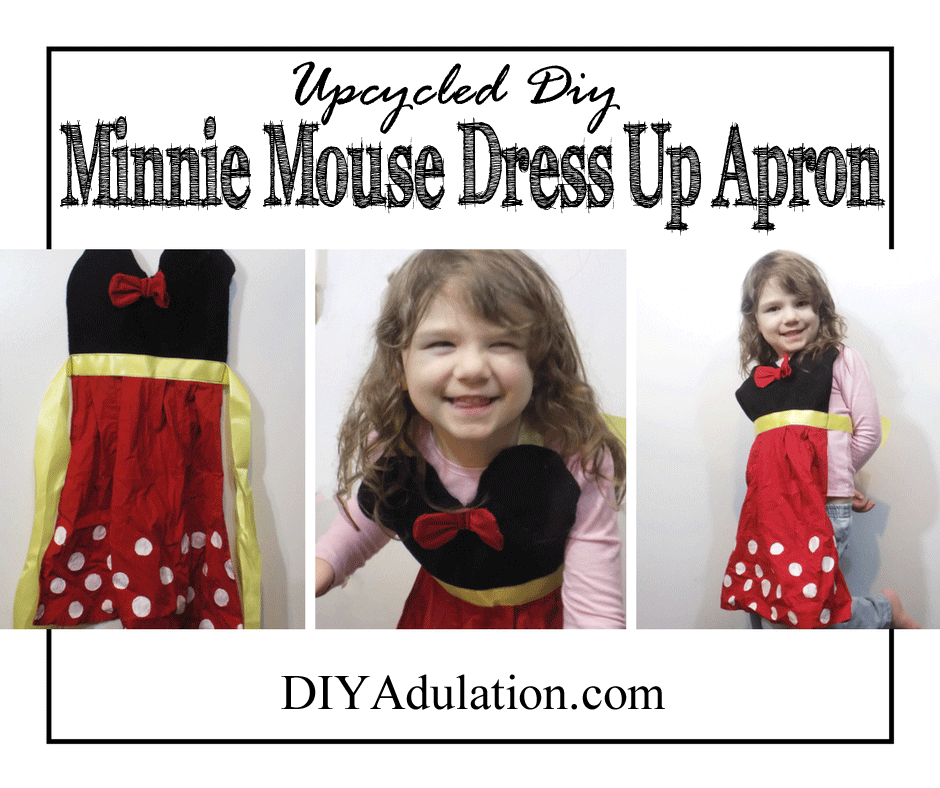
As you know, we are on a mission this year to pay off debt and live on a budget. Luckily, that doesn’t mean we can’t keep living. Instead, we’re finding creative ways to save money on everything from food to toys. That makes the monthly Thrift Store Challenge even more exciting. This month we’re playing dress up with an upcycled DIY Minnie Mouse dress up apron.
Affiliate links may be used in this post. Ordering a product through these links may result in a commission. Read the full disclosure here.

The Rules:
- Upcycle an item(s) from a thrift store, resale store, or garage sale into a new piece of decor.
- There’s no monthly theme.
- There’s no budget to stick to.
Meet the Hosts
Amanda | Domestically Creative
Angela | Simply Beautiful by Angela – Michelle | Michelle James Designs
Molly | Just a Little Creativity – Victoria | Dazzle While Frazzled
Marie | The Inspiration Vault – Marie | DIY Adulation
Lynne | My Family Thyme – Gail | Purple Hues and Me
Jennifer | Cookies Coffee and Crafts – Ann | Duct Tape and Denim
Michelle | Our Crafty Mom – Debra | Shoppe No. 5
Denise | My Thrifty House – Florence | Vintage Southern Picks
Deborah | Salvage Sister & Mister – Yami | The Latina Next Door
Pili | My Sweet Things – Kathleen | Our Hopeful Home
Karen | Dragonfly & Lily Pads
Make sure you follow our board on Pinterest for more upcycled decor inspiration!
[bctt tweet=”This #upcycled DIY #MinnieMouse dress up apron is proof you can surprise kiddos and stick to your budget!” username=”diyadulation”]
Full disclosure: I got over zealous with this project so there aren’t as many photos as usual. Luckily, this is a super easy project that involves simple sewing techniques. This is easiest with a sewing machine but you can do it by hand if you don’t mind the extra time involved.

Minnie Mouse Dress Up Apron Materials
Step 1
Start by cutting the back of your dress shirt off of the rest of the shirt. Make sure that the top is cut straight and disassemble the sides at the seams. Leave the bottom seam intact.

Step 2
Next, add white polka dots to the bottom of your red shirt with your sponge brush.
Step 3
Set your shirt aside to dry.
Step 4
Now, cut the cuff of the end of one sleeve of your dress shirt. Sew the cuff into a rectangle.
Step 5
Then cut a small strip of fabric from the same sleeve you removed the cuff from.
Step 6
Next, wrap your piece of fabric around the rectangle and create a bow.
Step 7
Set your bow to the side and pull out your black felt.
Step 8
Cut your black felt into a rectangle that is roughly 12 inches X 8 inches.
Step 9
Then round the top of the rectangle into 2 half circles.

Step 10
Next, sew the red bow you made to the top center of your black felt.
Step 11
Now sew the flat edge of your black felt opposite your bow to the unpainted edge of your red shirt back.

Step 12
Lastly, sew a long length of your ribbon to the center of your apron covering the seam between the black felt and red shirt.
Step 13
Finish off your apron by sewing each end of a piece of ribbon to the center of each half circle at the top.


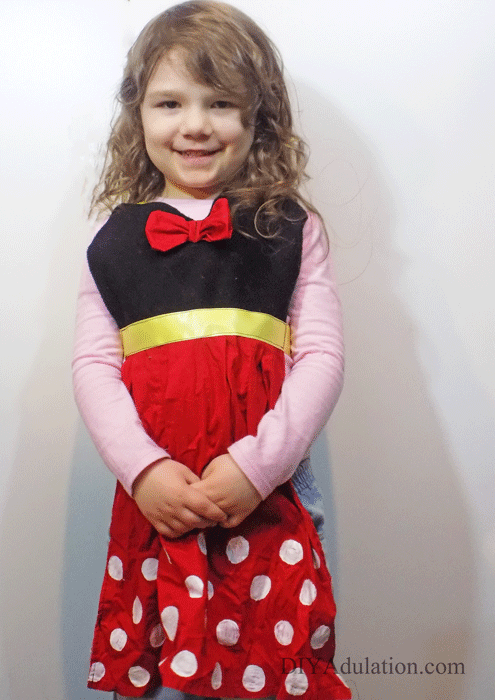
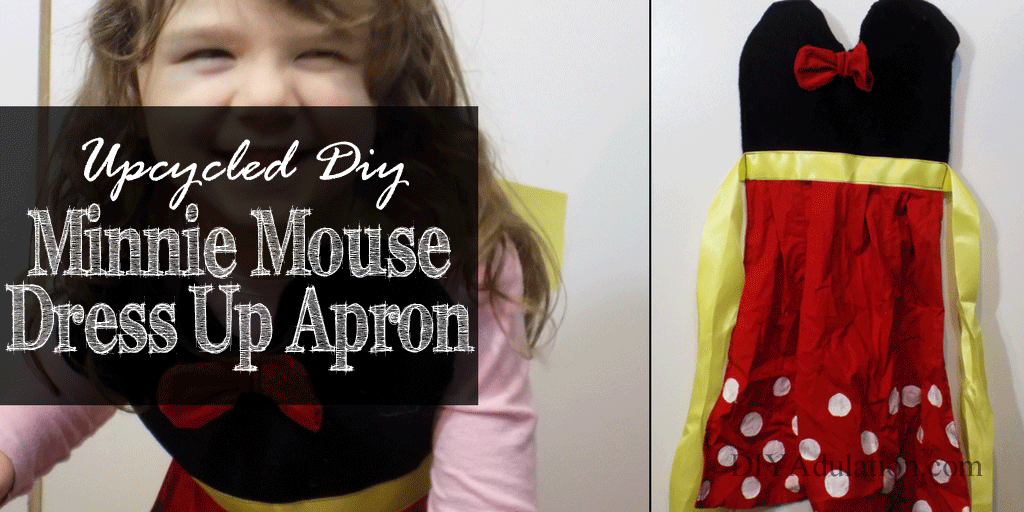
There you go! This upcycled DIY Minnie Mouse dress up apron is so easy to make. As you can see, baby girl is absolutely loving it. Who says you can’t live the good life on a budget? Now it’s time to see the other amazing thrift store projects my friends have come up with. Check out the rest of the Monthly Thrift Store Challenge below!
See where I’m linking up!
And now for more thrifty goodness!
Check out what my fellow upcyclers created below!
Don’t Forget to Pin It!
