It’s time for more awesome candy-themed Christmas crafts to sweeten up your holiday! Today, you can save money and dress up your tree with these DIY snowflake cookie ornaments. You probably even have everything you need to make them (except the sprinkles) in your craft room already!
Affiliate links may be used in this post. Ordering a product through these links may result in a commission. Read the full disclosure here.

[bctt tweet=”Make 40 ornaments for under $10 easily! Find out how to save money and dress up your tree with these DIY snowflake cookie ornaments!” username=”diyadulation”]
Welcome to Day 6 of the Fourth Annual 12 Days of Christmas Series!

We have teamed up with 50 plus bloggers to bring you a oodles of DIY Ideas and Recipes to make your holiday season merrier. There are 12 different posts in the series and we have spread them out over a four week period with three posts per week. Now is the time to subscribe!
GO HERE for the complete list of Dates and Topics plus a collection of most popular holiday ideas including ornaments, games, recipes and more from all 50 plus talented bloggers!
It’s Day 6 and we are sharing DIY Ornament Ideas!
 Photo Credit: HobbyLobby.com
These ornaments are what sparked the theme for my projects for this year’s 12 Days of Christmas blog hop. I saw the one above on Hobby Lobby’s website and fell in love (they are no longer available online). Unfortunately, I need a lot of them for my tree and couldn’t justify the the price tag.
Enter the idea to make my own. They turned out fantastically and, bonus, come at a fraction of the price! If you’re looking for a budget friendly way to adorn your candy tree this year then these beauties are for you.
Note:
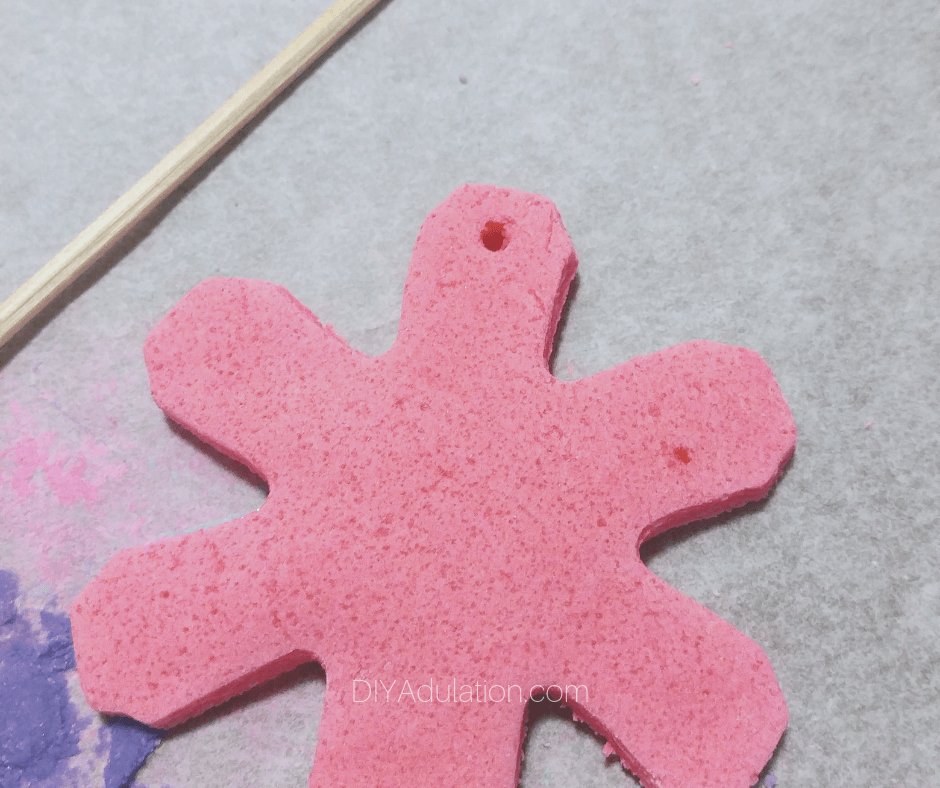
- The size of your snowflake cookie cutter will determine how many ornaments this makes. My cookie cutter was about 3” wide and made 40 ornaments!

Glittery Snowflake Cookie Ornaments Materials
Step 1
First, preheat your oven to 250º Fahrenheit.
Step 2
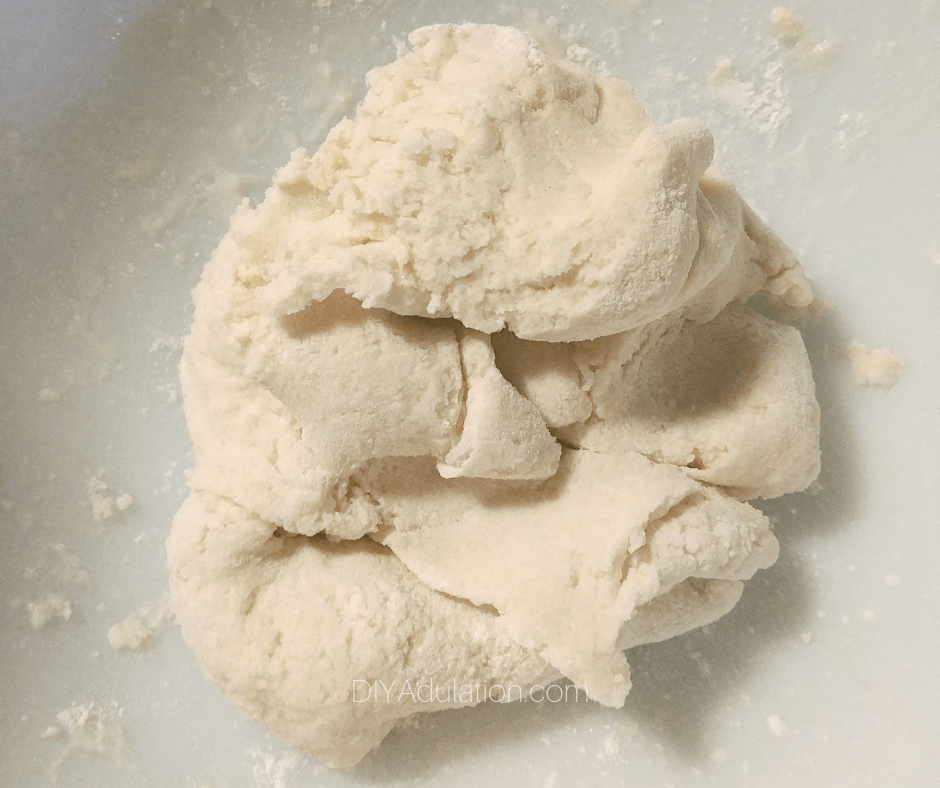
If you haven’t already, start by mixing up your salt dough.
Step 3
Once your dough is mixed, separate it into 2 halves.


Step 4
Set one half aside and then knead rose gel food coloring into the second half until you’ve reached your desired color.

Step 5
Repeat step 3 with your royal blue gel food coloring and the second half of your dough.

Step 6
Next, roll out 1 color of your dough until it’s about 1/4 inch thick and cut as many snowflakes out as your can.
Tip:
Store your dough in a glass bowl and cover with a damp towel while waiting between baking batches.

Step 7
Then place your cut out snowflakes on a parchment lined baking sheet and bake for 2 hours.
Step 8
As soon as your take the snowflakes out of the oven, poke a hole in one spoke of the snowflake with your pointy stick to create a spot for your ornament hanger. Then place them on a cooling rack to cool.
Step 9
Continue making snowflakes until you run out of dough.
Optional:
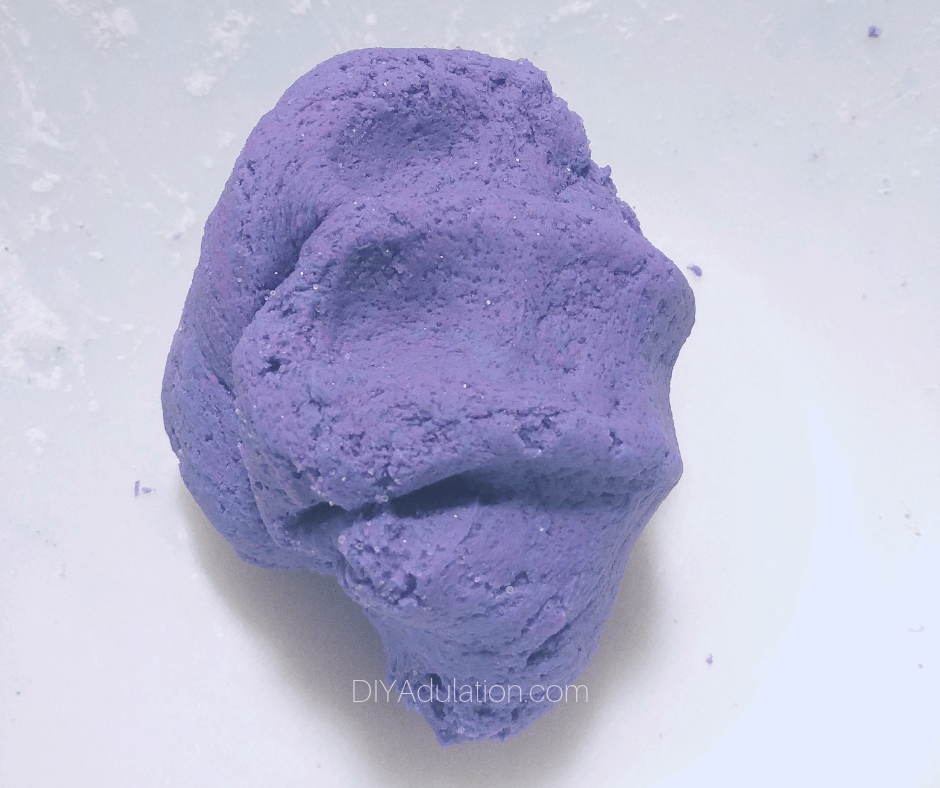
- When you get down to the last bits of blue and pink dough, knead them together to mix them into purple for your remaining snowflakes.

Step 10
Once all of your snowflakes have cooled, cover them in glue and glitter. Set aside to dry.
Step 11
After your glitter has dried, add your cord or ribbon hanger. You want to do this before you add your “icing” because you will cover the hole.

Step 12
Next, add a thick layer of white acrylic paint to look like icing. It doesn’t have to be perfect. In fact, it looks more realistic if it’s not.

Step 13
Immediately add you add your acrylic paint, top it with the Styrofoam sprinkles.


Step 14
Set your ornaments flat until completely dry.


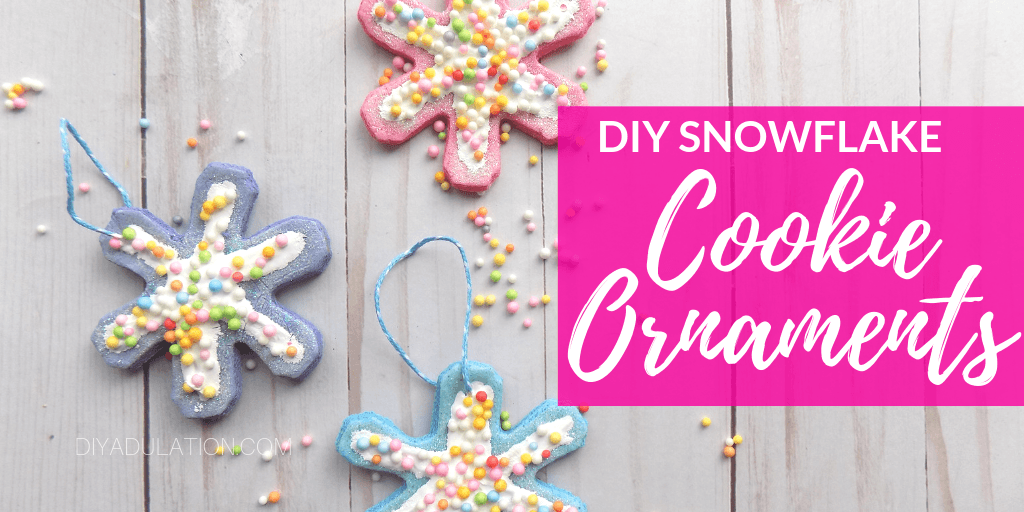
These DIY snowflake cookie ornaments turned out absolutely fabulous! If you’re keeping track, that’s 40 amazing ornaments for our candy tree for the low, low price of $5. That is incredible! Even if you have to buy some of the other materials, it’s still less then $10. That is definitely good for your Christmas Budget this year.
Speaking of, if you haven’t set your budget yet, check out the VIP Library of Resources for a free Christmas Planner that will help you knock it all out of the park. Not a member yet? No problem! Get free access when you sign up for the Newsletter today.
See where I’m linking up!
Don’t Forget to Pin It!

Scroll down for many more DIY Ornament Ideas for your holiday season!