Are you ready to tackle decluttering clothes the KonMari way? If so, you are in the right place. If you need some extra motivation, definitely check out Tidying Up with Marie Kondo on Netflix. It is awesome for encouraging you to take that first step!
Affiliate links may be used in this post. Ordering a product through these links may result in a commission. Read the full disclosure here.

[bctt tweet=”The experience of decluttering clothes the Konmari way is eye-opening. Learn more about your style and the reasons you hold onto things you don’t want.” username=”diyadulation”]
If you check out Does the KonMari Method Really Work you can see why I am highly motivated to tackle this project. It’s a huge undertaking but I cannot stand the status quo anymore. Something has to change and I’m getting the entire family on board.
The best way to do that is to lead by example. That makes me first to try decluttering clothes the KonMari way. What the show doesn’t point out is that most moms have a mountain of laundry waiting for them every day. I spent an entire week washing every single piece of clothing I could find. Every time it seemed like I was finished I would find more, a hamper stashed in a random room, the graveyard of socks under the couch… it was crazy.
Once you have everything washed, you can truly get started on decluttering your clothes.

Find Everything
The first step in decluttering clothes the KonMari way is to find everything. Make sure you look in every area of your home that clothes are stored. This includes coat closets, the laundry room, basement, and anywhere they might be. To help motivate people, Marie tells clients that after they go through all of the clothes, anything that they come across later is automatically a toss. That’s a great rule to impose on yourself to motivate you to truly seek out every item.

Pile it All Together
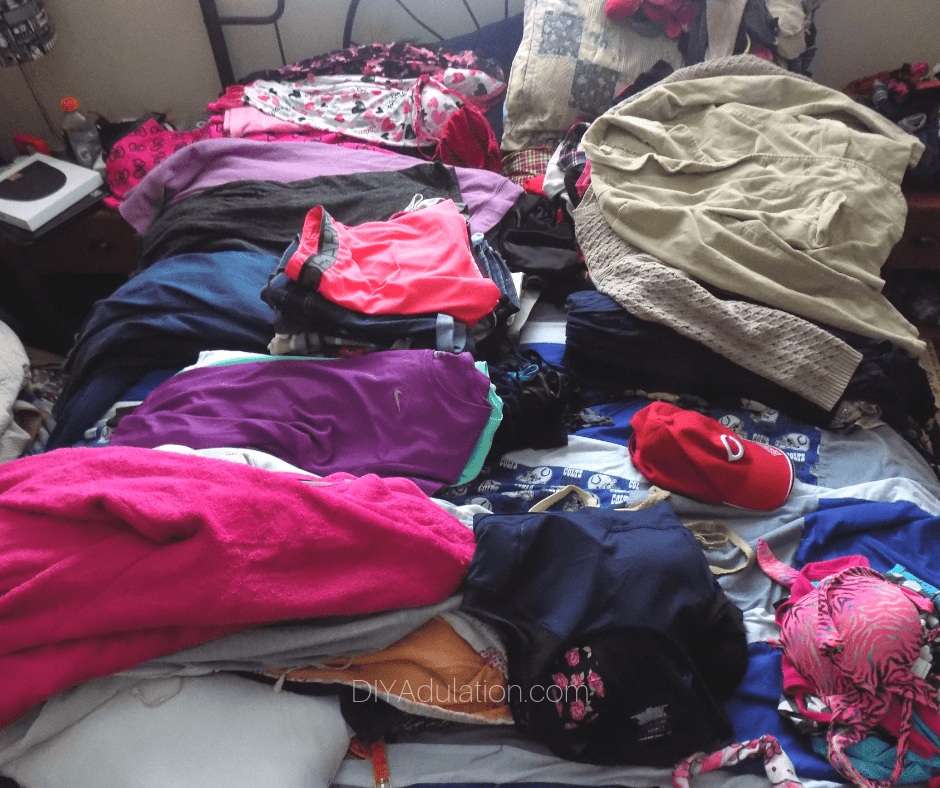
As you find your clothes, pile them all together in a central location. I chose my bed for this. This made it easier to put it all away after I finished.
Note:
- In the book she recommends breaking down your pile by item type, as this can make the process easier. For example starting with out of season tops is easier than starting with the ones you are currently wearing. I didn’t do this because I didn’t really need the additional help. I’m crazy motivated to get rid of stuff.
Grab Some Boxes
Before you start decluttering clothes the KonMari way, make sure that you grab some boxes. I had a stack of empty boxes behind me as I sorted to immediately place items that are being tossed in.
Sort Through Every Item
Now it’s time to tackle aaaaaaall of those clothes. It’s sobering to see exactly how much you have especially when you know that most of it isn’t being worn. The important part of the KonMari method is that you have to hold every item and feel if it brings you joy. This was easiest for me when I started with something that I knew I loved. That’s the feeling I looked for when holding subsequent pieces.
As you sort through every item, divide them into 3 sections. One pile for the items you are keeping, boxes for what you are getting rid of, and I added a third pile for items I was unsure about. Any time I came across an item that I couldn’t know immediately if it sparked joy, I placed it in the pile and went back to it at the end.
- Keep – Everything you’re keeping goes into a separate pile.
- Get Rid Of – Save yourself some time and energy by immediately placing items you want to get rid of in a box.
- Unsure – Place any items you are unsure about into a pile separate from the others. I think it’s important to note that this pile only had 4 or 5 items for me. This isn’t about putting off the process. It’s for genuinely difficult items.
Note:
- Marie says not to have anything on in the background while you do this. I followed that and didn’t have any music or television on. However, I went through this process with the 4 year old at home so that did affect my concentration some. Especially when he would run and jump into the pile of clothes I was trying to sort.
Second Pass Through the Keep
After I had done my initial sort of the clothes, I did a second pass through them to get rid of even more. During this I also began sorting them by type so that they would be easier to put away. In doing this, I was able to get rid of another entire box of clothes.

Put Them Away
Once you know what you’re keeping it’s time to put it all away. Folding clothes the KonMari way is really quite simple. Although I haven’t been doing it exactly the same way, I’ve always liked my clothes aligned vertically for easy reference and selection. This made adapting to her method of folding simpler.


This is seriously all of my shorts, leggings, and tank tops in 1 drawer!! How awesome is that?

Above is every pair of pants I own and there is empty space in the drawer, loads of it! Seriously, it is crazy exciting!
The one clothing I did not fold in her method are the socks. We are in the habit of rolling all of our socks because that’s how they need to be packed when my husband goes to drill/is deployed. While she rolls them, she doesn’t secure them because it stretches the edges at the top. I’ve never experienced that issue and love the neatness of our current folding style.

Shoes, Purses, and Scarves
These items I didn’t have to sort through because last year I did a hard declutter with them. I only have 3 purses and actually got my shoes down to just a few pairs with the exception of my boots which I absolutely adore. I have about 10 pairs of boots (rain boots, riding boots, heeled boots, comfy boots, hiking boots, and wedge booties) and I have ZERO guilt about keeping them.

This experience of decluttering clothes the Konmari way was definitely eye-opening. I learned more about my style and also some of the reasons I hold onto things that I don’t actually want. (Looking at you, sweaters mom gave me as an incredibly thoughtful gift.) I recommend starting this process first before moving on to your kiddos. The experience helps you familiarize yourself with the process and navigate some issues that will arise for your kids.
We’re already done the kids now, too, and I’ll be sharing some tips to make the process easier in the next post. We did it with a 4, 6, and 9 (almost 10) year old successfully. If we can do it, anyone can. Promise.
See where I’m linking up!
Don’t Forget to Pin It!

More Ideas You’ll Love: